Claymore Posted June 9, 2020 Share Posted June 9, 2020 (edited) Thought I'd start a progress blog. (and a Youtube channel for 2022) https://www.youtube.com/@dan91sgarage Bought the Starlet a few months ago and decided it needed a bit of tidying so first things were rust treatment and a bit of sorting out a few things. Its a 97 Sportif (tape deck and keep fit windows, but does have power steering.) Purplish blue metallic (8K9) pretty sun faded looks more like a light blue metallic, 42k miles. 13" rims. Reasonable condition, not been particularly well cared for by the previous granny owner. But a 1 owner car bought from a local garage near to where it was originally sold. Edited November 28, 2022 by Claymore Quote Link to post Share on other sites
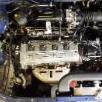
Claymore Posted June 9, 2020 Author Share Posted June 9, 2020 (edited) One of the first things was an engine bay clean up. https://www.youtube.com/watch?v=1eOBH64jDEw&t=17s Used meguiars quick detailing spray for the painted parts and brake cleaner for the bare metal surfaces. The original owner must have lived on a farm or something as the engine bay was pretty grotty. Before: After: Took a couple of hours but makes the bay look more like a 42k mile car! Edited March 8, 2022 by Claymore Quote Link to post Share on other sites
Sam44 Posted June 9, 2020 Share Posted June 9, 2020 Great to see this build. You have a captive audience. Nice colour too. Quote Link to post Share on other sites
Thonfella259 Posted June 10, 2020 Share Posted June 10, 2020 Can’t wait for this mate, a sleeper starlet!!! ill definitely be keeping my eye on this👍 Quote Link to post Share on other sites
Claymore Posted June 11, 2020 Author Share Posted June 11, 2020 (edited) Had some surface rust on the rear chassis rails to deal with. https://www.youtube.com/watch?v=Ewy2M9LiEWY&t=6s Access is pretty limited, I could only use a wire wheel on a drill to remove the worst of the loose rust, so decided to then treat what was left to neutralise it then paint to protect. I really rate the Bilt Hamber range of products. I've had good success with use on previous cars so bought these: Removed more mud from the wheel arches. Loose rust removed. Rear chassis legs a bit scabby still but solid at least. 2 coats of Bilt Hamber Hydrate 80 to neutralise rust High Zinc primer Top coat. The actual colour match is pretty good in real life, camera and flash make it look more blue than purple. Painted the towing eye brackets while they were off Rear beam next. Edited March 8, 2022 by Claymore Quote Link to post Share on other sites
Claymore Posted June 11, 2020 Author Share Posted June 11, 2020 (edited) The rear beam was in ok condition drivers side and good condition on the passenger side. Same deal as chassis really but access was better, remove loose rust, treat, zinc prime and paint satin black. https://www.youtube.com/watch?v=G10548Wb54s Drivers side gusset looked worse than it was, I was dreading it being as crumbly as a danish pastry but thankfully really solid, cleaned up well. Treated and then primed. Top coat The drum backing plates and rear beam arms will get the same treatment when the beam comes out for bush replacement. Edited March 8, 2022 by Claymore Quote Link to post Share on other sites
Zemerz Posted June 14, 2020 Share Posted June 14, 2020 Looks good mate. You gonna slap ct9 kit on too yeah? Quote Link to post Share on other sites
Claymore Posted June 15, 2020 Author Share Posted June 15, 2020 I will most likely use a tf035hm (I do have a TD04l also that may be tested). If both turbos are in need of a rebuild I may end up with a hybrid of the two but I am still sourcing the rest of the parts. Which leads me to: WANTED: TD04 ram horn exhaust manifold and downpipe. Preferably WEPR, Zisco, Race Tech or Tuning developments. PM me if anyone has one for sale (no eBay tat please) 😁👍 More updates to come, mainly chassis mods before the engine stuff but its on the way. Been checking out your build thread too, nice to see it back up and running. Quote Link to post Share on other sites
Claymore Posted June 15, 2020 Author Share Posted June 15, 2020 (edited) Time to tidy the rear end of Nanza: First had to remove bumper (3 bolts in each wheel arch, 3 bolts at top, 1 bolt underneath with 2 plastic clips). The rear valance has seen some parking / reversing into posts action but I already new this when I bought the car. Thankfully nothing too serious. Then the cracked rear light clusters, the left one actually has fungus growing in the reverse section! Cleaned up well with all rust spots treated as per the usual method. Replacement rear light clusters fitted. Edited June 15, 2020 by Claymore Quote Link to post Share on other sites
Claymore Posted June 15, 2020 Author Share Posted June 15, 2020 (edited) The rear wiper arm and boot handle were letting the side down so they were next for some attention: Used masking tape to mark the position of the wiper tip for easier re-install, Undo 10mm nut under cap and had to use a tiny 3 legged hub puller to pop the arm off the spline. Painted arm satin black. To get the handle off first need to remove inner boot cover, it's held on with push fit clips, I used a phillips JIS screw driver to hold it still from spinning whilst using a small flat blade screw driver to lever the middle button out. Remove all clips, then pull cover off third brake light, remove 2 x M6 screws, disconnect bulb socket wire, slide light housing up towards top of boot. Pull down on boot cover at top edge, unhook lower edge and remove. Un plug wiper motor, undo 3 x M6 bolts (think they're shake proof thread as mine felt "lumpy" whilst turning) remove motor. Now you can see the 2 nuts that remove the handle and there are also 2 plastic arrow clips also. Pressed arrow clip sides together with long nose pliers or 2 x screwdrivers to release. One of the nuts on mine was seized and the T-bolt broke free of the handle (oops) managed to find the required plastic pieces for the Industry approved 2 part epoxy repair process! 😉 Sanded, plastic primed and painted satin black (was never going to be able to match the faded body work with Purplish blue). In hindsight I would probably leave the handle on the car and mask it off but I thought "I'd do it properly this time". All re-assembled. Removed the crusty badges also and polished the areas, you can still see the outline as the labels protected the paint from UV. That's all for today. Edited August 5, 2020 by Claymore Quote Link to post Share on other sites
Keviano27 Posted June 15, 2020 Share Posted June 15, 2020 Nice tutorial mate 👍🏻 car is looking good keep it up! Quote Link to post Share on other sites
Claymore Posted June 20, 2020 Author Share Posted June 20, 2020 (edited) Indicator removal and repair time: https://www.youtube.com/watch?v=fWBOrM646ow I noticed that the indicator was a bit "flappy" so I removed it to investigate: Unscrew at top and slide forward (if the tab at the bottom is broken off like mine was then no need to slide forward) Quarter turn bulb holder to remove. It was quite obvious that the bottom tab that fits into a plastic holder in the wing was missing, but quite luckily for me it had stayed in the bumper for god knows how long. A retrieval device was fashioned from a long screwdriver and adhesive tape and the tab was all mine! Tab and indicator housing location. Drilled a hole in the housing to receive the smallest screw (2.5mm) I have ever used. Drilled a corresponding hole in the tab to receive the screw. (Mind your fingers!) Epoxy 2 part glue and screw to fix tab back into place. Let glue dry for 24hrs to prevent permanent attachment to car then re assembled. Managed to save myself the cost of a replacement indicator housing for an hours work 👍 Edited March 8, 2022 by Claymore Quote Link to post Share on other sites
Claymore Posted June 25, 2020 Author Share Posted June 25, 2020 (edited) Boot Gas strut replacement was overdue. It was difficult to open the boot and it turned out that the gas struts had lost their pressure so some genius had bent one of the strut shafts to increase the resistance. 🤠 move. First I propped open the boot and unbolted the 2 x M6 bolts from the bracket at the car end of the strut. These had thread seal on them and you could feel it upon turning them. Removal at the other end was not as easy as I'd hoped for, the ball and socket joints don't have an external retaining clip to remove (only an internal snap ring). It was not possible to disconnect the strut from the ball. It also turns out that the ball joint is red thread locked to the boot panel so my attempts to unscrew it with a thin 12mm spanner started to round the nut. After changing into my big boy trousers I grabbed the trusty angle grinder with a half used cutting disc (smaller diameter to fit into the confines of the area) and carefully cut 3/4 through the socket. Pried them open and released the socket end from the boot. I could have used a dremmel and cut off wheel instead but hey ho. Unfortunately manged to slice my balls quite badly with the grinder (Oh matron! 🤣) but the new struts were supplied with replacements. A 12mm wall drive socket was used for removal to prevent any further rounding off. Internal snap ring and sliced socket. So, I removed the gaskets from the old strut brackets and fitted them to the new brackets with silicone gasket maker (both sides of gasket) to prevent water ingress. Bolted them back onto the car loosely with new thread seal on the bolts, refitted the ball joints with washers to boot panel using thread lock. Clipped the socket end onto the ball joint, installed the retaining clip. Tightened the 2 x M6 bracket bolts to the car. Repeated for other strut. Awesome I thought, pulled out the prop and the boot fell down and hit me on the head! FFS 🤬 Long story short turns out the new replacements I'd bought had leaked and when I tested their force after removal on my calibrated bathroom scales turns out the worst one only had 20N force, not the required 300N. So I got a refund from the seller and bought another set of gas struts (Stabilus this time), repeated the whole process AGAIN (thankfully no angle grinder required as these ones clipped off the ball joints) and now I finally have a boot that opens and stays open. Edited June 25, 2020 by Claymore Quote Link to post Share on other sites
Claymore Posted June 29, 2020 Author Share Posted June 29, 2020 (edited) Corolla manifold and brackets tidy up. With the excellent weather we've been having decided it was time to get some painting done. As it started. Cleaned off the worst of the rust with wet n dry and gave it a quick rub over to help key the new paint. The manifold has an aluminised finish from Toyota. Cleaned out the inside also using brake cleaner and sloshed it around inside, it was quite greasy from the PCV system. Glad I did as I managed to rinse out a piece of old throttle body gasket (approx. 10mm x 5mm). Don't want that in the engine! Brackets (front and back) were rusty also and again wet n dry to remove the worst of the rust. Then Bilt Hamber Deox gel to chemically remove the remainder. 24hrs later All cleaned ready for paint. Manifold masked up and painted VHT silver. No primer or lacquer obviously. Used sacrificial nuts and bolts to mask off the bolt and ground attachment holes prior to paint for the front bracket as well. Rear bracket drilled for lightness and painted VHT matt black. Edited March 8, 2022 by Claymore Quote Link to post Share on other sites
Sam44 Posted June 30, 2020 Share Posted June 30, 2020 Fantastic progress. I'm still after 1 of these manifolds. Did you decide on a turbo. Quote Link to post Share on other sites
Claymore Posted June 30, 2020 Author Share Posted June 30, 2020 Thanks Sam, I got it off eBay in the end, found a guy who was selling a corolla 4efe engine complete with gearbox. Sent him a picture of the manifold I wanted and I offered him £50 for the manifold and both brackets, he took them off and posted them. 😎. There are loads of corolla engines for sale on there, just contact one at a time and you'll get one. Still going with the TF035hm turbo (assuming its not blown). Seems to offer the type of delivery I'm looking for and more than enough flow for my particular power goals. How's your build going? we've been waiting for some updates / pics, saw on the other forum you were experiencing surge issues with the hybrid? Any updates? Also when you mention surge are you describing open throttle compressor surge (too much flow resulting in cavitation of compressor) or surge of boost (sudden increase in airflow 80's style)? Quote Link to post Share on other sites
Sam44 Posted July 1, 2020 Share Posted July 1, 2020 (edited) On 6/30/2020 at 7:11 PM, Claymore said: Thanks Sam, I got it off eBay in the end, found a guy who was selling a corolla 4efe engine complete with gearbox. Sent him a picture of the manifold I wanted and I offered him £50 for the manifold and both brackets, he took them off and posted them. 😎. There are loads of corolla engines for sale on there, just contact one at a time and you'll get one. Still going with the TF035hm turbo (assuming its not blown). Seems to offer the type of delivery I'm looking for and more than enough flow for my particular power goals. How's your build going? we've been waiting for some updates / pics, saw on the other forum you were experiencing surge issues with the hybrid? Any updates? Also when you mention surge are you describing open throttle compressor surge (too much flow resulting in cavitation of compressor) or surge of boost (sudden increase in airflow 80's style)? I'm in Oxfordshire at the moment, working all hours. I'll be home again in afew week and back on the starlet. This virus has messed up things, but I'm not complaining I've got my health. The anti surge housing I'm after, but can't find 1 for the tdo4 13t is to calm down the surge of power hitting in 1500rpm just to help prolong the standard engines life as well as allow anybody to be able to drive it and not break it. Alot of what has been fitted has really increased turbo power delivery more than I was expecting. From what I was told about the 9 blade td04l turbine and heavily ported exhaust housing it should have been harder to recover the spool up. Plan b is to use the ACM piggy back to control boost build subject to engine rpm. Or fit the speed vision cams plan c which will yeild the best power if I can get a corrola inlet. Haha alot still to work threw. I'm still waiting for my walbro twin fuel pumps to from demon tweaks, for the twin fuel pump delivery system. The reason is Im getting at fuel pressure drop around 5krpm at 1bar boost on the 372cc 3sge injectors running 35psi fixed fuel pressure. Edited July 3, 2020 by Sam44 Quote Link to post Share on other sites
Claymore Posted July 1, 2020 Author Share Posted July 1, 2020 (edited) Good to know its still on going. Might be the combination of the wheels and housings used in the hybrid, hybrids are difficult to get right, might be the porting on exhaust housing, might be too much flow from the 11 blade comp wheel (looking at your build thread the 11 blade comp wheel blade height is a fair increase over the 6 + 6 stock 13t). Difficult to know as compressor maps are difficult to find with all the possible combos out there. Your the first starlet user I've read about who complains that his TD04l spools too quickly! Lol. Maybe exhaust manifold is flowing too well at low rpm? Can you elaborate on which other mods you feel have best improved the spool time of the turbo please (not the turbo design itself)? PM if you prefer. Was also wondering, you said about fixing the fuel pressure at a set rate and not vacuum referencing it as you were getting rich areas lower in the rev range. Which FPR do you have? Is it 1:1 ratio or rising rate 1:1.5 for example. Edited July 1, 2020 by Claymore Quote Link to post Share on other sites
Claymore Posted July 1, 2020 Author Share Posted July 1, 2020 (edited) Gearbox oil change time. Really like the Red line range of oils, went for MT-90 GL4 (75W-90) which meets the Toyota owners manual specified oil. It says you can use GL4 or GL5 but as the box appears to have brass synchros I stuck with GL4. Fill plug on front (24mm thin walled socket) always remove fill first to check you can. Drain plug (also 24mm) Clearly needed a change, probably never been done before. Drain and fill plugs removed (old aluminium crush washers at top, new at bottom) washer size is 18 I/D x 24 O/D x 2mm from Toyota (part number= 90430-18008). I managed to find some that were 18 x 24 x 1.5mm on eBay and they worked fine. Drain plug, crush washer refitted and torqued to 39Nm. I fashioned an exact copy of the official Toyota "special tool" for gearbox refilling! Took just over 2 litres but less than 2.5 litres. Fill plug, crush washer back in and torqued to 39Nm also. Screened the old oil into a container through a rag to check for debris, thankfully no synchro material. Don't know whats on the box magnet though. Ignorance is bliss. Shifts sweeter from cold. An improvement over the slight notchy feel. Thanks for looking. Edited July 1, 2020 by Claymore Quote Link to post Share on other sites
Sam44 Posted July 3, 2020 Share Posted July 3, 2020 (edited) On 7/1/2020 at 2:05 PM, Claymore said: Good to know its still on going. Might be the combination of the wheels and housings used in the hybrid, hybrids are difficult to get right, might be the porting on exhaust housing, might be too much flow from the 11 blade comp wheel (looking at your build thread the 11 blade comp wheel blade height is a fair increase over the 6 + 6 stock 13t). Difficult to know as compressor maps are difficult to find with all the possible combos out there. Your the first starlet user I've read about who complains that his TD04l spools too quickly! Lol. Maybe exhaust manifold is flowing too well at low rpm? Can you elaborate on which other mods you feel have best improved the spool time of the turbo please (not the turbo design itself)? PM if you prefer. Was also wondering, you said about fixing the fuel pressure at a set rate and not vacuum referencing it as you were getting rich areas lower in the rev range. Which FPR do you have? Is it 1:1 ratio or rising rate 1:1.5 for example. The fpr is the fse it's supposed to be 1:1 but it's not. I'm on a fixed fuel pressure at 35psi because that's the best pump delivery pressure.beause of other mods I've done and the larger 372cc injectors. There loads of mods that really impressed me and hit the turbo response noticably. 4efe inlet cam Fse fpr running a I line vacume chamber set to 3.6bar peak pressure Lightly ported head. 5e inlet manifold Twin plate Audi throttle body Kemso fuel pump (bargain pump, out proformed the wakbro) Zisco narrow diameter high velocity ram's horn exhaust manifold Engine earthing kit. Electronic boost controller. If you decide on running a smaller turbo and great corolla inlet the 4efte in!et cam shaft increasing peak torque to 5krpm you will not loose any low rpm proformance only gain topend mph times. Run heat range 6 plug under 1bar. these affect flame propergation in the cylinders alot better increases fuel efficiency and power because of there reach in the cylinders, the higher the plug heat range the shorter the reach with reduced efficiency. The E3 plugs I'm on are very very good heat range 6 at 1 bar and showing no signs of needing changing. Edited July 4, 2020 by Sam44 Quote Link to post Share on other sites
Claymore Posted July 3, 2020 Author Share Posted July 3, 2020 Thanks Sam, I had some heat range 6 plugs on the shopping list along with additional / upgraded earth wires. Even the standard battery earth looks a bit small. Interesting stuff with the vacuum chamber, I saw another of your posts regarding the delay of fuel pressure increase. Does the chamber only slow the pressure signal reference or does it reduce it also? Quote Link to post Share on other sites
momosr Posted July 3, 2020 Share Posted July 3, 2020 This may interest those who have been following the Nanza build: Quote Link to post Share on other sites
Sam44 Posted July 4, 2020 Share Posted July 4, 2020 (edited) On 7/3/2020 at 4:29 PM, Claymore said: Thanks Sam, I had some heat range 6 plugs on the shopping list along with additional / upgraded earth wires. Even the standard battery earth looks a bit small. Interesting stuff with the vacuum chamber, I saw another of your posts regarding the delay of fuel pressure increase. Does the chamber only slow the pressure signal reference or does it reduce it also? Just delays it. Helps the ems espically if you are running the standard unit or 16x16 table on a piggy back. Also very noticeable turbo spool up. What injectors are you looking at running?. on the kemso single fuel pump I maxed the 295cc 4efte units out at .7 bar on the tdo4l 13t hyb. (Over 80%duty) But I'm hoping with the new dual fuel pumps 1x 225 walbro & 1x kemso 340, on the high flow system (Evo MK4 fuel filter and b16 modified aftermarket fuel rail). I'll see a improvement on injector duty. All signs are pointing in that direction. Edited July 4, 2020 by Sam44 Quote Link to post Share on other sites
Claymore Posted July 5, 2020 Author Share Posted July 5, 2020 For my power goals I'll be using the "old favourite" Walbro 255lph with glanza 295cc's at stock fuel pressure. Might try and find a new glanza fpr (if they still make them) as my stock 4efe one is probably a bit tired by now. If nla I might add an adjustable fpr if I need more fuel. I've done a bit of reading up and it seems 300cc ish injectors are ok for 200 ish bhp at 85% duty. Seems a bit odd that you need to run such a large injector (372cc) and increased fuel pressure with 2 fuel pumps? Quote Link to post Share on other sites
Claymore Posted July 5, 2020 Author Share Posted July 5, 2020 (edited) Speaking of injectors. https://www.youtube.com/watch?v=fWBOrM646ow Glanza 4efte injector clean and paint: Before and after. Quick once over with 240 wet n dry. All cleaned up Masked and sprayed VHT silver. Not too sure about the paint, it says its resistant to oil and petrol but seems to come off quite easily with brake cleaner. Hopefully once in a hot engine bay it will "cure" or something? 😕 All done. Also picked up this in a joblot of parts, 4efte Cam cover: Yes its been painted and I've been "investigating" it yesterday so place your bets: A= clean as a whistle (Not sand blasted, only been chemically cleaned prior to paint.) B= Some sand blasting media inside. C= Quite a lot of sand blasting media and a surprise item inside! Edited March 8, 2022 by Claymore Quote Link to post Share on other sites

Recommended Posts
Join the conversation
You can post now and register later. If you have an account, sign in now to post with your account.