


Conrad1998
-
Content Count
7 -
Joined
-
Last visited
Content Type
Profiles
Forums
Wiki
Media Demo
Store
Calendar
Posts posted by Conrad1998
-
-
Hello everyone I have been offered
Sparco Evo with the side mounts has anybody put one of these in there car the widest part of the seat is about 24inchs
I also have access to a welder. To Modify the seat rails

-
Hello everyone
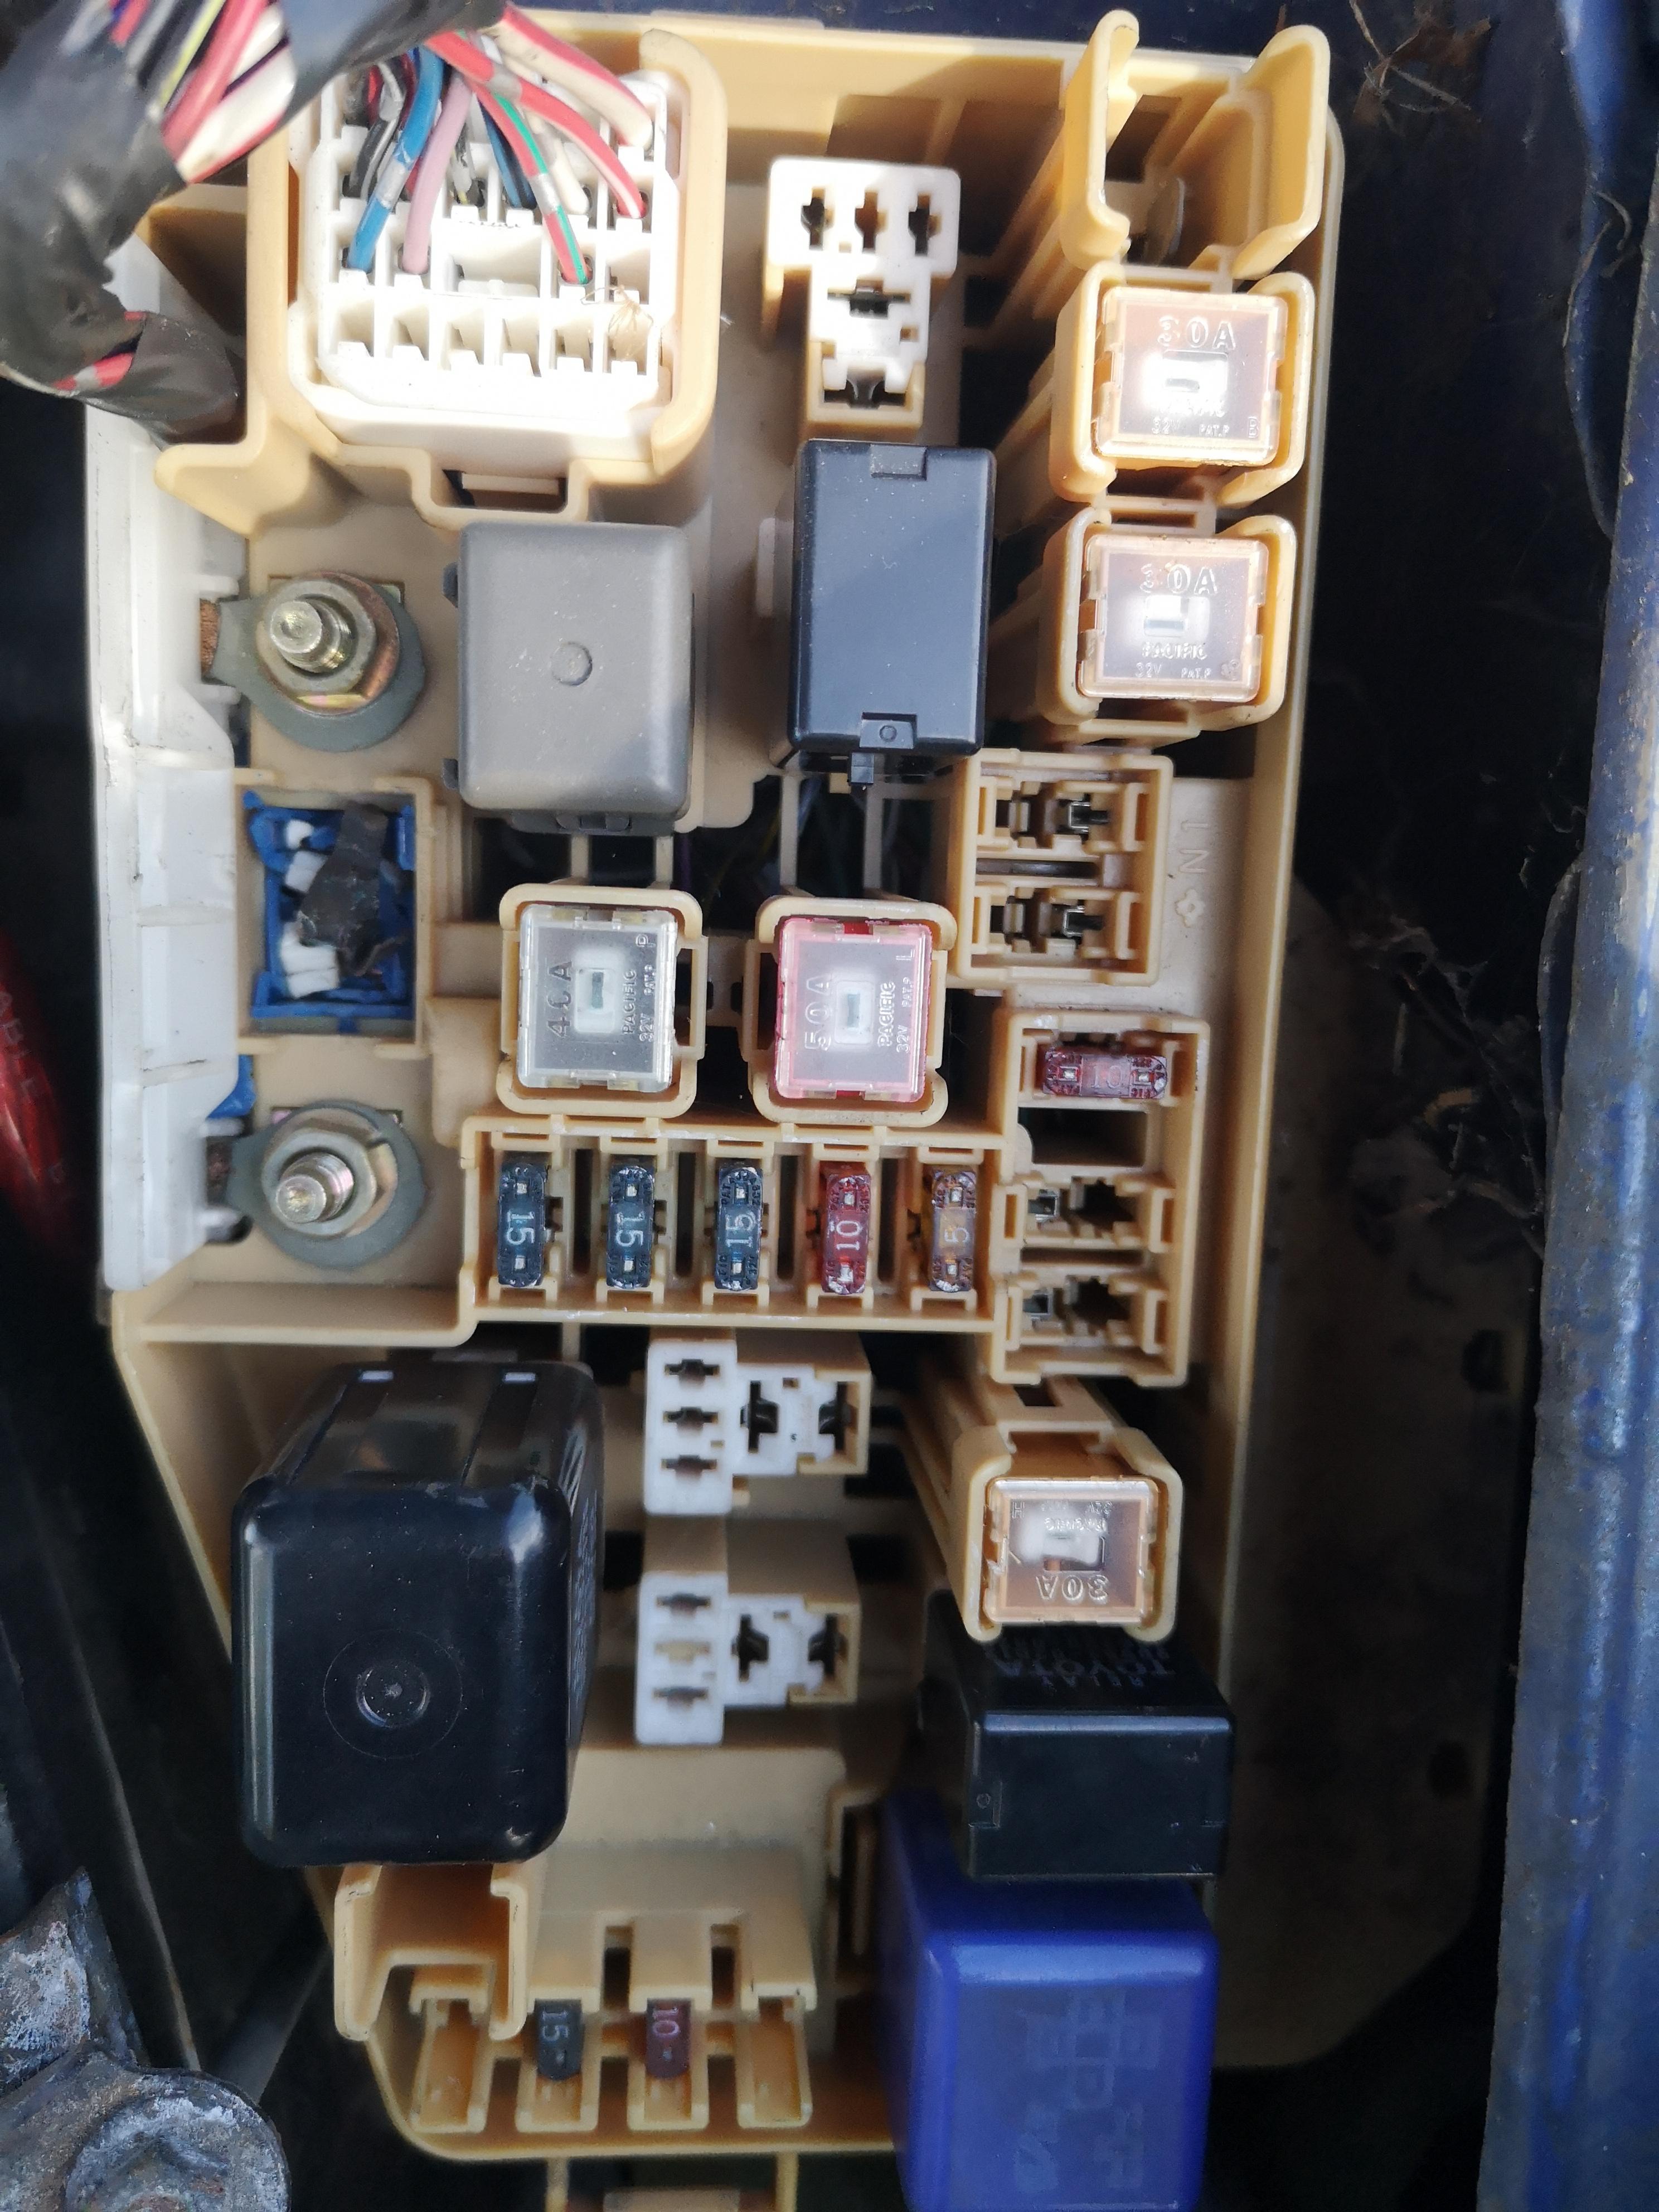
I went out to my car today. I have no lights coming up on the dash
No indicators
No stereo
No cigarette lighter
No wipers or water
I have checked the fuses but I can't seem to see any blown ones there is what looks like a relay
that has blown to bits could it be that

-
Hello everyone.
Over this lockdown period I have been out playing with the starlet that I have recently purchased.
I am wanting to do something a bit different. I have already relined the door cards and parcel shelf in Hessian I am now thinking about taking out the dash to repaint it in and old school brown.
Any tips on how to remove the dash would be great. 😁
I know how to remove the panel under the steering wheel & the glove box
Cheers guys
-
On 3/17/2014 at 11:15 AM, 5e colin said:
so me being a poor man i could never afford the big brand pro coilovers for my starlet so i went on a mission to find budget coild for my starlet so after months off research i came up with a closed match and they were old golf coils *so i put up a thread off it on toc and our moderator DJNR8 came to the resceu
he could provide me all the details i needed so he did he was strait on it emailing me the pictures and measurement *
so first off i want to say thank you djnr8 for being there with mi od requests
this is where i got them pm them tru ebay and request mk2 fronts and mk1 rears ( golf )
http://www.ebay.co.uk/itm/VW-GOLF-MK1-Complete-Rear-Coilover-1x-unit-ONLY-/251385383078?ssPageName=ADME:X:RTQ:GB:1123
so finally my ta technics coilovers arrived this morning there from mk1/2 golf fronts are mk2 and rears mk1
so strait away went digging up my old topmounts to try fitting them hoping they fit *:cheers:* yay they do strait bolt on we are in luck boys*they do knead small modifications but its only minor that could be done at home !!!!!
here a quick pic with the topmounts on for now till i make some more detailed 1s about the mods needed on the bottom off the coils
so taken some measurements *so here we go
these are the bits u need they just unsrcew off the coils
golf vs starlet mount
starlet rear 32mm
golf mk1 rear 50mm !!!!!!!
this is how much will come off off the sides still plenty left
its this way we knead to file the hole down a bit
think i will get my angle grinder out in a min. and trim the rear bushes
well i cut the rear bottoms to size *warning to people using a angle grinder cough cough some really nasty stinking smell comes off it do not inhale like i did i am still coughing brrr
this is the spacer u want to cut down 5mm to get more thread uptop
in the bench u get an idea now how much

this 1 is for bimotoman *as requester
when u cut the spacers make sure when u finish they are equal length like this
now my 2 rear coilovers are ready to fit this is what they look like
will have to play with spring tension and height adjusters
have a small issue :)ha ha
so i made the holes on both for the starlet hub to fit
here you can see my rooky mistake i should off taken equal out off both holes then this wouldn't of happened
anyways i am not bothered i will just buy 3mm thick washers and make a small cut out in them
problem solved 
-------------------------------------------------------
measured the front coils for stock camber did a bit of a miss calculation on the previous 1s

i then made a metal template for the holes
now using my template i dont need to dos around trying to align the holes and makes the job so much faster + i will have the template for future coils to 
--------------------------------------------------------
so i finished my fronts today *and made a pic how low they go with the helper spring removed
ONLY 400mm tall *!!!!!!!!!!!!!!!! while with the helper still in it its 485mm tal
thats an extra drop off 8.5cm !!!!!!!!!!!
here are how they are now set to softest and with the topmounts on *ready to fit
so who ever does this in the future go and enjoy them ha haHave you still got the photos as there saying currently unavailable
-
9 minutes ago, Sam44 said:
I was reading polo 6n2 fit with slight hub bolt mods and removing top mount spacers or something 5e Colin on here did a how to.
Thank you verry much do you know where I can find that
-
So I have recently got my self a Toyota starlet1.3 cd 5dr
I'm wanting to lower it and have a bit stiffer suspension BC coilovers are out of budget do polo/ Corsa bs fit


Bucket seat
in Interior & ICE
Posted
Ideal thank you did you modify your original seat base/ runner