


A Guide to show the benefits of fitting a Front Mounted Intercooler Kit to your Starlet Turbo, along with information on why it's a good idea and which is the best kit to buy! I've tried to get hold of the best pictures I can to give you a visual idea too which I feel is important. Small thanks to Ro55fumi for some photos I stole and edited, rest were mine! ![]()
Why?
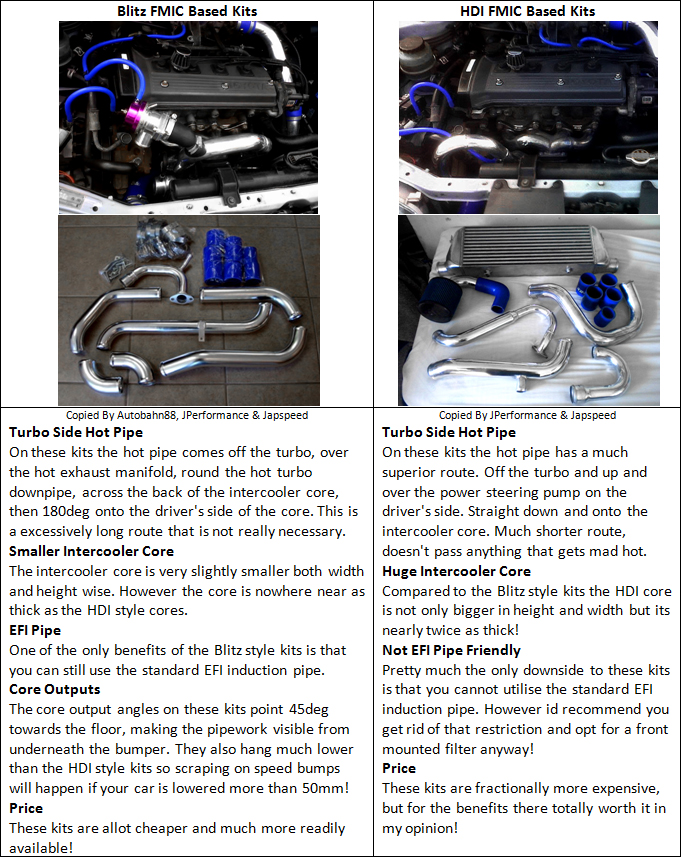
So what are the advantages and disadvantages of doing this change and going to a front mounted intercooler setup. There are more benefits to be honest and you will always hear different opinions but here are the main ones:

Which is the Best Kit to Buy?
There are many kits out there but the majority of them are all copies of kits that already existed on the market! Essentially there are 2 main types of front mounted intercooler kits. The only major difference between the 2, one being the pipe route pre-core and the other being the physical intercooler core itself. Below is a small table with the features of both kits:
How do I Fit a FMIC Kit?
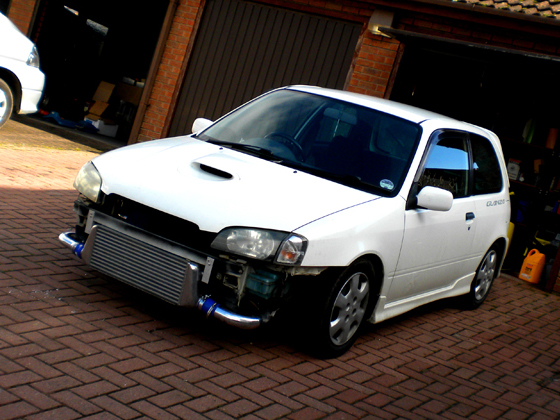
Get all your components laid out and ensure you have everything, in these pictures I will be fitting a HDI Kit to my EP91 Glanza V.
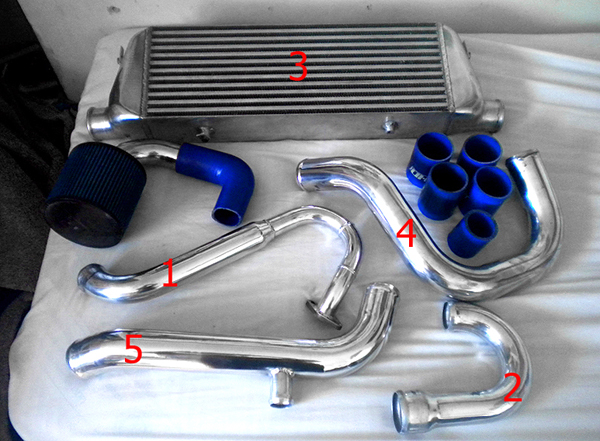
1, Turbo To Pipe 2
2, Pipe 2 to Intercooler Core
3, Intercooler Core to Pipe 4
3, Pipe 4 to Pipe 5
4, Pipe 5 joins onto Throttle Body
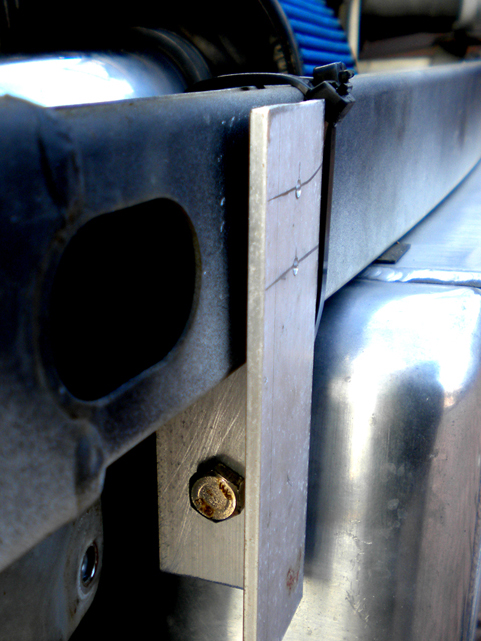
Fix your intercoolers core firmly in place. The pipework and joiners will allow a small amount of flex but the intercooler core must stay firmly in place! This is to help pipes becoming loose and you ending up with a boost leak! Try to get it slap bang in the middle too if you can! The mounts that come with these kits are usually thin straight pieces of metal that you have to bend at the right places to mount your intercooler core. I fabricated my own as you can see from the image. No matter how you mount your core, cable ties are quite good for holding the core in place (hanging) while you adjust, bending or fabricating mounts.
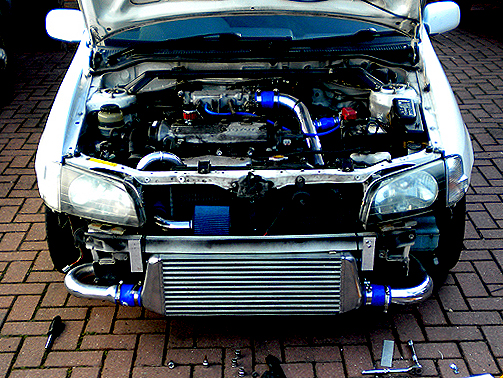
Mock fit your pipework with the joiners but don't tighten up your jubilee clamps just yet. Make sure all the pipework is clearing all the major components and wont rub or rattle on anything. The pipework can get quite close to the towing hooks, washer bottle, battery tray and bottom water hose. This could cause a failure overtime!
Once your happy everything has sufficient clearance use the clamps to secure the pipework in place.
Its then wise to go for a quick test drive, this is actually illegal (to drive without a bumper) so make it short. You just want to be testing there are no boost leaks (which would be easy to spot on a boost gauge, or even hear).
Also make sure nothing has moved or started to come loose and is still secure.

The final part is to trim bodywork/wheel arch's to clear the new intercooler core and pipework. Remember this is the bit everyone will see so take your time, it took me about 20-25 attempts, trimming a bit off the bumper, test fitting and repeating until it fitted perfectly. If you do a neat job it will look stunning.
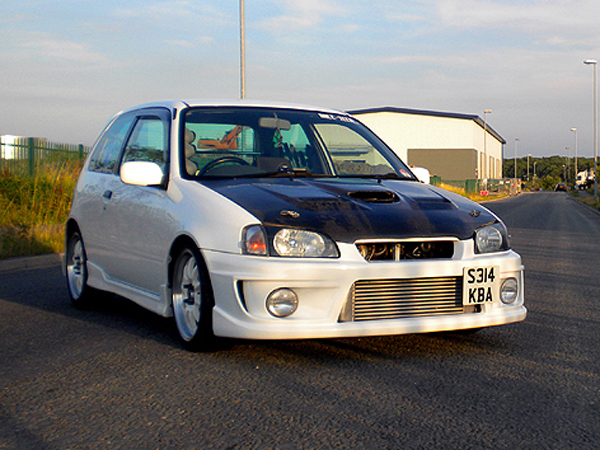
The Varis Aftermarket Bumpers are designed to suit the HDI Style Intercooler Cores perfectly, so this is also a brilliant upgrade!
So there we have it, that's how we fit a Front Mounted Intercooler setup to a Toyota Starlet! Generally to reach 200bhp on the stock engine and turbo you will need one of these kits. The more boost and bigger the turbo the more power you will get from fitting one of these kits too! Enjoy!
Recommended Comments
Join the conversation
You can post now and register later. If you have an account, sign in now to post with your account.