
scatter
-
Content Count
97 -
Joined
-
Last visited
Content Type
Profiles
Forums
Wiki
Media Demo
Store
Calendar
Posts posted by scatter
-
-
alright mate,
Have you still got manifold?
If you have when u say - little dent on one of the runners - what do you mean? sorry I'm a noob and dont know what the runner is, assuming its the pipes but aint sure...
-
Trying to find a decent brand/price on ebay for the felt stuff and Ive got some scavaged VW bulkhead foam-rubber stuff to patch the gaps in our bulkhead like around the steering column and grommet areas. In the meantime Ive made sound deflector cups from milk cartons to point up at me and co-pilot...

Love the DIY approach mate, especially the sound deflectors... Let us know how it goes. As for me I've come to realise I play my music too loud! its ok if its only me in the car, but when I got a passenger music is drowned by road noise :-( unless its the misses lol
-
I've been flat out trying to get other bits done for Japfest mate....but i did have a read through the how2, and its spot on, really in-depth!
Good effort!

Cheers mate, that's good/encouraging to know...Hope you had a good japfest!
-
Scatter my car isnt stripped, thats my old car in the photo. As a standard car they are still quite noisey over 30mph. Im just thinking I need ti add foam or something as that butyl resin is already in our cars in most places.
I didnt notice till you pointed it out lol let us know how it goes mate would like to do it myself...
-
Thanks boys....defo gonna have a bash at mine!
did you do it mate? I made a how2 thread...
-
Still editing...nearly done need to add a pic
Ok so this has been done three ways that I know of, here is link to another how2 showing one way.
http://www.ukstarletowners.com/topic/3218-how-2-mesh-your-front-bumper/?hl=mesh
Initailly I tried to rush this job but I just fucked it up so had to start again! The second time I was patient and it paid off, job looks much better. Below are the basic steps with some things that I learnt along the way...
1. saw out the the slats with a junior hacksaw
In hindsight it is best not to saw the vertical ones completely, i.e leave a few mm and sand them down this way you dont
damage surrounding bumper and create the need to use body filler to fill saw scratches, as I did.
2. Remove bumper to make the rest of the work easier.
There are 2 screws on top of the grill; 2 bolts at sides of number plates; 4 bolts at front of bumper and 4 screw-bolts on
the sides, 2 on each side, one at bottom and 1 inside of wheel arch cover.
3. Fill in the sides, where you cut out the horizontal slats, using bumper filler.
Also use some alunimium body mesh, as suppourt on inner side of filler (I used cardboard and grill mesh as I'm tight, but in
hindsight wish I spent a couple more quid and used the fine aluminium stuff used for body work).
Once done smooth with sandpaper.
If you aint used filler before I advise watching a video or reading some info to get some tips - After trying to rush it I
found its best to be paitent and build up small layers rather than doing loads at once.
4. Sand down the top of the bumper, smoothing where you cut out the vertical slats and if there are holes/saw-scratches fill them with filler and sand to smooth.
5. Now the paint with primer, base coat and lacquer - basic instructions (things I learnt) for those new to painting are at the bottom of the page
6. Paint horn and bonnet latch to help hide them behind grill
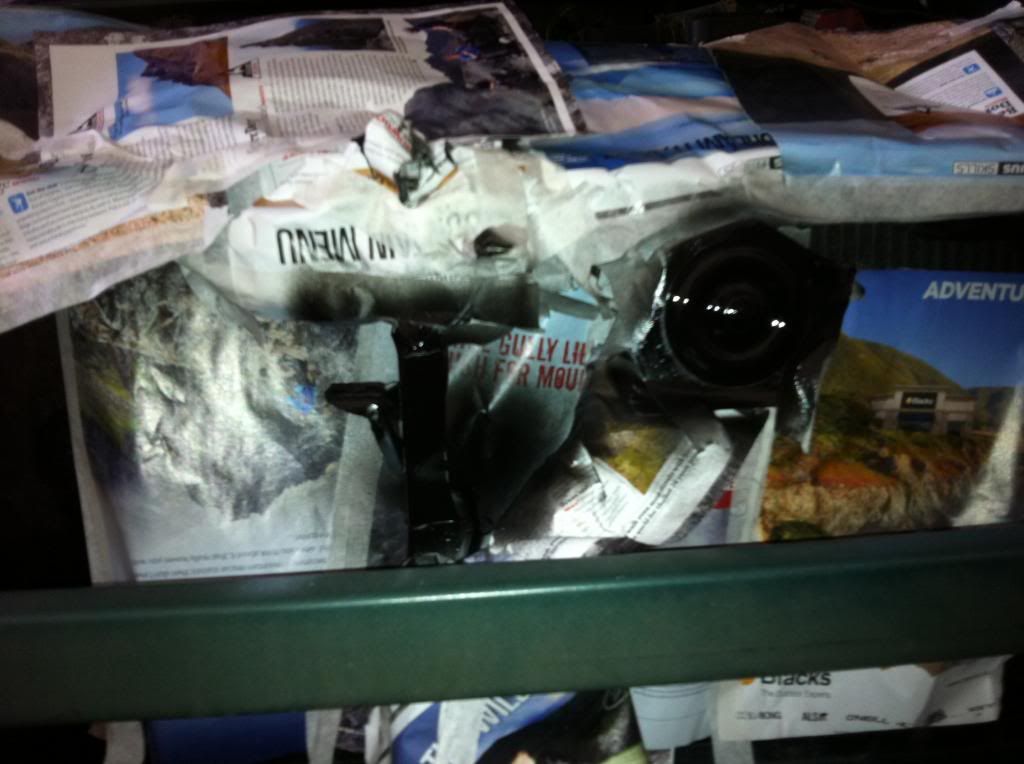
7. FINALLY on with the mesh.
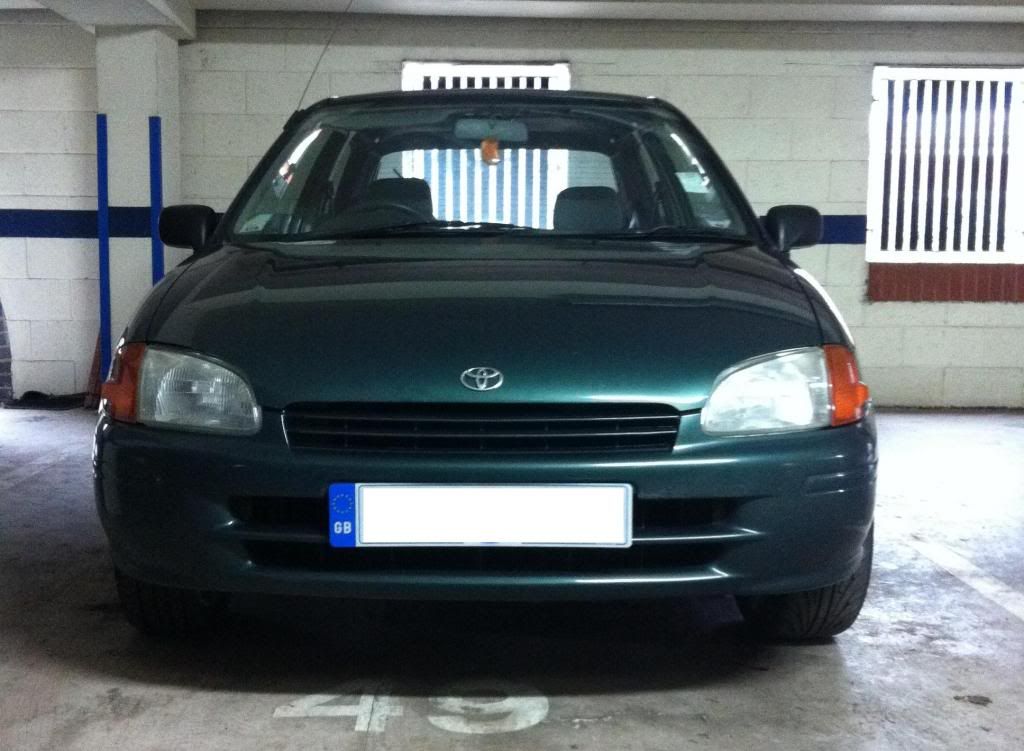
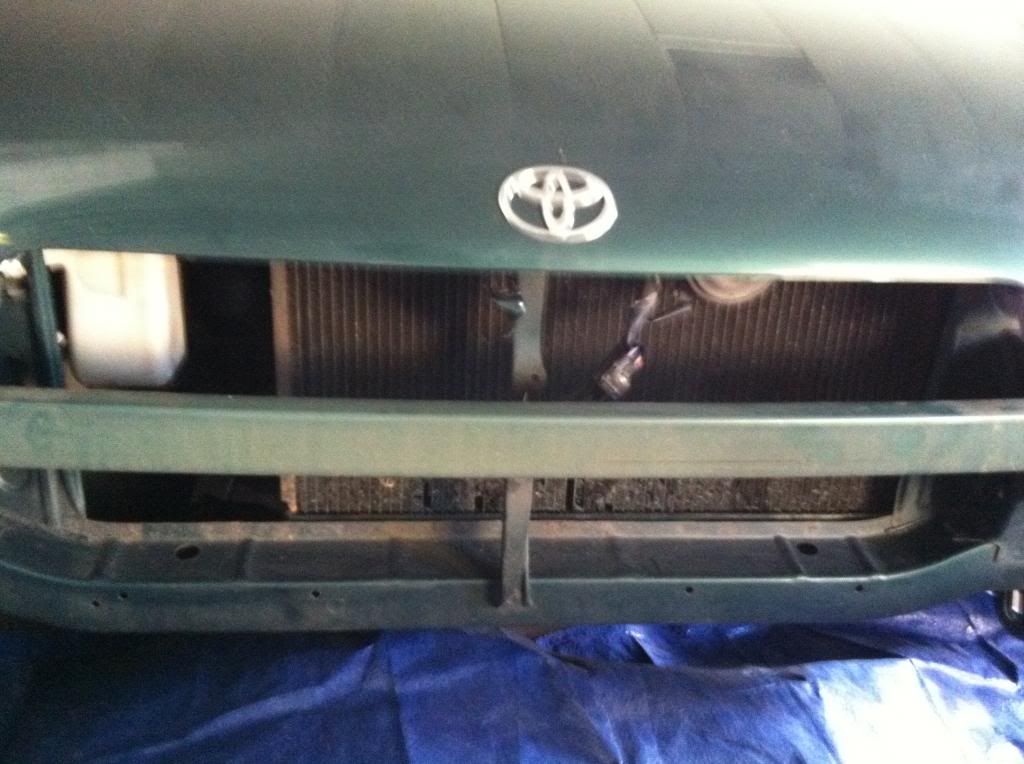
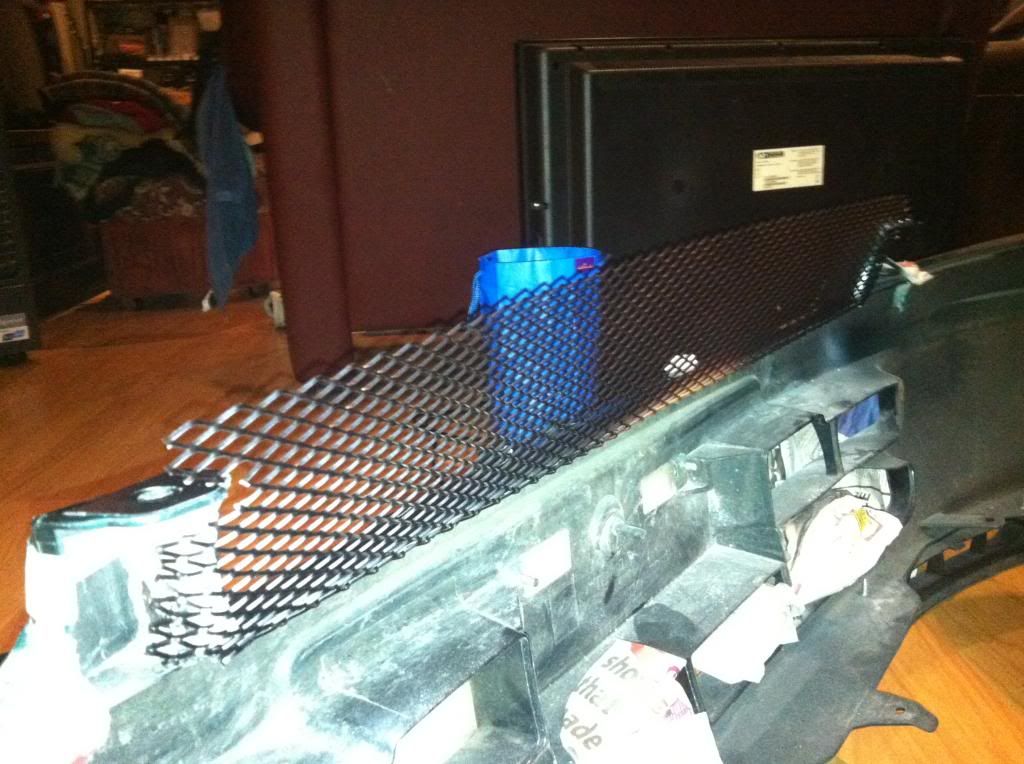
I wasn't sure what to do here, didn't want to use the method in the other HOW2 and other users who meshed their cars said they stuck it to the crash bar behind the bumper - shown in the pic below. But I wanted to find a way to stick it to securely to the bumper itself, forvever! Luckily when preping I noticed that toyota conveniently made a ridge that is perfect for sticking mesh in...
^. 7.the step...Make a carboard template - so you can test the size before fitting mesh
I wanted to get this right as to avoid cutting it to size once on, as this would result in sharpe edges. rather than measure it I sized it (if that makes sense). Sorry I forgot to get a pic, its not hard to work out though but just incase here are some steps.
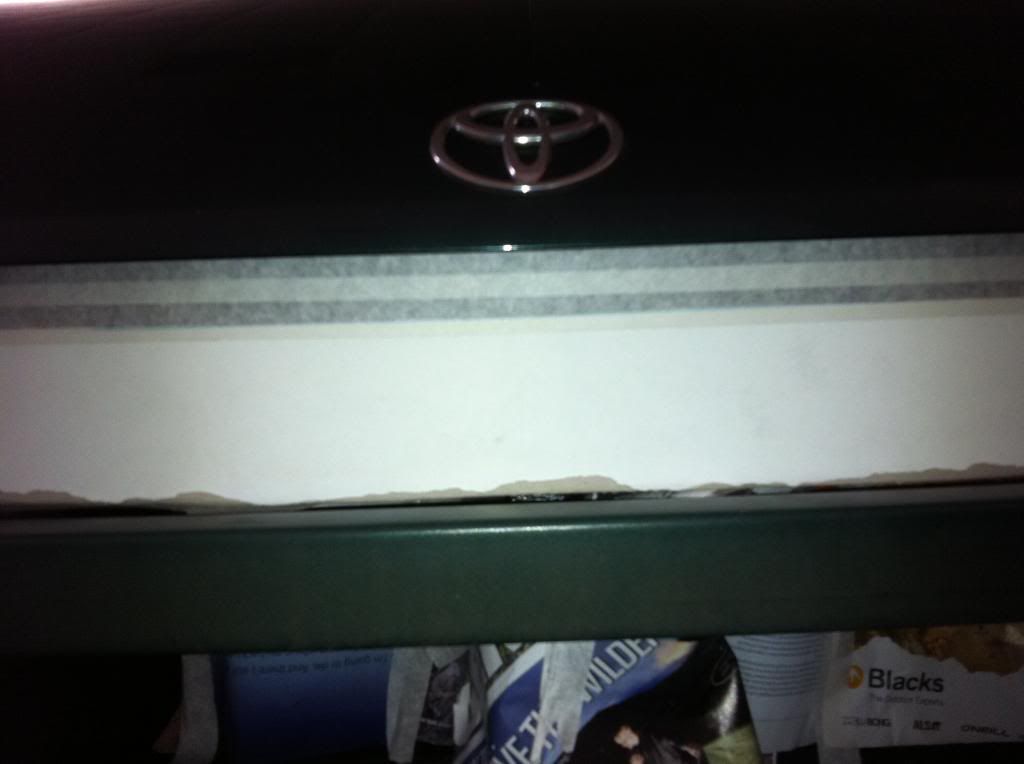
1. cut out a suitable sized rectangle cardboard template fitting it to bumper ridge.
2. bend it towards the grill so it bends in an L shape.
3. cut it so its flush with the screw holes in on top of the bumper
4. cut own the corners so that you can fold the far ends around the inside of the bumper where you body filled, now you should have a basic template, next step is to make it high enough (look 4 pictures down if this makes no sense)
5. take template to car and stick it with some tape to the top, so that lines up with the screw brackets on top of bumper.
6. Now you can add some strips of masking tape on the template to build up to the corrcet height - as shown in pic
8. use cardboard template to cut out the basic shape of mesh
9. Cut bottom to fit in ridge.
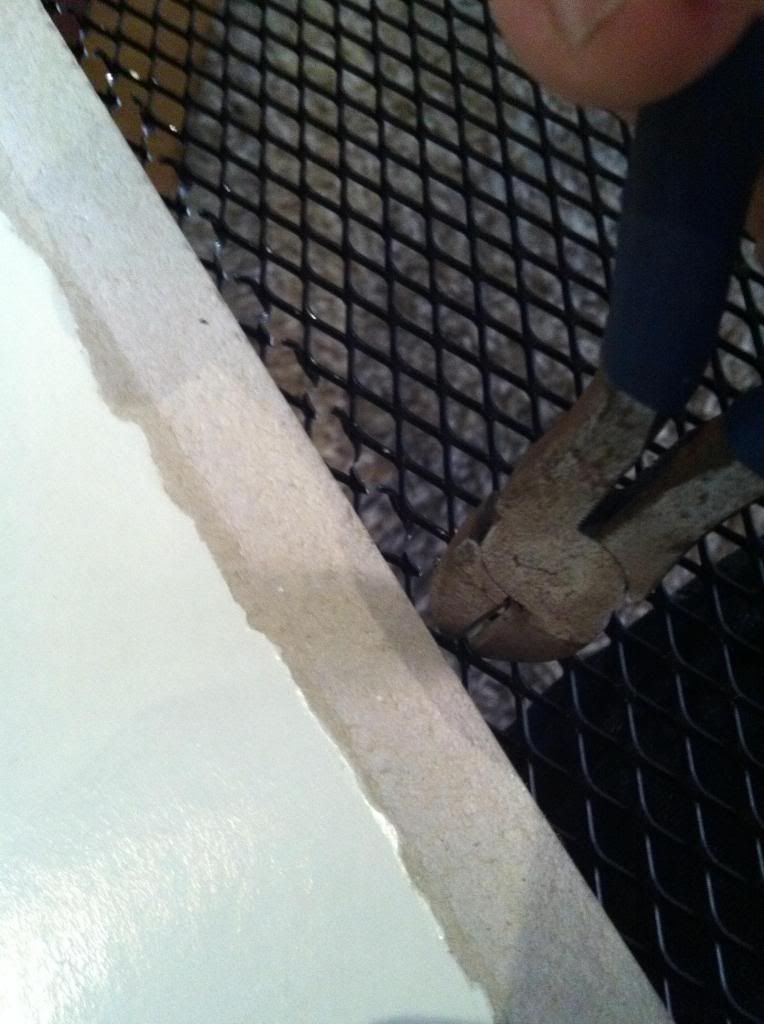
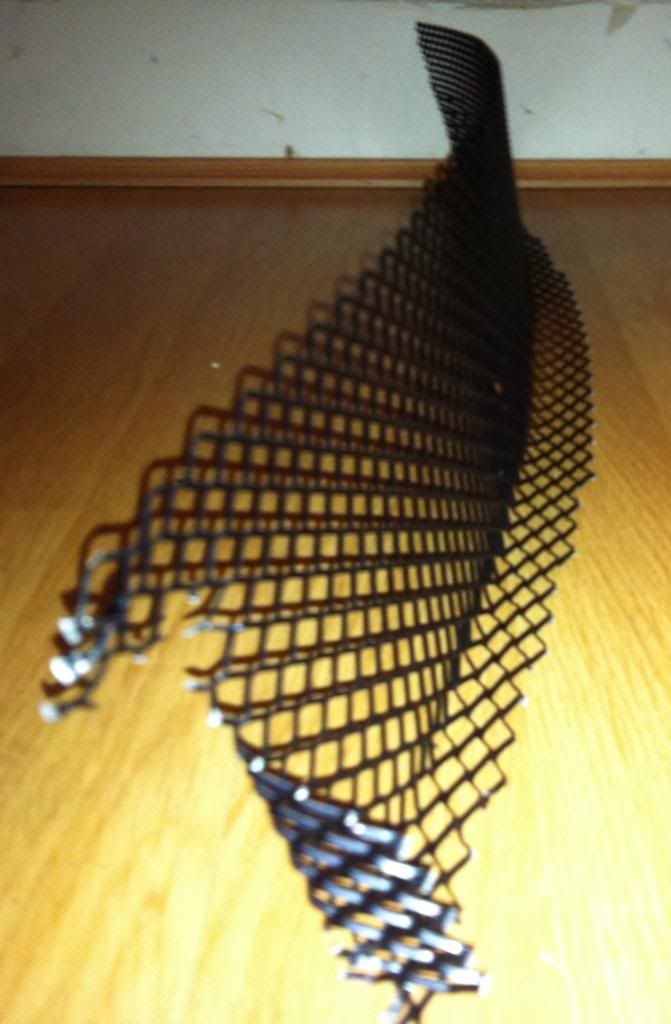
I found that the bottom of the mesh needed further shaping to fit properly in the ridge. It needed to be made into 'steps' -like in pic below. I did this by trial and error, but if you look at my pic you can just about make out the cutting i did.
At this stage do not bend the mesh into an L shape as excessive trial and error bending may bend or snap it, as i noticed with my mesh at least.
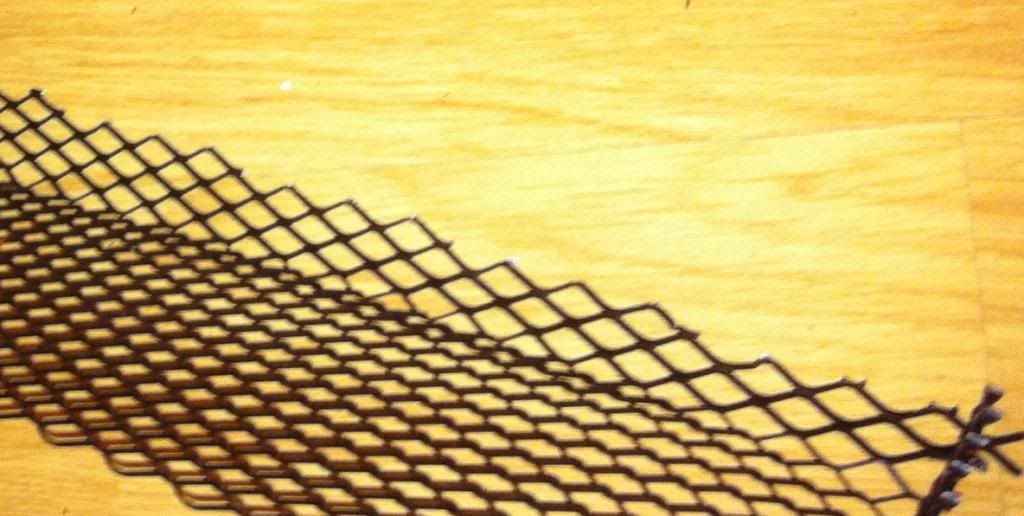
10. Warm metal up slightly - So once you have cut it to fit the ridge warm it up with a hair dryer before bending it (I stupidly used a fire, which burnt some paint that I had to go over in a permant marker)
11. 'Mould' it to fit, Once warm put mesh in the ridge and gently bend into L shape to fit bumper, like cardboard did.
Once this is done if you take it out it will look like this
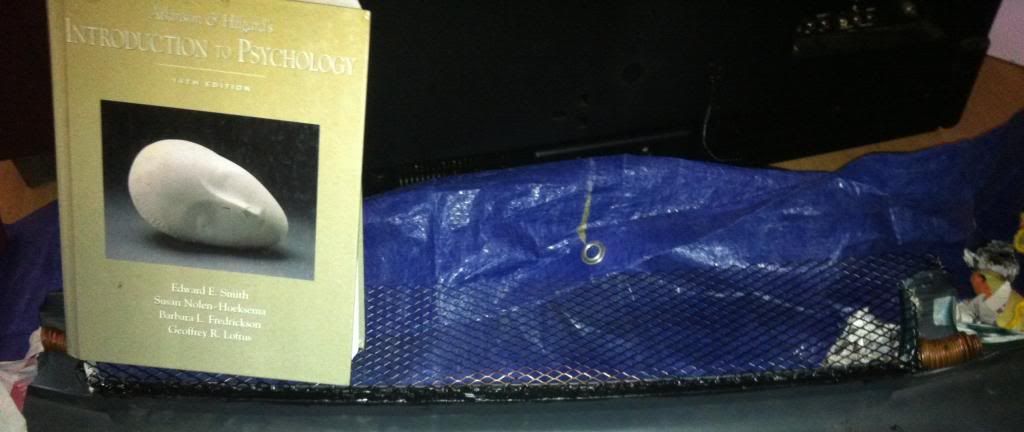
12. sticking the grill in. I used tiger seal for this. I had to weight down one side with a heavy text book and then push the sides in with some copper coins (i knew they would come in handy one day!) but apart from this I didn't need any other pressure. I left it to dry for 24 hrs...
13. FINALLY put bumper back on car and admire! Soon I think I will mesh the rest of the bumper and the splitter vents. You might also want to cut a finger hole to make opening bonnet easier...
Painting Tips for users new to painting
WARNING! I rushed painting initially and as a result had to start over (also I didn't take bumper off - step 2 and left out step 4 - which made paint job even shiter!).
If you aint sprayed before watch some vids on techniques etc its imporatnt to do painting right, here are some basic things I learnt: preparation is everything, surface inperfcetions will be prenounced after painting so get rid before painting; make sure surface is prperly clean; spray lightly and build up coats slowly or solvent gets trapped and messes it up; ideally do it in a well ventillated area or outside on a dry, non windy day when its not really cold (warm day better) away from the road (otherwise cars passing may dust up your paint job) actually I ended up doing it inside because it was cold and wet and I'm impatient, as a result I got quite high :-) remined me of sniffing glue in D&T lesson at school; finally paint needs to be warm (well not cold at least) and shaken for 2 mins or so before each application. I warmed mine up with a hair dryer
Now what to do (for those who haven't paited before):
(i) Clean sanded surface with some soapy water then washed with clean and left to dry (ii) clean it with white-spirit to remove left over grease etc - some people use pur alcohol or more expesive paint prep stuff (iii) mask off the bumper except the surfaces to be painted (I've) Primer it, I did 2 coast 20mins between each and then left for 24hrs as can suggested (v) after primer sand out any imperfections with 800 grit sand paper if nessessary (vi) wiped clean with dry lint free cloth (should of used liquid I think but was paranoid of fucking it up) (vii) sprayed with colour (6P3, which i got made up at halfrauds) and left to dry for 24 hours (viii) as 6p3 is pearlescent I read that pearlesecent and metallic paints need lacquer to oxidation/dulling - lightly sand painted surface with grit 800 or so to dull (this didnt feel right but worked) then spray with lacquer (since i heard that apparently you should only spray lacquer in one direction) which you are suppose to leave 1 week before polishing, havent polished mine yet)
-
not sure on this one, haven't got the same problem as engine, exhaust etc standard and interior is not stripped. but have a few ideas and did some quick research...
are your speakers in rear only? if so it might/should help if you get some front ones as well or relocate rear speakers to front door cards (assuming there too big for standard place...here is a how to i was looking at http://www.ukstarletowners.com/topic/9564-how-2-fit-optional-door-speaker-pods/?hl=speakers, although I suppose if you have loads of road noise this might not help too much.
Loft insulation, not asbestos shit though, you'll die.
Surely loft insulation will retain water? ...
In america corning 703 insultaion (covered in felt) is used in many hiphop studios (even renowend ones apparently) as cheap effective soundproofing, But you cant get it in UK but I found out that a good alternative is suppposed to be rockwool RW5, http://www.building-supplies-online.co.uk/rockwool-rw5-insulation-slab-3754-p.asp - link says it is water repelant but I would of thought that its too thick and imprcatical for car? So Found this online car deading shop that might help you http://www.deadening.co.uk/
Finally you might find this video helpful, you could use info and like you said 'strip the foam/cloth from a few cars at the breakers' but maybe use it from luxury cars as vid says they have much better soundproffing material
-
cheers mate
-
sorry ryan, regretfuly not going to make it, the umeployment centre made me sign up to a course on the thurs and fri on 'finding and getting a job' - it would of made sense if they put me on in feb, when i signed on, but then again nothing the DWP do makes sense... Its in leicester so will be too far away. will make next south wales meet, car seems to be running ok now and I carry a spare alternator belt just incase :-)
-
I pm'd you about this and strut??? got a strut now but would be interesterd in this still... you have my number on pm so if you want to sell it to me send me a text
-
When my mesh was fitted, masking tape was used to hold the mesh in place and tiger seal applied to hold it on. Keep the tape on for 24 hours to allow the seal to dry properly
cheers mate, just about to seal it...
Make sure you wear a pair of latex gloves, when I put my wind deflectors on I didn't wear any and my hands were stained for about 3 months !
James
3 months! shit, will make sure I get some gloves on, cheers mate
Sorry to jump on this thread but do any of you guys have any pics of your meshed grills....would like to have a go myself? Good luck getting it fitted mate!
Cheers and no worries mate, best place for it :-)... There are a couple on here http://www.ukstarletowners.com/topic/42153-mesh-grill-request/?hl=%2Bmesh+%2Bgrill and this is my all time fav starlet http://cars.bazoom.com/uk/gallery/1844-toyota-starlet-ep91
pics up over weekend...
-
cheers amjad, I bought some gloves and bought my mesh black...
Gonna do this tomorrow, I took the bumper off to fill and paint and noticed a ridge that I can put seal/mesh in to, so gonna try that first because I really want the mesh to stuck to the bumper so I can take it off when needs be.
-
I have bought some speedlines that are going to get refurbed in a different colour
Could people post up pictures of their cars with speedlines on as iam looking for a good colour to go for to put on mine
Hey Raffa
Did you decide on a colour and get them done, any pics? I've put mine off untill the weather is a little warmer because I'm gonna refurb myself.
-
I stuck mine to the back of that bar and it sat just right
cheers man, I was hoping you'd see this... did you clamp it?
-
Hi
So I've cut the grill on my n/a and want to add mesh but wondering how best to do it. I have thought a few questions please.
1. Do I need to apply pressure with a clamp to make things stick to tiger seal?Then where to put it?
1. Thought of sticking it to metal bar in front of engine, as this would make it easy to clamp grill on while tiger seal sets and also there is a large surfae area to stick it to? ... but i'd rather not do it this way as I cant take it off.
2. Shape mesh and stick it to grill direct but thinking this will be hard, as there are only a few mm's of grill edge to stick it to, would this small/tiny surfae area be enough to support the grill? ...I'd rather this route if it will work
what do you think
so 1 stick it to back of this metal bar
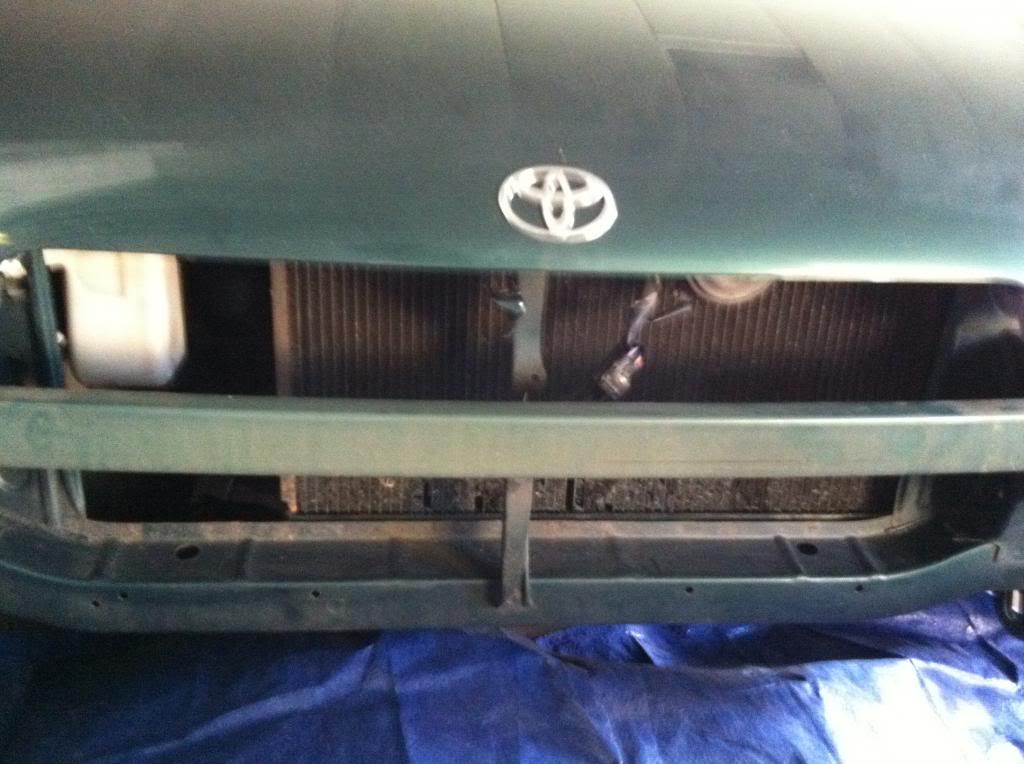
or 2. stick it to the bumper direct
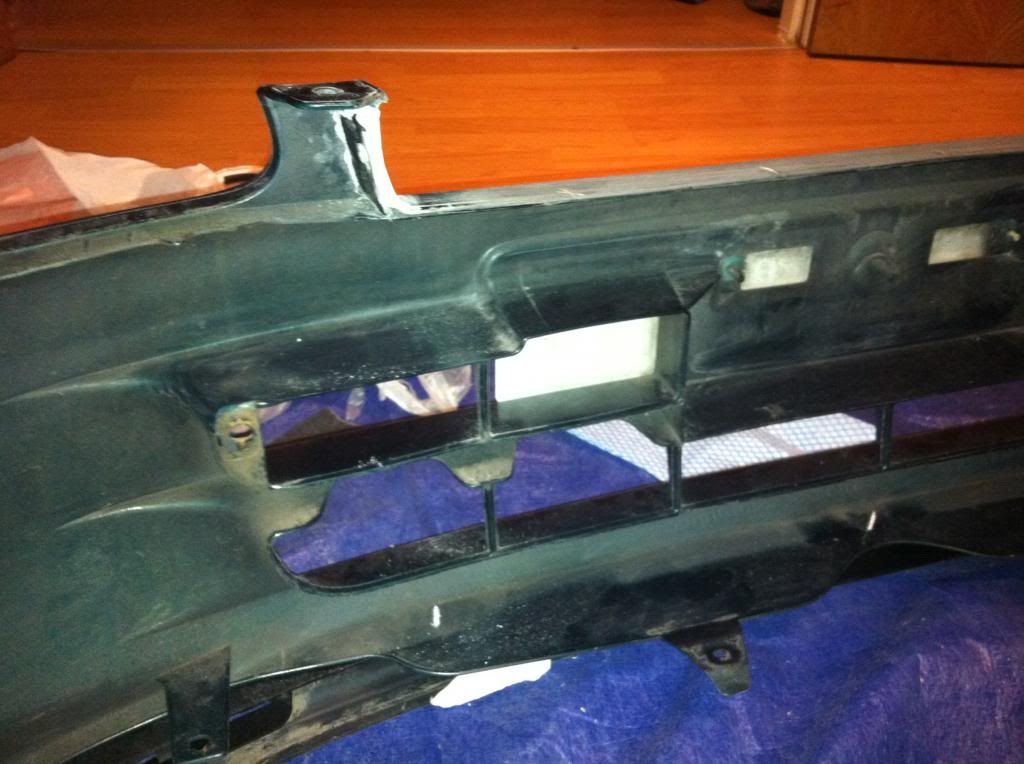
cheers
-
cheers man, when he said it I was thinking he meant just injectors but he reckoned it'd be the same with manifolds. but wasn't sure to believe him because surely the manifold only effects physical gas flow, am i right in thinking this?
-
I thought he was but wanted to check and also didn't want to tell him he was, i was in his valley not mine ;-) Your cars looking nice mate
-
Want to do this mod myself. I went to a breakers the other day to buy manifolds and injectors from a corrolla but they'd crushed the car! One of the guys there told me I shouldn't go messing with manifolds and injectors, I told him engines are the same and loads of people have done it, but he siad its no good and reckons i'd have to potch about with the electronics/wiring and shit to do it propa...and if I didn't it would eventually fuck the engine.
What do you all think about this? Is he speaking shit or is there a bit of truth in his opinion? I still wanna do the mod, but need to know if theoretically they are anyany risks because of differnces in electronics between the two cars?
Also
The map sensor should compensate for any differences that mani would have. Nothing to worry about really
would this be automatic?
cheers
-
Good axle stands are £14 off amazon lol
cheers, good price for my life lol
Fyi when fitting the.altenator belt you need to lever the altenator with a 'lever' or 'stick' to have right tension on the belt its near impossible.to do by hand
Thanks for the pointer. Luckily I had my stepfather helping and he knows what to do, we used a crow bar. but think he may of done it a bit tight as the garage took it off to have a look and now its not screeching...figers crossed problem is sorted.
-
sound mate, well let us know if you dont shift them
-
do those rear seats fit an ep91 as well mate?
and
Is that modified bracket a complete hole like an O and not a C ? hope that makes sense...I'm a bit dubious putting in modded seats because I'm a paranoid sort of person
-
Go back to the garage lad and get them to sort it
They couldn't see anything and screeching seems to of gone, hoping it was just a weak or over tight belt. only time will tell.
As a bonus they fixed my blowing exhaust fro free - wasn't looking forward to doing that with my standard wheel jack, extreme mechanics lol
-
good luck with fitting and that mate, if you dont get a wiring harness you might find the link below useful and if you dont use a harness make sure those wires are securely fitted together.
http://www.ukstarletowners.com/topic/58953-headunit-wiring
Also if you do decide to go with the amp make sure you earth that properly onto bare metal, I say this because when I bought my amp someone was in the shop who'd blown theirs up because they earthed it to a painted surface.
-
still missing the point...if you agree that we all have different opionons why are you laughing at mine, its belittleing, which is ironic because you dont even relate 'turn it up' to 'turn up the gains'. I also wasn't aware that rmsnoel wanted an award winning sound system, if he does then my advice would be different, infact it would be along the lines of yours.
It would be nice to have a conversation rather than a battle mate, then prehaps we and other people can both learn something from each others opinions. But if you want to continuing trolling me then...


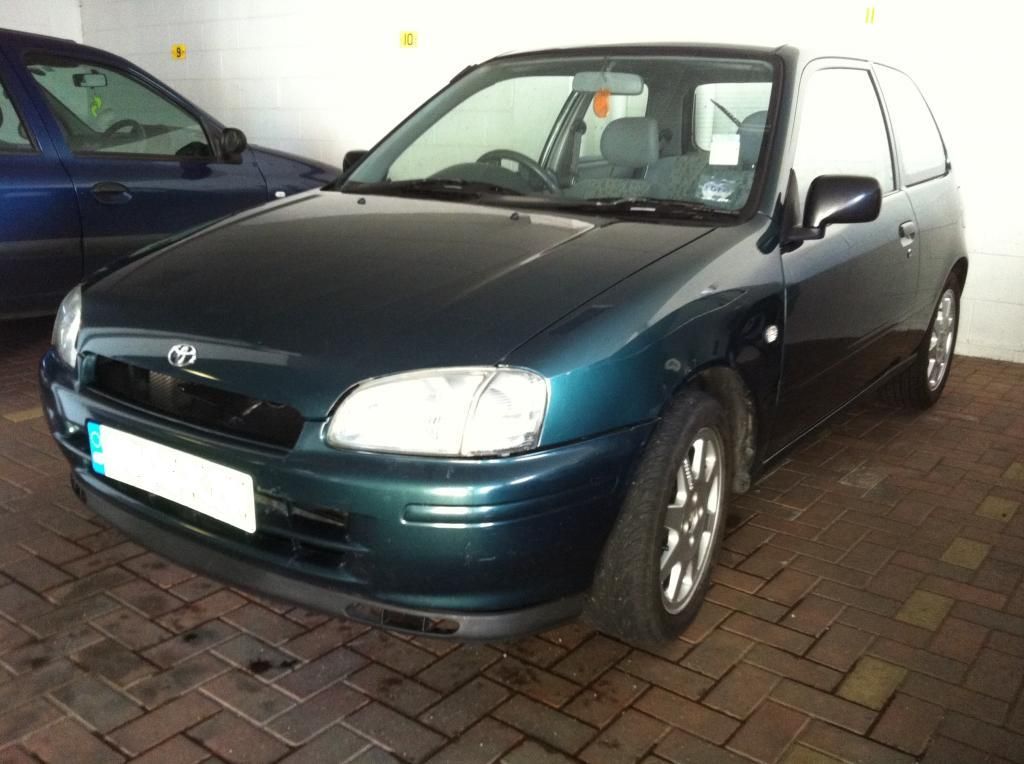
League Midas 15" alloys & corolla manifold
in Starlet Parts For Sale
Posted
Cool how little we talking? Is there any rust on dent etc? And if i buy any chance u can drop it off to my mate in Milton Keynes? Then I can pick it up off him next time I'm down