


AlanD
-
Content Count
70 -
Joined
-
Last visited
Content Type
Profiles
Forums
Wiki
Media Demo
Store
Calendar
Posts posted by AlanD
-
-
fishy isnt wrong about the red one being 'fishy' pardon the pun.
Those wheels are innovite ones, not even rotas or real volks. Thats been done once it entered the country, so id be asking why it was changed, and id be wanting to see photos of it leaving japland
-
about time...
Theyve badly let down a lot of customers with nigh on appalling levels of service including failure to provide policy and skipping court etc... remember that poor lad who paid his policy and Quinn wouldnt turn up to his court hearing?
These guys deal with disgusting amounts of money, for what is a necessity to be on our roads, and its comforting to see that justice is being done.
No im not bitter towards fat cats in the slightest!
-
Thats why you keep the bonnet catch aswell

RIP
unfortunately it wasnt as clean cut as that, the bonnet wa at such a hardcore angle that the catch wouldnt meet, so it was abandoned at an early stage....
Just to note, the car was in having its exhaust syste rehung, the bonnet was up checking the flange, and I was told the car was good to go... Still, that doesnt negate me totally from being soft enough not to check my car over before driving!!!
get the kleenex at the ready for some may shed a tear at the horrific images of a bruised and beaten kitten that are about to follow

I had taken this week off to mot the car and get her ready for next season, but unfortunately my plans were dramatically cut short on my way home from the local exhaust shop, who having looked under the bonnet and checked the turbo-> downpipe flange, and re alligning some hangers, told me I was good to go...
Now its probably my fault but the bonnet pins wernt fastened... need I carry on????
It may not look bad, but I can assure you the state of my boxers looked far worse!!!
The roof unfortunately is dented in the middle, its hard to see but if your looking at it close, the gap around the windscreen is wrong.
PLEASE LEARN FROM MY MISS JUDGEMENT FOLKS!!!


the bonnet actually came clean off the car, as it ripped the hinges off the mounts in the bay, and fortunately stuck on the windscreen wipers till I came to a halt. I was a very lucky boy that no other car became involved.
I spent a few hours stewing over it, and unfortunately I dont see sense in carrying the project on, as I simply cant afford to inject more cash into it. so it had to be - the car was broke in the space of two days-


The shell is to be collected tonight, to put another starlet back into life, so its not a total loss....
Plus my visit to Trevors last night proved very fruitfull

-
MORE TOYS!!!!!
Thanks to Trevor for providing yet more sexual components to the party - 370cc injectors, ready to dump inordinate amounts of fuel to the party.

Also new to the spec is this manifold provided by Trevor too:

a 304 stainless manifold! I thought it might have been silk road, but the pictures ive found of a silk road dont seem to match this one. The closest I can match it to was my old Jap speed one.... see?

Does anyone know what the Japspeed manifold was a copy of?
The manifold was used and had a few cracks, so I took it to a relative's engineering company to have it re-worked.
It started with having the mani x-rayed for internal damage. Any cracks were ground proud, then heated like a champion to relieve stress, and then a flange blocking plate was fabricated, the purpose of this was to pump the mani full of gas, a technique called 'purging' I believe. In laymans terms what happens is that an inert shield coats the TIG weld, then draws it deeper, penetrating the crack to the inside and mushrooming out onto either side of the split, strengthening the weld. The internal penetration was then die ground nearly flush with only 1/32" of weld proud of the surface to help gas flow. Substantial welding was carried out, and a sample of the steel was sent to see what the material was - 304 stainless with a high iron content.
Check out the handiwork - he used to compete in welding competions and holds three BOC uk champion titles.


After it was welded he had the manifold annealed and left in a special sand for the week - it was still warm when it came out last night!
next it was checked for plane, and found to be within 0.02 of plane - dead on!
this will allow me to now run as much boost as I see fit, the only issue? the engine taking it and the gearbox hanging on for dear life... my target boost? 12psi should suffice.
I asked him why it had failed to begin with, and was able to tell me that the outer 2 runners had caused the fault, apparently they were at odds with each other
-
The Sportif stickers are going
The supercharger thought had crossed my mind a few times.
But being realistic now, I'm sticking with the 4EFE.
I'm sure the supercharger thing is possible though, take the intake side of a CT9 and connect the shaft to a pulley?
not quite, the tension in a charger belt would bangle the shaft and bearings of of ct9 in about 10 seconds, you could always contact CPL who would advise you. there is always the prospect of taking a 4efte, as the internals would be better suited to taking the forced induction... just think... lagless 4efte!
-
you would be, everyone else gets a 4EFTE... you will have a 4EFE + T
been there done it! unique? supercharge it and keep the sportif stickers!
-
I got the carbon HERE matey
-
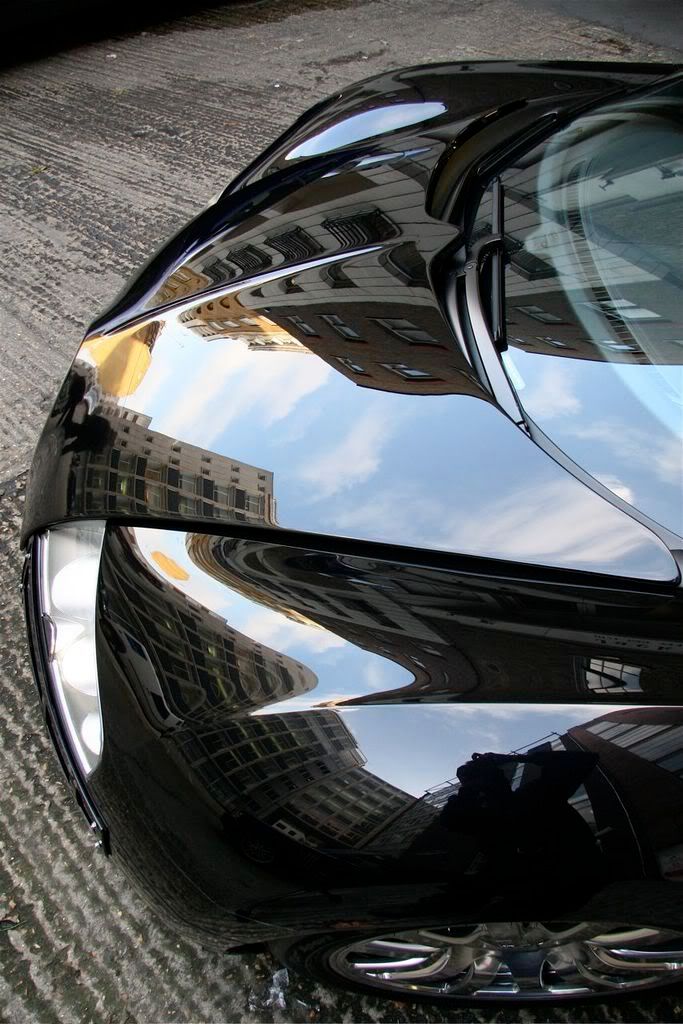
its really hard to see, but if you look to the left of the numberplate in the top photo, I have a rectangular section cut from the bumper to allow more air to the intercooler, I decided to leave it at that lol!
-
The colour on them rims look ace, are the centres matt black?
theyre a satin finish, gunmetal in colour! The lips are polished, just in need of some errrrr... polishing lol!
heres some awesome pics taken by Jaystar yesterday!
Just some photos as taken by the Jay-meister at the weekends NI meet. awesomeness


the smile speaks volumes!


-
Ive noticed these on more and more Race/Track prepped starlets coming in through Trevor of late so thought there must be good reason for them.
Upon inspection of my starlet the only earth I discovered was one wire going from the battery down onto the frame and one little strap onto the front slam bar!
Upon consulting a few NI Ep-masters, I heard more and more tales of poor earths causing poor running, so thought id use the kitten as a guinea pig and make my own kit.
All that is really required can be bought on the high street @ Halfords, though the more astute may wish to purchase the components on Ebay, and assemble the required components.
Materials
======
1x Battery '-' terminal with ideally 8awg connections, 4 or more will do the job!
5-6m of 8awg oxygen free copper
4 or more 8awg ring crimps
Method
=====
measure out runs of cable from the battery to the points you wish to earth, ensure you leave plenty of slack to locate around obstacles etc. cut back the insulation to approx 15mm of bare cable with a good pair of wire snips.
Next crimp on a ring terminal onto ONE end of each earth wire. Then fasten the bare end into the negative terminal.
It will leave you with the following:


Using a 10mm spanner undo the positive battery terminal. Excercise GREAT CARE not to touch the spanner against anything metal in the bay whilst doing this.
Remove the terminal. The battery will now look like this:

Next remove the negative terminal, again using the 10mm spanner to undo the fastening nut. The battery will then look like the one pictured below.

Still using the 10mm spanner, remove the bolt from the slam bar, in front of the battery as pictured below:

the last bolt to remove is located to the left of the battery deep down into the bay, as pictured below:

I found I needed to use the long extension bar in my socket set to reach the bolt:

The bolt is a 14mm one, I found to get a good grip on it, I needed to use a 6 sided socket, to reduce the risk of rounding out what is probably a very soft bolt.

you can now see what little earths the shell to the battery. Looks a bit pants doesnt it!

Place the terminal onto the battery and get ready to make some quick progress!
For the first new earthing point, I used the right hand suspension turret. To undo the nut, use a 13mm spanner, place a crimp underneath, and fasten the nut again using the 13mm spanner:

next up is the big bolt that came from deep down into the bay, beside the battery tray. Place a crimped end over the bolt.

then fasten it back down using the 14mm socket on extension. Take care when fastening not to overtighten this bolt. it would be very awkward to extract should you shear the head!

I noted the 1500cc monster had one of the earth teminals fastened to the rocker. To do the same you will require a 10mm spanner. Remove the 10mm nut, place a crimped end underneath and refasten.

next up, replace the last stock earth point on the slam bar, using another crimped end and fasten down using a 10mm spanner

The next stage is optional.
I wanted to go to town with my kit, fastening earth straps to all areas of the engine bay, the majority of aftermarket earth battery terminals have 4 points for 8awg. I chose to expand upon this by making an extension from the terminal to the far left hand of the bay.
To do this I used a 4 awg crimp, and fastened 2 lengths of cable to the crimp by baring back 15mm of cable, placing it inside the crimp, and crimping it by using a lump hammer and a chisel to crimp what is an awkward size to fasten.

be sure to insulate the bare wire using good insulating tape.
Next up, I tidied the cables by cable tieing the loose cabling to the charge air pipes and along the strut brace.

I decided to add another 4 terminals by using a distribution block from Halfords... Cost? £10... Ebay? £3.99...

I fastened the distribution block to the left hand side of the strut brace.

I ran the wire that I just fastened to the back of the strut brace to the distribution block.

next up?
well! thats upto you! you can run how ever many wires off to where ever you like in the engine bay, well except to the positive wiring!!! lol
I hope this helps people perform what is a cheap, but effective modification!

-
http://www.belfastbar.co.uk/portside-inn-review.htm
this be the place! it even has a satellite view to help you find it!
their burgers rock. deeply!

heres a more realistic damp-o-vision view from this mornings recce run!
its the building square in the middle of shot. when you come off the roundabout at fortwilliam marked as the docks, sweep over into the right hand lane, take the right, then turn left into the entry of the car park.
See you all there - bring a brolley!
ps Ill have a Pivot speed meter with me for sale if anyone is interested, and I also have an oil pressure guage and sender, unused with me too. If anyone particular is wanting it, I have a rebuilt 4efe head for sale too, but I wont be bringing it unless its a sale lol!
-
just a couple more touches for the meet tomorrow:
brakes painted blue lol

little velcro stickers for the show plates:

proper carbon sheet over the wiper hole:


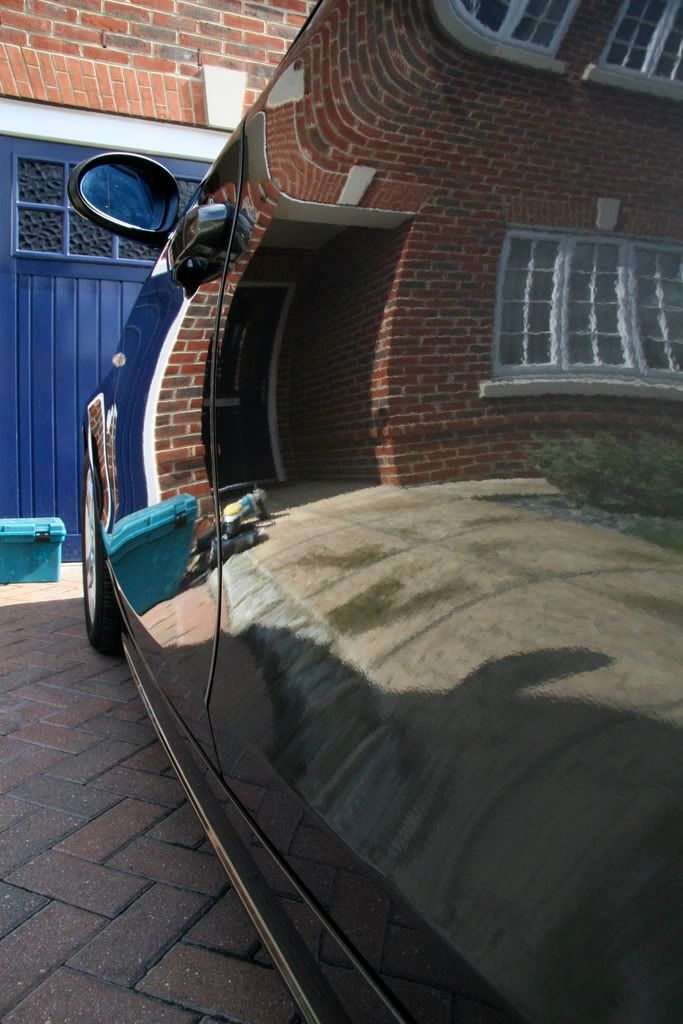
then Robbo and myself buffed just the roof for the sheer novelty of it lol!

-
^^^Man tells no lies!^^^
I have a close buddy who had his (my old) GT4 sat in impeccable condition prior to ownership. He listened intently on what he needed to maintain its finish, and invested in touchless washing gear, and simply one good wax. The car looks every bit as good nearly 2 years on, and has yet to see my porter cable anywhere near it.
I detailled a laast gen celica in blue for another good friend, who was warned he had soft paint, and that if he didnt change his wash method (old sponge, probably dropped a few times during a wash, left un covered to the elements during the week) that the car would be bad as ever proper quick. Low and behold he landed back after three weeks wanting it buffed again, only to be told no, as I wasnt satisfied that enough clear coat was left.
morale of the story??? people assume waxes and polishes are key to having a greeat looking car, but forget that a bad wash is as good as cleaning with wet and dry papers! lol
-
you couldnt have put it better Jay. We need to define a clear line between the detaillers out there and those who simply detest cleaning and see it as a chore. Supaguard is grand for that as its basically providing a layer of sealant, as opposed to enhancing the visual appearance of the car. The issue is that most places that apply it just apply it straight or maybe after a brief paint pdi. My main grievance with this is that the canvas its applied to is virtually always flawed when it leaves the showroom. Take leannes new Fiesta anniversary for example, I was able to get £1k off the price by arguing defects with the salesman.
All said though, the typical customer for supaguard isnt exactly wanting optical perfection.
What a round about way of basically saying 'horses for courses' lol
-
its really interesting reading here, it seems more people are interested in hiding damage than correcting it and maintaining it at a high level.
its similar to the concept of having an underlying issue like a smoking engine and using a 'stop smoke' additive. The issue is hidden for a while, but its still there.
I have a few friends that are Auto Glym addicts, who lament for hours on how good the SRP is, but the simply truth is its simply a mask for underlying issues. For the cost of 5 or 6 bottles of SRP, one could budget for corrective work, backed up with a good pot of proper wax, and provide years of quality protection rather than simply a 'sealant'.
im sure the other detaillers like Pav could back me up on this one lol
Recently I saw an advert showing a DB3 and a DB9 side by side, with some script about how AG had protected said aston for years, but in the small print went into detail about how the aston had been lavishly restored by aston themselves. It was only when I read the small print did I realise this. Should I have left it at a quick glance, id have assumed that the AG would have been all it took to maintain what appeared to be a great lustre.
-
Was up to a bit of mischief in work today and made a set of show plates for the meet his sunday so I dont need to be concerned about people blanking my plates, what do you think? lol

I brightened up them last few pictures a little too!


-
On the subject of the mk1 Alan, what would you recommend for new paint that has been lying under a sheet for a year? I've only polished the car once with turtle wax since the respray.
nothing at all! just leave her be! step away from the Auto glym, replace the car cover and grab tenbeer....
Ill do her with the real gear! how are you for water pressure in the vogue by the way?
-
by the way you owe my auto a once-over don't you Al? Must get that done at some stage!
indeed I do sir! must get her in for a weekend, at least I have a td04 Sportif as a courtesy car, beats most 1L punto or Corsa courtesy cars lol!
TBH regarding charging people I do it more for the love of it, on average I spend around 16-30hrs on a car for 100% correction where the canvas allows it.
Most people I just ask to pay me what they feel they think im worth, given how good/bad the starting point is. I have yet to earn money detailling a car lol as I would rather see people going away 150% sold on what they got was good value for money. Perhaps this is where im goin wrong lol!
I realllllllllly want to get my hands on Jays mk1 when hes ready to show it.
-
I browse detailling world sometimes, but im settled now with the chemicals I use, so I find browsing it makes me want to do bad things like spend money on new stuff!
I wash with a citrus degreaser and snow foam first using the foam master
rinse
wash again using maxi suds and snow foam,
rinse,
air dry (I use a water filter)
re-apply wax if needs be.
if im doing a car from scratch I would then clay the car, correct the paint using the porter cable, clean with swissol paint cleaner, then seal with klasse, then wax, then final seal with wet mirror from chemical guys
-
im using Swissvax shield to maintain my girlfriends Fiesta anniversary, my mums corolla and my dads yaris (guess who wears the trousers there lol!)
before my mr2 got wrote off, I applied 3 coats to it, then it got wrote off, and lay there for 6 months outside, and was literally caked with 5h1t, after 6 months I snowed the car, and there it was good as new underneath.
My mothers car has two coats on it, my fathers yaris has 1 coat, and leannes fiesta has 3 coats. I also applied a coat to a mondeo, and a 200zx got two coats. Im about a quarter through my tub.
based on re-coating each car every 4-6 months, id say ive another two years left in it. So if you do the maths and forgot about the other cars ive done, theres 18 months left, so approx 2 years per pot for 3 cars.
I spent £70 on my shield, so divide it by 24, and it costs me approx £3 a month to keep my folks cars lookin tight, and my girlfriend smiling! cant really complain can I?
asper the high carnauba content in crystal rock, my understanding is that its a similar premise to royalle wax in that its enzyme based and doesnt solidify untill its reacted with the moisture in your skin.
-
orgasmic ^^,
i want swissvax.. wouldn't mind the Veyron either

lol get yourself some Swissvax samurai as an introduction. I use it on most Starlet details, its only £50 a pot, and a tub could last you years!
-

Paul's new Swarovski Crystal pot wax, the 'Paul Dalton's Crystal Rock Wax' is a £10,000 wax with a staggering 76% pure white Carnauba concentration. the £500 pot is no different, just a lot smaller and minus the crystal case - it comes in a plastic pot. Plus for the £10k pot paul will travel to you anywhere in the world and detail your car and instruct you on how to use your new purchase.
optical perfection...
remember the door is sprayed up carbon...

god you would wouldnt you!
-
rumour is its £500 a tub, but if you weigh it up over how long it would last, its not actually that bad an investment. If only I had a car at the house that was worth protecting lol!
-
Awesome combo, cant argue with that. How long has it taken you to learn paint correction work mate? Was looking at the G220 kits the other day and they looked tempting. Can't remember how much BoS is (£150 ish?), how is it to apply and remove? The only "decent" wax I have is supernatural, pretty happy with it so far
Supernatural is a kickin wax! Ive no issues with it, hang on to it and use away at it. As much as I adore my swissvax collection I cant help but feel miffed at how they treated their dealers when they retracted all the dealerships. I got a credit card and bought heaps when they were all selling out lol!
I trust mark @ morethanpolish explicitly and he swears by race glaze' new '55' wax, heI certain its as good as destiny, and thats a very bold claim.
Id still cut a testicle off for crystal rock though - paul daltons new signature wax!
BOS is beautiful to work with, as long as you leave it overnight with the heaters on! I use egyptian cotton towelling, and it buffs to a shine a treat! the only issue is that it rehazes after buffing, so it ideally needs left for two days in my experience and NI climate lol!
ps. applying!
I use my bare hands to apply my waxes with. Im never sold on applicators, as your bare hands can feel any contamination instantly, its not unheard of for a panel to dust up with the static residing on it. The other thing is that BOS is supposedly enzyme based, which is catalysed by the moisture in your skin.
"TeH KiTtEh" TD04 Sportif
in EP91 Progress Blogs
Posted
the car wasnt as horrific as my boxers mate... I ***nearly*** redecorated lol
you know what them small back street garages sitting on the edge of 'divided' areas here are like mate, I could have challenged it, but id no doubt be found with a wild sore set of knees down an allyway. sometimes its better just to accept responsibility, it is my car and my problem after all, blame pushing never solves the issue.
BUT I have turned a bad situ to a good one....
My new car is coming 19 years old with just under 50k miles on it, and quite the looker too!!!!