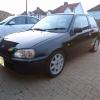
Nosixpack40 Posted June 23, 2016 Share Posted June 23, 2016 Here goes my first post so sorry if i get anything wrong or miss anything, So i purchased a Glanza boot-lid for my Ep91 Starlet SR and created this guide to aid others looking to wire up the reverse lights due to there being no wire in the loom as the reverse light is found in the back left light. The first step involves removing your rear light cover to access the blue wire which is needed for the reverse lamps on the glanza boot lid. After the cover is removed, make sure you have a decent length of wire which will be long enough to tuck under the boot floor and reach up to the c-pillar and into the boot. As shown, i had a long blue wire which i had left over from a remote power wire. The next step involves running the wire across the boot floor, being tucked under the plastics in the boot by prying up a corner as they do not have to be removed as shown here. The next step involves removing the plastic trim surrounding the rear seat belt, A further 2 bolts will also be exposed when the cover is removed and these need to be undone along with a small Phillips screw. Then, popping off the cover off the seat belt and using a 14mm socket to undo the seat belt bolt. This will allow for the panel to be moved. (You may need to loosen the trim along the rear quarter glass too and you can slowly pull the strip around the glass to release the trim) The next step involves peeling the headliner back and it is clipped in along the top and it can be slid out as it has a rigid plastic built within it. As you move through the process slowly thread the cable under neath the panel that is just removed or loosened and run the cable to the top and through the bung to follow the rear boot lid loom. After this is achieved the panels can be placed loosely in place and the headliner can be replaced into the grove and slip back in (the boot seal can hold the loose bits as this can be pulled to access the headliner) A small trick that is useful to get the wire through the rubber boot as it can be tight, is to use a coat hanger and crimp the end with pliers to hold the cable and stop it from moving then it can be pushed though with greater ease. For the next step the vents in the boot-lid can be popped out to aid within feeding the cable through, again the coat hanger can be used again. Now for the wiring bit Looking at the loom in the boot lid, i located the earth being the stripey black and white and found a cable splitting from 2 into 1 that was wrapped in blue tape, i removed this and used this as the ground as i interlinked the positive feeds and negative feeds as shown below. I made a mini loom for the reverse lights using more remote wire one being darker than the other and i soldered and heat-shrinked the connections. I then hooked up the negative feed to the single wire and connected them together to meet with the other 2 wires. The positive was also attached at the right side where the new wire was added. Within regard to wiring from the back light it is as simple as cutting the blue wire and splicing into it using our new wire that runs to the boot lid, the factory reverse light in the rear light can be left so that you can have both the boot lid reverse lamps and the back light one operating as 3, according to your preference the bulb can be removed and the light can be tinted but it is entirely optional. Sorry about these next snapchat quality pics ha Sorry about any errors as its my first post ;) and will eventually get a lick of paint and a bigger number plate! Quote Link to post Share on other sites
5T4R7ET N/A Posted June 23, 2016 Share Posted June 23, 2016 Nice little write up. Quote Link to post Share on other sites
EP70-PT Posted June 23, 2016 Share Posted June 23, 2016 I converted ghe factory one to a fog light (got a glanza tail light) Quote Link to post Share on other sites

Recommended Posts
Join the conversation
You can post now and register later. If you have an account, sign in now to post with your account.