

Dean @RW-Developments
-
Posts
2966 -
Joined
-
Last visited
Content Type
Profiles
Forums
Wiki
Media Demo
Events
Everything posted by Dean @RW-Developments
-
new, whooop whoop whooosh whooosh
Dean @RW-Developments replied to Spesh_Starlet's topic in Welcome New Owners!
ye a staffs meet soon would be great theres a fair few of us now just say where and when -
man sorry to hear this! hope you get it all sorted! heartless pricks!
-
cheers fella looks alot better than the one i managed to do lol
-
thanks for all the good comments everyone! as for the seats i just stitched some trd patches on them, it made a hell of a difference to the seats though.
-
nice i bet they cost abit! looks abit like its on R1 throttle boddies!looks smart
-
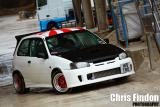
few recent pics from my mini photo shoot.. pleanty more to come in the future
-
i got a new toy today look my rocker cover needed some tlc so i got to work before- after- after i put it on i like it! another few pics.. hope ya like.
-
what it looked like after i gave the car a wash pictures arent brilliant. better ones to come
-
more recent update i decided that the only thing rewening the interior of my car was the standard door material! so went and got some seude material just so the interior didnt look granified lol. i had loads of material left so i decided my some thing could be done with the sewin machine my new gear gaiter and handbrake gaitior everything matches now.
-
ok bumped into a problem! on the way home whilst following a few of my friends my car began 2 missfire i couldnt go over 30. the next day i did a compression test and found that cylinders 1 and 2 had no compression wat so ever? my head gasket had gone. i got straight to work with stripping it and sending the head to be tested and skimmed, within 3 days everthing was back togerther along with my new bits of blue piping. the build, whilst the head was off i decided it needed abit of paint working fine after putting it back together!
-
haha time for an update on my new engine bay! my new rocker cover was just as bad as the last one so i started cleaning and polishing it i also cleaned the rest of the engine bay and took several parts off for spraying! i hate rust! the polishing came out ok but not crisp, so i moved on so sanding and spraying a few fusty bolt on bits such as the radiatior brackets. i also added the trd decal wat do u think? i first sprayed all the items gloss black, then for the extra detail. attention to detail lol radiator bottle bracket battery clamp both battery clamps fitted also got some new clear indicators watdo u think? still needs abit of work
-
ok i now wanted to change the cars image slightly because unfortunatly one of my clear lenses broke resulting in me putting the old orange ones back on the bonnet also got dented so i ordered a glanza one which unknown to me at the time is obviously slightly overhanging, i was gonna sum day swap the lights and bumper for somsort of glanza style one so it didnt reli matter! im keeping it black i also made a new radiator pannel as i broke the old perspex one. the new one was aliminium instead. the bonnet needs slight adjustment! soon after fitting the bonnet it started to snow, this was a problem as i didnt have the scoop for the bonnet so i made what i thought was a tempary messure but has now been on the car for well over a year lol.
-
when i transfered all of my interior i decided i needed some harnesses to go with the seats so i got some sparco 3 point harnesses. updates of my interior.. after trying the harnesses i was well impressed with how well they held me in the seat theye were abit restrictive so i slackened them off slightly!
-
finally 4 weeks after ordering my new wheel it arrived from italy! i got straight into fitting them as i had alraedy transfered all of my old cars mods on to my new one. i also fitted some 40mm lowering springs because as everyone knows the starlets handeling isnt the best! i will get coilovers on a later date. this is how it looked after the transformation. "> my new jap numberplate fitted to the rear. any comment welcome
-
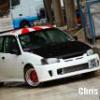
asoon as i got the car home from manchester i began swapping everything back over from my old car i was really annoyed as all of the hard work had been wasted and i also needed to relace a few modified parts that were wrecked bumper splitter needed re painting had to order new momo wheel tint my new back lights with trd logo and get my exhaust re welded because i had to cut it off my old car. so i took all my interior out apart from my seat and went to mij performance again so they could reweld my exhaust whilst i was there i had them weld my exhaust in sections with flanges so it could be removed easily in future, i also had a detachable decat pipe that bolted in so i could put my cat back on for my mot. my new decat pipe on the way back from getting my exhaust done with my newly fitted decat pipe on. a police officer pulled me and gave me abit of advice it went abit like this " your exhaust is way too loud i could hear it from miles away it needs to be quietened down because if i see you again with your exhaust been that loud i will give you a section 59 for noise polution" or somat like that. i took his advice and took it off as it was slightly over the top lol
-
not long after fitting the alloys i took my test and passed first time. because i brought the car when i was 16 it meant that i could save and modify the car before i passed my test which is what i did. i also took my pass plus which got my insurance down! unfortunatly a few weeks after passing my test due to lack of experience and crapy road conditions i smashed the car, meaning i had to get a new car a few weeks later i purchased an identicle white starlet lol. all my friends said i was mad buying the same car again, but i knew i had know where near finished what i wanted to do with one of these little starlets, i had big plans after several conversations with the insurance company they finally decided to let me have all my modified parts back off the car! this was my new car i just needed to swap all the bits over then begin modifying again
-
after a long time choosing what sort of alloys i should go for i finally choose these as they still kept with the style i was going. the momo corse wheels i got them in 15s and wrapped in toyo 195/50/15 tyres. i love this pic th bumper cannards also make such a difference to the looks of the car! needs lowering though it looks like its on stilts lol
-
update. i hated how dirty the engine bay looked so it was time to sort a few things out. i got to work on the rocker cover and orderd my blue radiator piping a square numberplate and i also had some perspex left over so i built myself what may have been the first na radiator pannel lol the rocker cover looks better but isnt at the level i want it i want it to be polished like mad lol nevermind just abit more work!
-
now for the interior from day 1 of owning my starlet i ripped the rear seats out so there would be no confussion with me been a taxi for my friends. i didnt want the back of the car to look crap and i still wanted sum sort of a soundsystem, so i went and got. a sheet of perspex (very light) vibe 6x9 s whiteline strutbrace 12inch fly active sub. sparco gear knob and pedals and a few cans of spray paint. also 2 reclinable seats only tempary until i get some carbon fibre ones when i got the perspex it was clear so i cut out the holes for the 6x9s and sprayed it metalic black then held a can of candy purple paint from a distance so it put a slight purple overspray tinge to it. more pics to come
-
ok the bumper looked slightly bare and with the new scoop id just painted i chought i would alter the bumper and the bonnet at the same time! so i soon got on the net and brought a few things foglights and some metal bumper corner cannards, unfortunatly at the time i couldnt get my hands on any carbon fibre ones. when i fitted everything it looked a little like this.. i also sprayed the side trims on the doors. ok im not really keen on the silver mesh i think i might spay it black or dark grey when i can be bothered! i also decided to take the toyota badge off the front. now im thinking of putting sum black wheels on it with a lip - this is just a ruff idea haha lol crap attempt but gives me a fuff idea at the time.
-
i still needed to do some alterations with the bumper but thought id leave it for another day! so i was thinking of free mods when a brainwave.. yes my mom had a spare mini vaccum, this was to become my new air intake lol so i began measuring it for the bonnet so i could get the angle right! now everyone please dont jump to conclusions because i am no chav or barry! trial fits.. ok it now needs colour coding i soon got into fitting it and cut the hole int the bonnet to feed the air.
-
looks like its coming along nicely mate
-
ok an update everyone! i finished letting the bumper dry and harden so i could go and fit it this is the first pics.. to be honest in sat slightly lower than i thought it would, i was dreading speed humps!
-
cheers for all the nice comments everyone
-
yes its pretty mad its like half a foot deep but still bright sunshine lol