

enzo_e492901
-
Content Count
219 -
Joined
-
Last visited
Content Type
Profiles
Forums
Wiki
Media Demo
Store
Calendar
Posts posted by enzo_e492901
-
-
Now that is a small throttle body butterfly.
This is very Interesting info. I am so rusty with all the engine info/differences. It's frustrating trying to remember everything I know I knew once. haha.
Unfortunately I didn't measured the rods.
Gavin
-
Thank you. I like to do my best.
I think the Gi throttle body is 50mm. I don't know for sure because when the Gi engine was fitted to my car they used the ep91 UK throttle body (because of sensor differences) and circumstance ment I never got my hands on it.
I don't know about ep80s but as I understand it all ep82 4E-FEs came with pink injectors. I believe the early corolla 4E-FEs had dark green injectors.
A higher dome you say? Interesting.
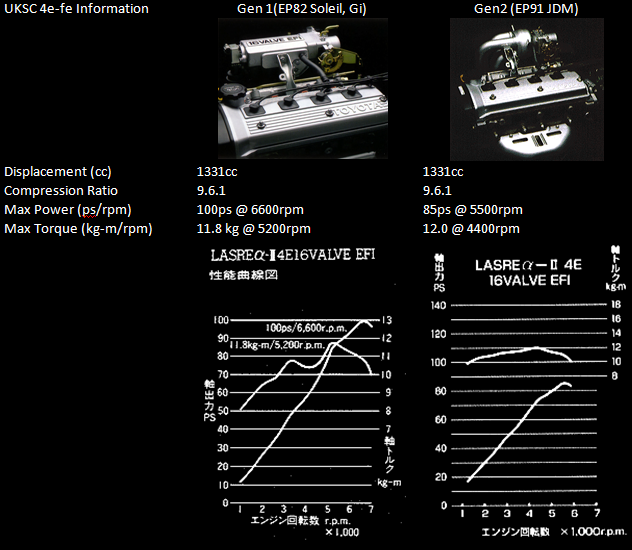
I think the Gi 4E-FEs have a 7200 rev limit. Again not sure because the UK ECU was used and i've only tested the Gi ECU with half the sensors missing so was not about to find out what the rev limit was. However based on this image that shows the difference between early and late engines I have assumed it would be 7200 RPM because that's the limit of 4E-FTEs.
Sorry I can't be more help.
Gavin
-
Checked my UK Starlet and it's recalled! Kinda lost for words.
I was thinking the other day if my 22 year old airbag would work in a crash and now I get a new one. Bonus I guess.
Gavin.
-
I am wanting both armrests that incorporate mounting for the electric window controls in UK light grey. Must be in good condition.
Anyone have any?
Thank you.
Gavin
-
Cheers. Yep years ago, i've been working on this for a decade or more now and it's gone by very fast.
Gavin
-
Quality work, looks super clean.
Gavin
-
-
No problem and thank you. I always try and learn as much as I can because I remember the old saying "A man with only a little knowledge is a dangerous thing" and I will only share knowledge if I feel I can explain things as simple as possible because that usually means it is understand in depth.
Anyway, always glad to help people if I am able.
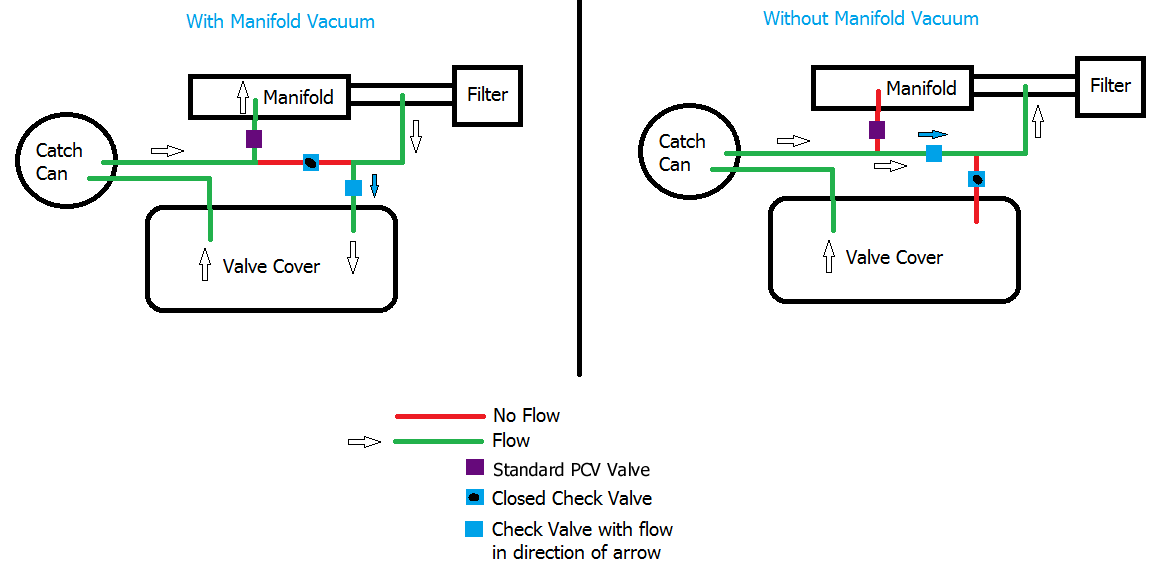
Good luck with the breathing system, the theory of engine breathing and catch cans has got to be one of the most debated subjects around modding cars.
Gavin
-
You mean this?
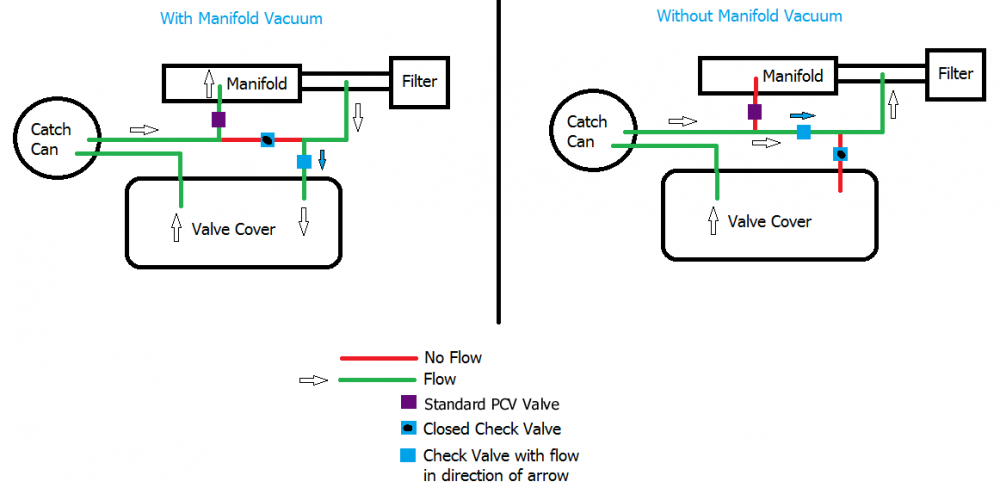
If so yeah it was me. I have not tested this yet but I did hear someone might of tested it successfully. I would guess the check valves would need soft springs to work properly.
-
Cheers mate.
I have never had access to measure a FTE inlet cam. I have read all the available information on the internet about the differences between engines but we all know you don't believe everything you read on the internet. I had the opportunity to acquire the 5E-FHE cams so went with them. I have so far only verified the amount of extra lift at 0.75mm on inlet and 0.3mm on the exhaust. The valve timing I have not measured yet.
Gavin
-
You have an epic car here. I have not yet read the whole thread but I will. Your attention to detail is superb and it shows in how the car looks. Can't wait for this to progress.
I still have a really soft spot for this colour. 8K9 Really beautiful.
Gavin
-
I would love to see actual dyno evidence of the max HP and power delivery for all the manifolds. It's something no one has done yet for the N/A engine.
You are definitely right, you don't get the full benefit of the 1st gen manifold without a higher rev limit. The higher rev limit of the 1st gen Gi ECU i'm going to use is another reason I went with the 1st gen manifold.
Thank you and I hope this is the start of a Starlet and forum revival. This forum used to be buzzing all day and late into the night at one point. It's so sad to see it like this.
Gavin
-
Cheers mate. Ha yeah, Photobucket certainly did earn the title of the hosting company that broke the internet. Well deserved title if you ask me.
There are a few reasons I changed back to the earlier intake manifold. I know nobody really knows if it's in the ECU or manifold or both but it supposedly makes more power and I guess it felt like it fitted my driving style better. It also allows easy hooking up of some of the engine sensors needed for the older Corolla or starlet Gi ECU.
Gavin
-
HAHA 5 years later. Oh Well.
All photos have been fixed.
Also, maybe updates soon because believe it or not this project is still alive. Just.
Gavin
-
Thanks guys
On 7/28/2015 at 9:12 PM, Bluebear said:Will we see her at JAE? Would look a treat there

Not this year, maybe not next but one day this will be at shows, I hope.
Gavin
-
Thank you guys, really means a lot.
Update: I am still working on this although very slowly. loL
Gavin
-
That is some work right there pal
Thank you buddy.
Nice to see you still posting mate! Some lovely machining work happening here

Yeah I'm still here. I am determined to finish this project no matter how long it takes. Cheers mate.
Gavin
-
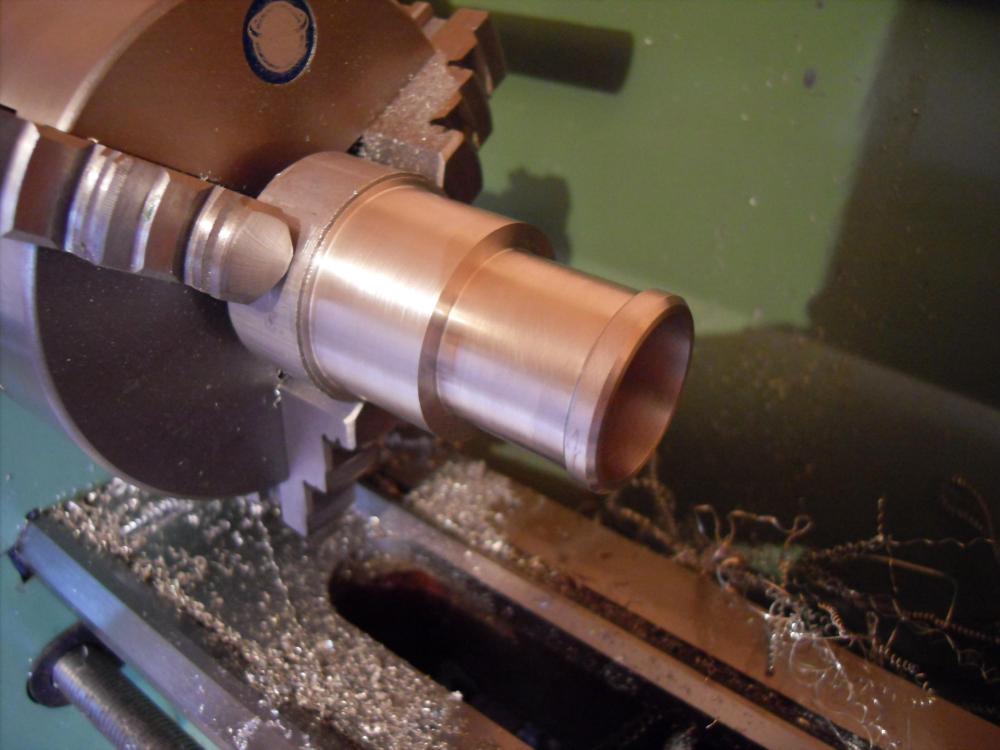
Small update, nothing exciting.
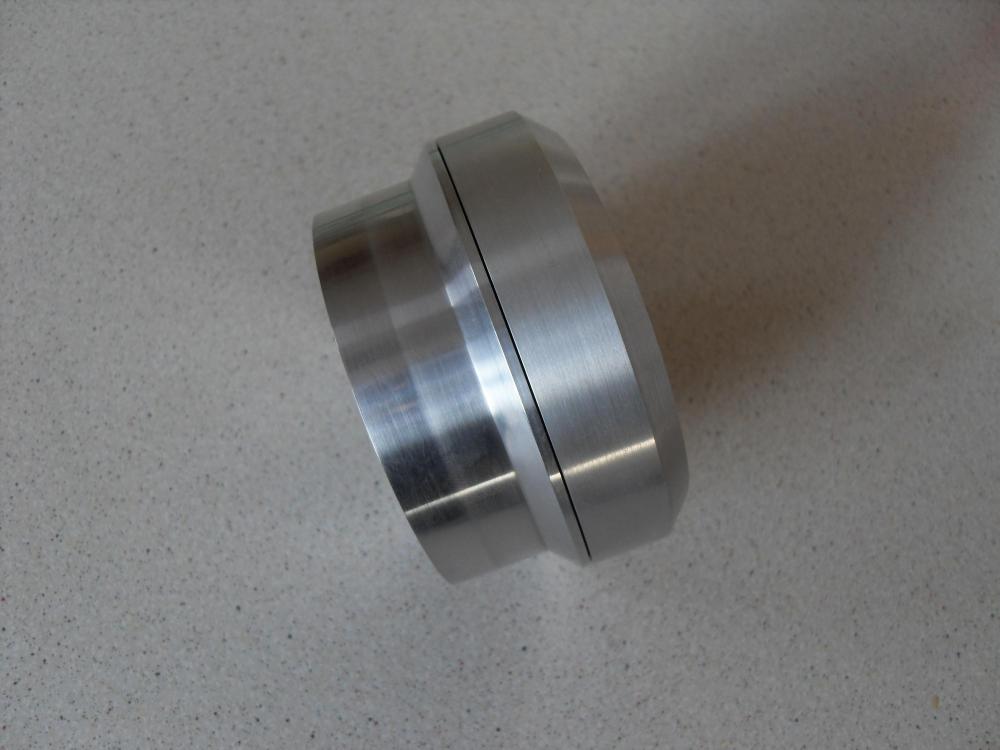
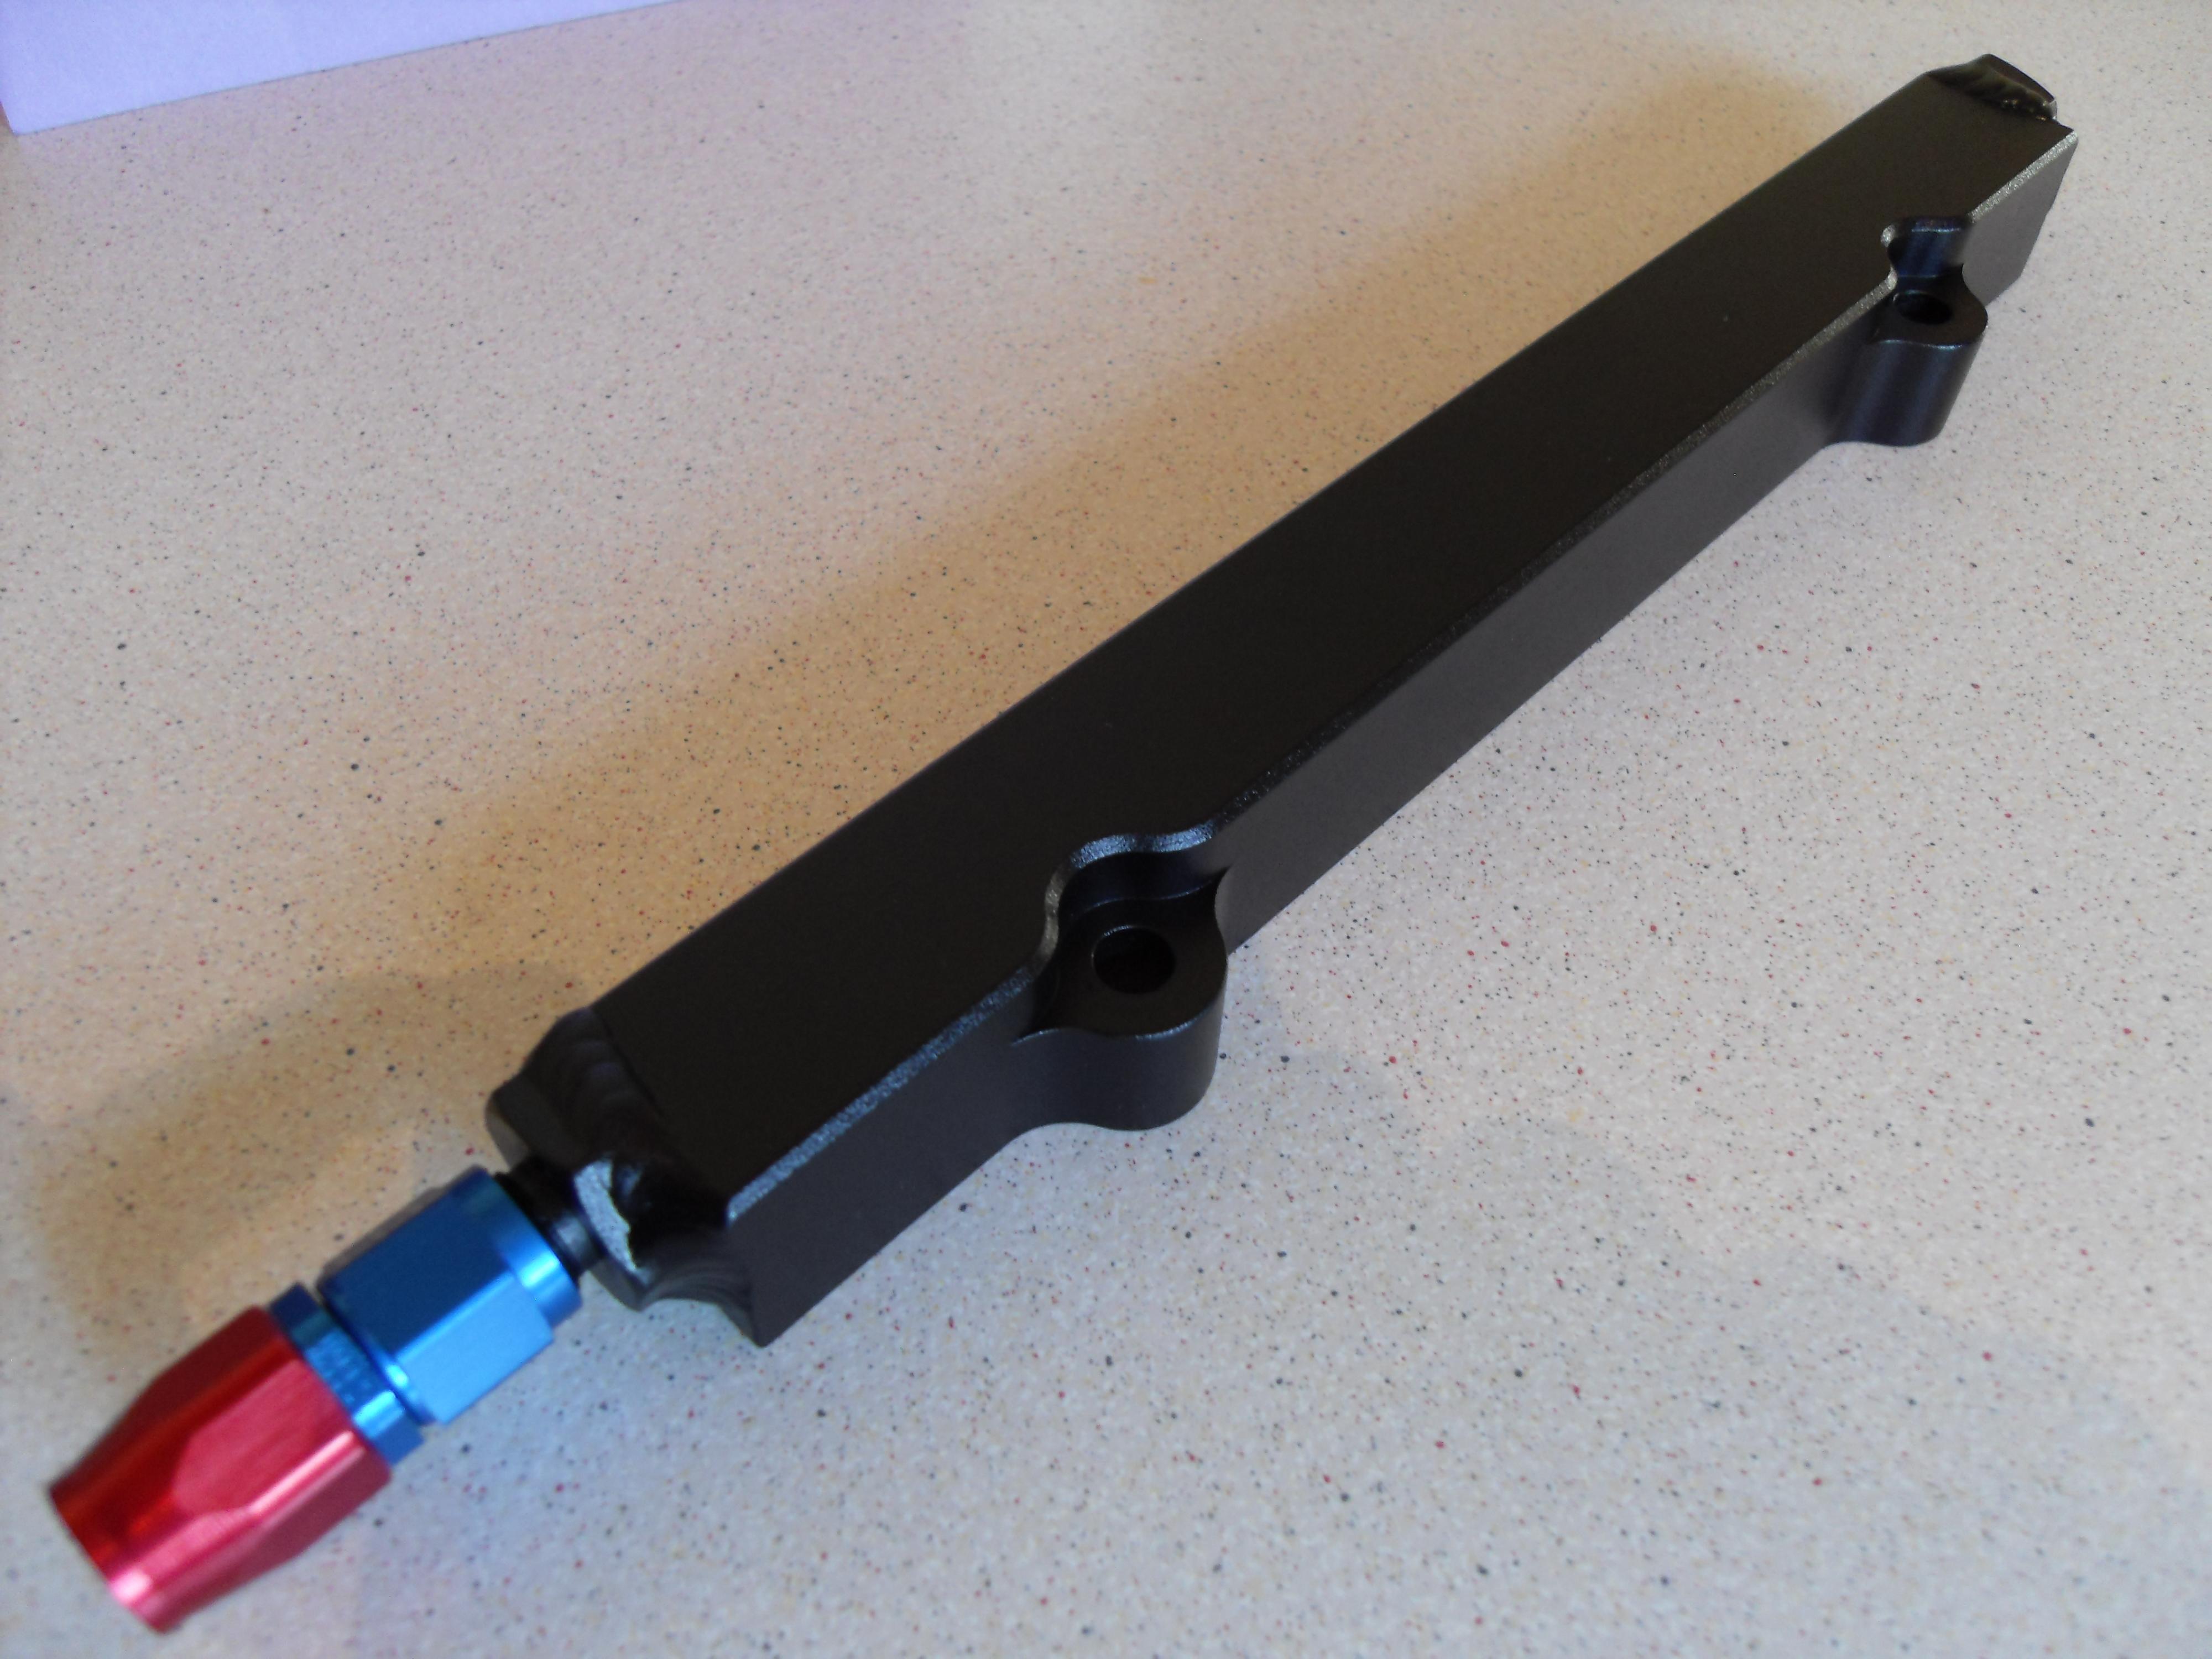
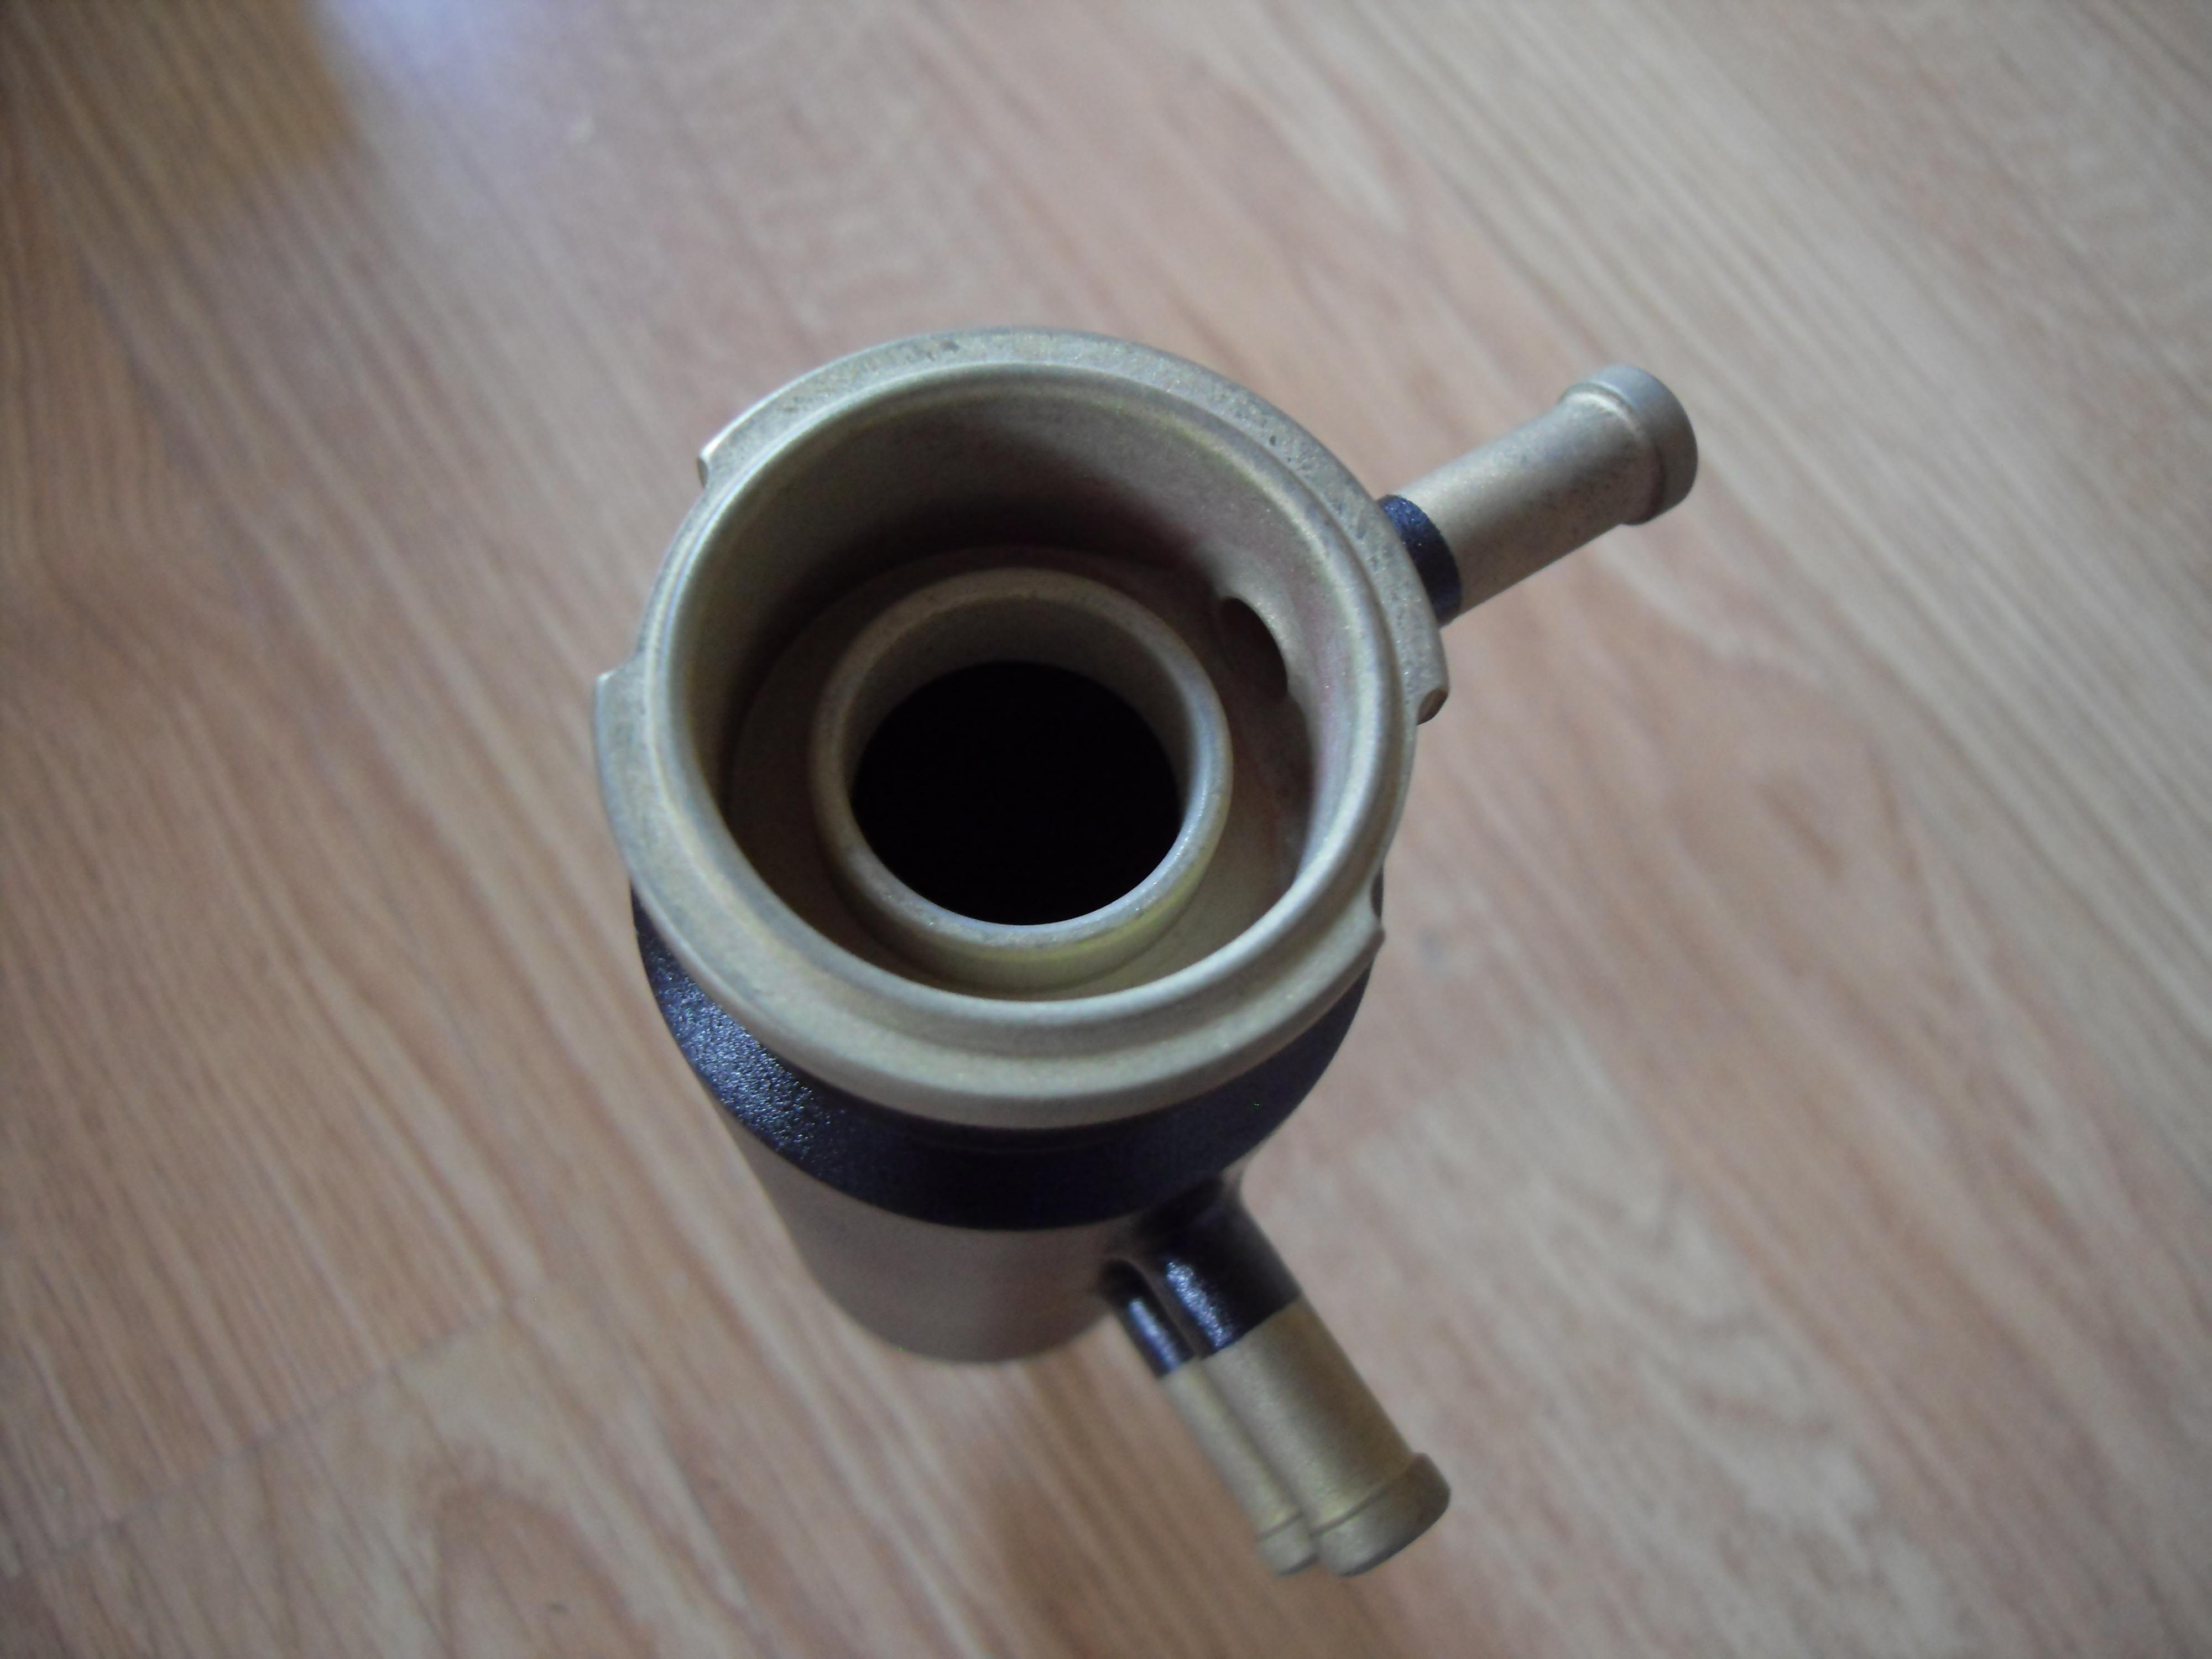
I got some more DIY custom parts made this week. Now I can start making the bigger, more interesting parts. I also managed to de-anodise and paint the old style TD Fuel Rail I've had for so long.
Hopefully within the next month I should be able to order a JUN lightweight flywheel and Zep brake and clutch hoses.
As ever photos speak a thousand words...
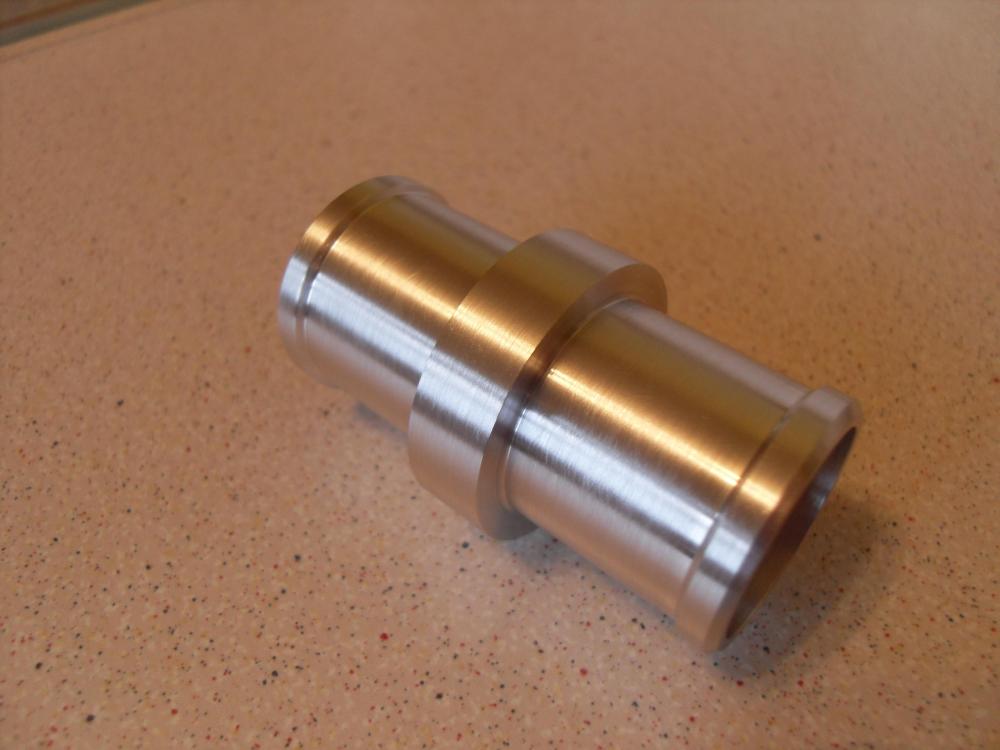
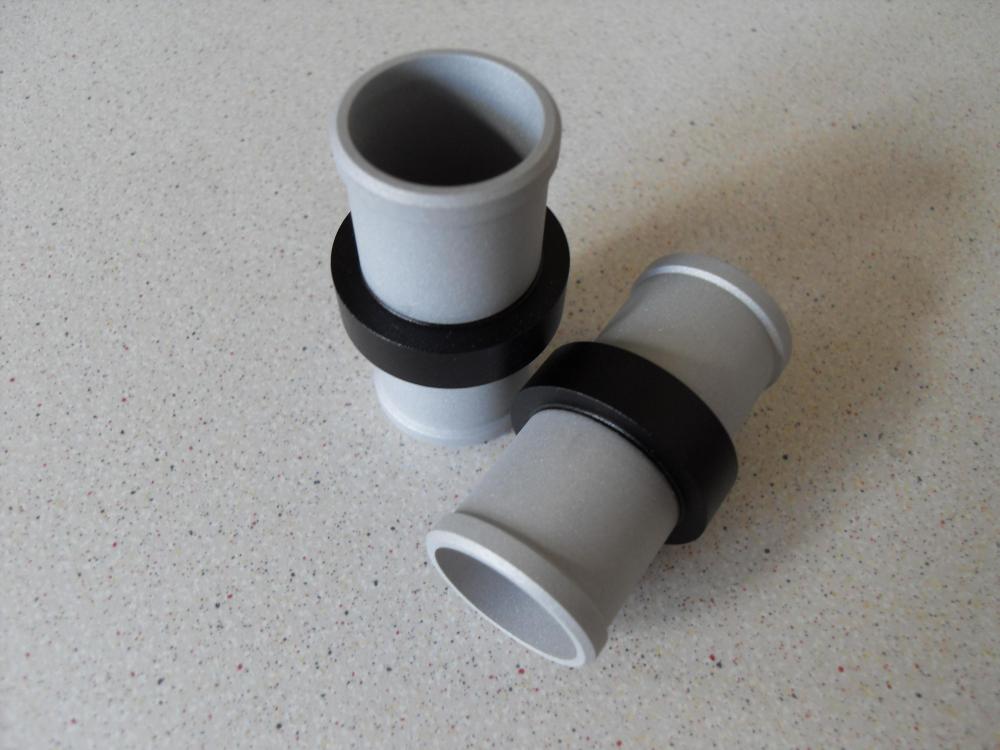
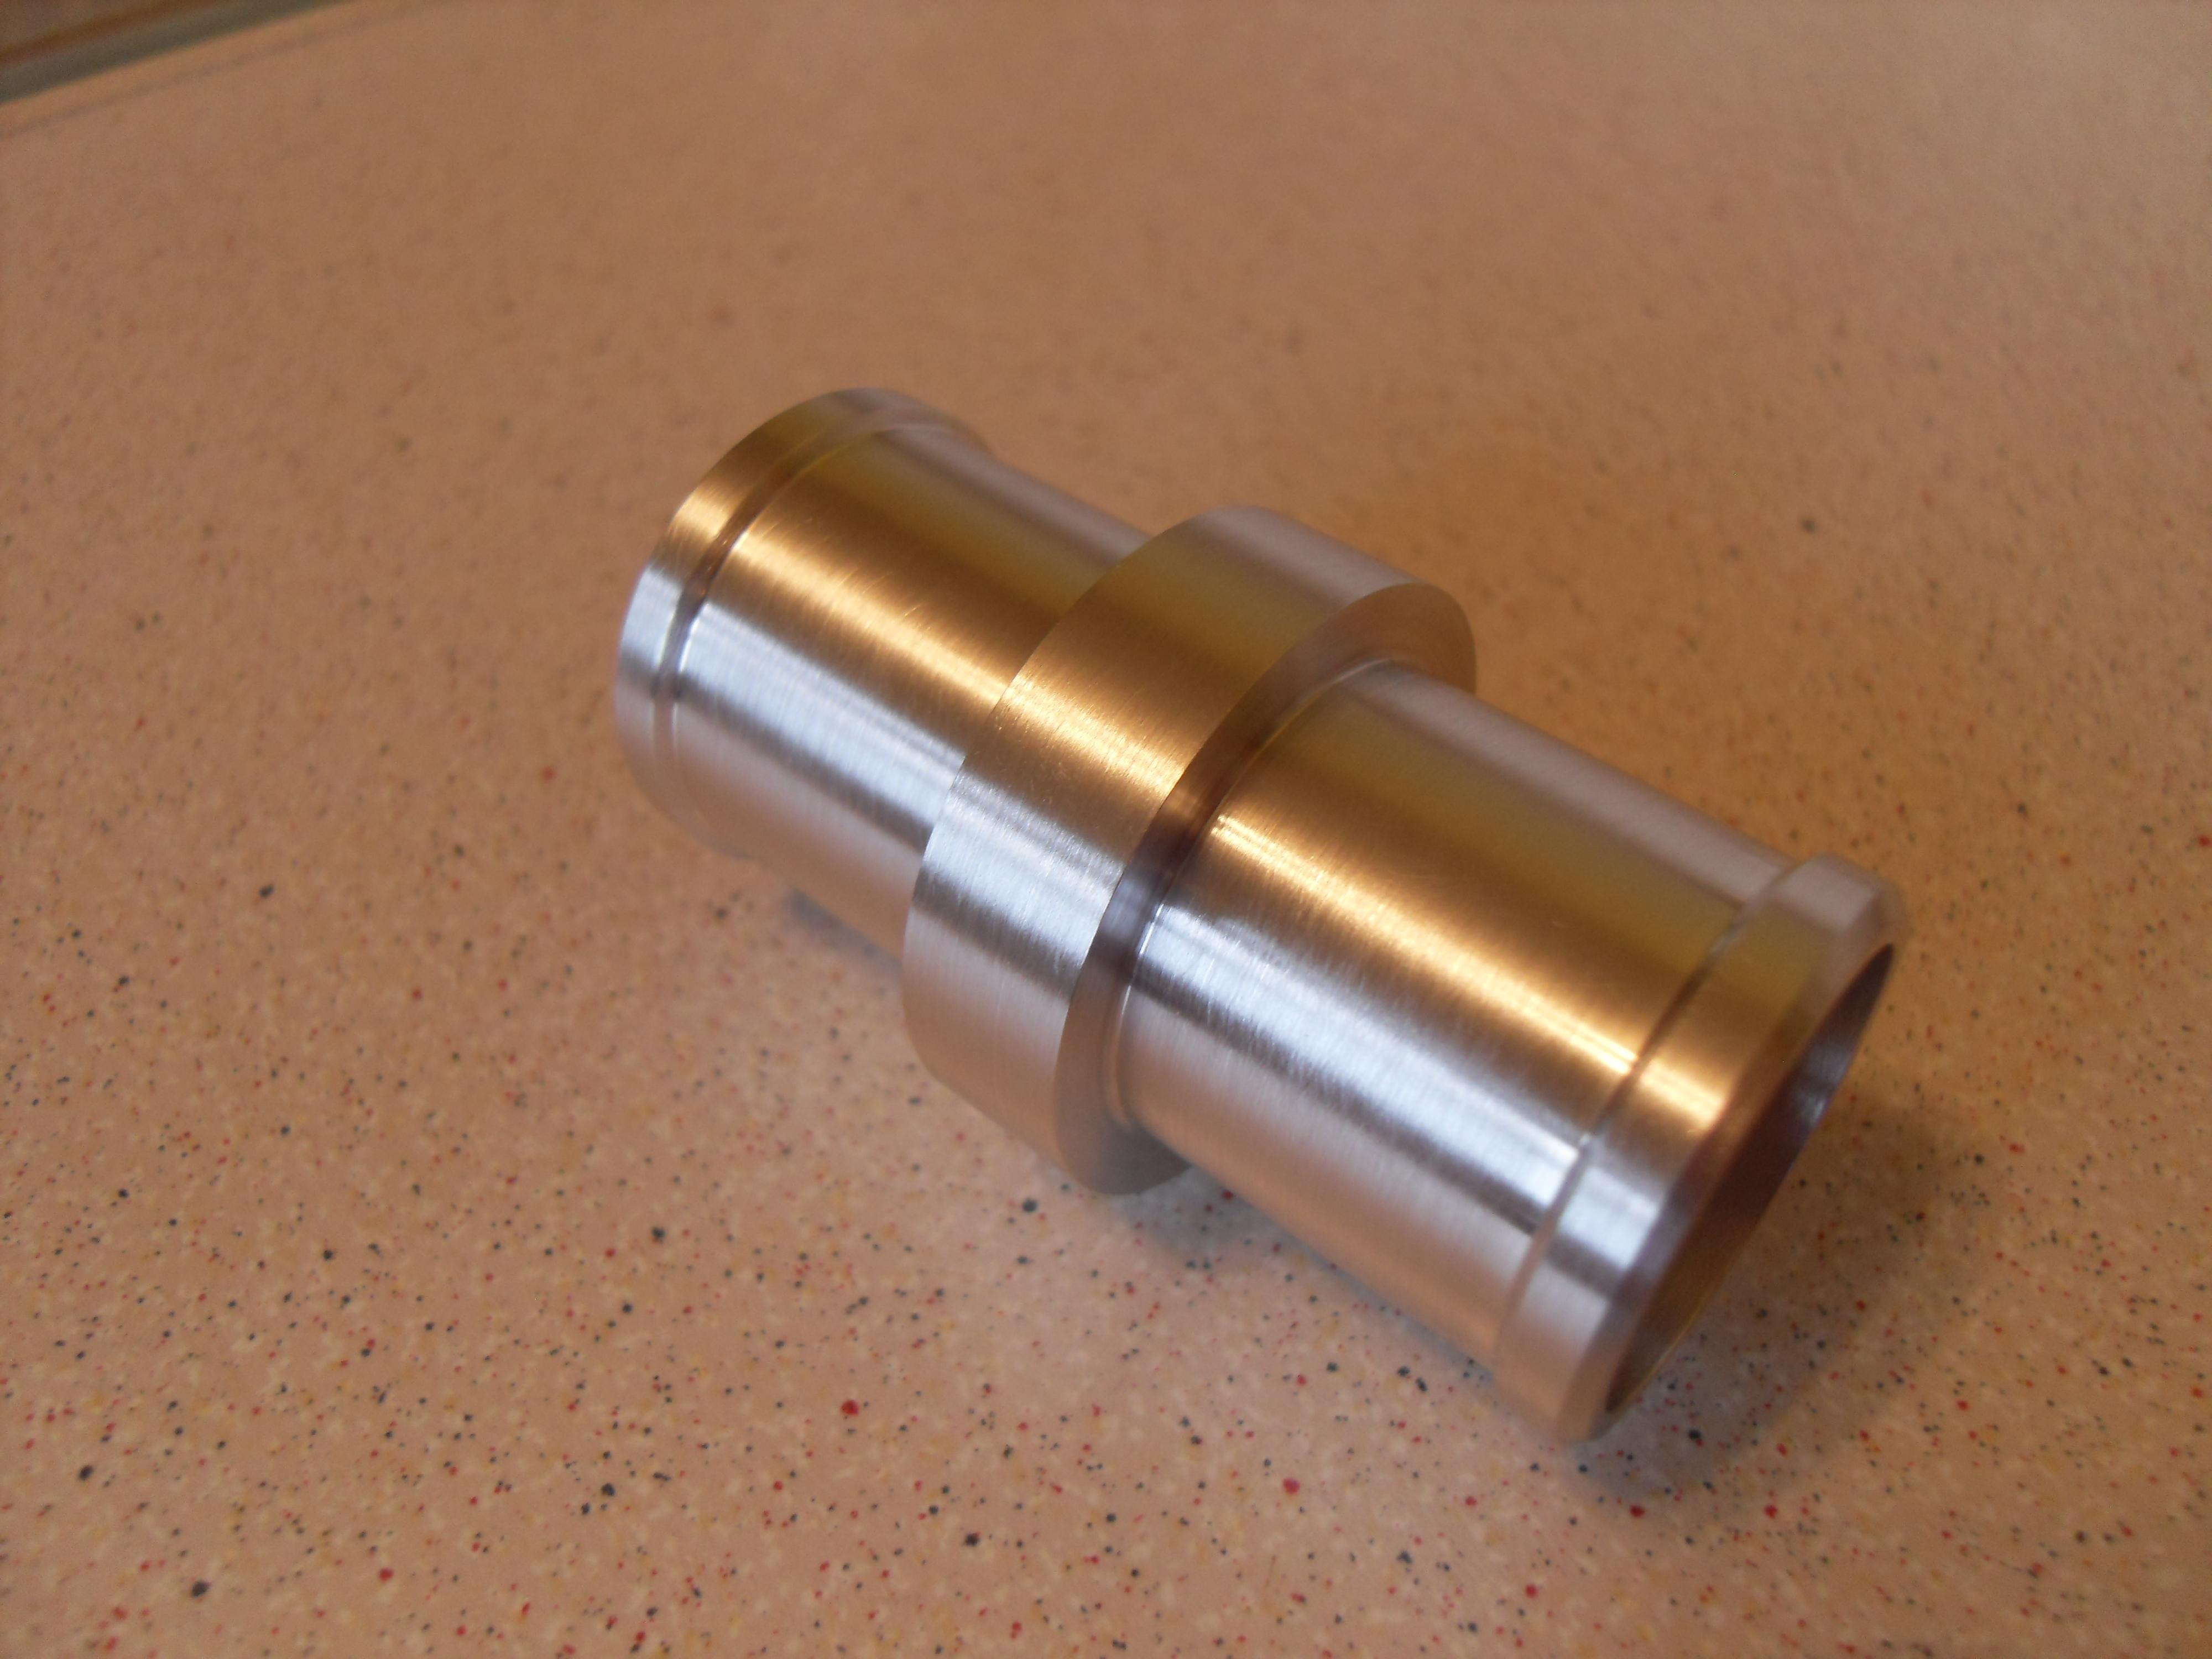
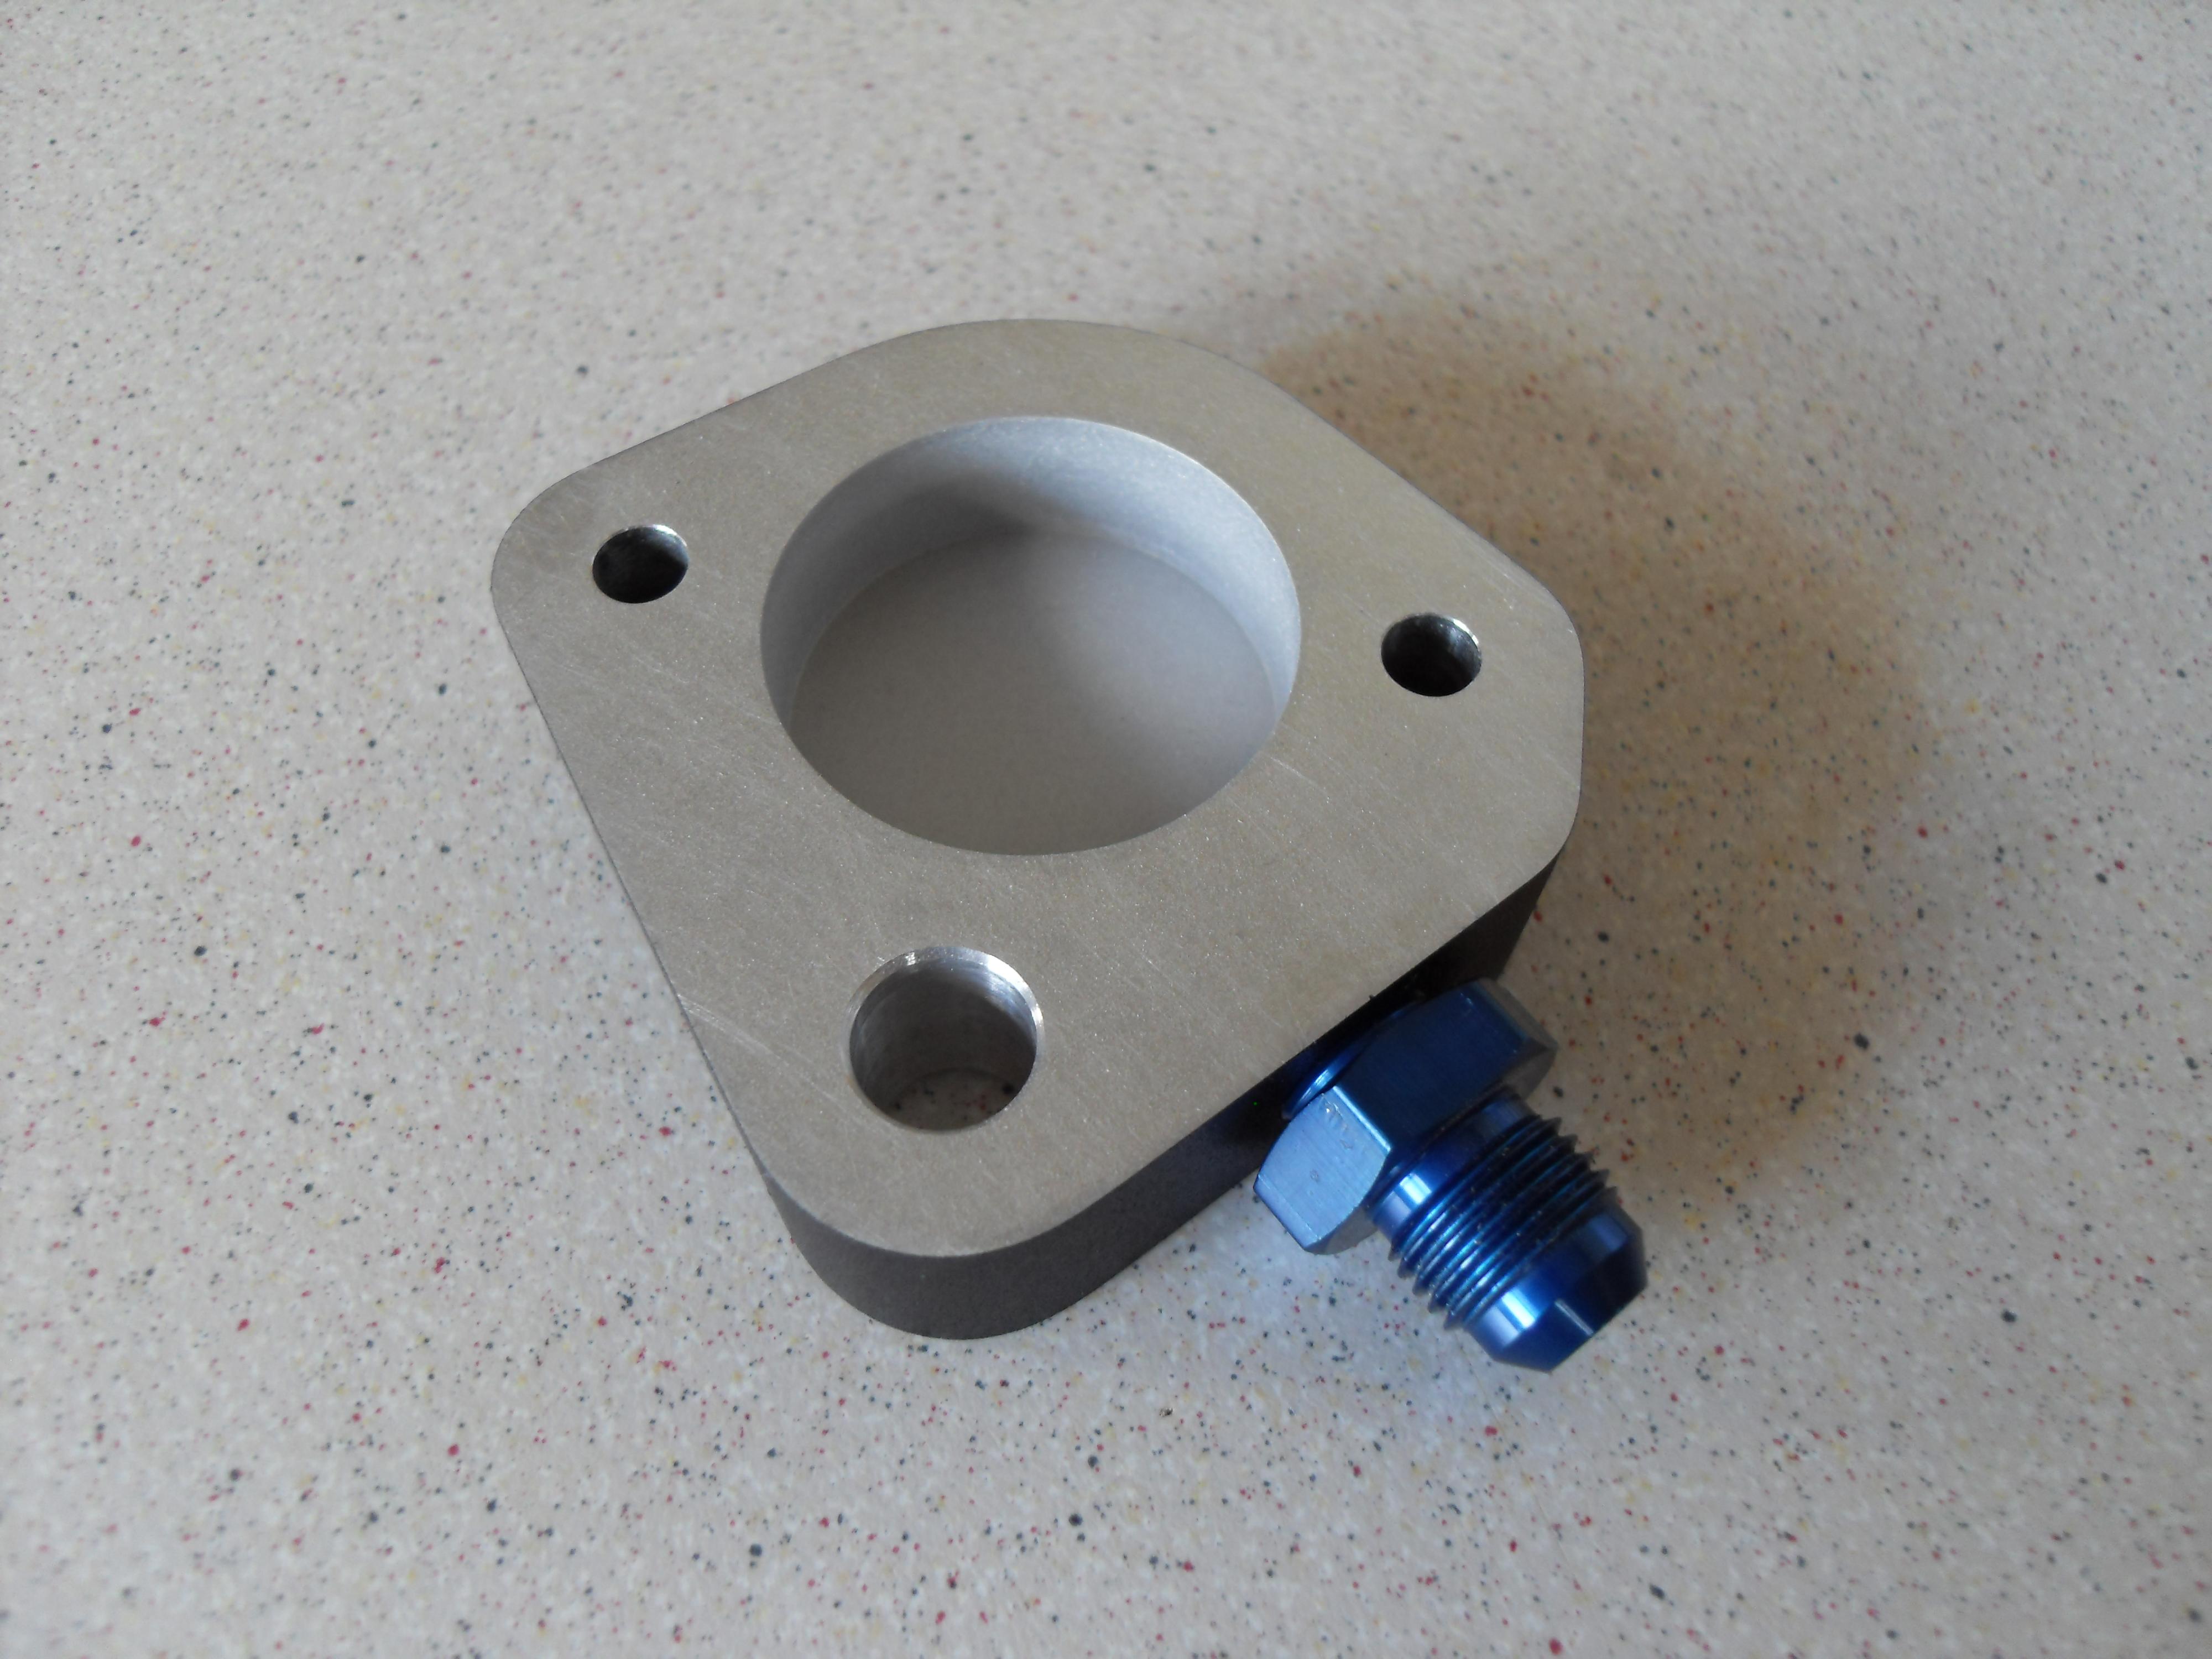
Hose joiners for the custom cooling system plumbing. I've made 4 so far but I think I might need a couple more.
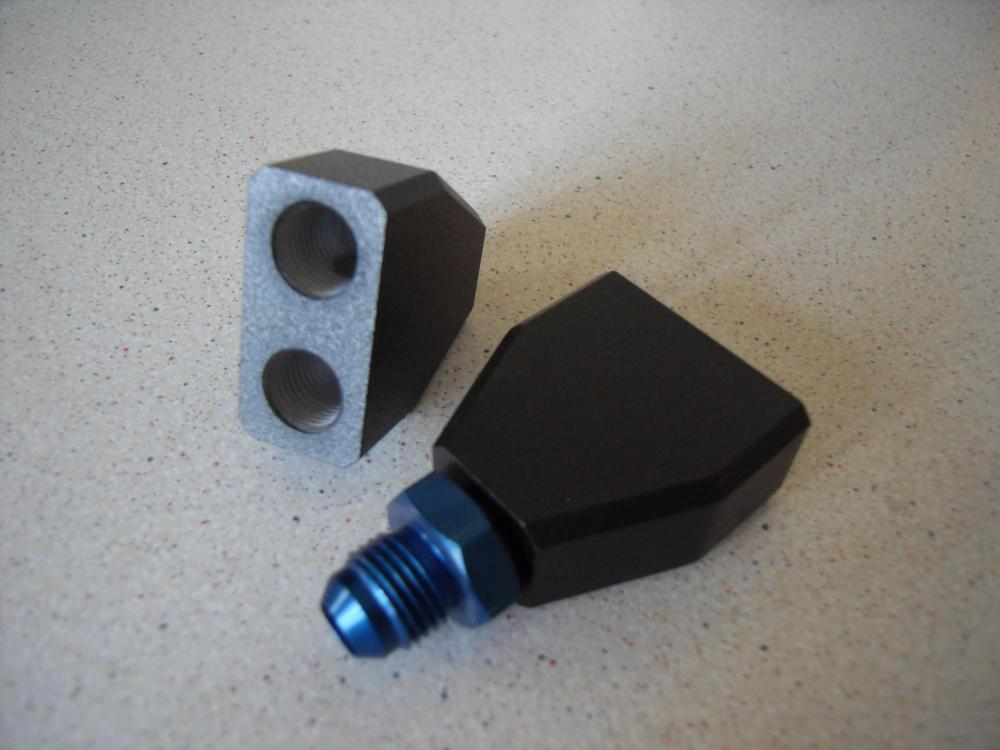
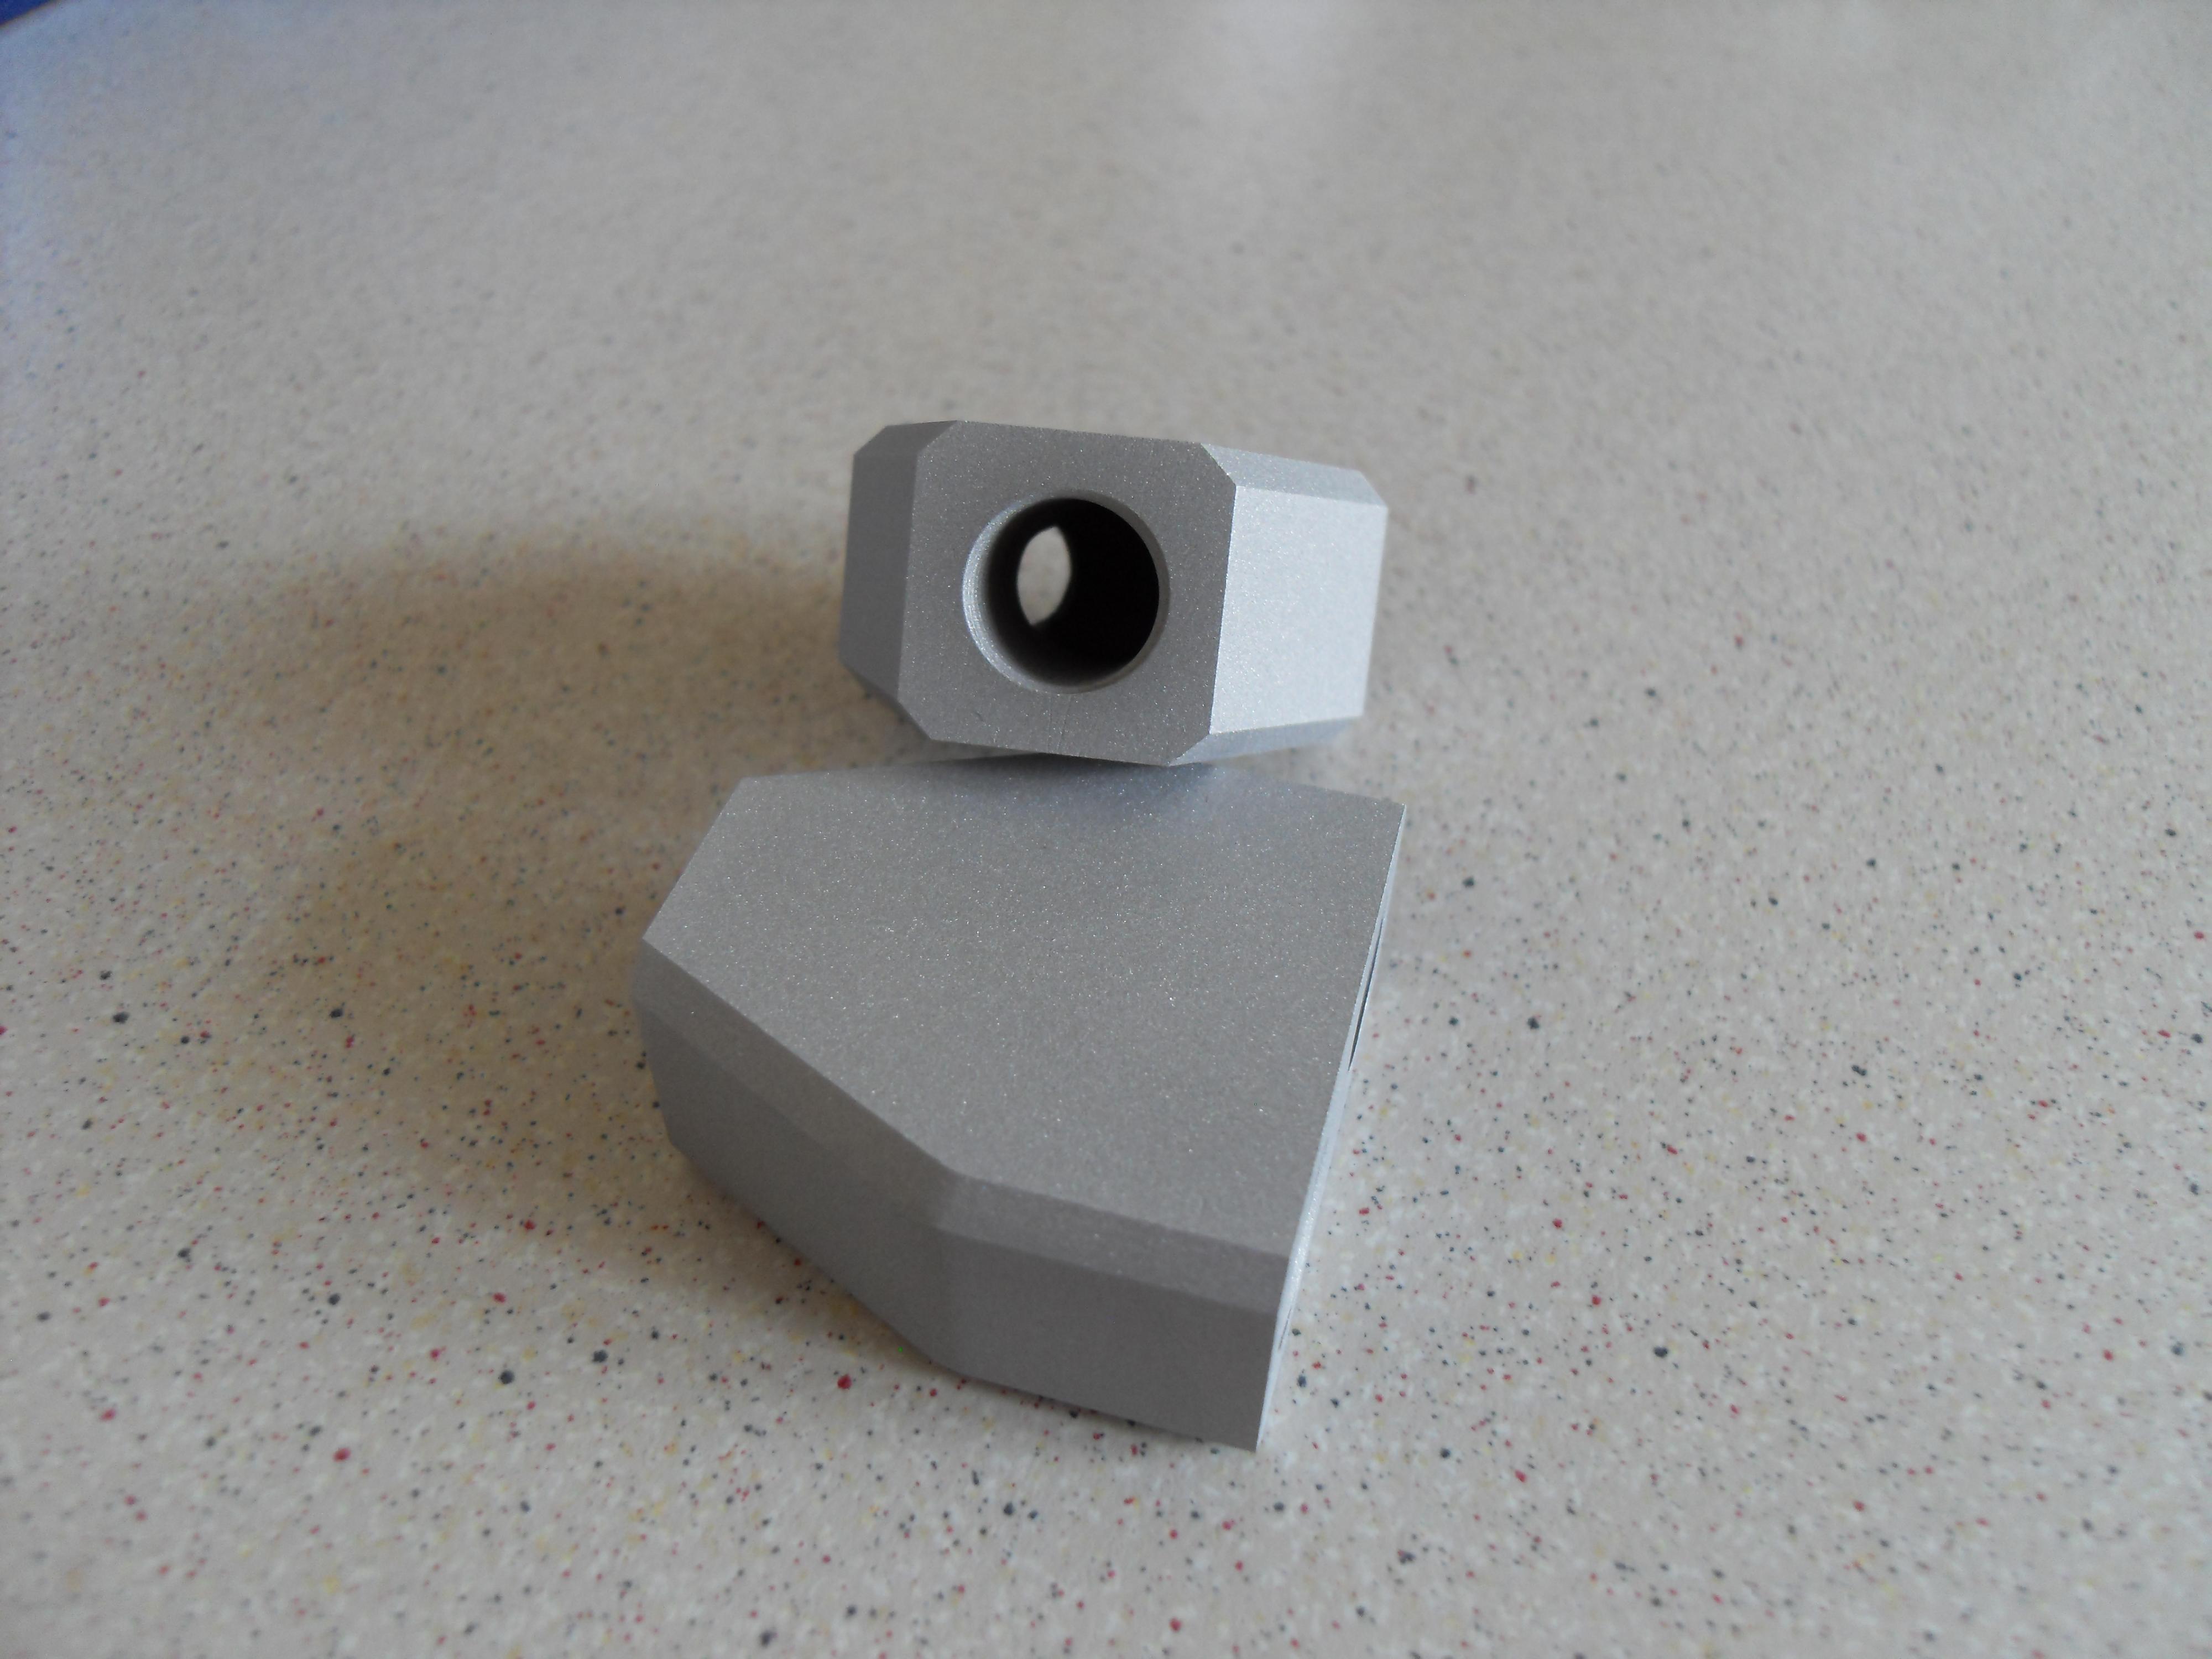
Splitter blocks for the custom 2 way oil catch can and breather system.

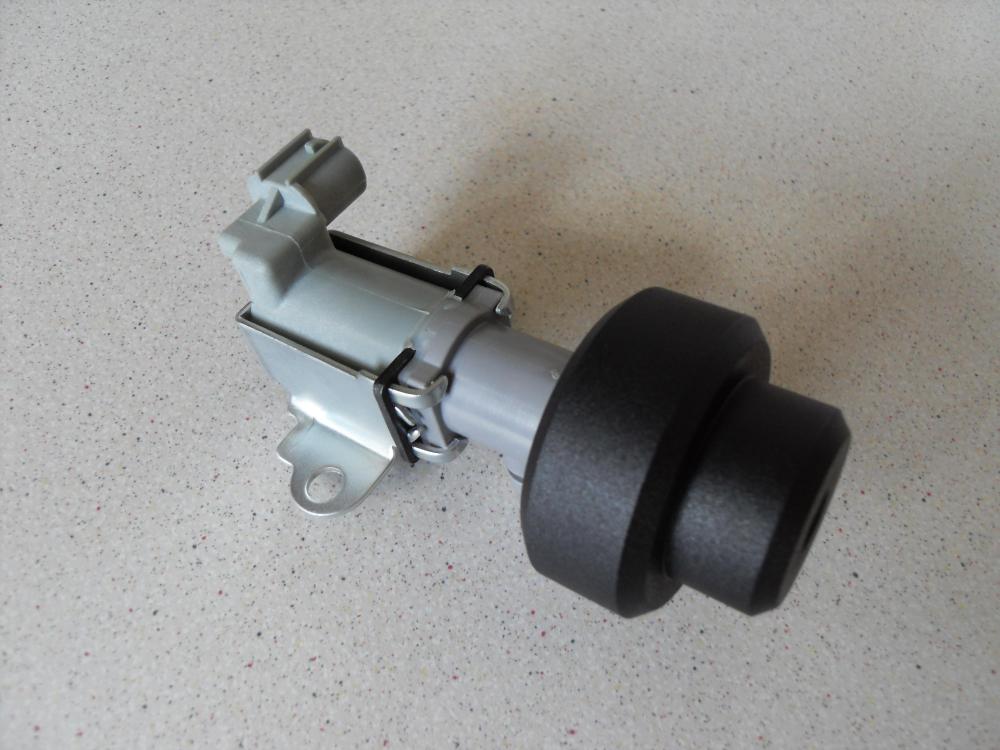
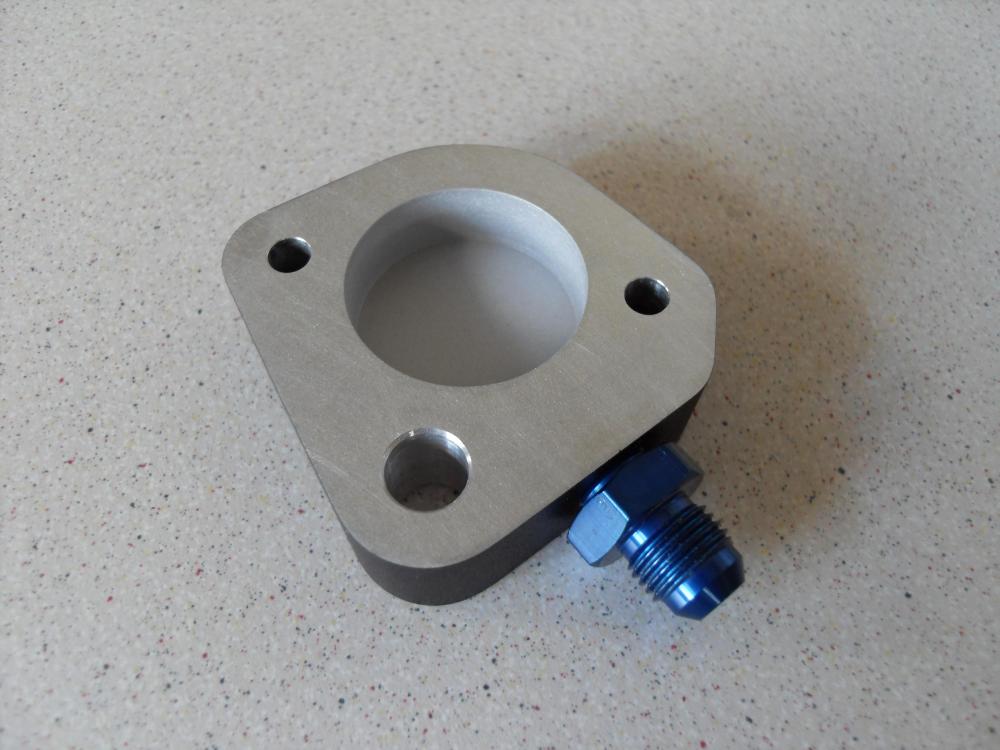
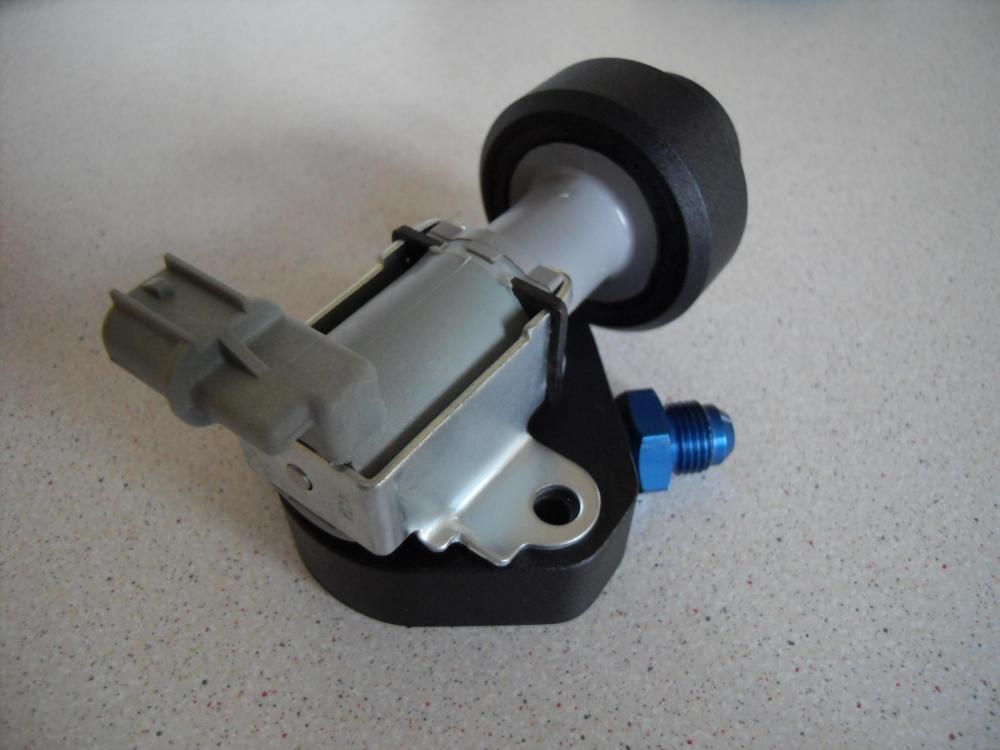
Idle stabilization valve modified with a slightly bigger reservoir.

Idle stabilization valve sandwich plate.
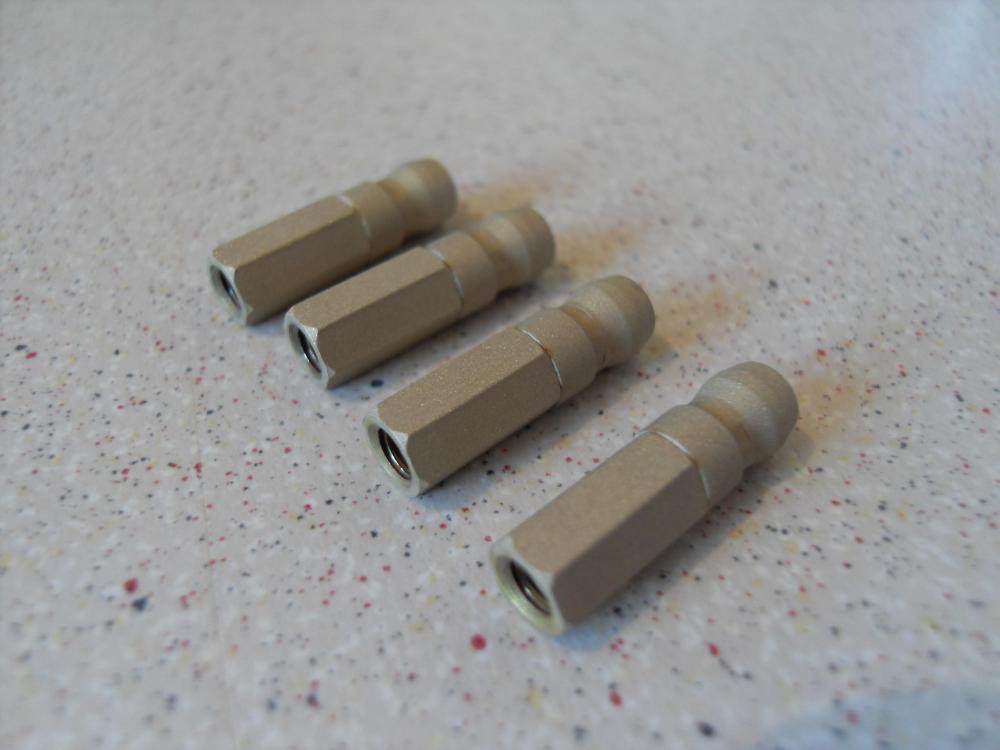
Spark plug extenders. Spark plug nuts silvered soldered to PCB standoffs.
The painted TD fuel rail.

More soon
Gavin
-
Cheers guys.
Gavin
-
Another year, another update. Well I guess even an update that is a year late is better than no update at all.
Let’s start with some photos of what I've been up to over the last year.
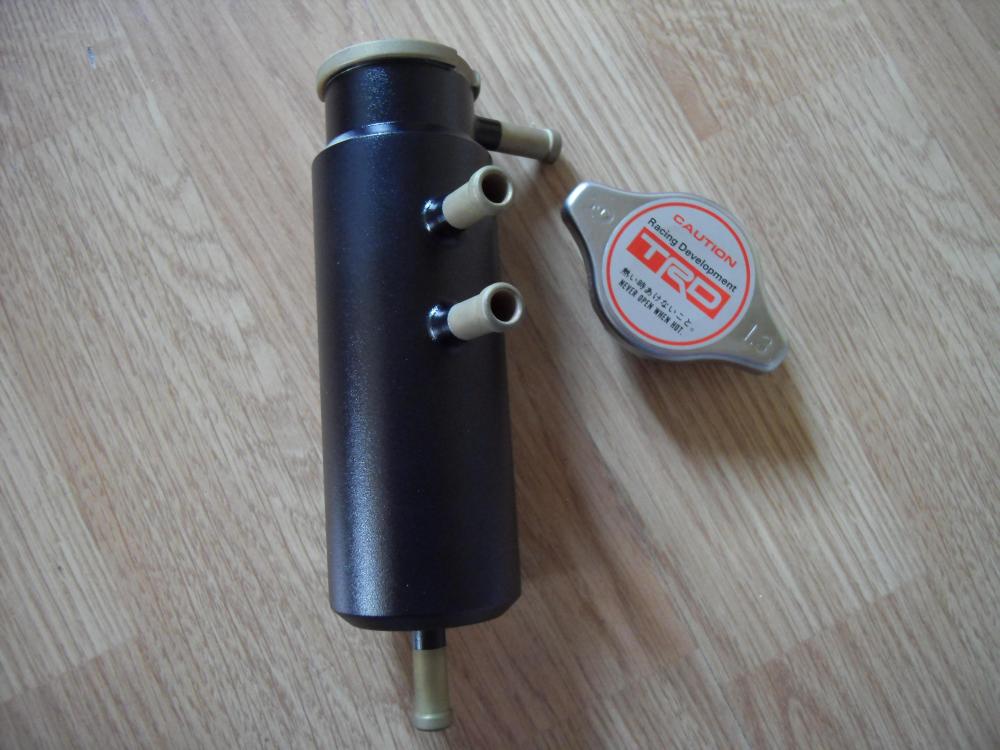
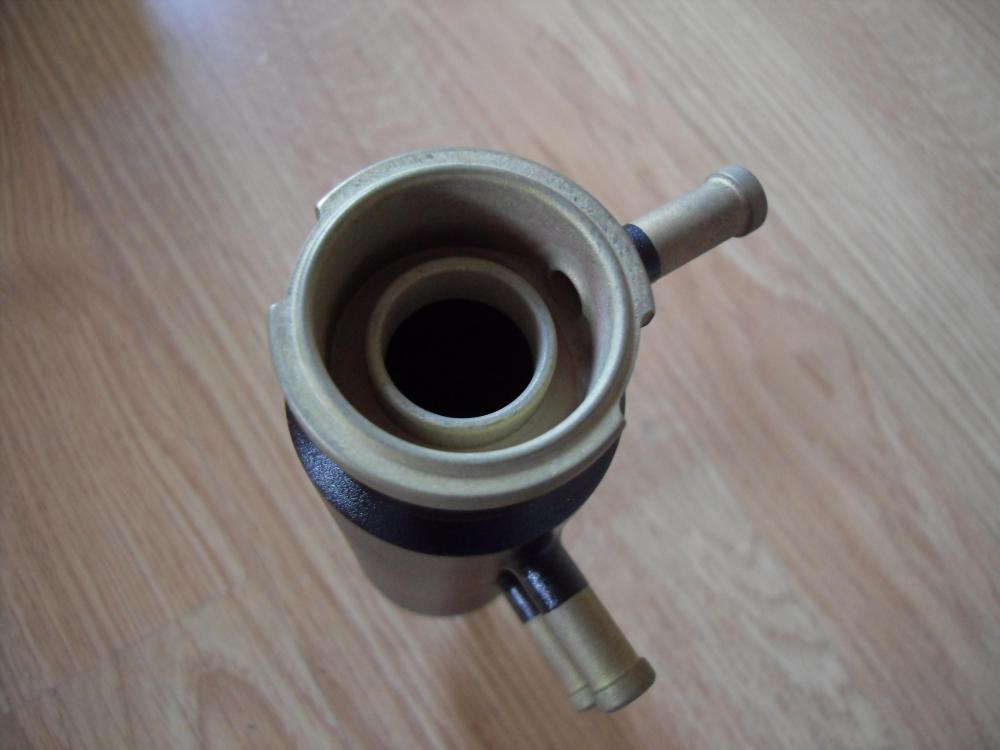
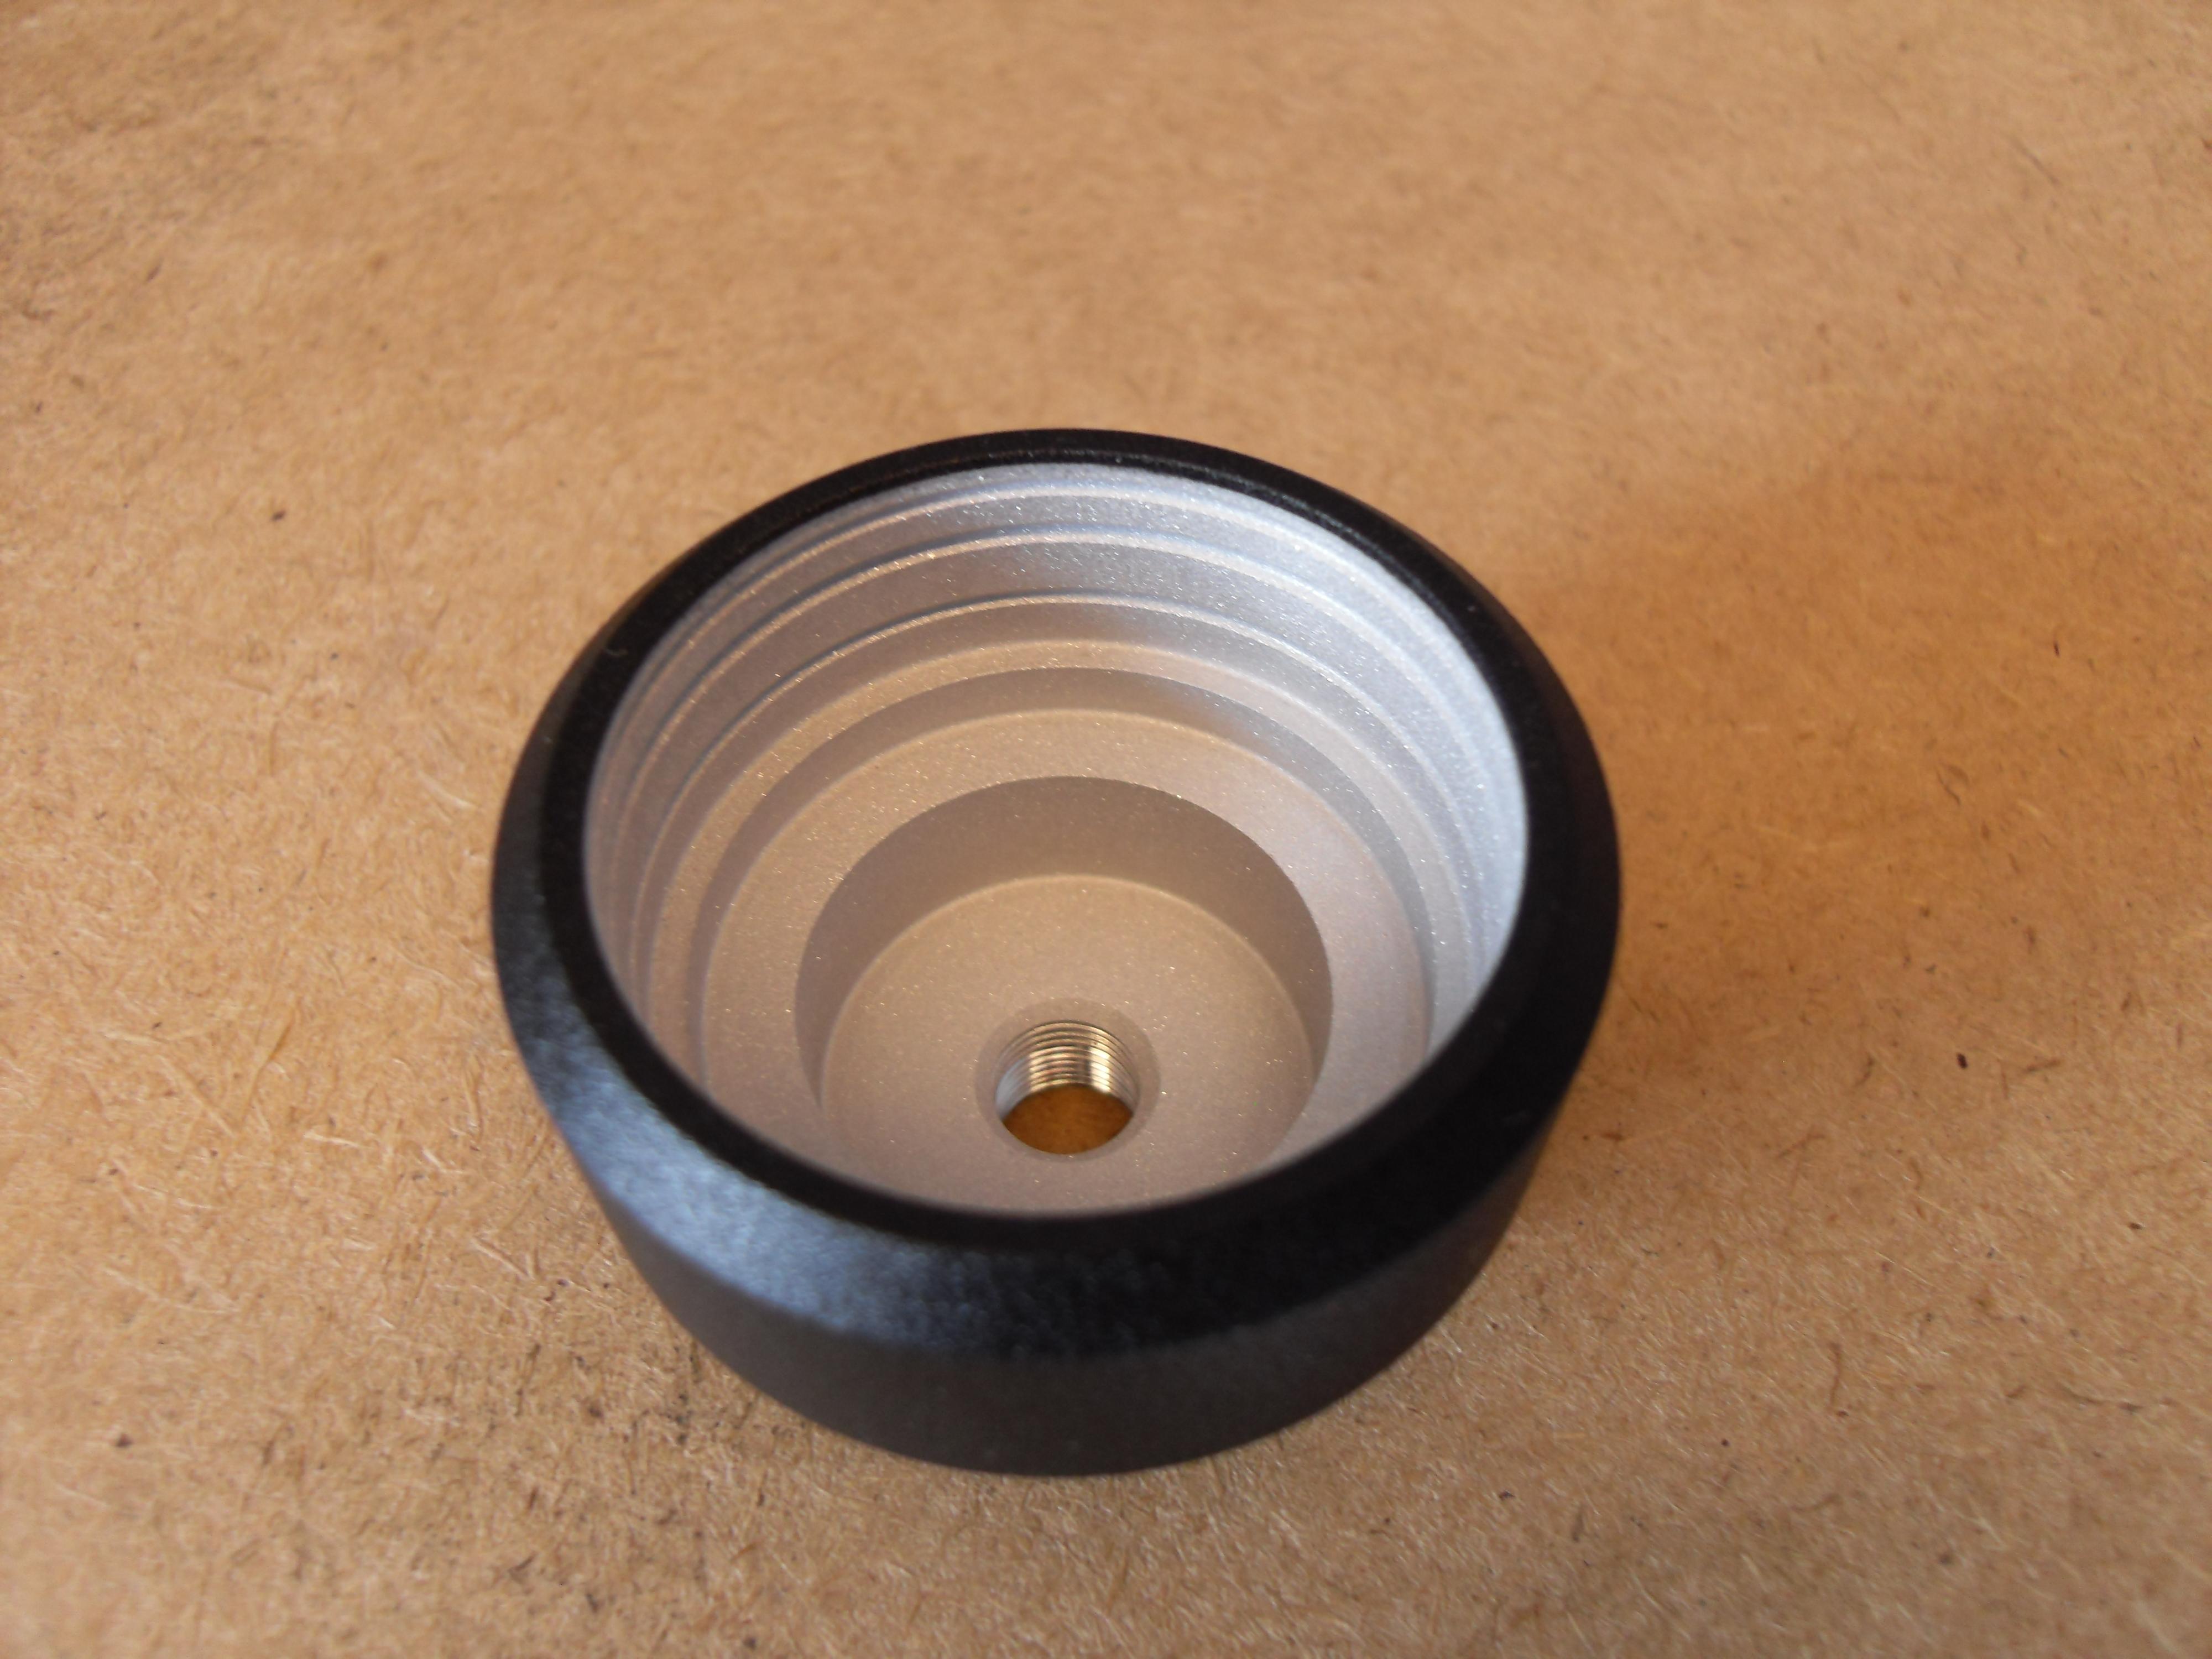
I've made half the Coolant Swirl/Constant Bleed system. This is the custom DIY Constant Bleed Pot. It's made from brass silver soldered together and has a machined neck to suit a TRD Rad Cap.
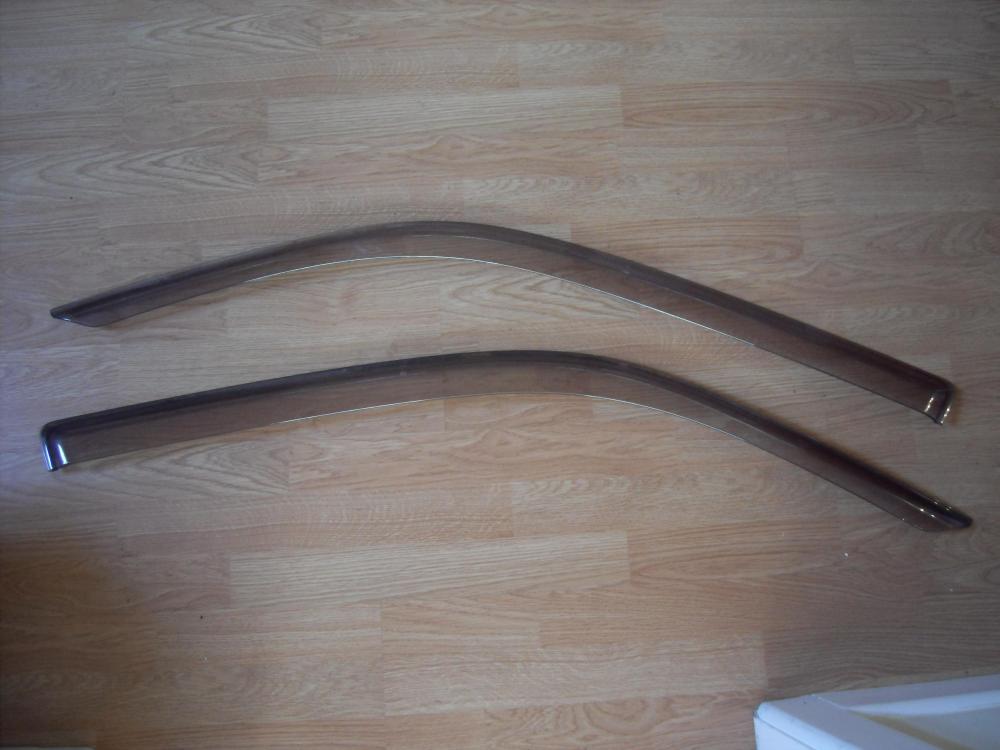
I've finally managed to get a pair of Genuine Glanza Wind Deflectors and clips.
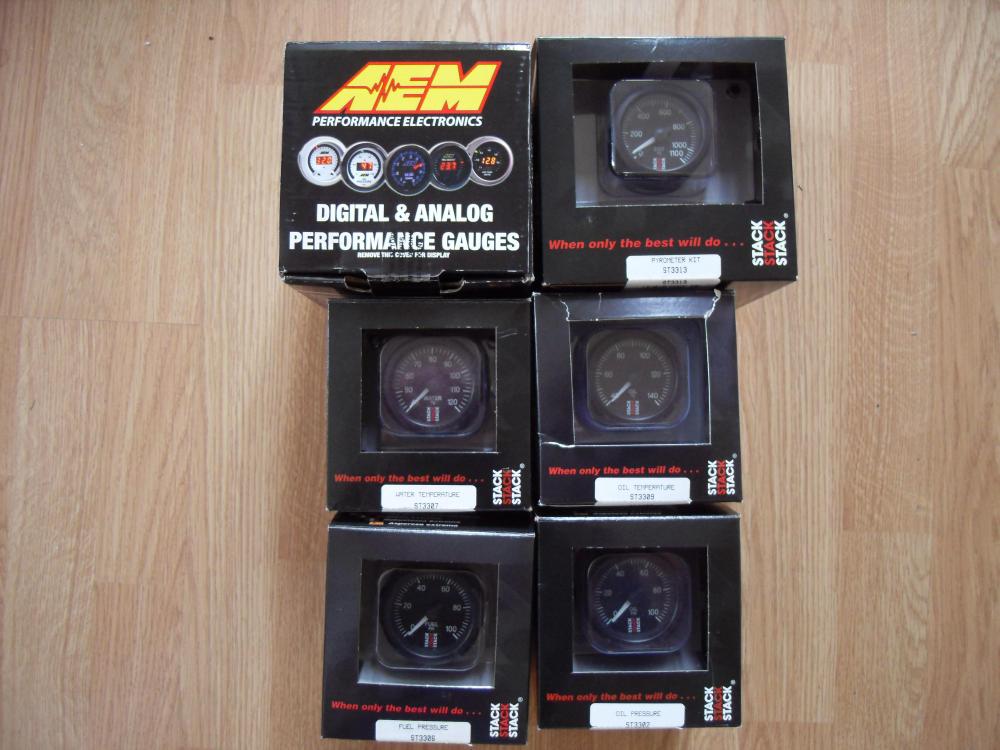
I bought the other half of my gauges. I now have my complete set.
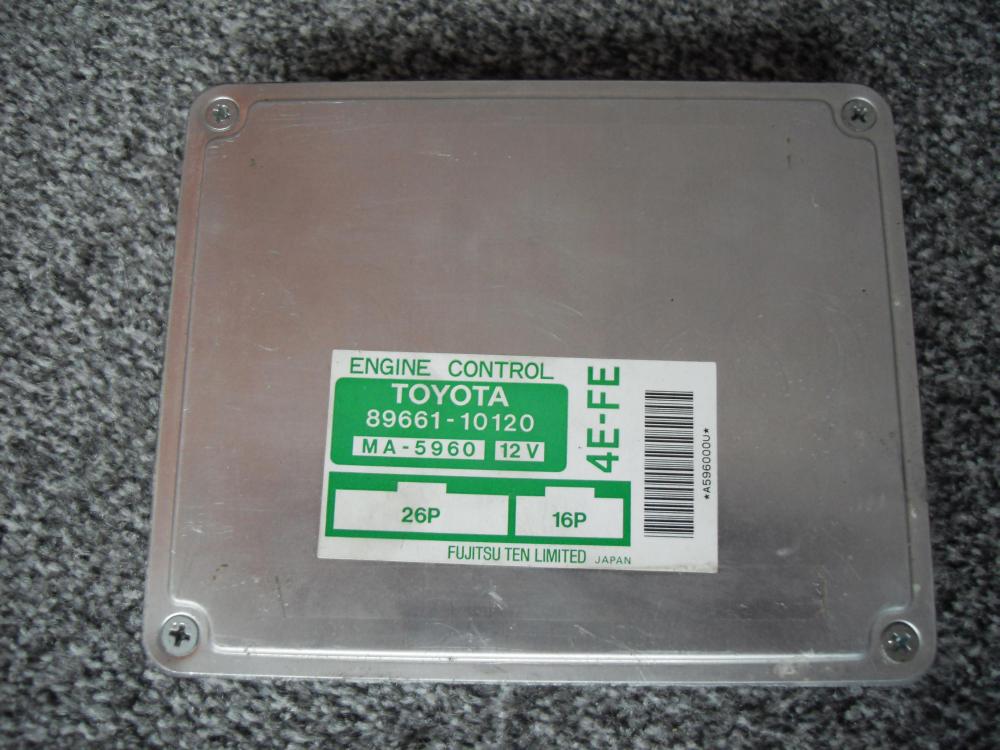
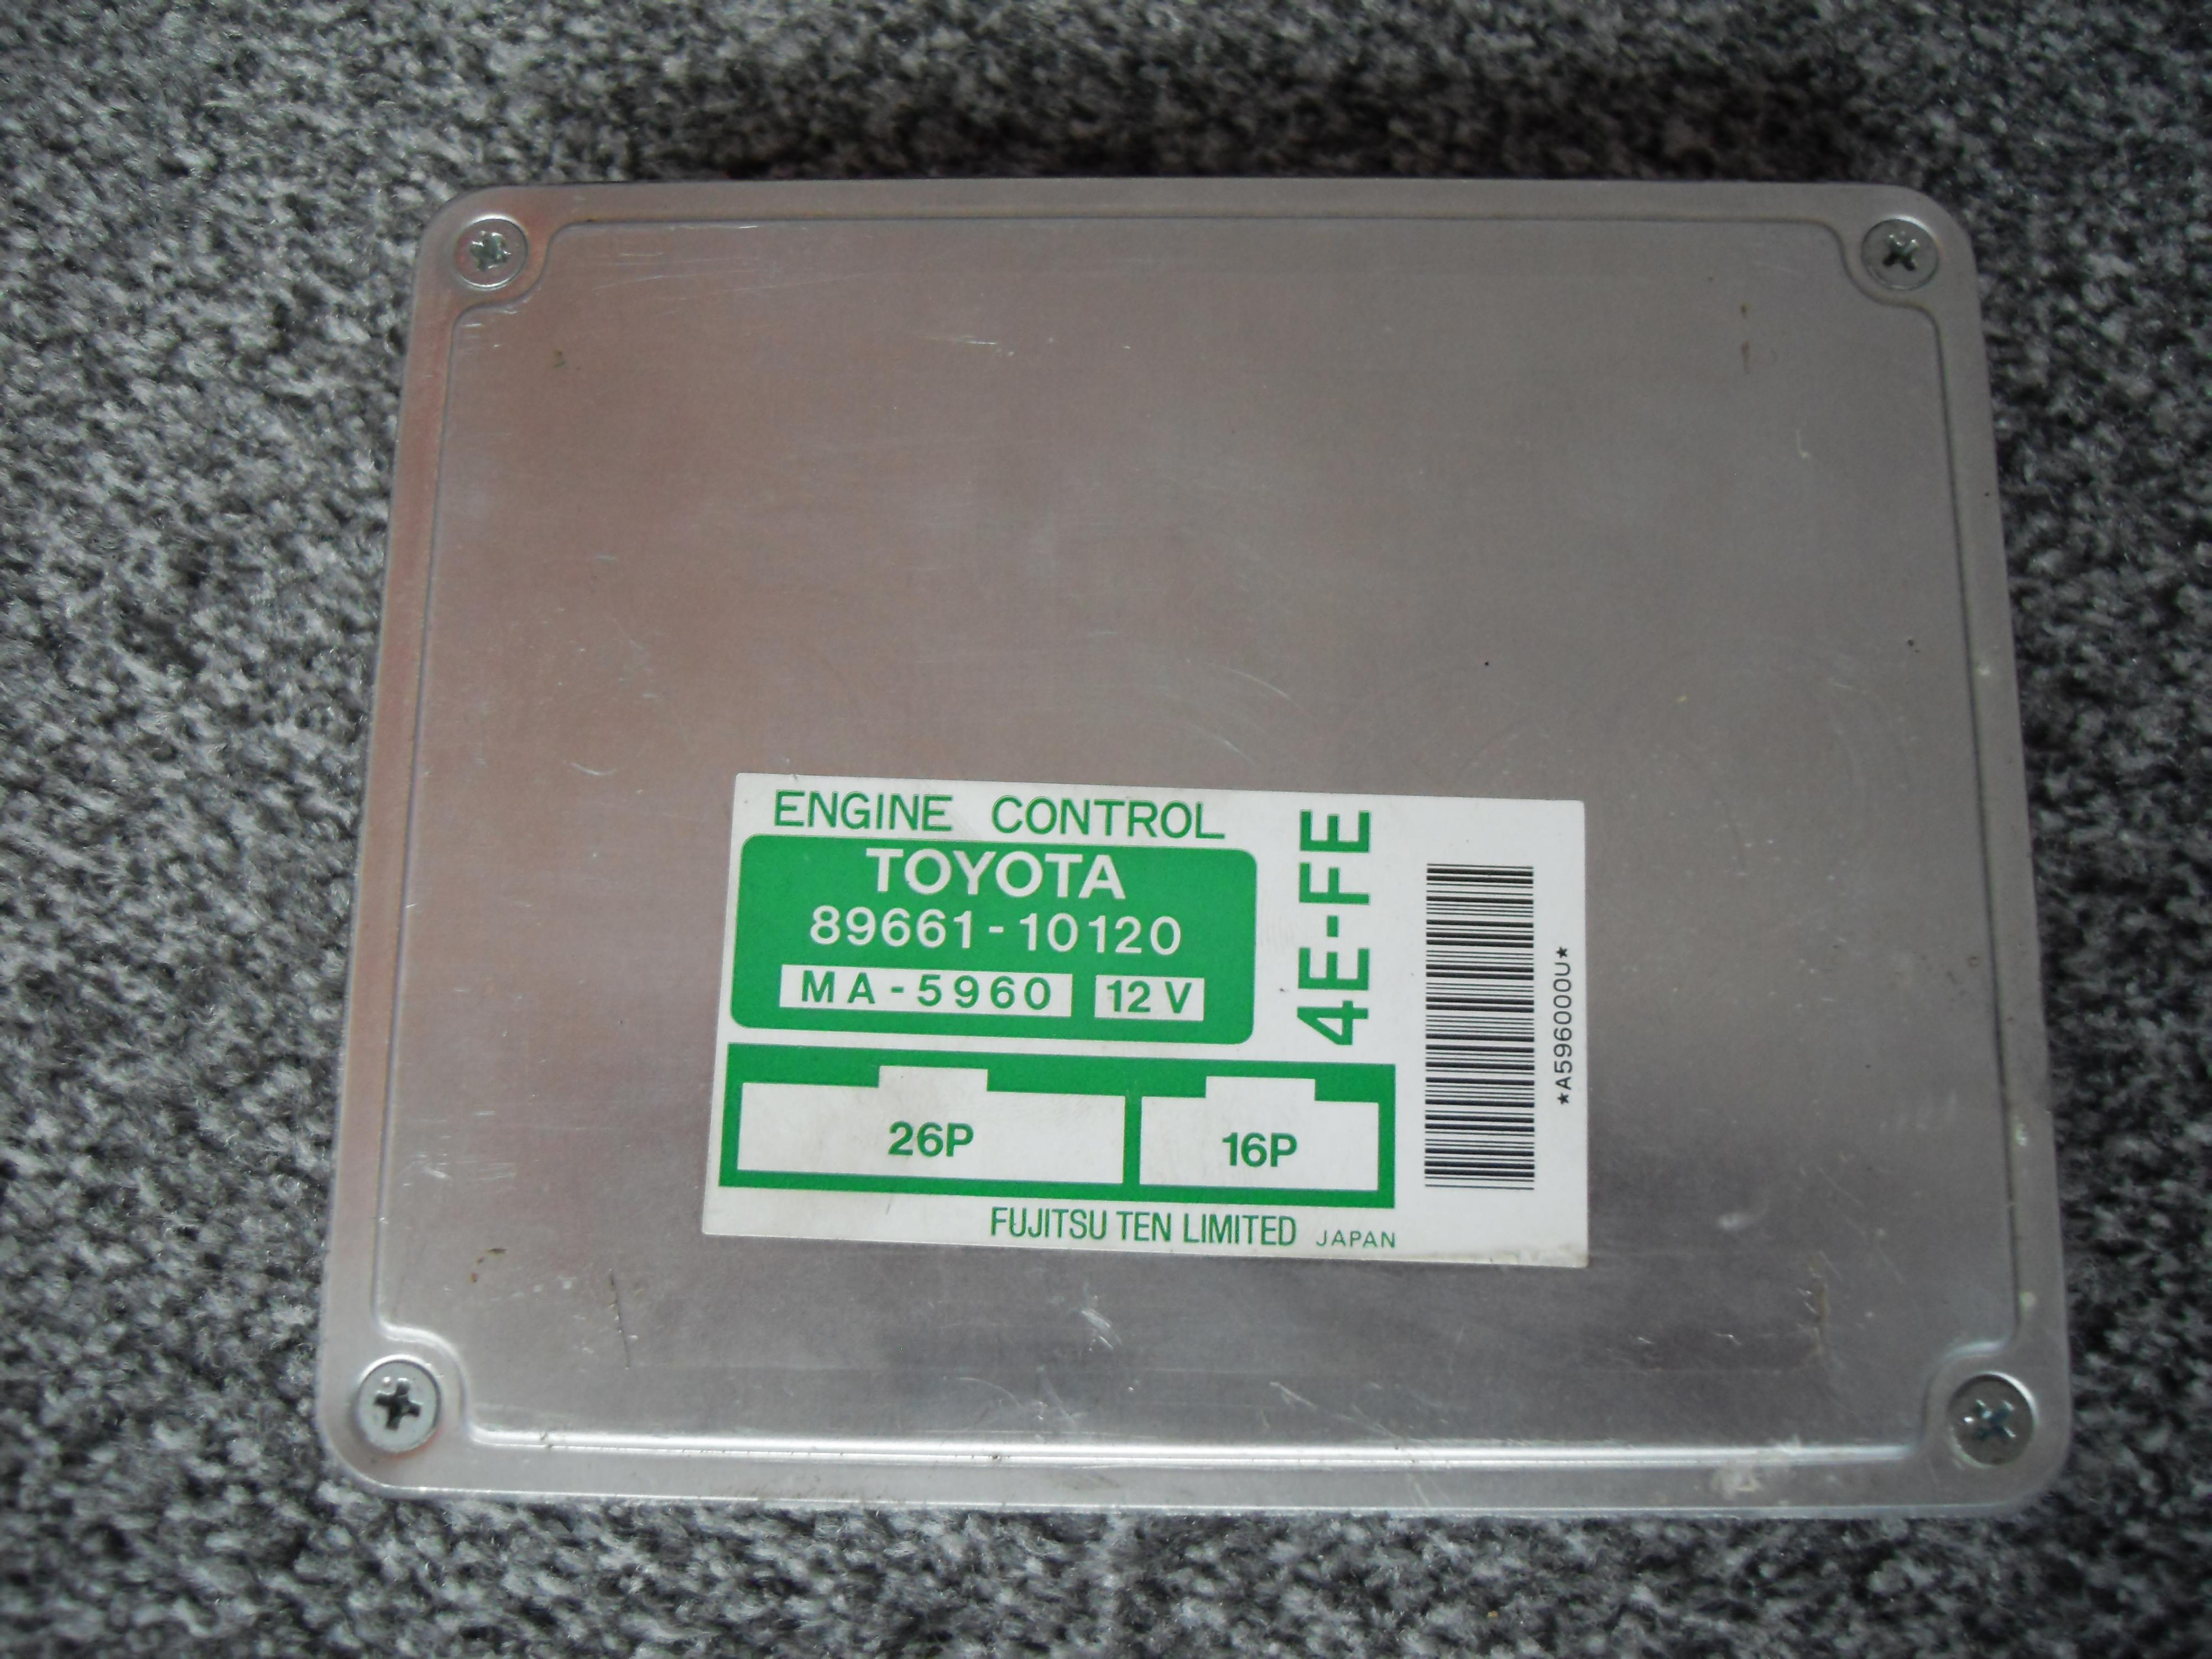
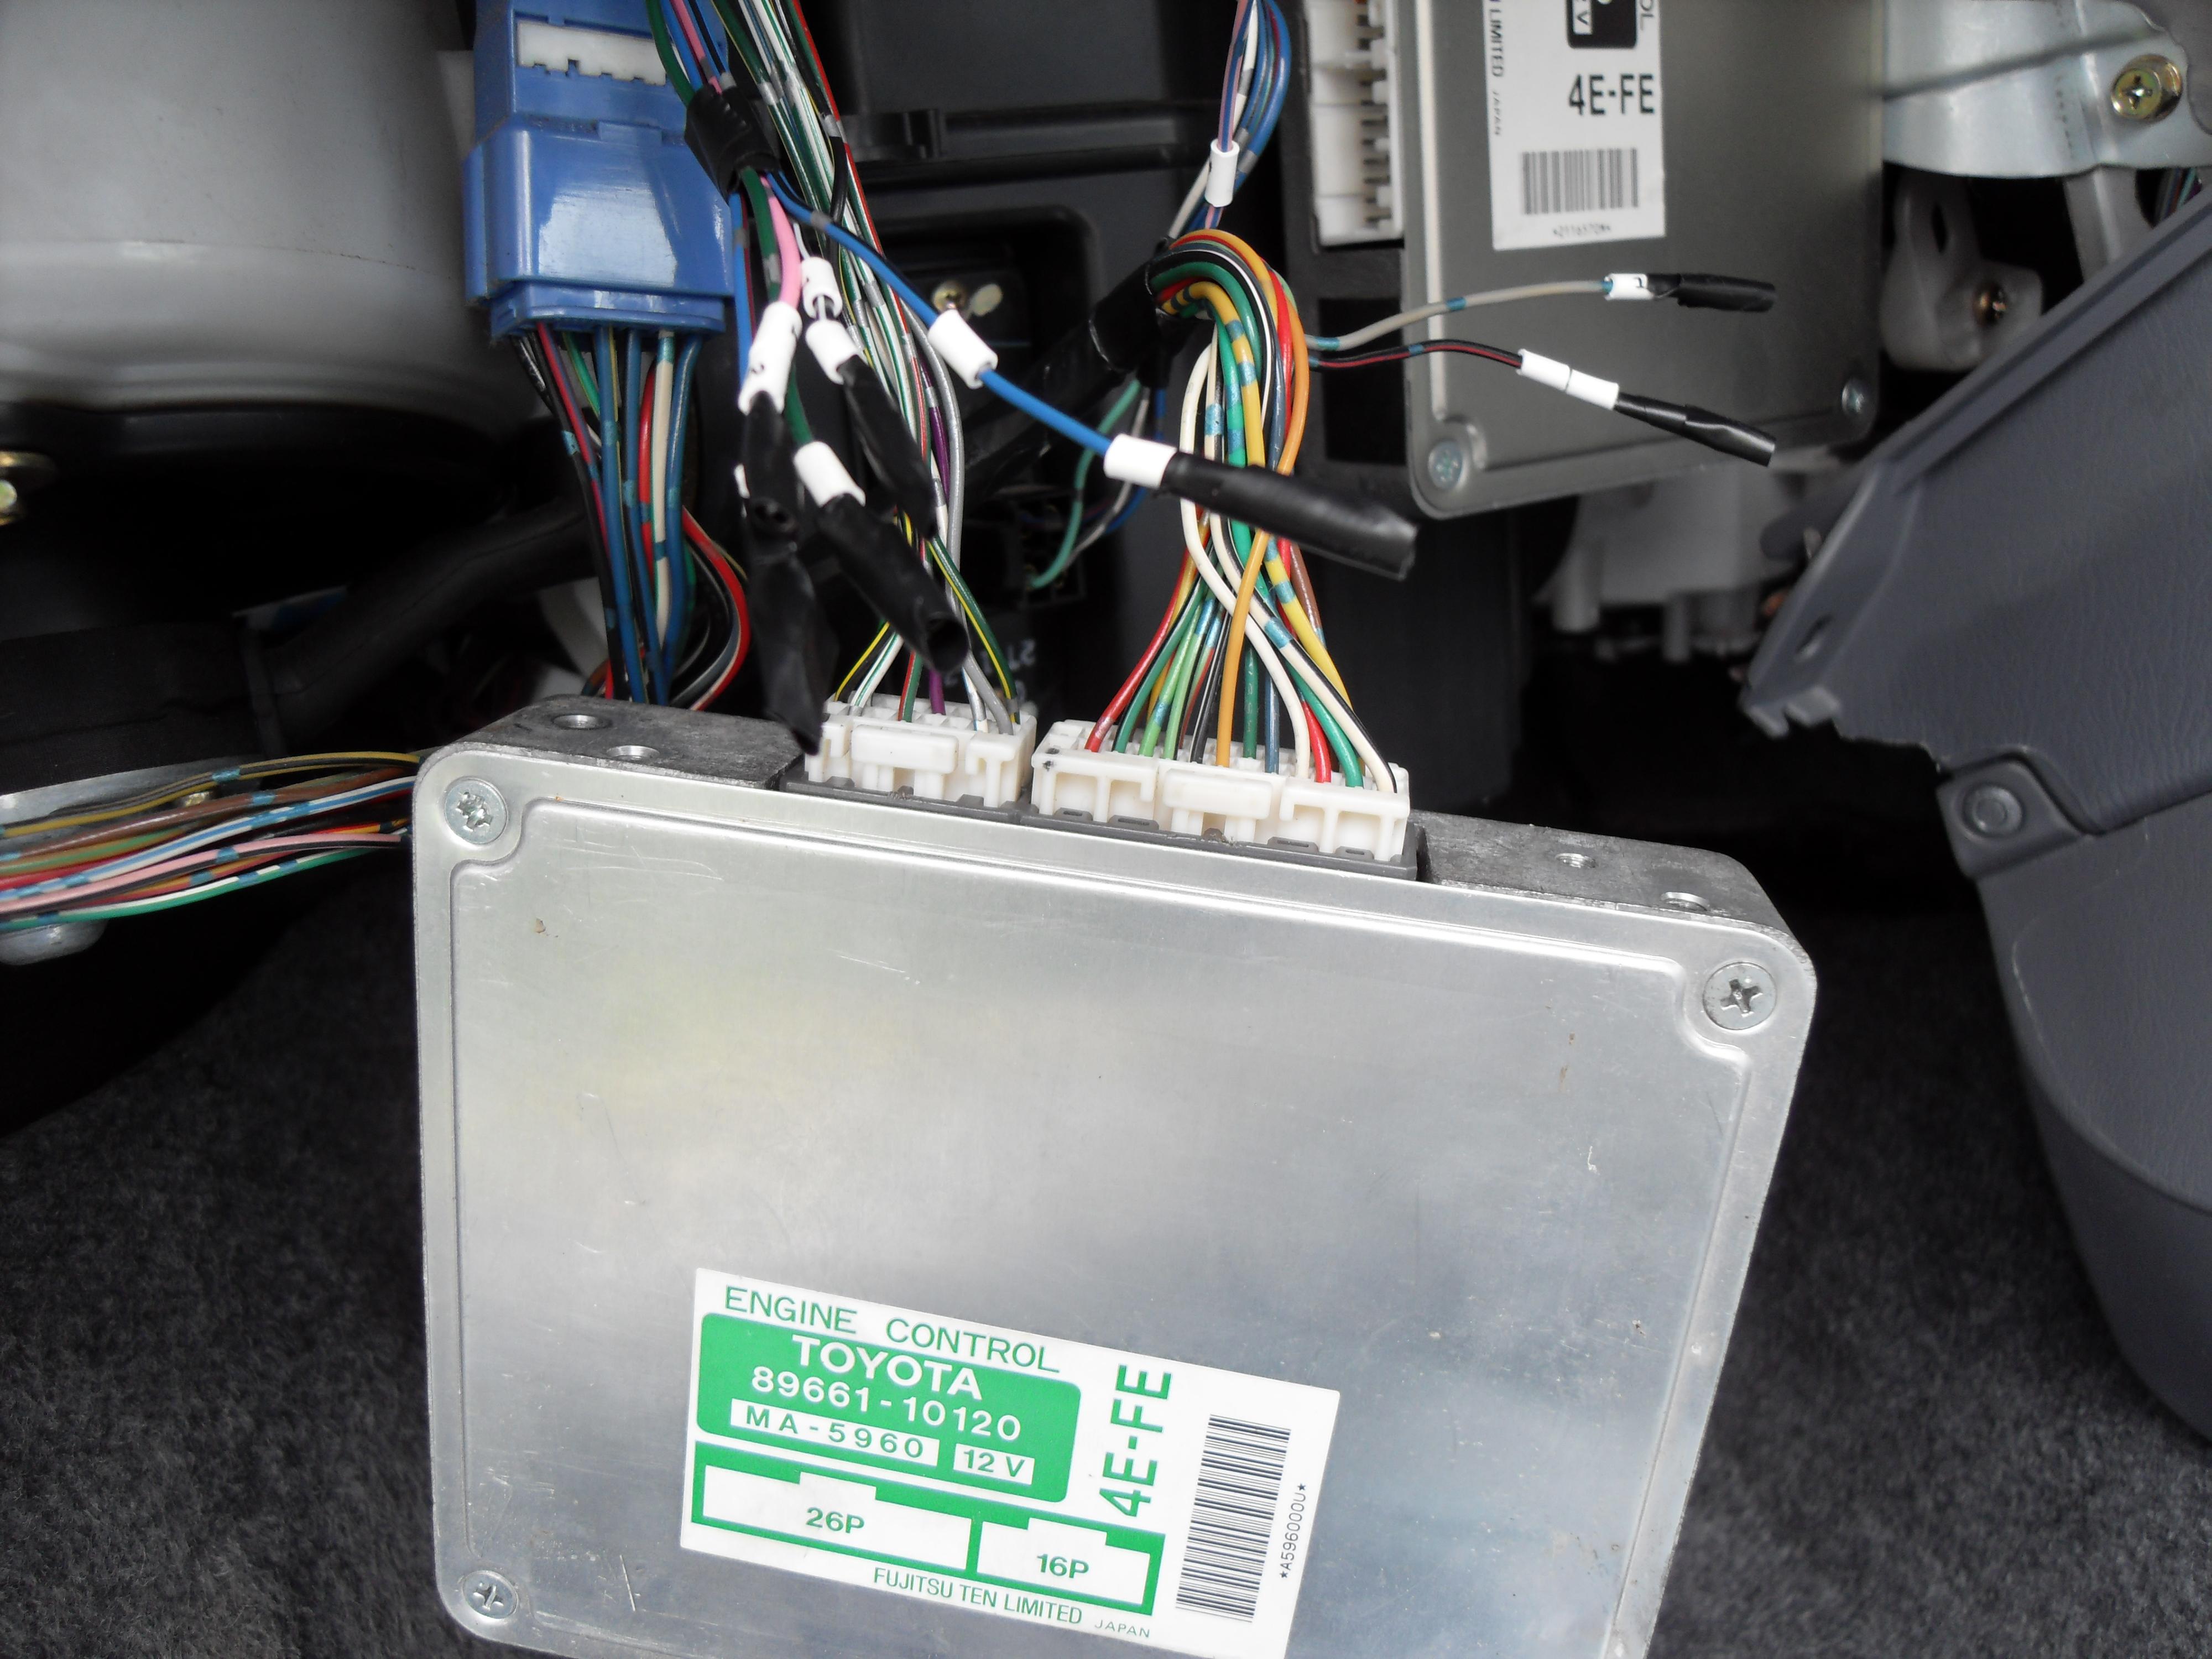
I finally managed to get a 100HP Gen 1 JDM ECU (P/N:89661-10120) EP82 Engine and EP82 ECU finally reunited in a EP91. It's going to be beautiful.
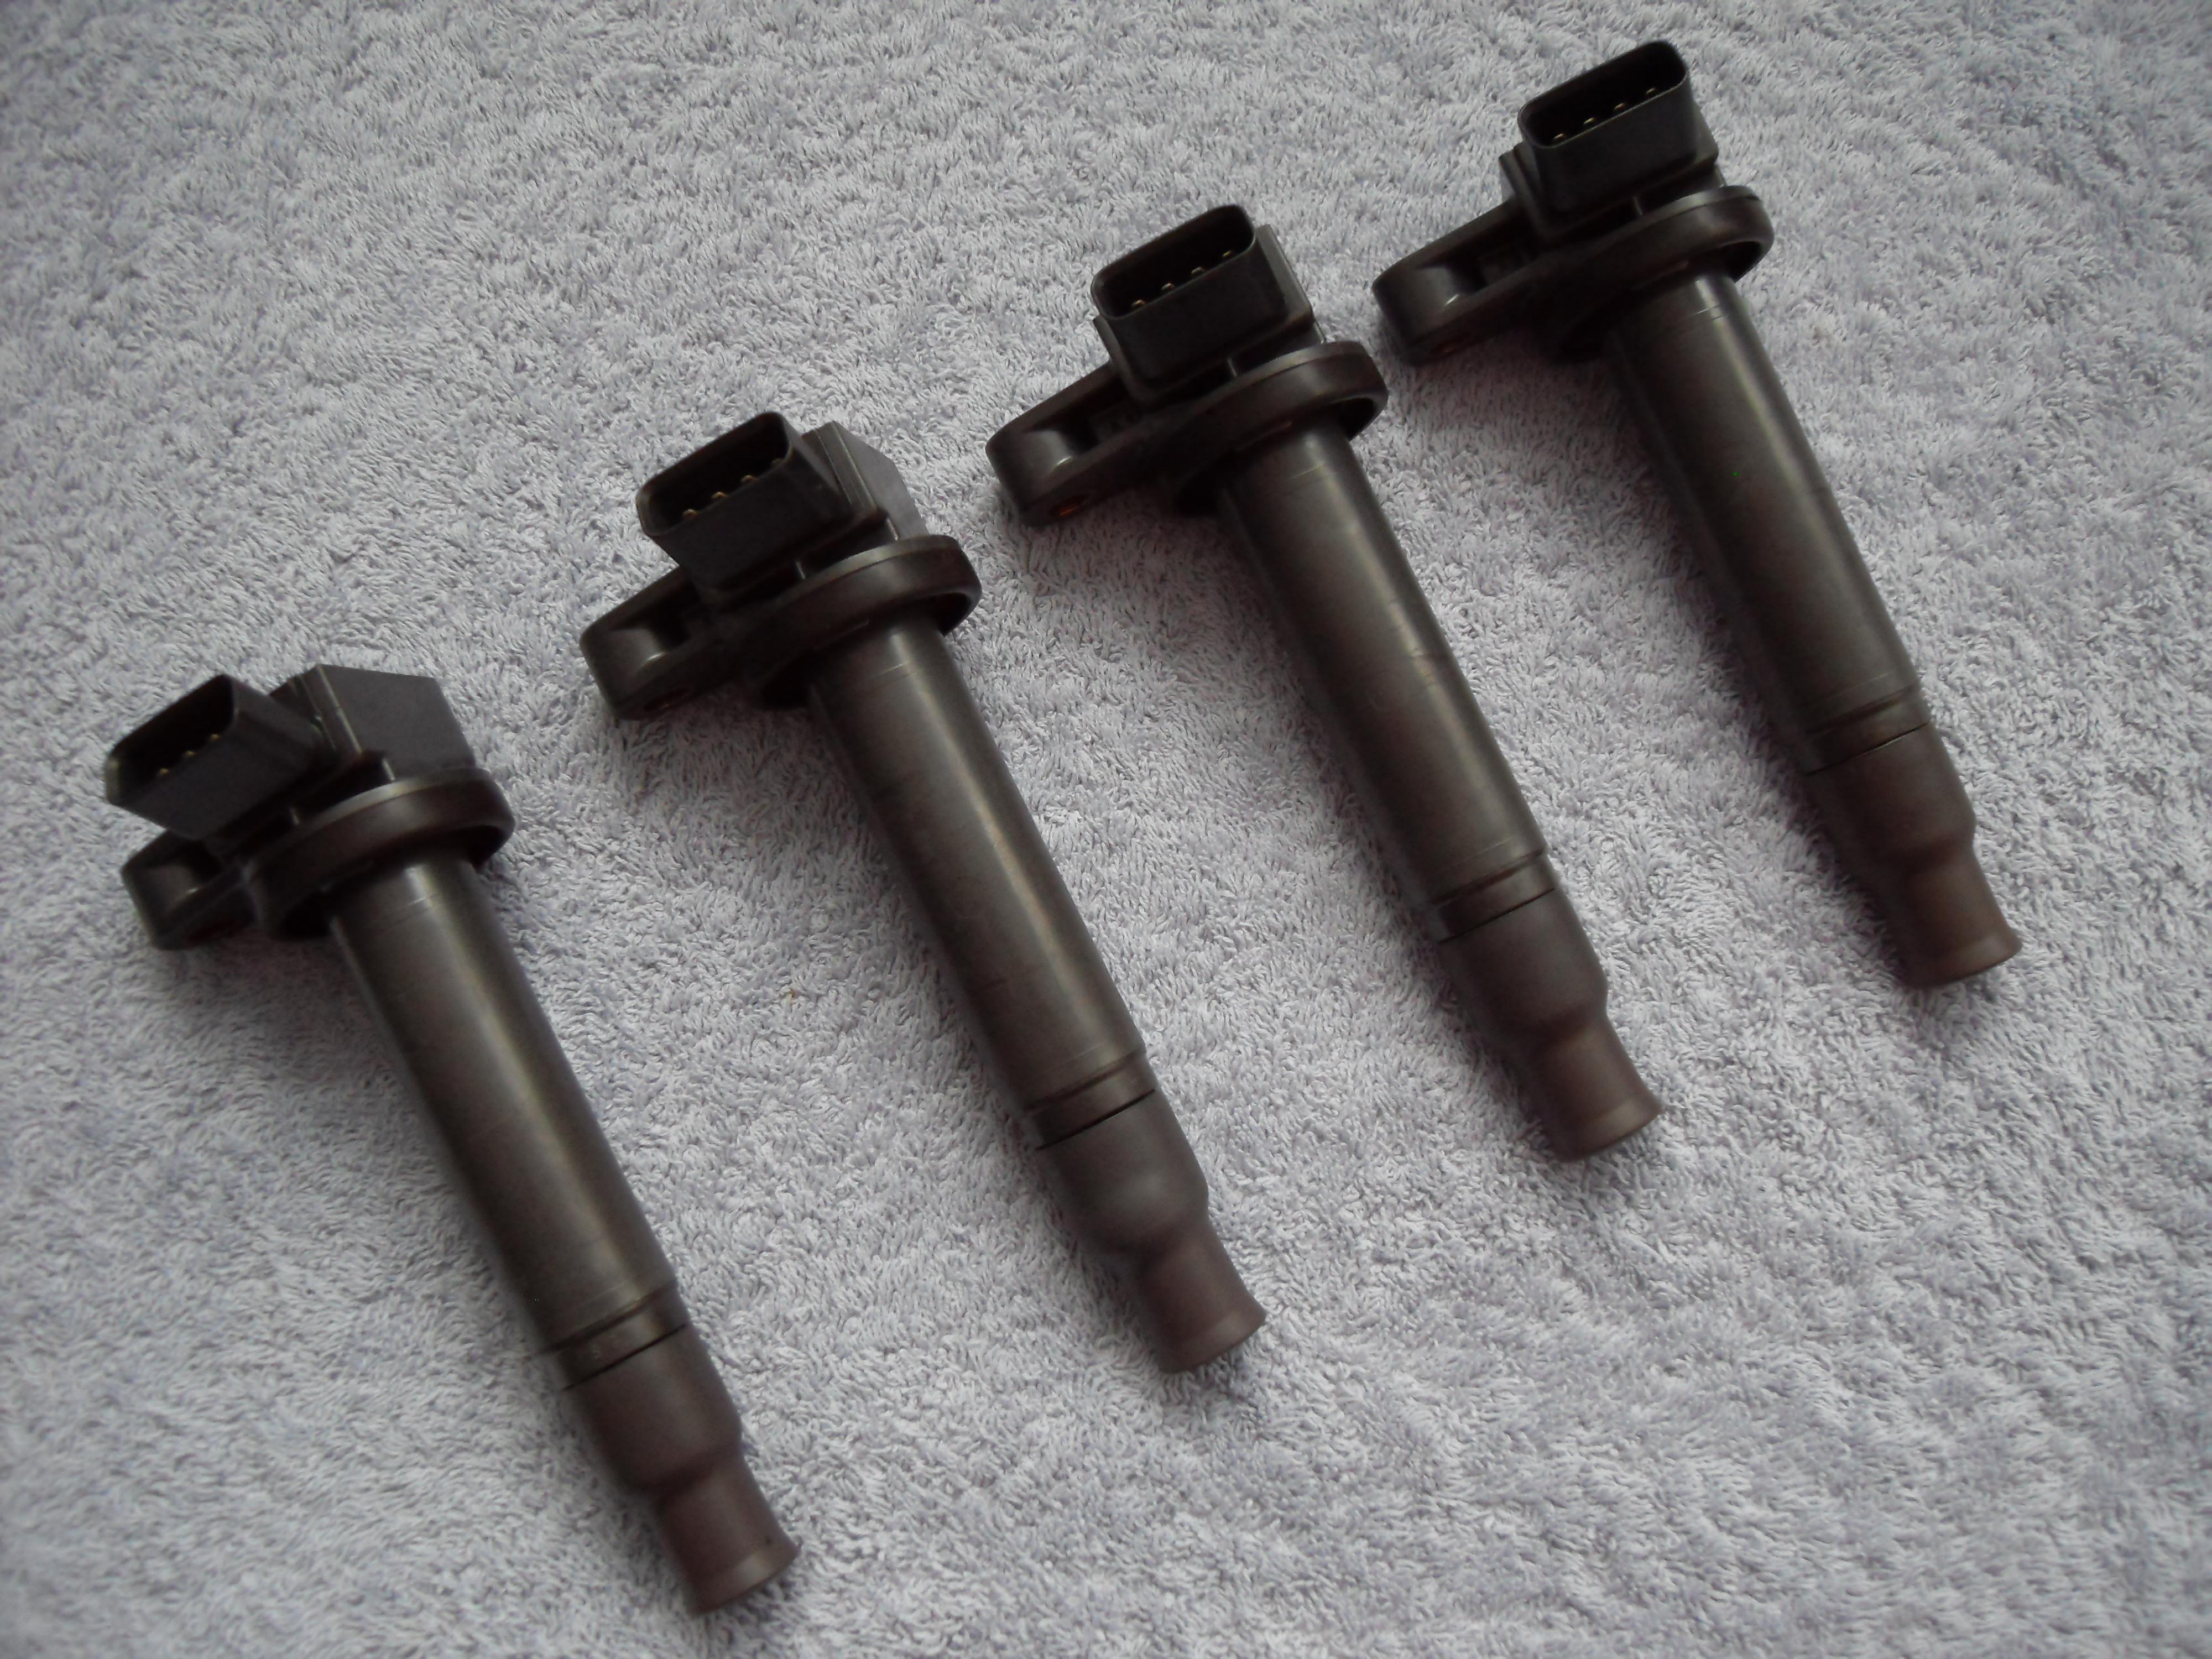
And I got some Toyota Denso Direct Mount Coils (P/N:90919-02230)

Now to the good stuff.
I have already got the JDM ECU working in my car. To make testing the ECU easy and because some of the pins might interfere with the ECU, I disconnected some sensor pins and the immobiliser pins, 8 in total, I also swapped 1 of the pins position. When this ECU is fitted for good the 8 pins need new wiring because of the difference in sensors.


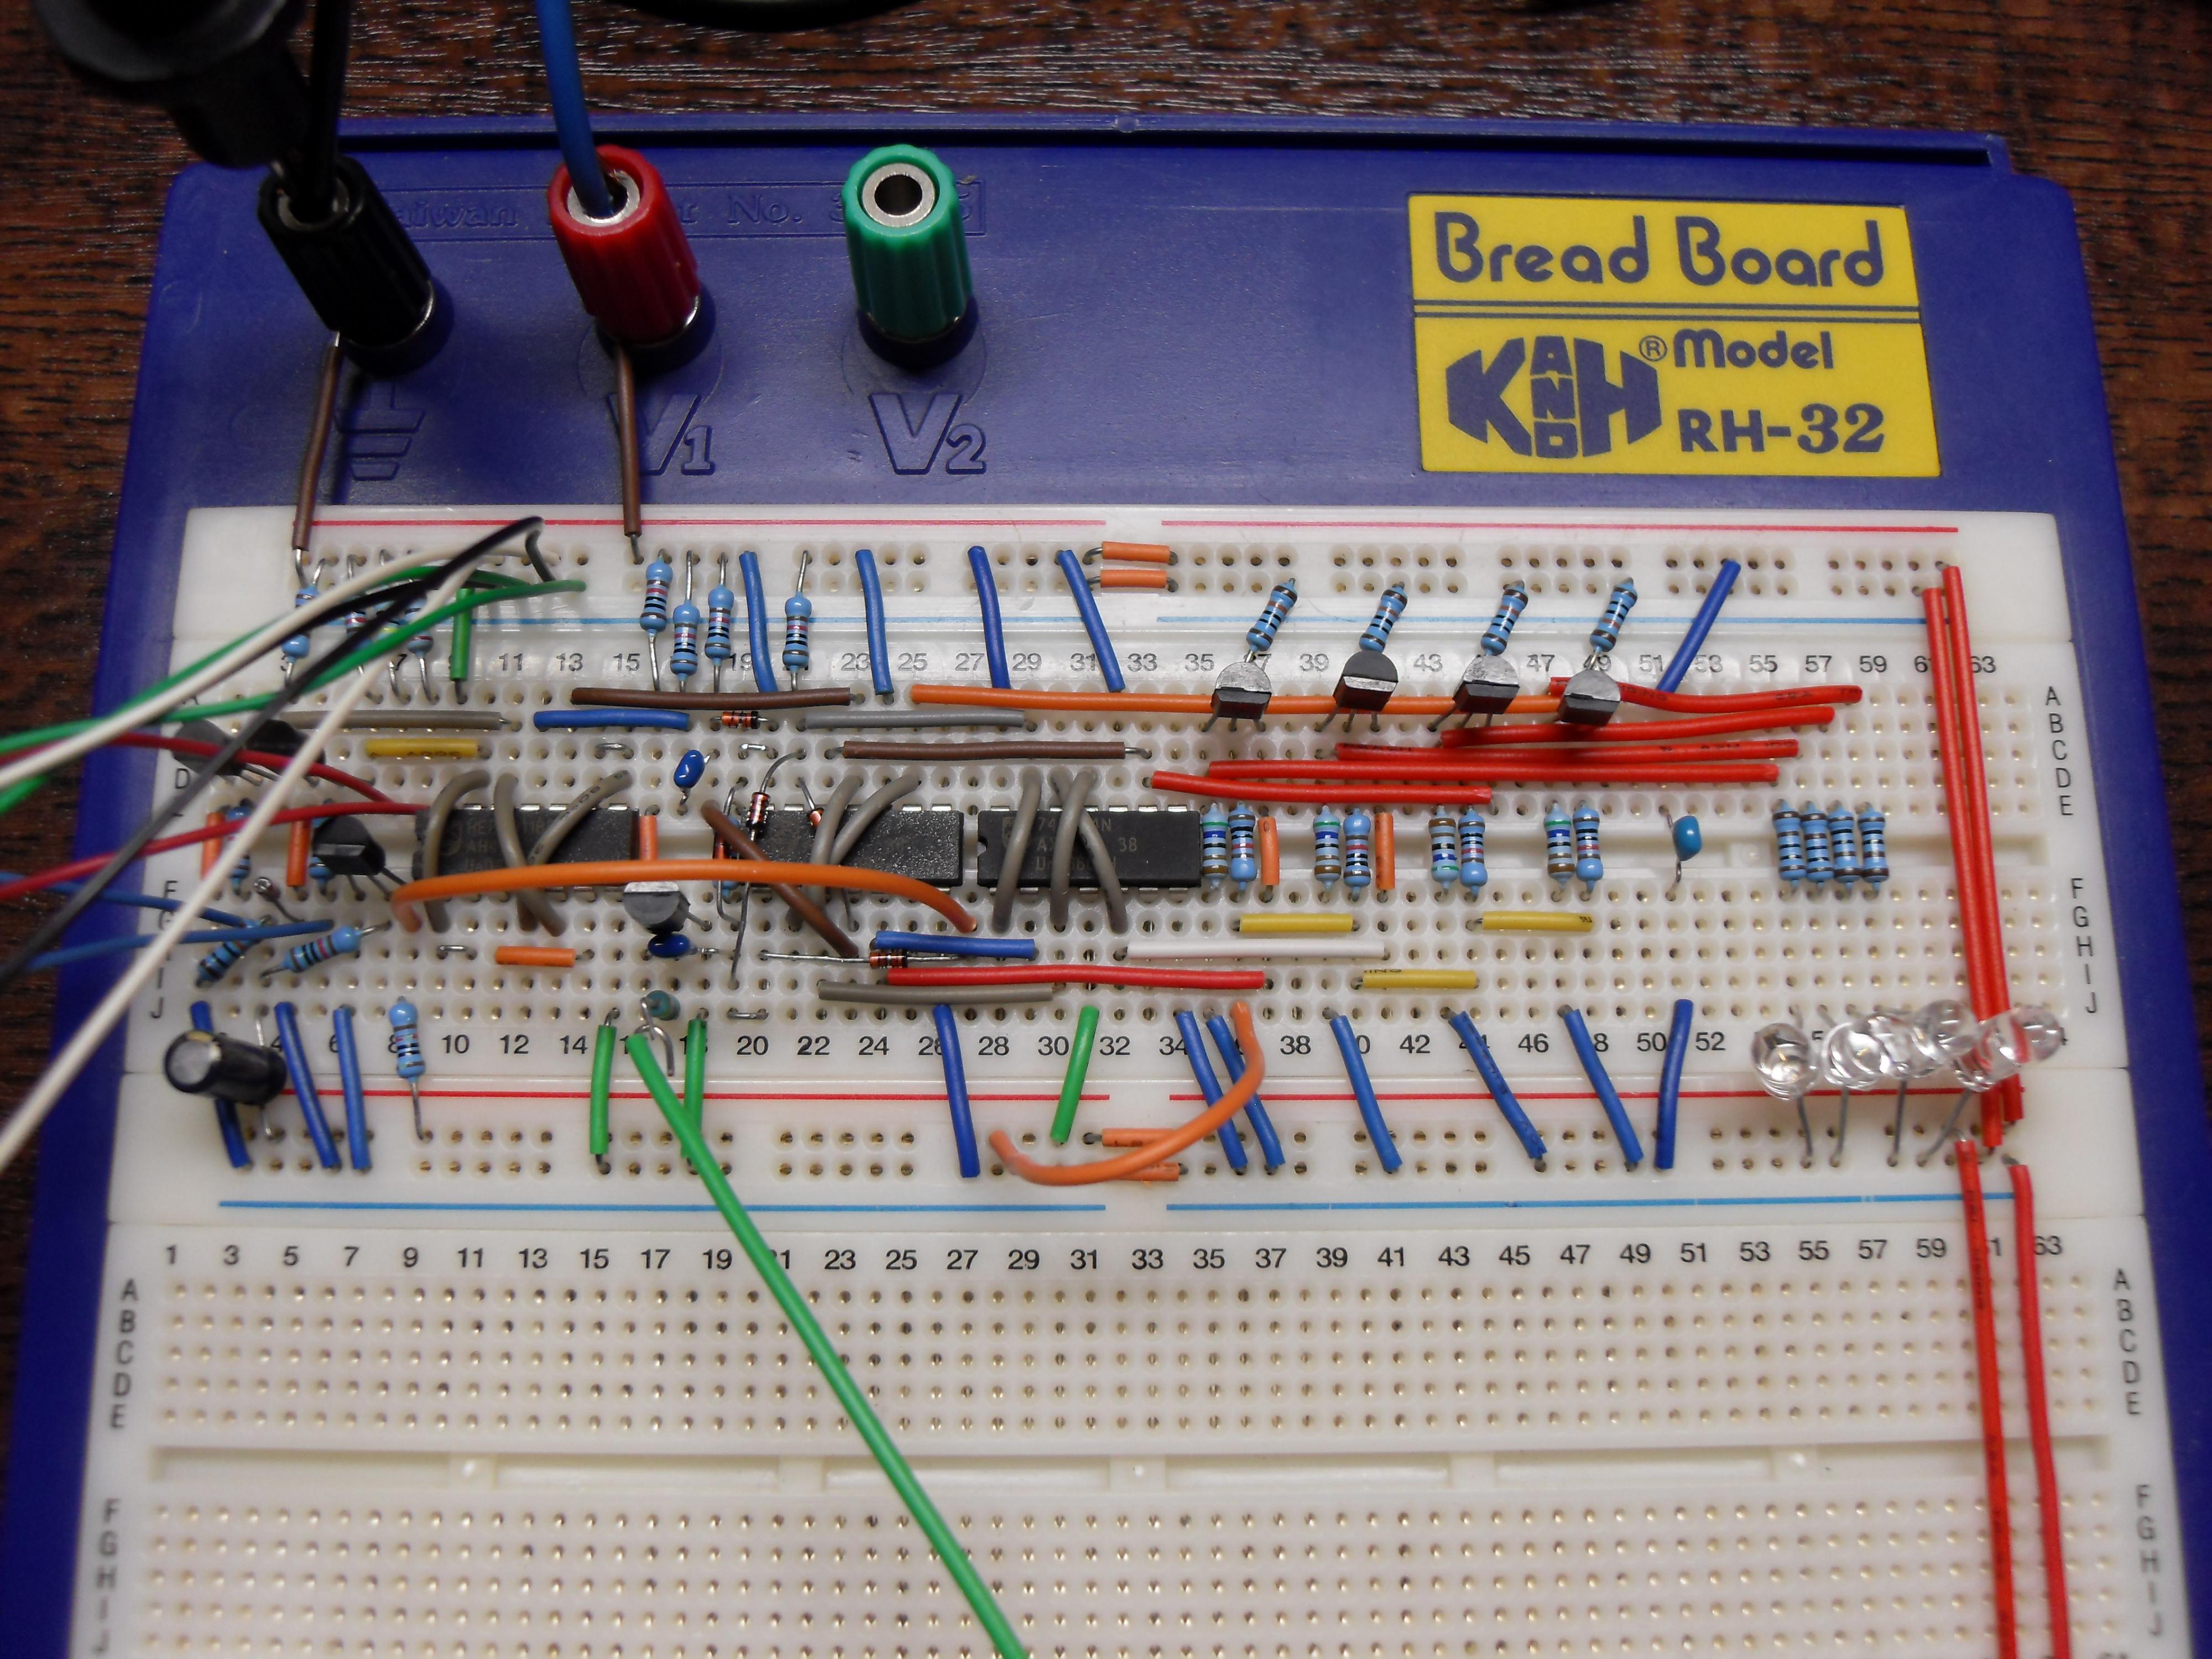
Now, anyone with a sharp brain might be wondering how I'm going to use the coils with the JDM ECU. Well that brings be to the "something that's very interesting" I mentioned a few posts above.
I am in the process of designing and building an upgrade to the ignition system. This system won't give each coil independent timing control but because of the separate coils it will give some benefits. There are no HT Leads for starters and each coil has more recovery time. This will result in a stronger spark, smoother idle, smoother running and the ability to run a larger spark plug gap.
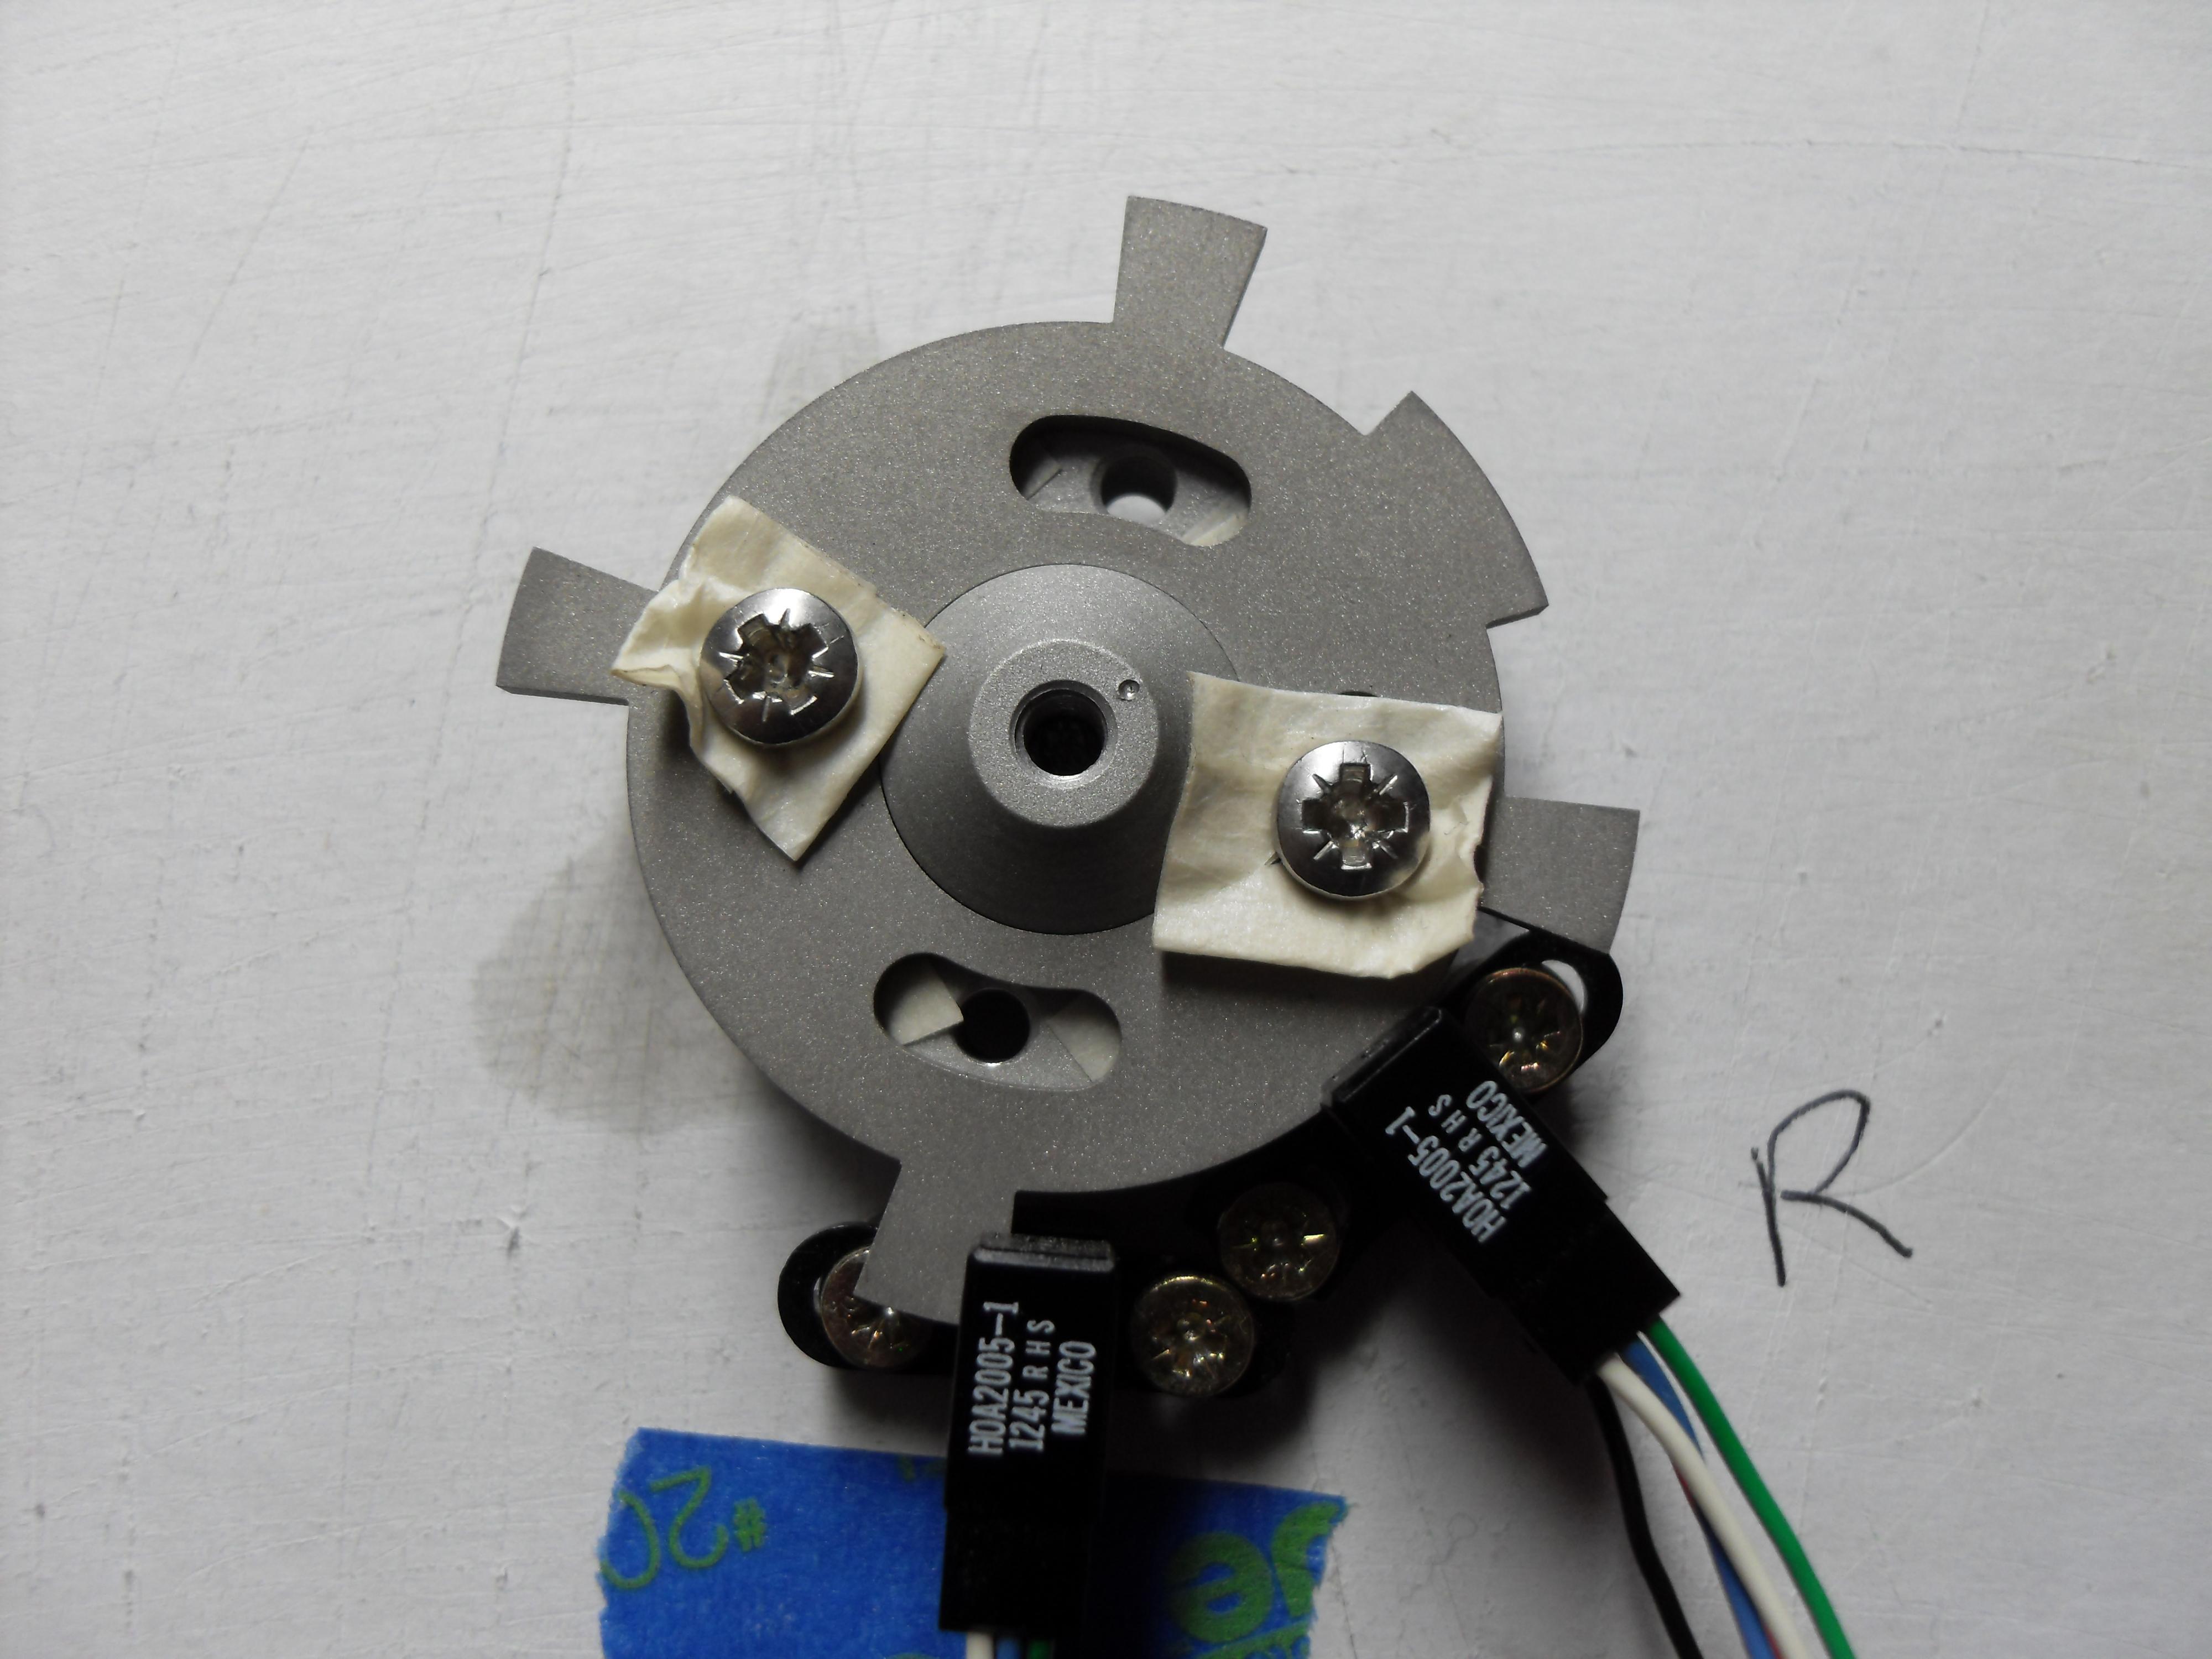
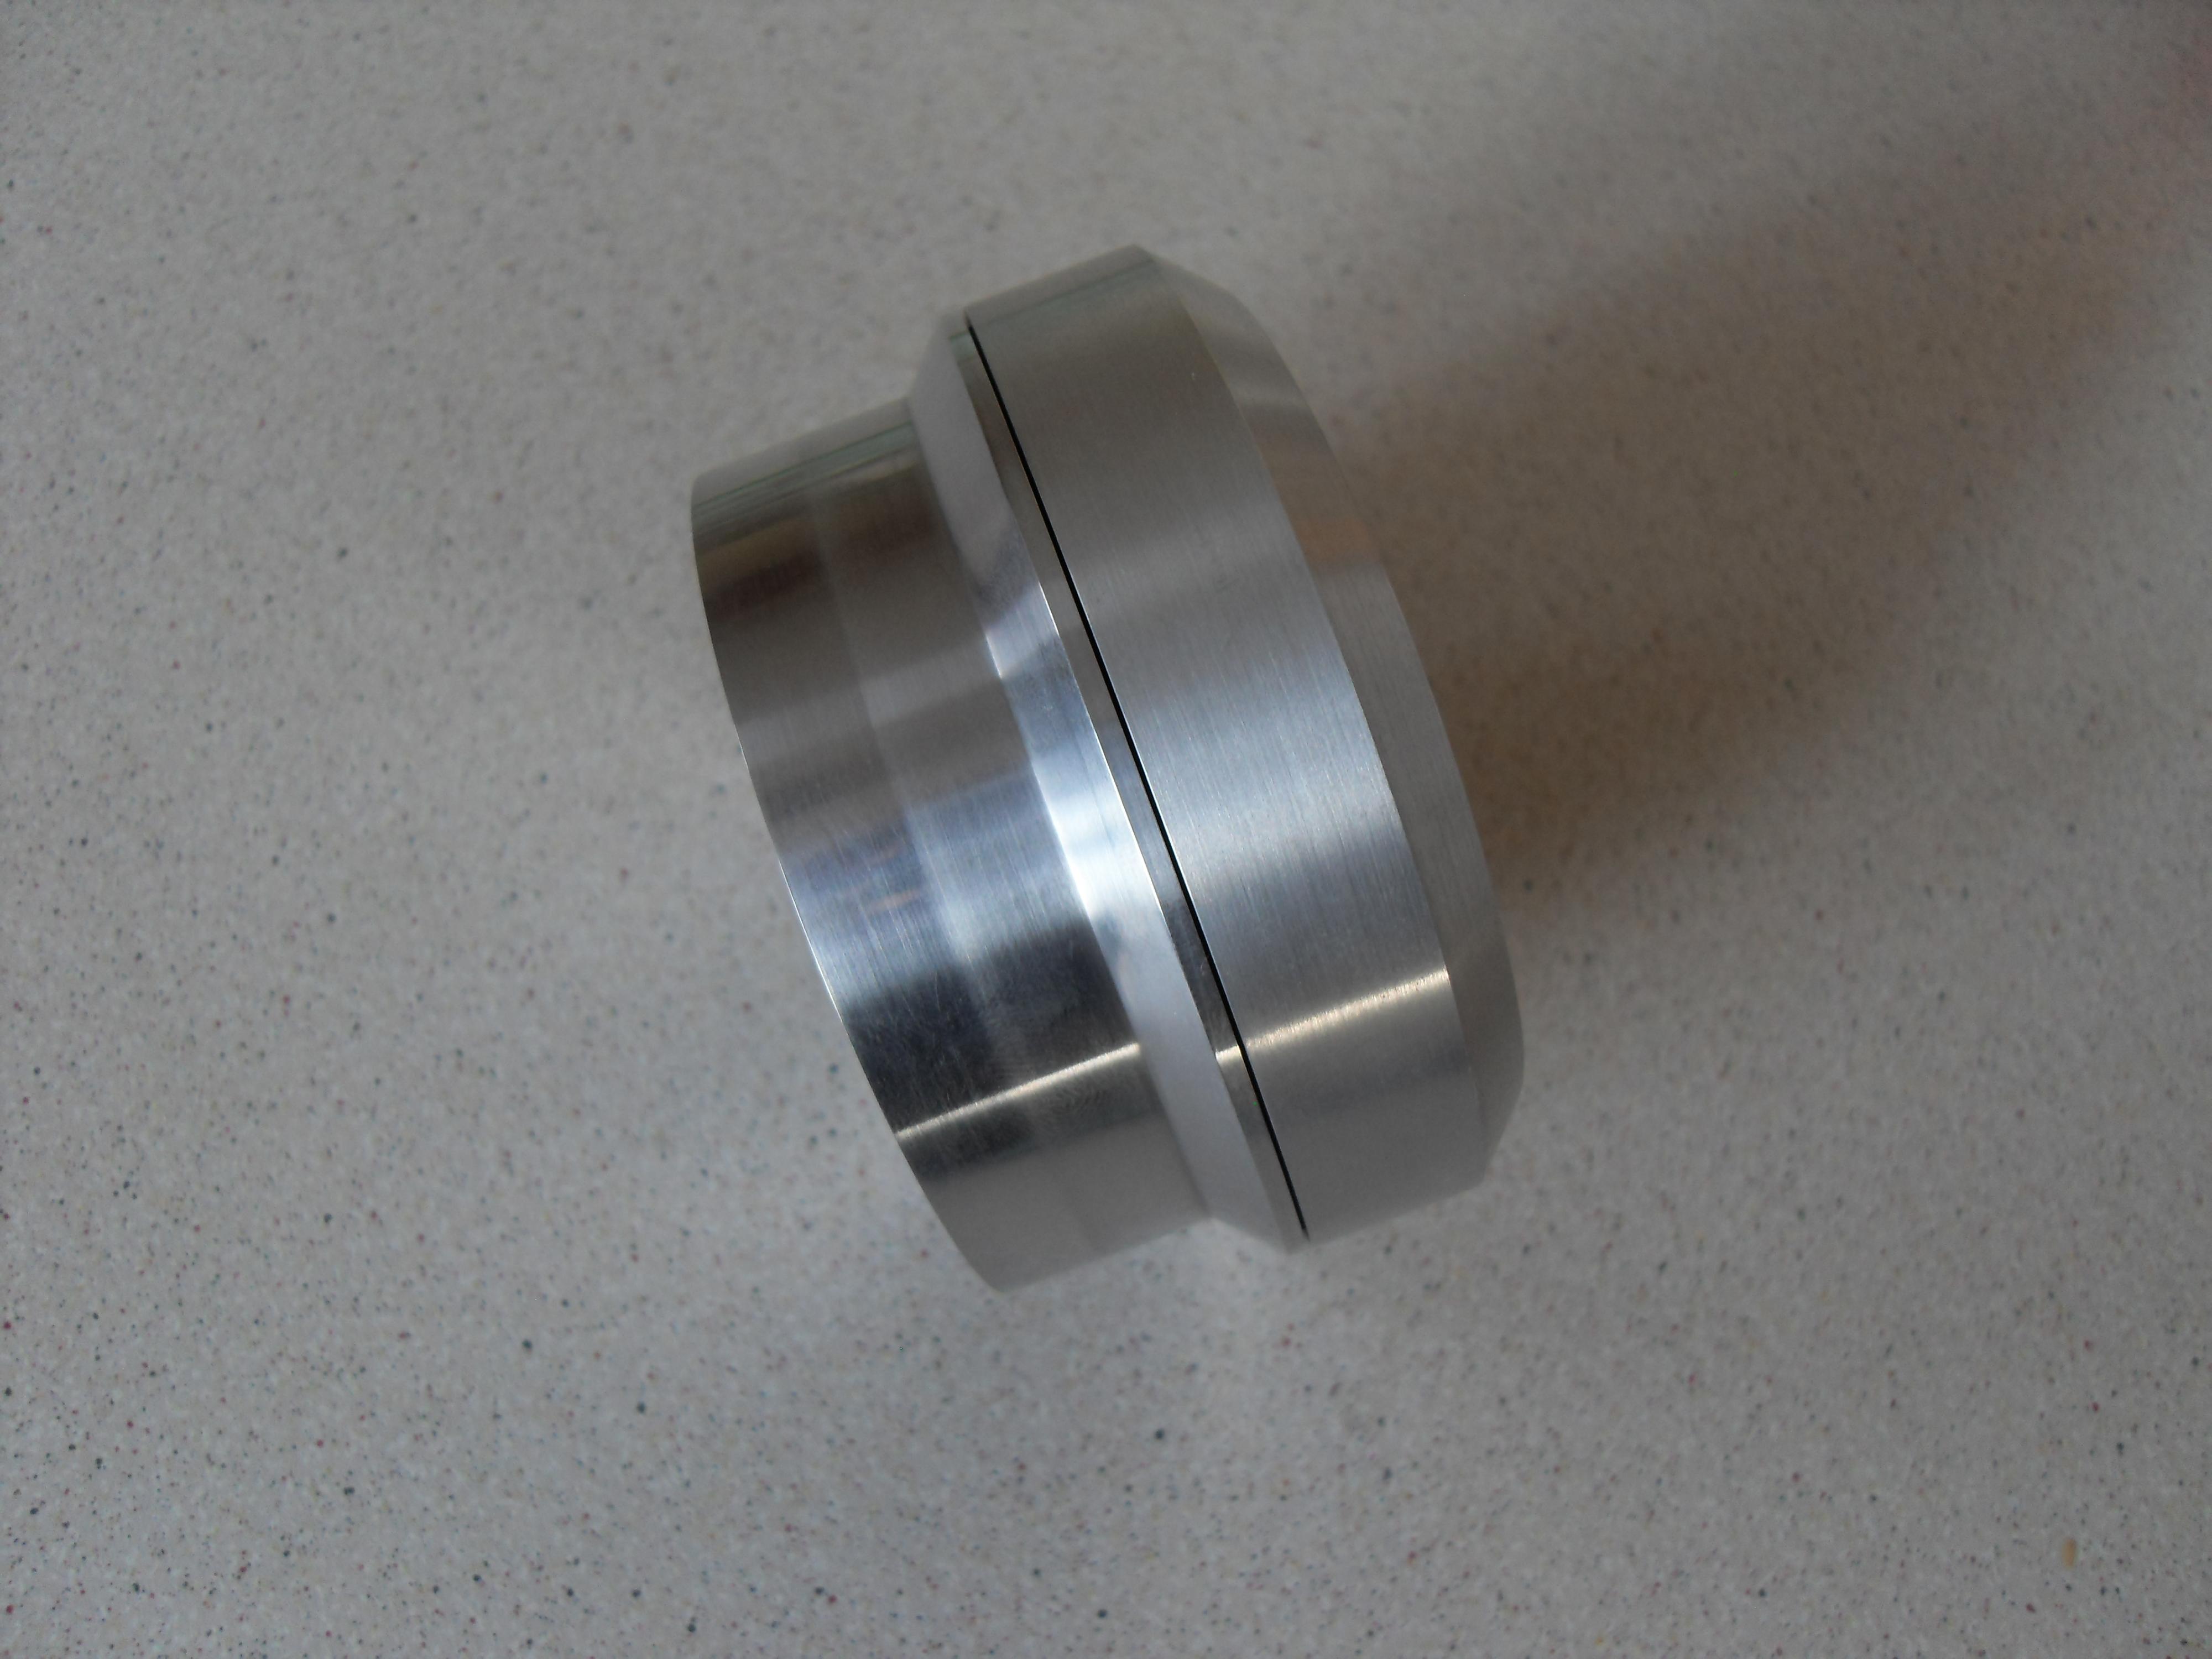
Here are some photos.
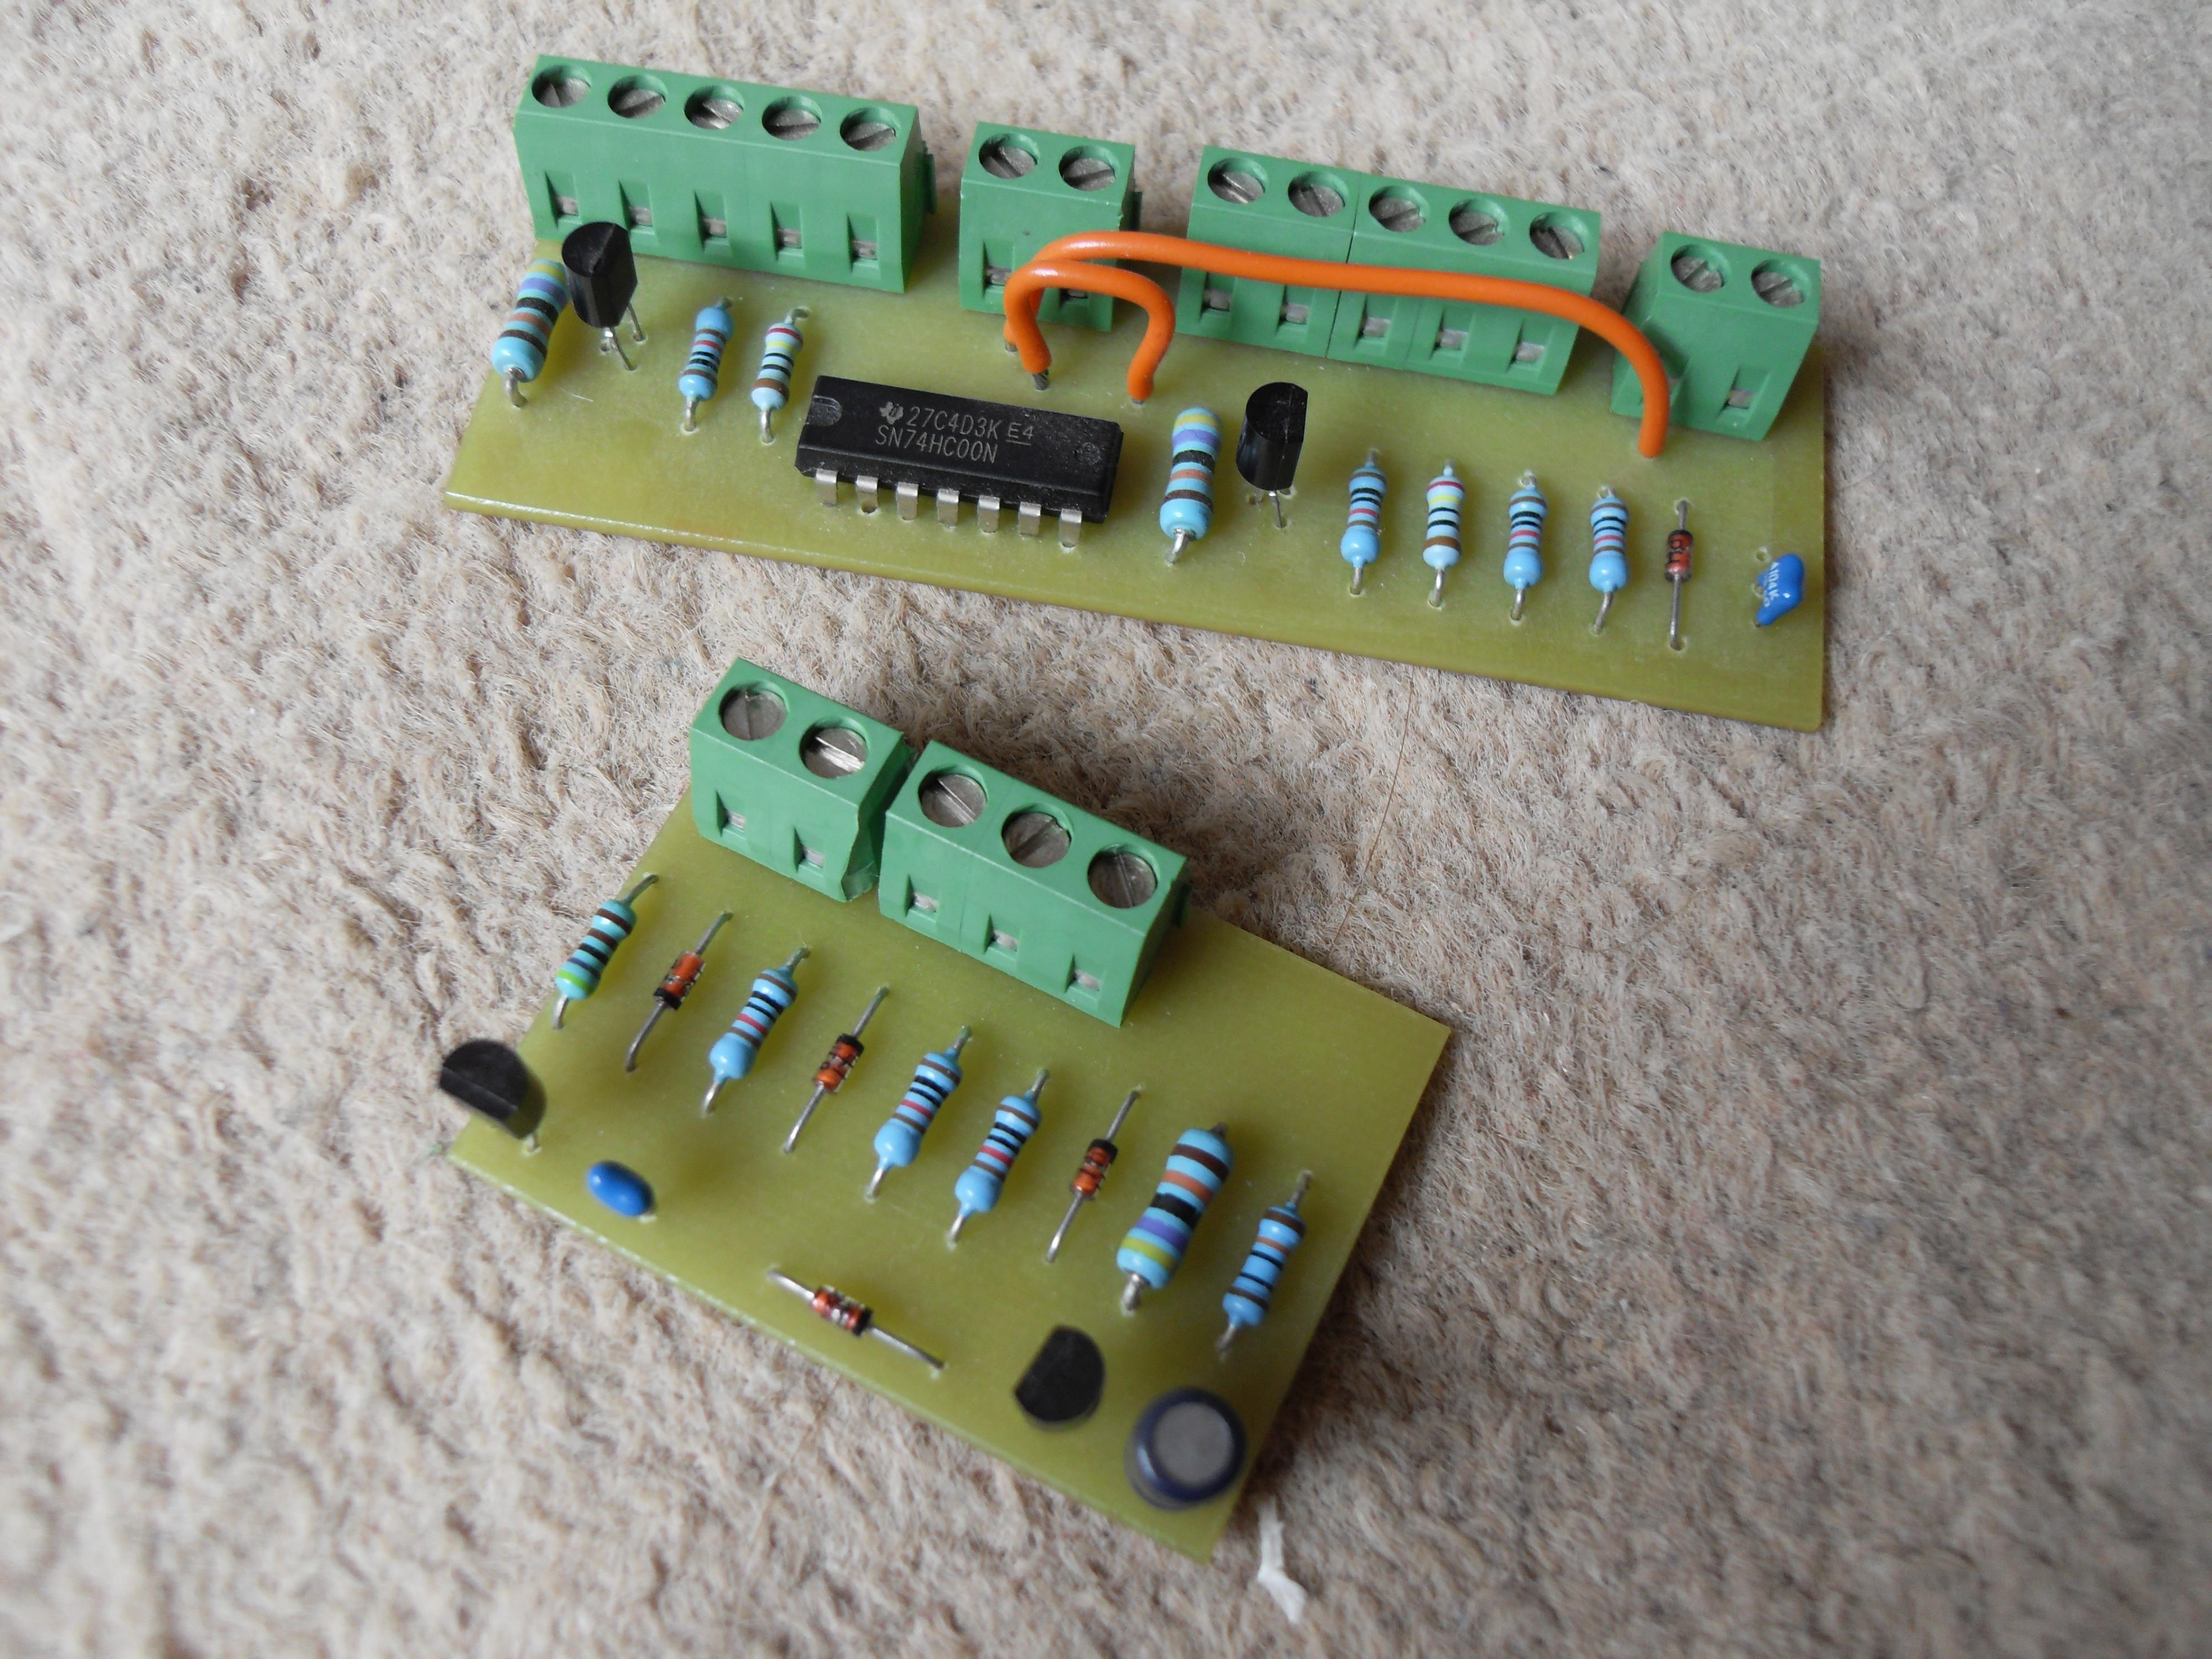
Prototype v1 electronics on a Bread Board.
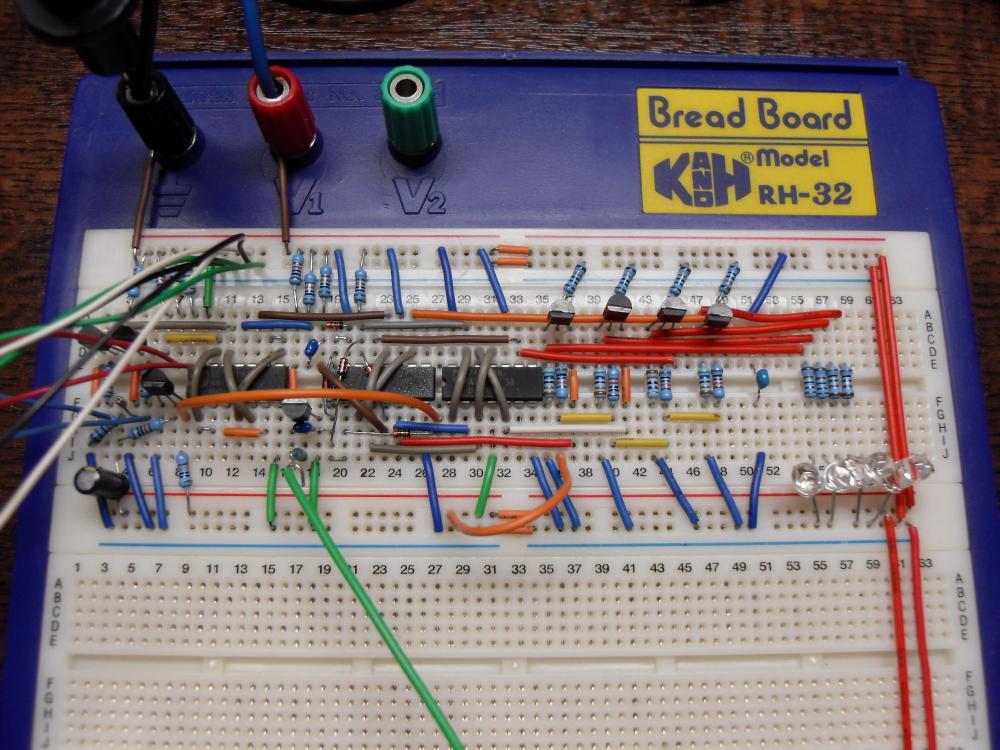
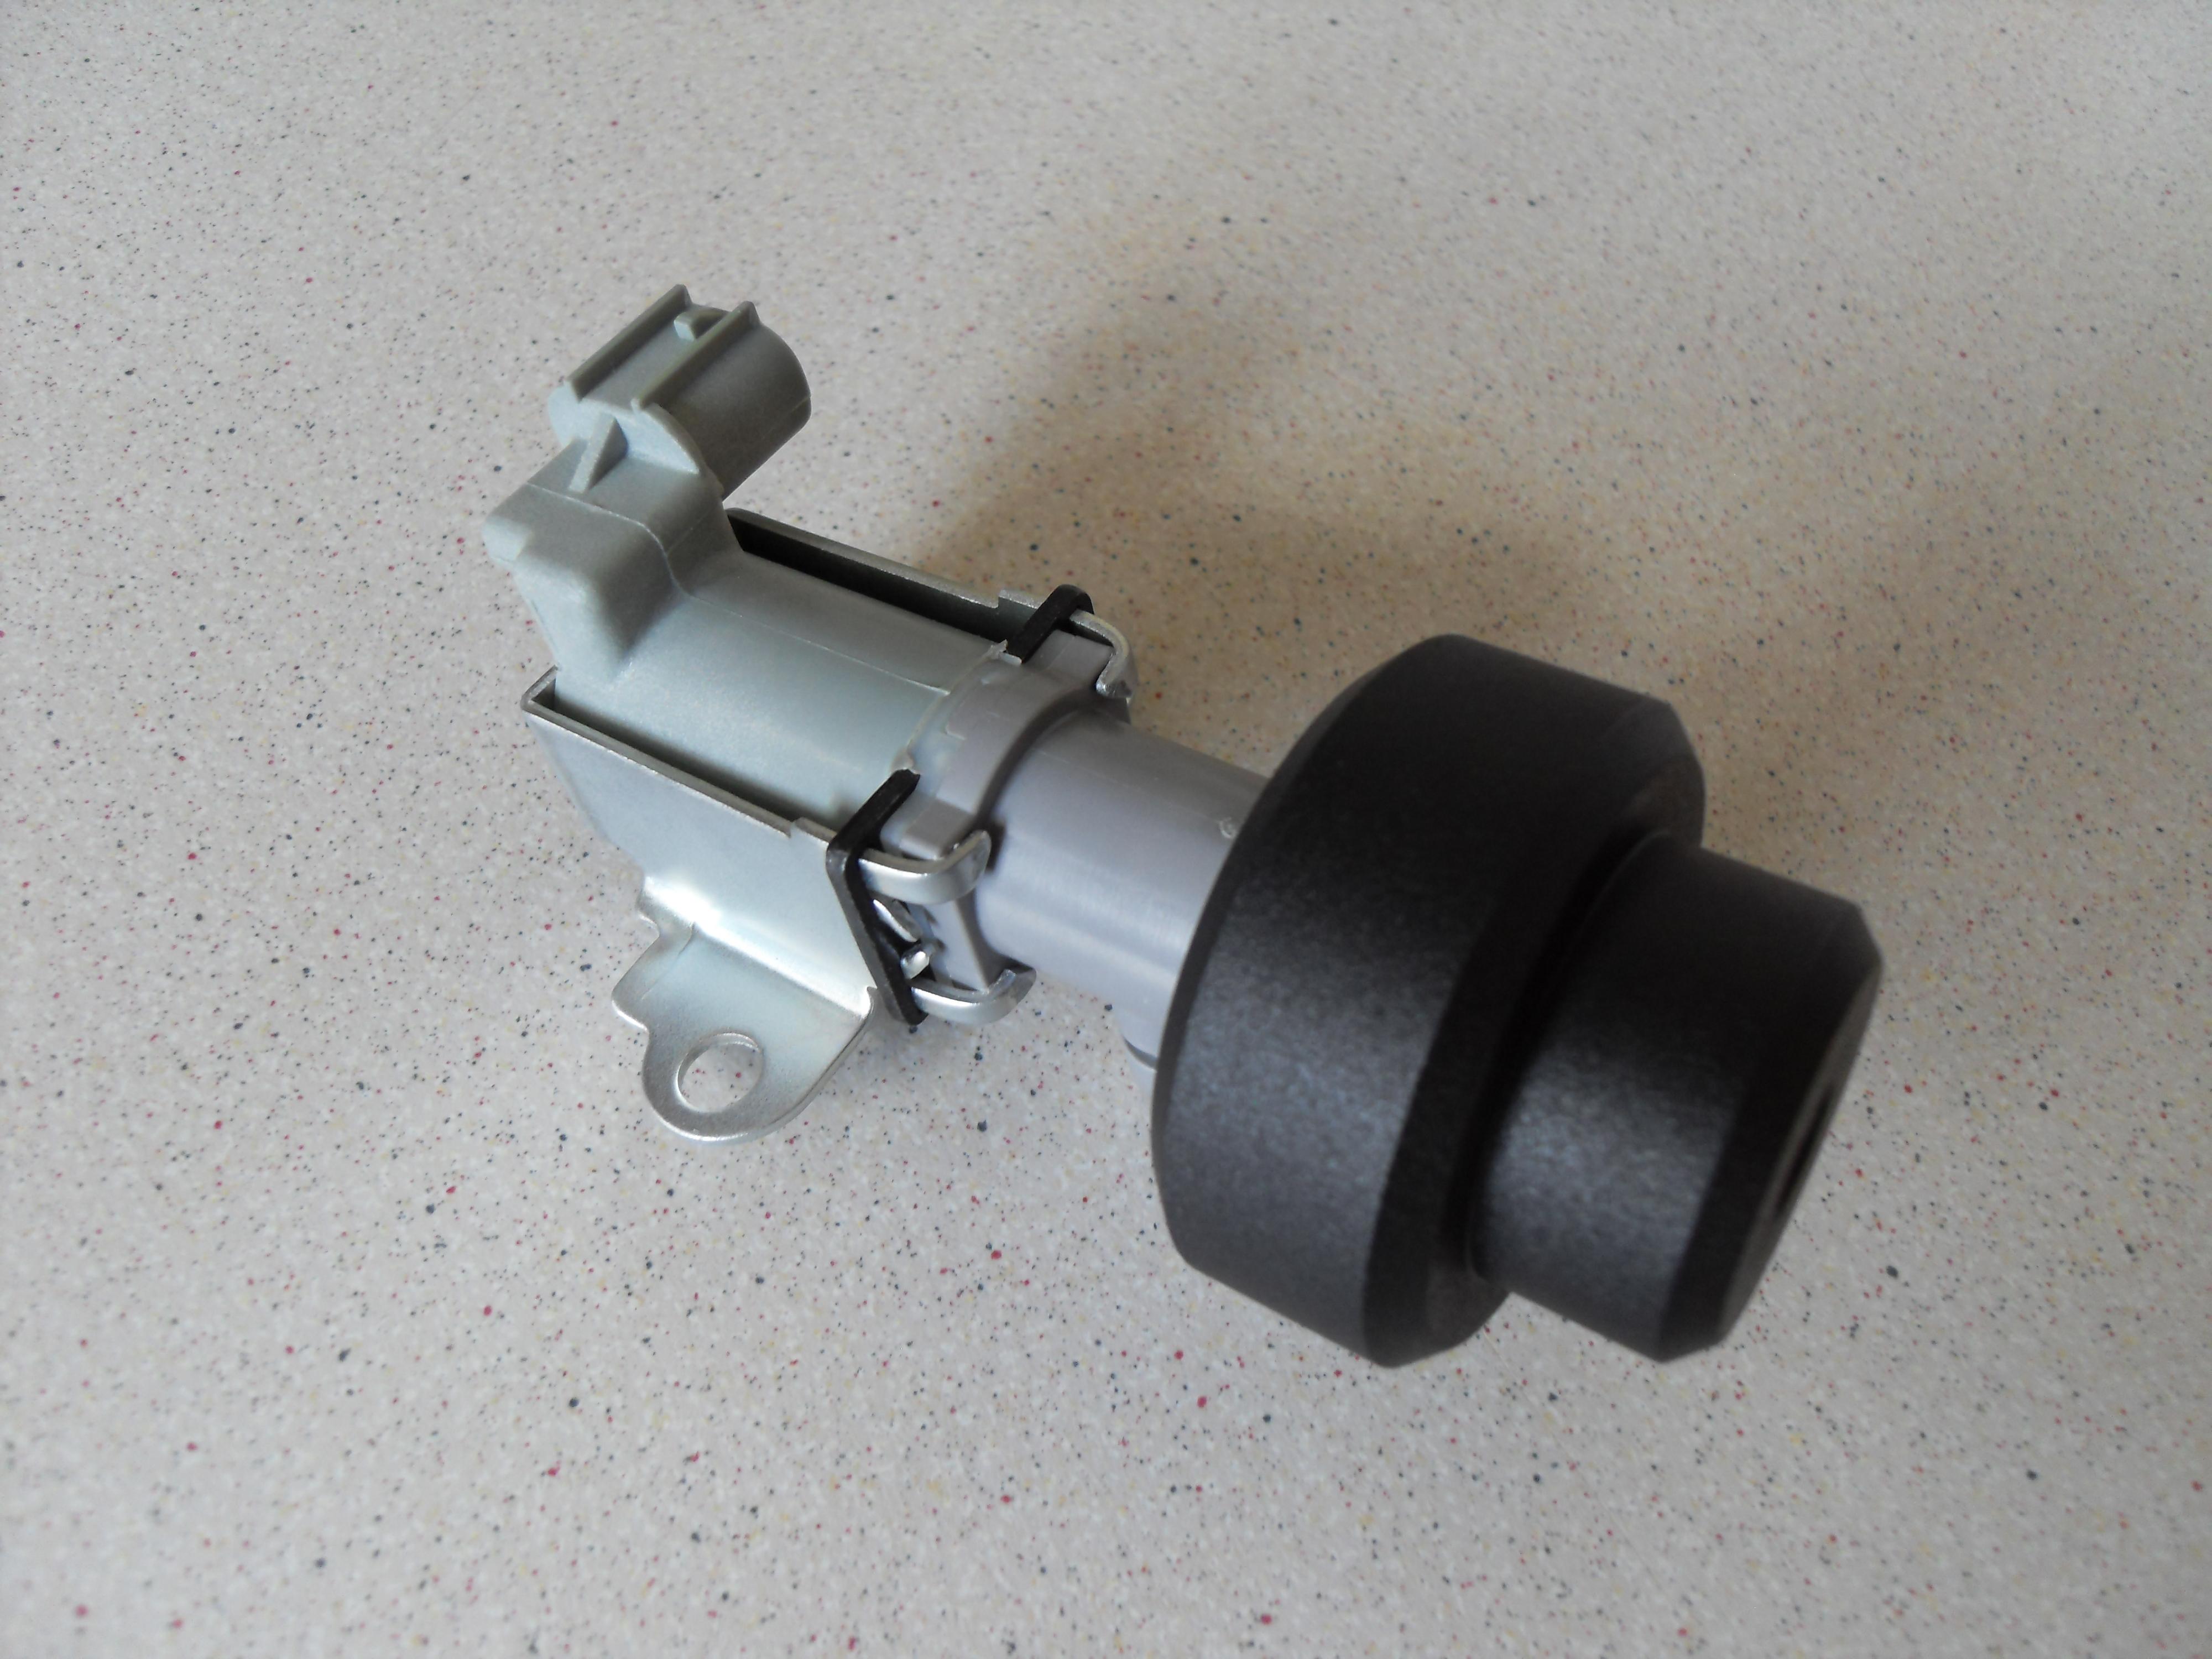
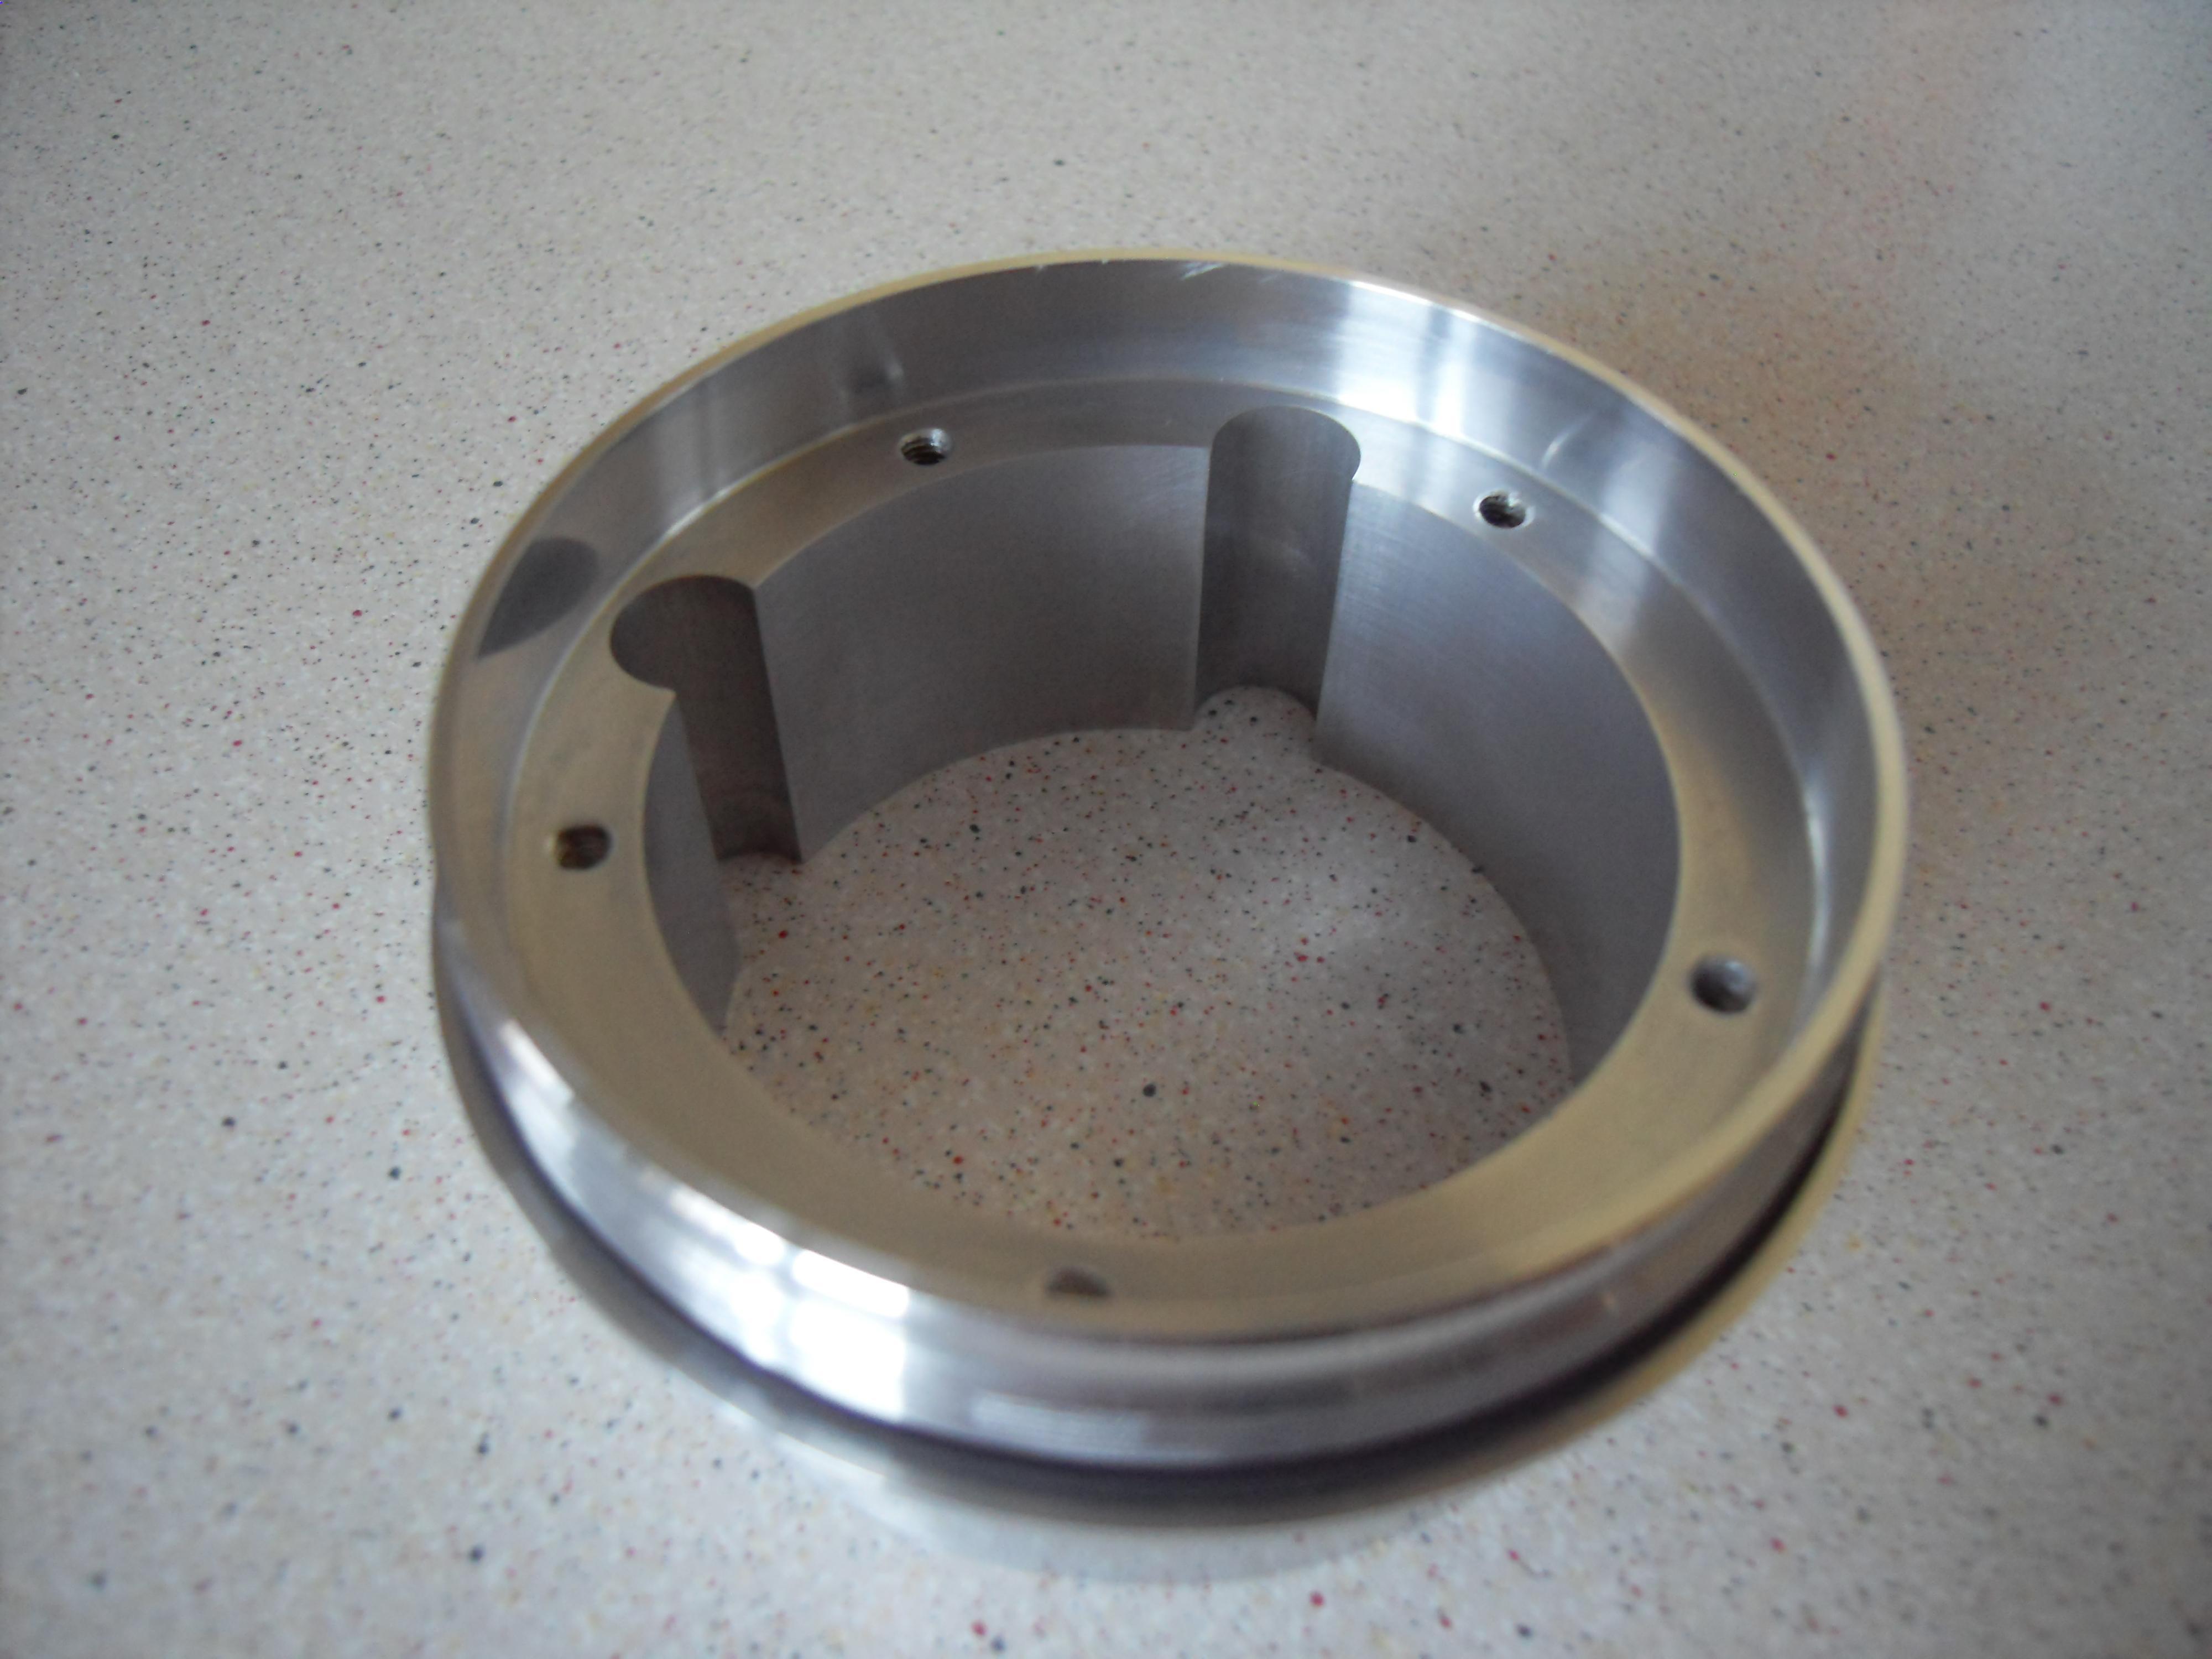
Prototype v1 Crank/Cam Sensor.

Prototype v1 distributor housing.

Parts of prototype v2 electronics on a PCB.

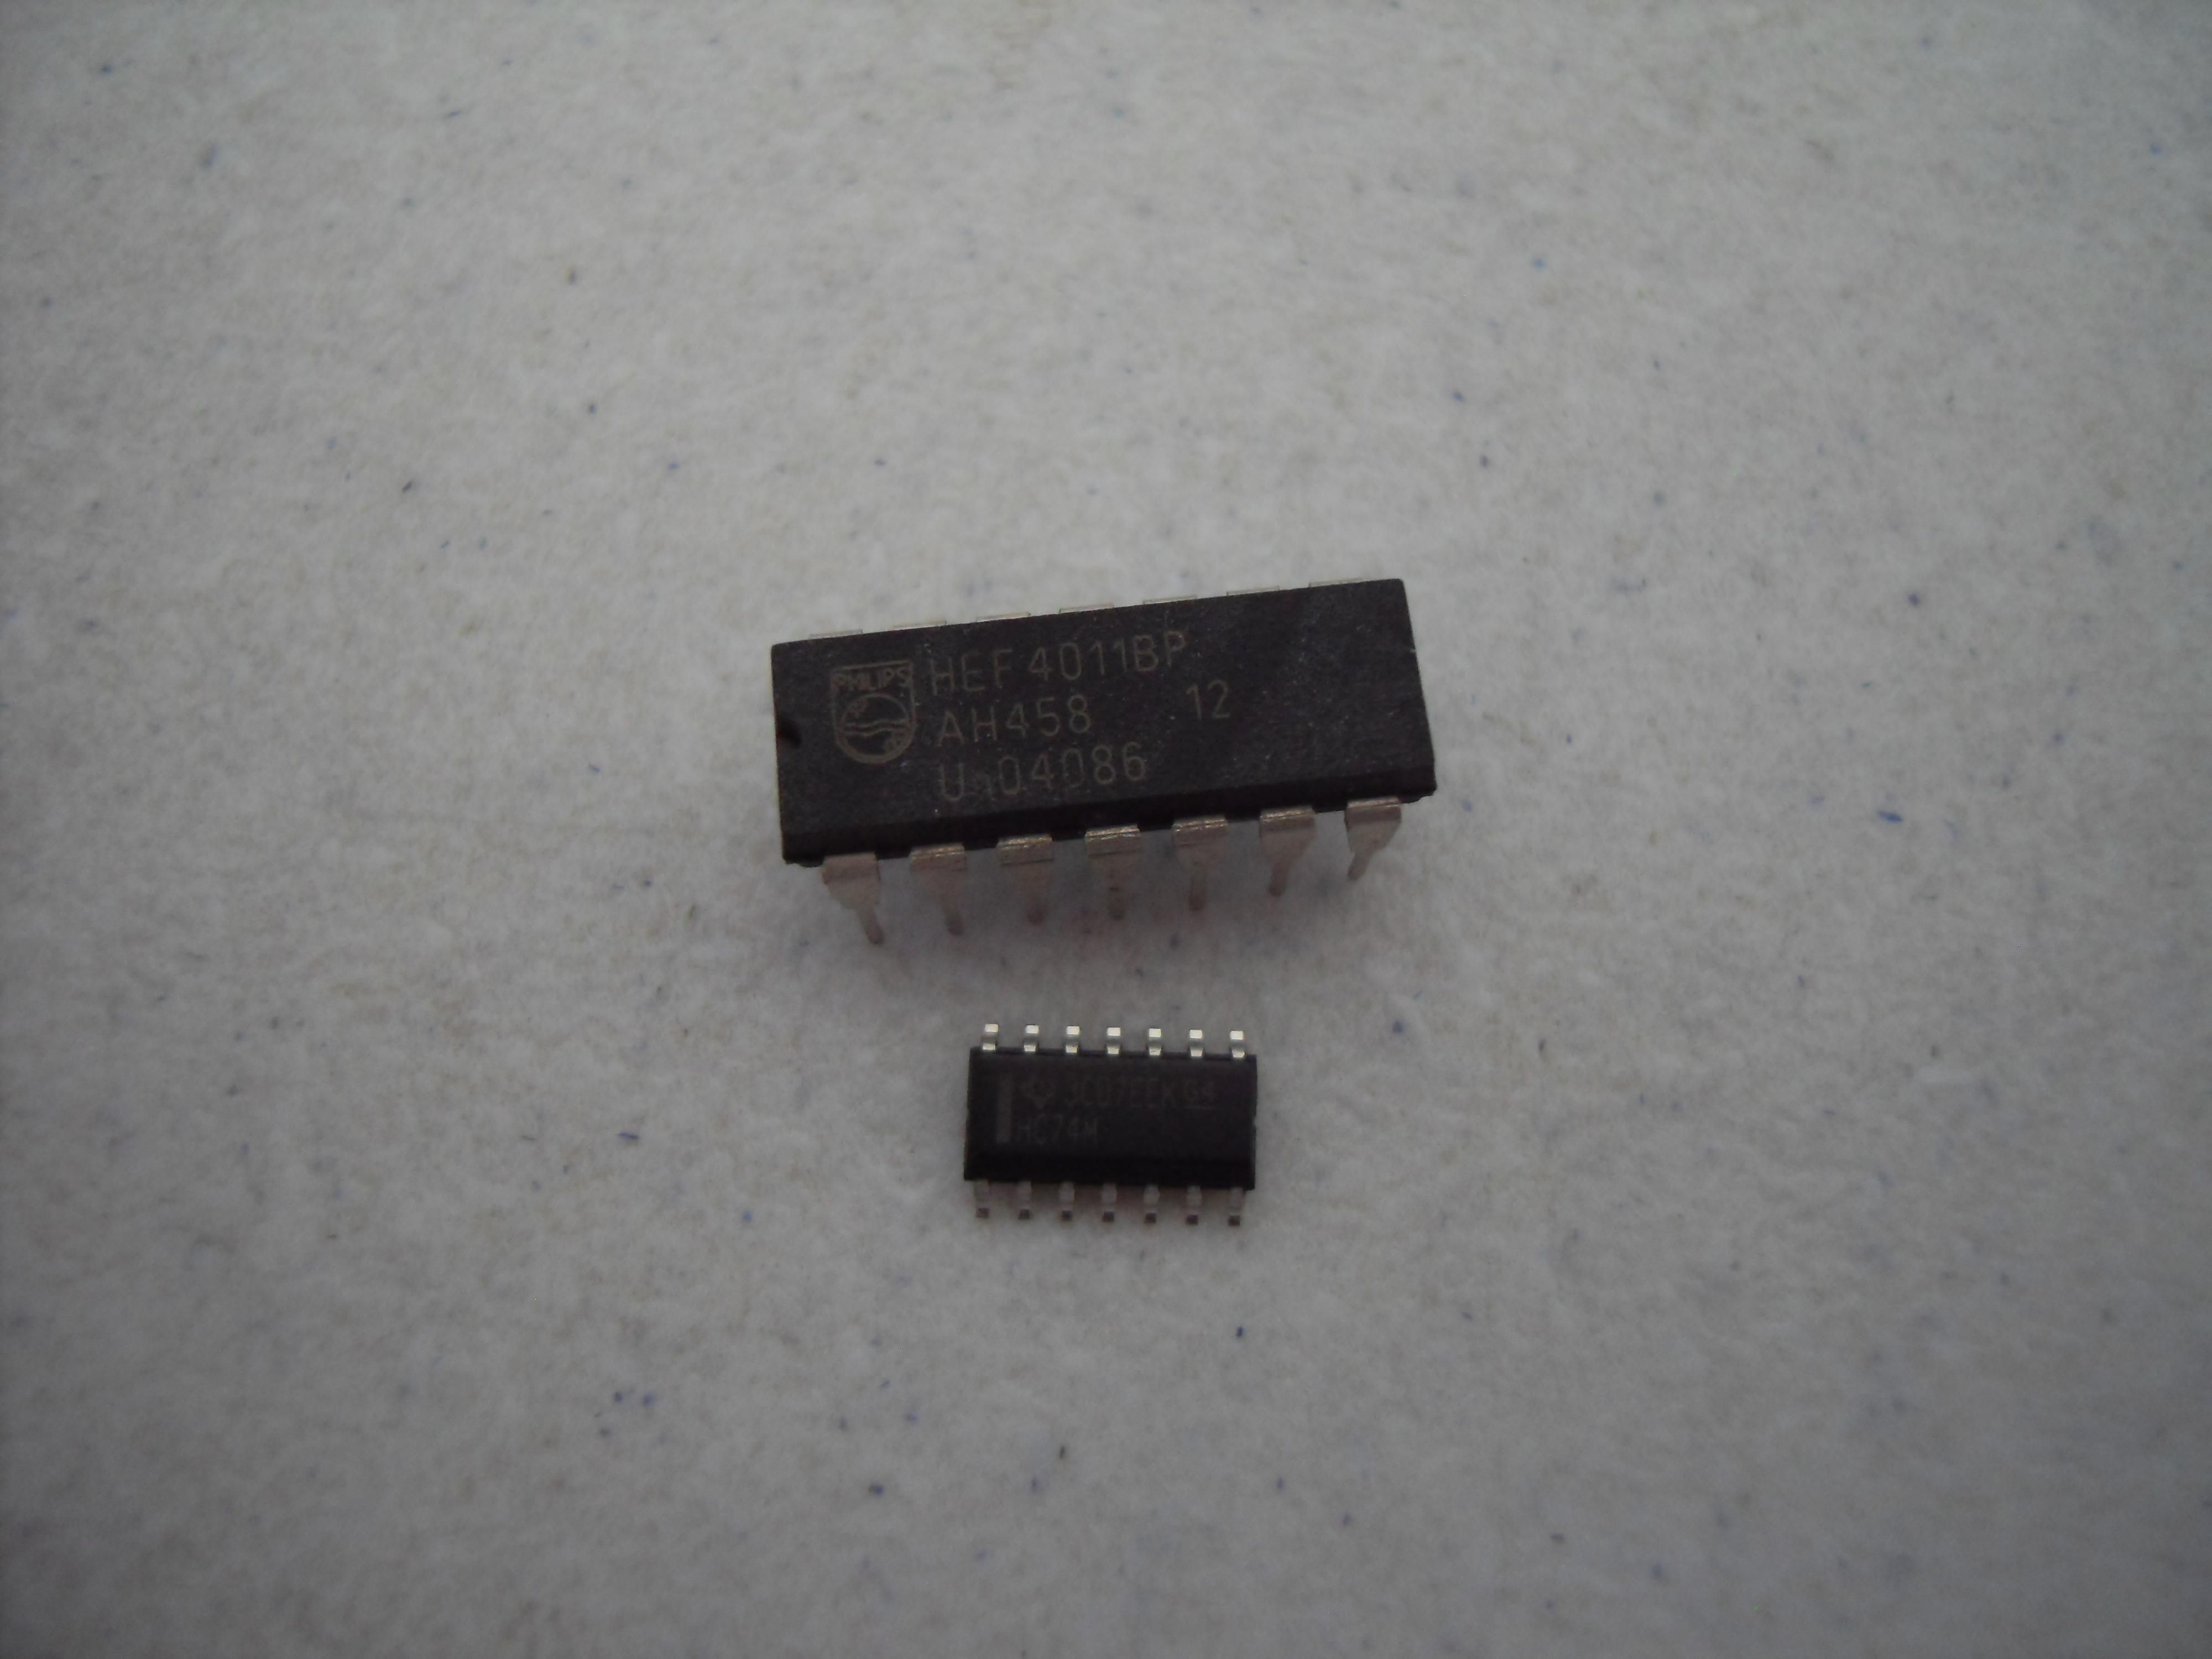
The components used for the prototypes of the electronics are called through hole but the parts I will use for the finished electronics will be surface mount, this will mean the complete electronics will fit inside the new distributor housing along with the new Crank/Cam Sensor.
Through hole VS surface mount components.

As soon as this system is working you will be the first to know.
That's it for now, hopefully more soon.
Gavin
-
Dat blue <3 same as my first starlet, such a nice colour!
Yeah I like this light blue. I was after one from the very first time I saw one this colour.
MMMM! Blue and Orange... My favourite colour scheme combo aha
Yeah orange is my favourite colour and blue is my second favourite so all good. lol
Completely missed this topics revival!! Brilliant to see you back Enzo, always loved your blurple Starlet,
Thanks bud, I really do miss the 8K9 colour but love this new one more.
So guys I should have another update soon.
Gavin
-
Just looked at the plugs again. Using a Stanley blade try shaving the big lump of plastic on one side of the igniter socket to the same size as the lump of plastic on the other side.
Gavin
-
I don't know if you are aware that's the plug for the igniter not the coil. The coil plug only has 2 pins.
As far as I know they are wired the same so I believe all you have to do to make the Glanza plug fit the GT igniter is cut a little lump of plastic off the bottom of the igniter socket on the outside.
Gavin
Edit: That might be the wrong way round. It might be the Glanza igniter that has an extra lump of plastic.
-
Yeah I filed the standard throttlebody shaft down to 7mm and Ive had no issues, if could get the pierburg to work with the auto gearbox Id use it as the feel through the pedal is far nicier because of the finer spring. My sister done the cfm maths for me on the two and the pierburg is by far the better option because of the shaft diameter. Gimme a shout when the cars roadworthy, ive a 100ps ecu I might part with7500rpm
I can't wait to feel the pedal! lol.
I was under the under the impression the Gen 1 Corolla ECU had a 7500rpm limit too? Because power figures are quoted as 88HP @ 6600RPM. Our n/a limit is what 6500-6700RPM?
nice work lad! where did you get the covering for the loom if ya dont mind me asking and was it dear and what did you use to paint all the brackets black?
Thank you.
The corrugated split loom tubing came from ebay. The tee's came from http://www.thetoolboxshop.com/. Both are Durite brand. I'm doing mine again with braided sleeving soon.
It's just normal paint with a petrol resistant lacquer over the top. The texture comes from a dusting of lacquer to give a matt/satin finish.
Gavin


Ultra Blue Point Power Plug Leads
in Starlet Parts For Sale
Posted
Made in Japan. 7mm blue 4E-FTE clip type silicone plug leads, Couple of years old but never used. Probably the best but definitely the most JDM plug leads you can get for the Starlet. These retail for £155 from RHD Japan. 4 plug leads plus king lead. These leads do not come with clips.
Couple of years old but never used, new condition.
Price: £120