EliteMilk Posted April 9, 2010 Author Posted April 9, 2010 B-pillar barshad ago at making some they come out alright Only had the pics from jays thread to work from Had to use 2 cans of orangeWhen there dry will upload a pic fitted, UPDATE! Quote
EliteMilk Posted April 9, 2010 Author Posted April 9, 2010 some Livesports sideskirts i picked upnew lower ball joints Quote
EliteMilk Posted April 10, 2010 Author Posted April 10, 2010 330'snew grill ^__^cleaned up bottom rad hose Quote
Russleh Posted April 10, 2010 Posted April 10, 2010 yeh man i will finish mine and then use mine as a template for another. good guy . u do love to clean and make bits lookin good and the grille looks sweet Quote
EliteMilk Posted April 10, 2010 Author Posted April 10, 2010 good guy . u do love to clean and make bits lookin good and the grille looks sweetal let you know mate yeh man had 5 months to wait for my engine so been bust cleaning bits and gahering parts lol Quote
Galliano Posted April 11, 2010 Posted April 11, 2010 MY GOD! Your attention to detail is sublime!!Keep up the astonishing work, I will certainly be keeping my eye on this! Quote
EliteMilk Posted April 11, 2010 Author Posted April 11, 2010 MY GOD! Your attention to detail is sublime!!Keep up the astonishing work, I will certainly be keeping my eye on this!cheers mate i do have a girlfriend lol this wekend i have been very busy and nd if photobucket would sort its self out i will be updating shortly ^__^ Quote
EliteMilk Posted April 12, 2010 Author Posted April 12, 2010 picked up some nismo vents abit back but never got round to fitting them in till now. going to body shop 2 moz so i needed to get them in quickhere we goam going to fit them 2 half inc from middle cut out on my TOMS bumper working to a straight line...there is no right or wrong was to do this its up to you but i picked this wayMarking upmake so slits with a grinder to get the jigsaw instart cutting out ! got 1 sunk in to far now need to trip it up to get it flush as possible used the grinder to knock off abit at a timeboth cut outs are now done quick gander at what there going to look likeas the vent are not for a TOM'S bumper the shape makes them stick out alot so you have to keep taking bits at a time off to get them flush as possiblegetting therehad to see it oni used pink grip to get them stuck inyou can wipe off any bits you get on your bumper with some thinnersmix up some filler and run it round the edge to flush them inoff to the paint shop now to get paninted what do you think silver TOM'S bumper and the vents black?? or all silver??? Quote
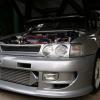
EliteMilk Posted April 12, 2010 Author Posted April 12, 2010 i love the look the pipe work is top dog! havent heard it yet as i have no engine in atm lol but am sure its going to be cool heres some pics of itJAPKETS Quote
EliteMilk Posted April 12, 2010 Author Posted April 12, 2010 Glanza washer bottle came from a member on here :] very happystelfrunning pipe work down other side was abit of a shitemanage to get it round all tucked in and upto the right side bonnet catch insted of the left leaving to bottle to dry over night will get it mounted in the morning Quote
EliteMilk Posted April 12, 2010 Author Posted April 12, 2010 While i was sorting the water jet pipe i wanted to get my battery relocation cable ran through nice and tidyremove the earth and use it for the rear relocation Quote
Sanchez Posted April 12, 2010 Posted April 12, 2010 Nice mate, i was thinking getting a glanza washer bottle.Where you putting it? Passenger side arch?Or may just use a universal one yet... Quote
EliteMilk Posted April 12, 2010 Author Posted April 12, 2010 Nice mate, i was thinking getting a glanza washer bottle.Where you putting it? Passenger side arch?Or may just use a universal one yet...do it! the hole and bolt holes are already there its easy mate.. i had to get a bit more pipe tho to run it through. tucked it in nicely, extend the wire and plug run across the front crach bar inside the trunking so its tidy Quote
EliteMilk Posted April 19, 2010 Author Posted April 19, 2010 been busy few days picking up parts from 1 part of england to the other lol! met some top lads (mark, abbot & friends)few things i have been up to ...like i said the bonnet came through the post i was like a kid at Xmasnew oil filler capchanged the CV gators to set of polly 1's time to clean the box up !lightned flywheelforged 4EFTE wiseco pistons SCAT rodsreground crank, chemically cleaned,.... still got some painting to doold plugs was fuckednew 1s inpainted up my new rad bracketspainted up a fair few bits Cleaned up the old inletclean up the gabs Quote
rob_bower Posted April 20, 2010 Posted April 20, 2010 wows nice work dude you got the engine back from ricky then!! i need to pop and have a look at this at some point!! Quote
nastyrash 2003 Posted April 20, 2010 Posted April 20, 2010 very nice work fella. this is wat icall a good job well done. and nothing you will not have a go at, i think you and me are cast from the same mold. this site is awsom. wats the purpos of this car fella just out of interest. Quote
EliteMilk Posted April 20, 2010 Author Posted April 20, 2010 Painted up the inletcage timeGot it sat in ready to drill out some holestook it out again ready for another paint Quote
EliteMilk Posted April 20, 2010 Author Posted April 20, 2010 fitting the TC's to the rear, yeh they need a paint red stuffs to go onextended the washer bottle plug Quote
whiteglanzav Posted April 22, 2010 Posted April 22, 2010 none of the piks are working for me dude !!!!!????? Quote
EliteMilk Posted April 22, 2010 Author Posted April 22, 2010 none of the piks are working for me dude !!!!!????? just mapped my photobucket up to pro 3000bhp lolrobed me £20 for the year Quote
Sanchez Posted April 27, 2010 Posted April 27, 2010 More updates mate? :harhar:Now you got that cage which is awesome, maybe you should sell me those side bars you made up? lol Quote

Recommended Posts
Join the conversation
You can post now and register later. If you have an account, sign in now to post with your account.