micrat Posted May 4, 2012 Share Posted May 4, 2012 (edited) Thought I'd delete my old thread, start a new one minus a lot of the guff, its all a bit new for a lot of people on here anyway, so don't need an update every time I whacked a sticker on ;)The story began with the death of my beloved but truly awful rover 220gti which expired just after the gathering last year due to cambelt failure and being hit by a taxi and a passat all within a 2 week period : r.i.p rover!anyways I needed a cheap car in a hurry, so I found this little toyota which had been backed into a lamp-post! the damage didnt look bad, but the boot floor was quite creased, the spare was stuck in! within an hour or so it was roughly the right shape, then after a wash and polish it was sitting on the wheels from the rover, they didnt stay long as the tyres were shot, but looking back, I liked them quite a bit!the plan was just to run around in it, which it did a great job of, for a car with over 170000 miles it drives like new, so I pottered around in ghetto farm-slag mode for an age until, when bored on a mates driveway, we found some jaguar rear springs and fiesta xr2 front springs and saw they were pretty much the same diameter and had potential for lows!!!heres the aforementioned ghetto farm-slag look and the springs:I also won some BBS Mahles cheap off evilbay, however after getting all excited and refurbing them, I made the fatal mistake of only trial fitting the rears, stud lengths and odd shape calipers meant they had to be sold straight on my rat liked them hahathey would have looked so nice I know studs are changeable but I made good profit on them, and had an offer that was hard to refuse!!!she got lowered, and I had a good tidy up of the body as best I could!!!made an adjustable panhard rod too, as this type of suspension makes the axle sit off to 1 side once lowered:de-wipered, straighter bumper and vaguely JDM home made rear lamps:oh yeah...lows 8-)and that was about that for a few weeks, and where my last build thread ended (taking 4 pages to get there) until a random change of circumstance dictated otherwise...*instantly scurries off to write part 2 and reveal the van-y-ness*ok so about a week after I thought she was 'finished' things went a bit odd at work and we changed premises, the driveway to which is about a 1/4 mile long, and looks like someone tarmacced the somme, circa 1916, even with my balloon tyres I was smashing my gearbox and sump to bits, aside from this, my car looks like this most days anyway:what with that, a trip to drop off some alloys to MonzaPhil, and the arrival of some keys to my new and awesome lock up, a plan developed, meaning I needed a little van, and why risk buying a super cheap vauxhall combo or something with what little money I had, when I have a perfectly reliable little 'yota?!so, back up she went, and some poverty spec, a-team style converting ensued!!!stripped and cleaned:plastics reinstalled along with anything that could be handy to use as a tie down etc (like the old seat catches)foam rubber layed out and loft boards (lol) cut roughly, I put the seat squab back in as it gave a flat floor and a bit more sound deadening...cut out spare wheel area, foam filled to give some support underneath and sound deaden a bit, and carpeted (with tiles, as its cheap and so am i, and a bit of wood, orginally to hold the carpet in place, but if it proves its worth for sliding heavy thing over it may stay)a bit of audio to pass the timeand my first fill up, a good 150 KG of dog grub for my mates dobermann!add a splash of vinyl and shes done:have got these to go on too, mx5 wheels from CtiStu:that should finish her off nicely Edited August 12, 2012 by micrat Quote Link to post Share on other sites
mattyD Posted May 4, 2012 Share Posted May 4, 2012 haha to be fair mate, i quite enjoyed reading that lolhas had a bit of a dramatic turn around Quote Link to post Share on other sites
Galliano Posted May 5, 2012 Share Posted May 5, 2012 Looking fantastic there buddy. Really like the way you have gone with this one! Quote Link to post Share on other sites
TrisK Posted May 5, 2012 Share Posted May 5, 2012 Id build a split behind the b pillar Quote Link to post Share on other sites
micrat Posted May 24, 2012 Author Share Posted May 24, 2012 Id build a split behind the b pillarmight do now, used the length until recently with the seats folded down, now got a rack!pasted from retro rides...part 2:she's had a few little improvements, unfortunately the alloys are now up for sale, as the brakes are in desperate need of an overhaul so I'm freeing up funds! also, had to expand upwards as she's not the biggest inside and was limiting what I could carry, however that was easier said than done, being a 3 door with no roof channels, no roof rails, non-opening, bonded rear side windows, all worked against me fitting any roof mounted equipment...so we got all excited and used power tools and bravery...did the most important job first:then pulled out my rubber gutter-stuffers (dont know what they're called haha) and offered my rack up (£30 quid bargain off of ebay) the feet can be adjusted and were a nice fit inside the gutter...obviously this was going to require bolts and weld! so to protect my vinyled rear windows I whacked out the foil, and masked up...some butt ugly welds and medium amounts of fire later it was on!!! (dont worry, we cleaned up a bit!!!) also then ran a drill through, and nut and bolted them with big repair washers under the roof skin, just in case...chopped and replaced the black rubber sections that filled the channels, and then added some graphics that ive been given or had laying around!!!currently welding up some bars that will fit lengthways attached to the roof bars, and will be movable to cater for wide loads down to alloys!!!its strong as an ox, but sounds like a stuka above about 60 now with the wind whistling through the rack!!! Quote Link to post Share on other sites
hough39 Posted May 24, 2012 Share Posted May 24, 2012 This would make an awesome sleeper ;-) kind of like the idea of a van too Quote Link to post Share on other sites
micrat Posted May 24, 2012 Author Share Posted May 24, 2012 This would make an awesome sleeper ;-) kind of like the idea of a van toohehe if it makes me some money i might glanza it!!! Quote Link to post Share on other sites
Fozzie Posted May 24, 2012 Share Posted May 24, 2012 I love this project, I'd wondered before about how a hatch would look if you converted it into a mini van! Would be awesome if you put a 4efte in there haha ;) Quote Link to post Share on other sites
TwentyBingoTom Posted May 25, 2012 Share Posted May 25, 2012 Really enjoying this thread, something different Quote Link to post Share on other sites
micrat Posted May 30, 2012 Author Share Posted May 30, 2012 had no luck selling the wheels, but had no luck making them fit either, they either hit the caliper, or by the time they were spacered out had no thread left to screw a nut onto (same story as the BBS's)but i prevailed! excuse the state of it, its been working hard, but heres some unwashed, but successful, piccies!!!quite pleased with them actually!!! Quote Link to post Share on other sites
Billy SR Posted May 30, 2012 Share Posted May 30, 2012 slammed without the stickers and some banded steels would look sweet Quote Link to post Share on other sites
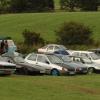
micrat Posted June 4, 2012 Author Share Posted June 4, 2012 it seems to carry loads a lot better with a bigger footprint and less sidewall flex! has a LOT more grip when empty too talking of loads, she's been doing her bit this weekend, I went to visit a friend in lincolnshire (300 miles or so away) and collected an engine while I was up there, did the 300 miles home with me, another chunky chap (my mate mike) all of our luggage, 4 wheels and a radiator haha! legendary little thing have a few pics of my friend toms metro, his mate (also toms) bike carbed and 16v'd polo, and his brothers BX which has just been to switzerland and back too!!! Quote Link to post Share on other sites
micrat Posted July 22, 2012 Author Share Posted July 22, 2012 Mega-update alert!!! So have a bit of backstory...Right, so as anyone who has previously looked at this thread will know, my little starlet (charlotte) started life with me as a rear-ended, bog standard base spec starlet, i then tidied her up a bit with things like a de-wipered rear and some old rover gti alloys, and painting the bumpers/mirrors/scuttle/wipers etc...Her second evolution was started by me getting a mega-cheap set of BBS alloys, these didnt fit however it planted the seed and she was then lowered a silly amount on choppy springs over standard rims...Her 3rd evolution came very soon after when things went a bit pear-shaped job wise and i needed a small van, so I converted the starlet, and she ran around like this for 3 or so months i guess, earning me a few pennies, and this is where the thread last got to...Recently though i came to a bit of a crossroads, the flooding round here left the back totally soaked, the wood warped, and the thing was constantly steamed up, add that to some niggling problems, and some self inflicted ones (fire damaged headlining lol) and i wasnt sure where to go, i didnt see the point in keeping her as a van, as the cost of the extra insurance to carry goods wasnt paying for itself...but, i stuck with her, because the little trooper has grown on me, takes a legendary amount of abuse for a car which now has 177,000 miles and climbing!!!The whole following update has been done by me, single handedly, basically 99% over this weekend, and im quite proud with what i achieved its nothing amazing but ive never done wiring of any kind before and only learnt how to lower a car a month or so ago...let alone other stuff, no great engineering, but im really happy After taking my last big van-full (noodles the dobermann) I stripped out the back revealing a dogs-mess of expanding foam, water, old accident damage, rusty puddles and general skankyness...Before:After:de-vinyled the side to see what i was dealing with a bit better, then got busy with the ratchet straps and mallets, straightening her out a bit!!!closer than ever, i guess...Obviously the rear end now resembled tin foil but hey its true and seals to the boot, its as good as its going to get!!!The headlining which we kinda set on fire a bit was then removed, revealing some hideous glued on carpety crap interior and headlining cleaned and nearly there...rear carpets trimmed to be straight across, they had weird tags heading off behind what would have been the rear seat area...now the more interesting bits started, with the aid of some hot tub pipework from work, i whacked an induction kit and some cold air piping on, whacked the air temp sensor in the old resonator hole...then, er, lowered it she already had an adjustable panhard rod on from before, so that was one less hassle, bonus of black lowering springs, you can feign innocence about it being low if needs be haha...in a moment of randomness i decided i wanted some form of release for the hot air under the bonnet, i know its no 200bhp glanza, but still air temps matter, and i was bored and had a drill...so started drilling, cant be afraid at this point lol...pattern is a bit scatty, i should have planned better, heres a during...it does qork quite well, put my hand over it after a spirited drive earlier, lots of hot air coming out, also means the cold air feed should be doing its job, not just blowing into a pocket of heat...anyway, bumper then came off for a respray, it was stonechipped to hell...while that was drying...chopped up one of my old arch rolling poles, should make a good brace...rear bumper off...nice lick of paint to tidy the inside and rear panel up...paint the spare, still need it, daily driver and all...spare in and secured, brace painted and trial fitted (smacked until tight lol)wired up a rev counter, never even tried this before so was well happy when it worked (see vid) wiring still needs running properly but hey, should be nice and blue and glowy at night too vid:so thats about that, epic weekend!still to come, finishing off, fitting exhaust (cherry bomb), and some nice pics of the finished article, oh and wheel refurb lol! i would lose the roofrack but we welded it on, plus it still gets used:oh also, you've read this far, spare 12 seconds for this its worth a laugh, playing xbox the other night, think they overdid what happens when you smack a clipping point!!!  Quote Link to post Share on other sites
micrat Posted July 24, 2012 Author Share Posted July 24, 2012 not on the same magnitude as the update from sunday but...went and had my car 4 wheel aligned earlier on, i'd love to say it now handles on rails but my drive home was in mega-summer traffic (the joys of living in a seaside resort) but hopefully i'll have a fun commute in the morning would recommend alignment over tracking though, i knew my rear end needed tweaking with the adjustable panhard and all, and even with the standard front end (save the lowering springs) they still adjusted a bit of camber etc...oh also my rev counter is blue and awesome...little things please little minds lol Quote Link to post Share on other sites
micrat Posted July 28, 2012 Author Share Posted July 28, 2012 I got all creative and whacked my sharpie out! (oo-err) my driving style is a lot like this game at the moment, always ends with an angry bird!opinions welcome oh and talking of birds, for the eagle eyed among you (geddit?) yes I know I still havent welded my strut brace in! its a good fit though, smacked in with a hammer and its been there all week lol! Quote Link to post Share on other sites
micrat Posted August 12, 2012 Author Share Posted August 12, 2012 OK sooo more progress:I had so many loose ends after the last bodging/smacking/tweaking session!First job up was to do the exhaust...Cherry bomb!!! Being tacked onto the old hangers which were cut off the standard backbox...Look at the delights of Mikey B's belly haha, as you can see the 'zorst sat really high, we had to hack a bit out of the rear panel haha!The driveway was a bit busy that day too, the mk3 estate, my starlet, the drifty and now RWD welded diffy audi a4 and some other tat!My rear bumper was full of pug and mesh as the car it came off in the scrapyard had a wobbly exhaust and had melted it so when we tried to cut it for the new exhaust it became a weird and lop-sided shape! Fail...Im not going to pretend that this is anything but a god-awful bodge but using the lid of a big casserole dish of mine i cut a template and tacked it onto the bumper :sHehe...bodge.Welded the brace in...Started flap-wheeling the underseal off my roof and rack mounts...why did I ever do that?!?!?!Then headed off down the scrappy with the world most un-junkyard-doggish-dog to get some bits for the escort and I fancied a splitter...Found this polo one...Flukily good fit!The end profile was all wrong though and too square...Chopped it, will adjust more later...Tided the bonnet as the paint was awfulTided the roofrack mounts...Fitted the 6x9s...Wheels!Fag-paper caliper clearance!Prep/Before...During (Retro-Rides blue FTW) (Lada Adriatic Blue)Trial fit, painted bearing/hub nut caps too...Still filthy, still needs bits putting back on, still needs the roofrack, but shes getting there! Quote Link to post Share on other sites
B11G KY Posted August 13, 2012 Share Posted August 13, 2012 Going for the Rat look! lol love it cool build bro! Quote Link to post Share on other sites
micrat Posted August 13, 2012 Author Share Posted August 13, 2012 Going for the Rat look! lol love it cool build bro!Hah cheers, its not intentional rat-look its just a state ;) gone from being a runaround to potential euro look to van to whatever this is! Starlets have really grown on me now though, id like a nice one to do properly! Quote Link to post Share on other sites
micrat Posted August 17, 2012 Author Share Posted August 17, 2012 Just gave her a wash and tickle as off to the retro rides show this weekend which hopefully means some track time too Quote Link to post Share on other sites
LukeSR Posted August 17, 2012 Share Posted August 17, 2012 Haha I love it! The colours just work! Quote Link to post Share on other sites
m1n1man1275 Posted August 29, 2012 Share Posted August 29, 2012 Excellent read and great car, what did you have to do to those wheels to make em fit? and what plumbing pipe is that for the cold air feed? Quote Link to post Share on other sites
micrat Posted August 30, 2012 Author Share Posted August 30, 2012 (edited) Excellent read and great car, what did you have to do to those wheels to make em fit? and what plumbing pipe is that for the cold air feed?Cheers mate O.K the wheels are a direct fit on the rear, centre bore and PCD is exactly the same, on the front they need a 10mm spacer to clear the calipers, they dont have much thread left though, i need some longer studs really! Then just lightly tighten the wheelnuts with the wheel off the ground, do pairs opposite each other, this will centre the wheel as you no longer have the hub for location...The piping is just some ebay heavy-duty flexi!I must update this, have binned the charcoal filter, moved the fuel filter, fitted a glanza strut brace, and have some nice pics from the retro rides show that people took!!!MOT next week, if it passes without needing much spending on it then its time for some new shocks, cambelt service, decat, take out the centre silencer and a rear ARB Then eventual plan, get a shiny, non crashed starlet and swap all the good bits over!!! Edited August 30, 2012 by micrat Quote Link to post Share on other sites
micrat Posted August 31, 2012 Author Share Posted August 31, 2012 Miniman: 7mm spacer just found my 10s in the shed, couldnt remember! 10 didnt leave enough thread for the nuts... Quote Link to post Share on other sites
m1n1man1275 Posted August 31, 2012 Share Posted August 31, 2012 Cool thanks for that. funny really got rover 400 steels on mine at the moment and a set of GTI ones same as you started with!. good luck with the MOT Quote Link to post Share on other sites
micrat Posted September 1, 2012 Author Share Posted September 1, 2012 Cool thanks for that. funny really got rover 400 steels on mine at the moment and a set of GTI ones same as you started with!. good luck with the MOT Haha random, the gti wheels cleared the calipers easily but id put say a 5mm spacer on the fronts as they are high-offset and rubbed on Lock, was running 195 50 15s on them fyi... Quote Link to post Share on other sites

Recommended Posts
Join the conversation
You can post now and register later. If you have an account, sign in now to post with your account.