

Bean
-
Content Count
2016 -
Joined
-
Last visited
Content Type
Profiles
Forums
Wiki
Media Demo
Store
Calendar
Posts posted by Bean
-
-
Yep they do still crack.
-
years ago a mate bought one of the lower power 206 gti's as it was cheap locally. we had a right laugh rallying it round back roads and gravel roads it got absolute death. It was good fun.
-
Sounds a cool place to work with a decent boss! the 206 looks tidy for a track car. ive not seen a gti180 for ages now.
-
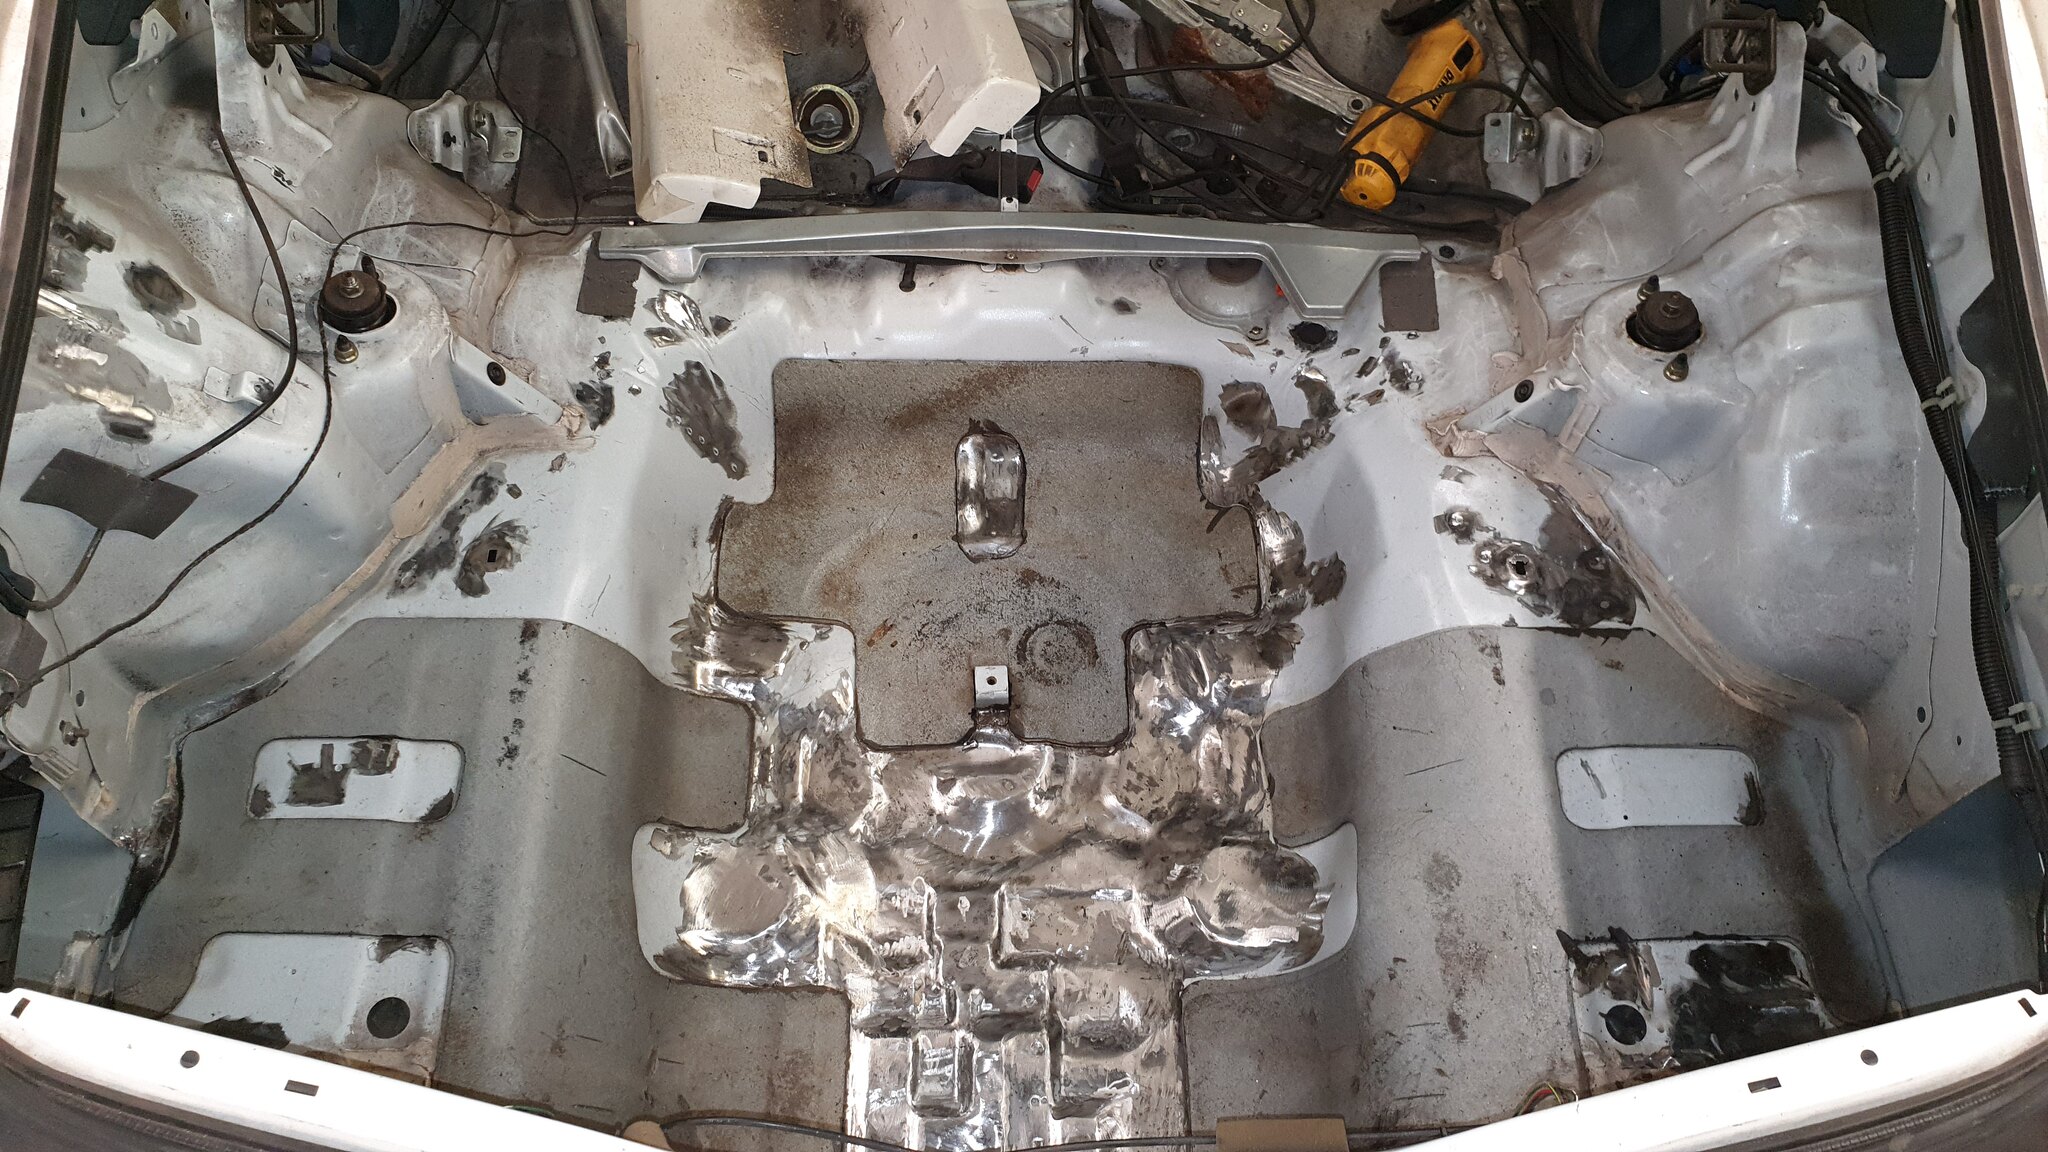
Its been a good while since any updates but i got the floor pan cut out the donor teg and welded into the other car. Then got the car back from my mates unit.
 Dc2 by Bean Beano, on Flickr
and back in the garage
 Dc2 by Bean Beano, on Flickr
I then started cleaning up inside the boot as there was quite alot of surface rust
 Dc2 by Bean Beano, on Flickr
Ground it all to clean metal with a flap disc in a grinder, then used a wire wheel in a die grinder for some areas and a really small wire bit in another die grinder for bits like the spot welds.
 Dc2 by Bean Beano, on Flickr
Wired it all down with degreaser, a few times and hoovered it all out then applyed some Bilt hamber hydrate 80.
I havnt got a pic of that yet. Next to to carry on with the rest of the floor pan then spray it all with epoxy primer. then its all nice and clean. -
You could have a na box there, was the end cover pressed steel rarther than ali?
-
2 hours ago, SKINY said:
Mint condition GT bonnet folks what's it worth

80-£100??
-
The cars looking good mate. You've had a few box issues now haven't you? or is it them same one that didn't get resolved?
-
One of the problems was i didnt have a log book or reg for the bike but after i received the new frame the guy looked through his box of bits and he found the old tax discs from 83-85 for the bike, and these had the reg on.
he was good enough to send me these.
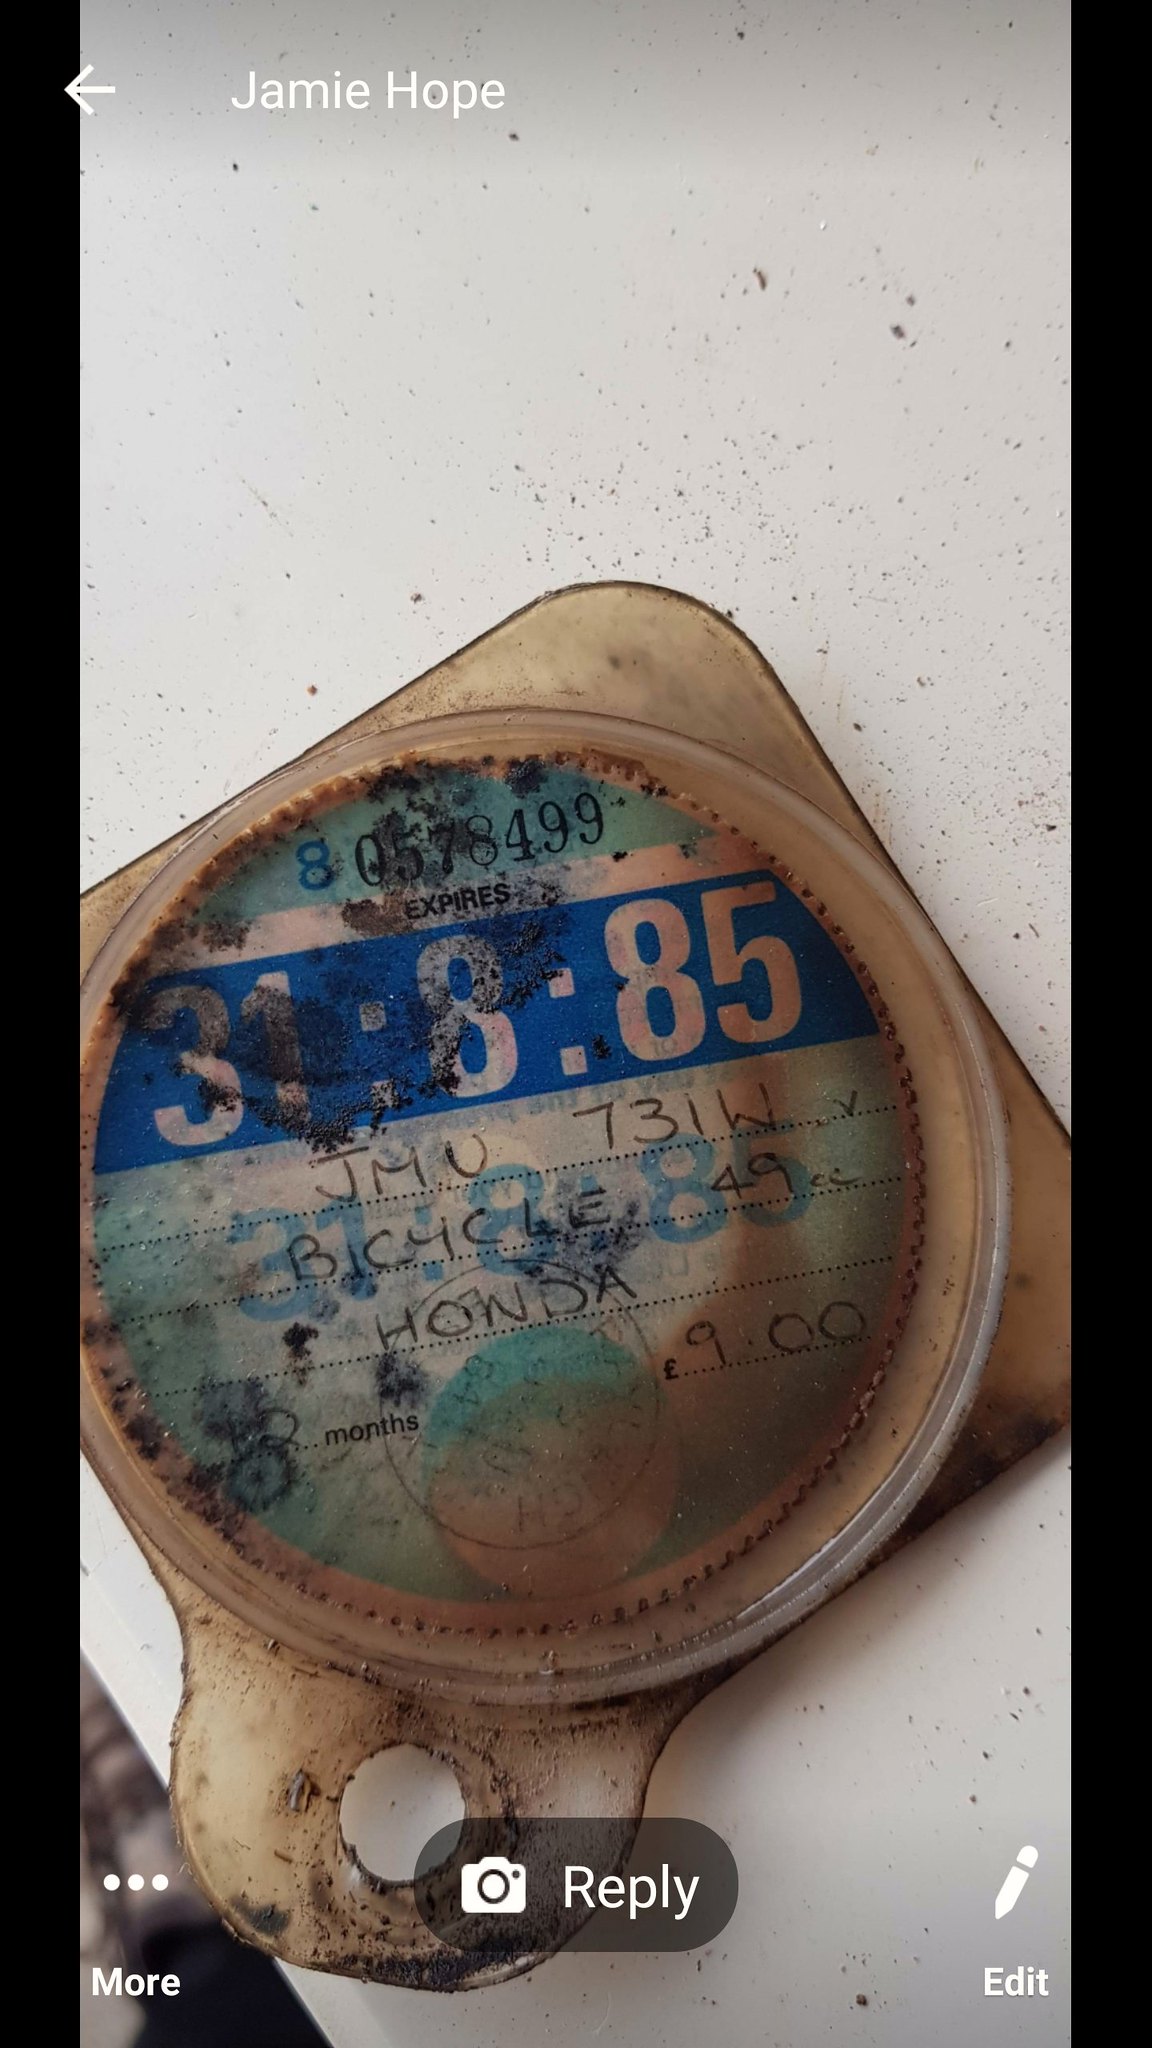 Tax by Bean Beano, on Flickr
So i filled out a v62 form and sent to the DVLA with £25 postal order. about 3 weeks later i got a log book back woo.
A quick check on the dvla site shows it was last taxed in 85 and had 3 owners.
Next i took pics of all the stickers on the frame and sizes and a guy on ebay has drawn them all up for me to reproduce them and they look spot on.
 dfbhdd by Bean Beano, on Flickr
 dfhdsf by Bean Beano, on Flickr
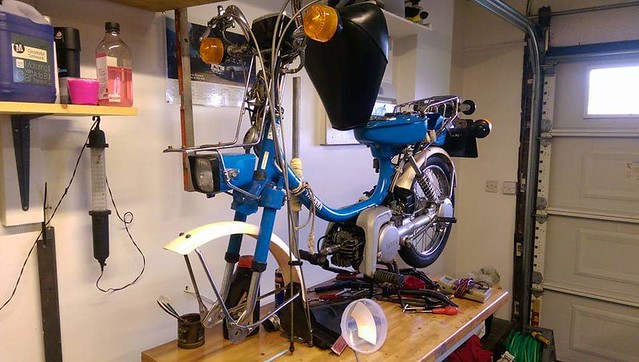
Stripping the engine down.
 Update on the express by Bean Beano, on Flickr
 Update on the express by Bean Beano, on Flickr
 Update on the express by Bean Beano, on Flickr
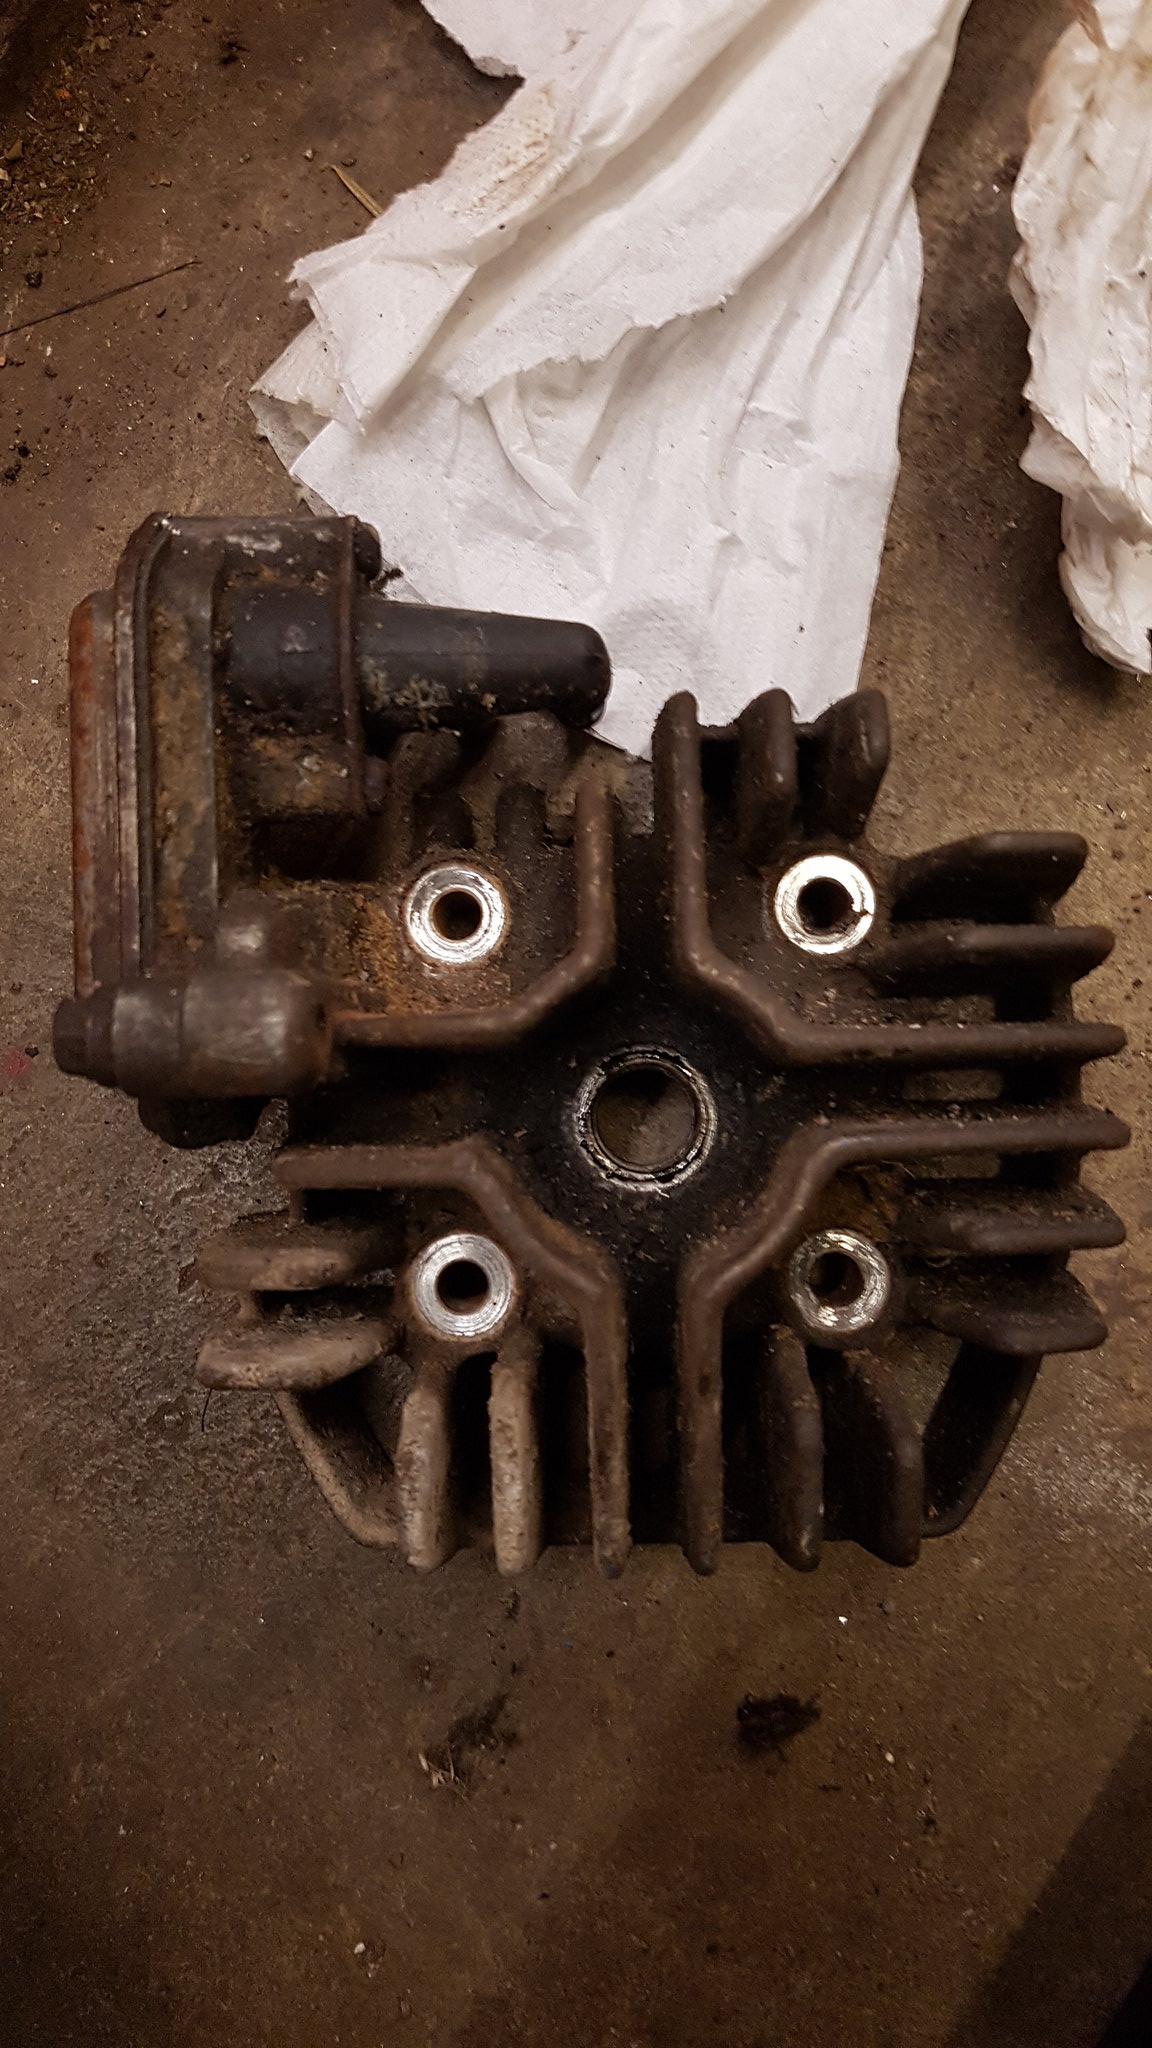
That lump on the side of the head is for the auto choke. im running a manual hand one on this so i removed it.
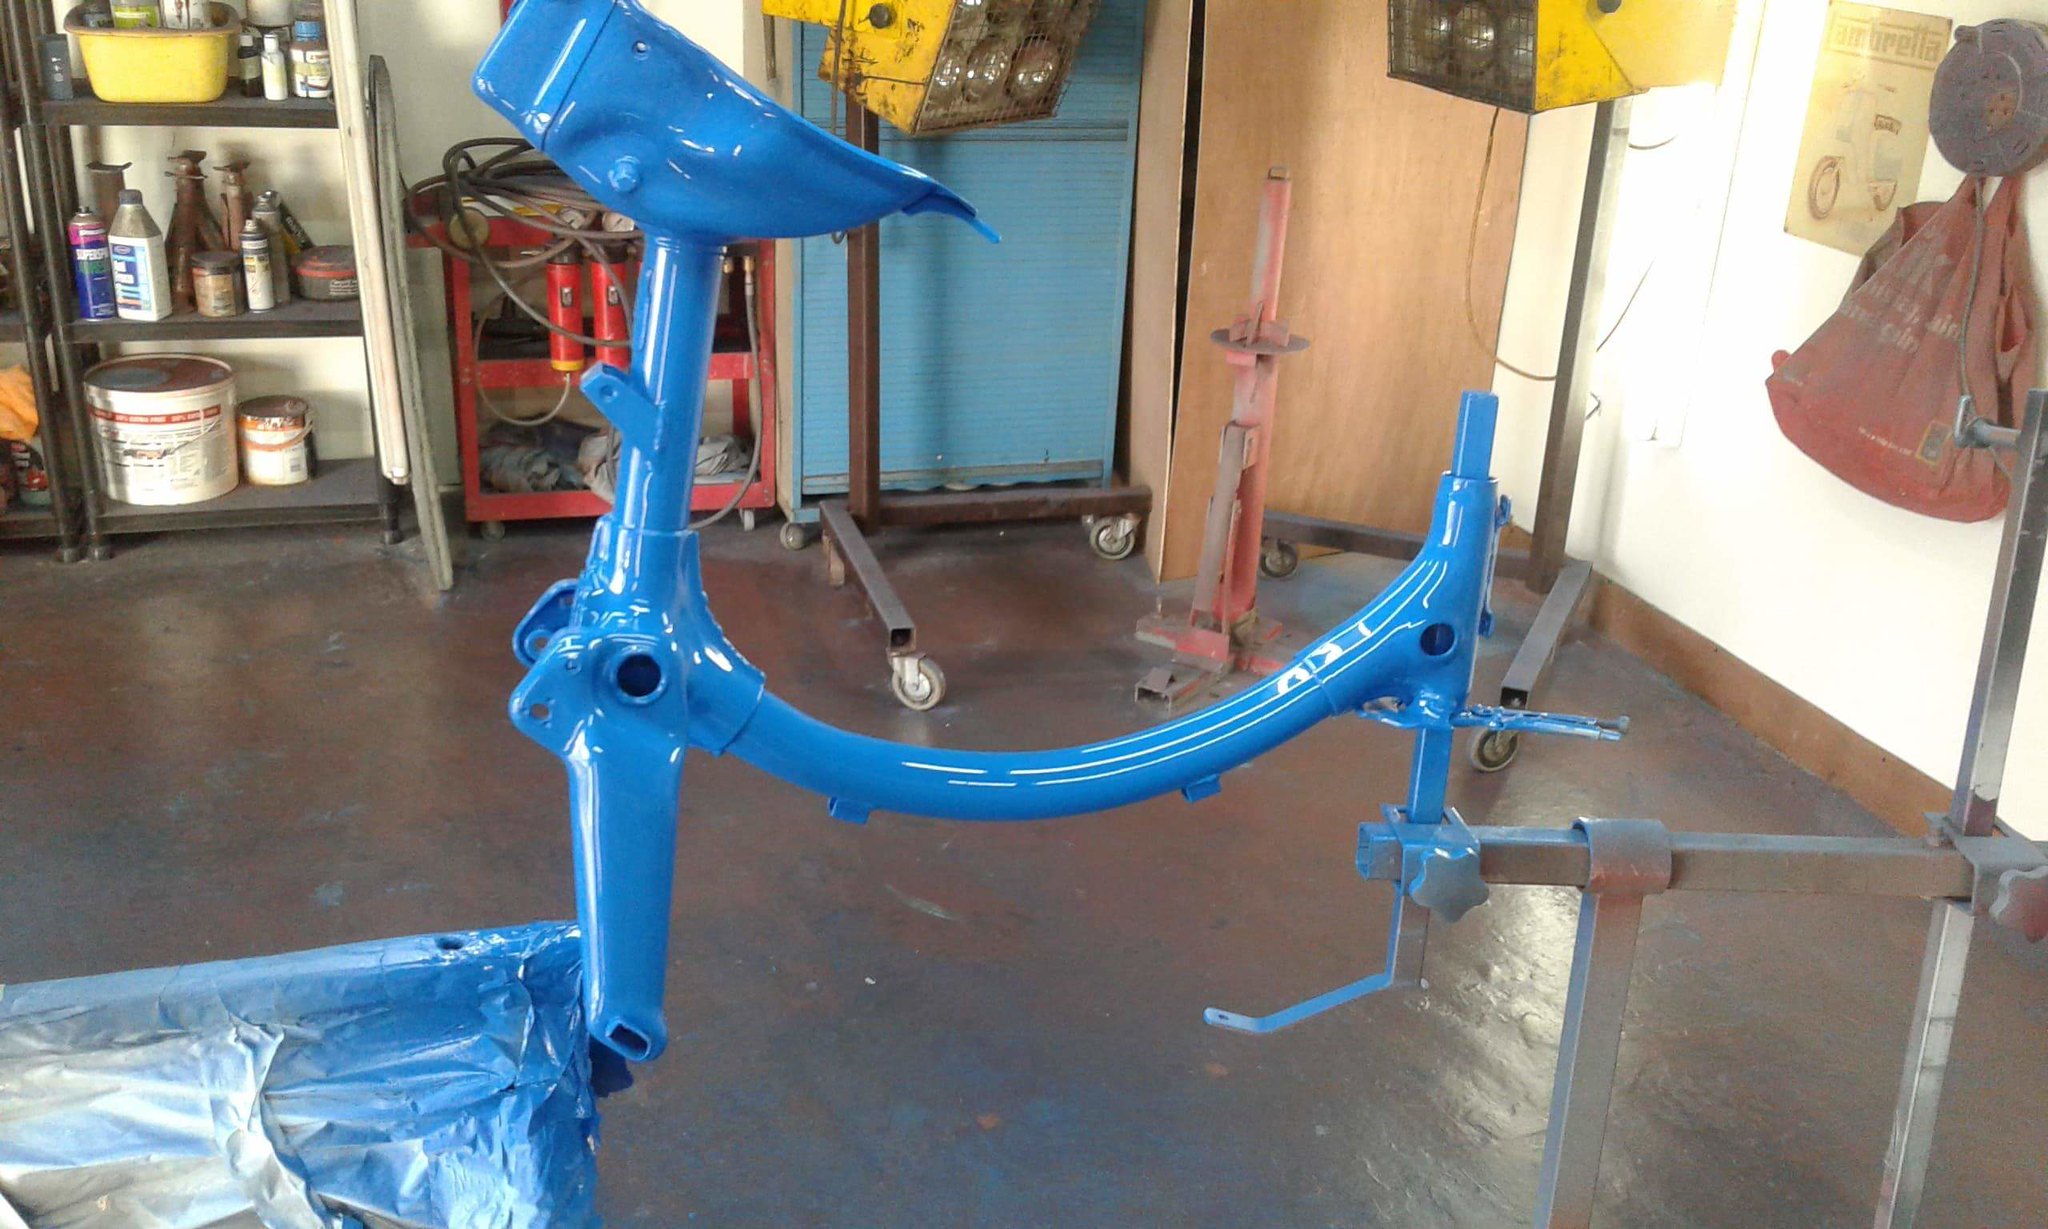
Around this point i decided to get the frame powder coated, but there wasnt a decent match for the original colour, so i peeled off the original decals and took the frame to a paint place in carlisle, they scanned the colour with a laser/scanner thing and found out a match for the paint.
I then got the frame blasted
 Express updates by Bean Beano, on Flickr
I then did a little more prep work and also finished off one of the welds on that round bit in the middle of the frame.
Then i mixed up some 2k epoxy primer and sprayed it
 Express updates by Bean Beano, on Flickr
I had a few issues with the gun pressure and the water trap and my arse fell out. i asked the guy who did the paint work on the gt4 to spray it for me and he did me a favour.
 Express updates by Bean Beano, on Flickr
 Express updates by Bean Beano, on Flickr
 Express updates by Bean Beano, on Flickr
He also clear coated it as he didnt think the paint was that good. I couldnt believe how good it looks, really happy with how it came out. This then set the standard high for the rest of the bike though!
i carried on stripping the bike down
 Updates by Bean Beano, on Flickr
 Updates by Bean Beano, on Flickr
Next i started cleaning the barrel up it was really rusty i soaked it boiling water with bilt hamber deox c and after a few goes and a little wire brushing and scrapping ti came out great.
 Updates by Bean Beano, on Flickr
 Updates by Bean Beano, on Flickr
i got some high temp engine gloss black enamel paint and painted it with a small brush and also some of those ear bud things.
its a bad pic in the sun but it looks pretty good.
 Updates by Bean Beano, on Flickr
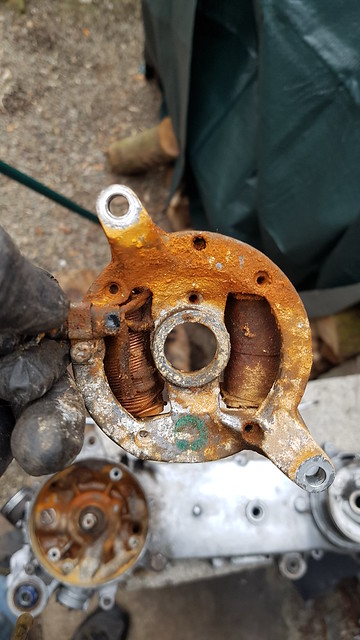
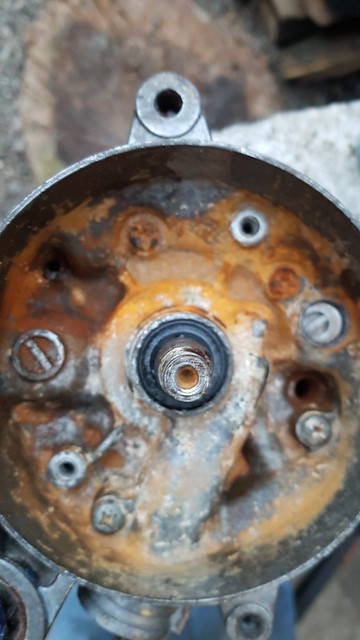
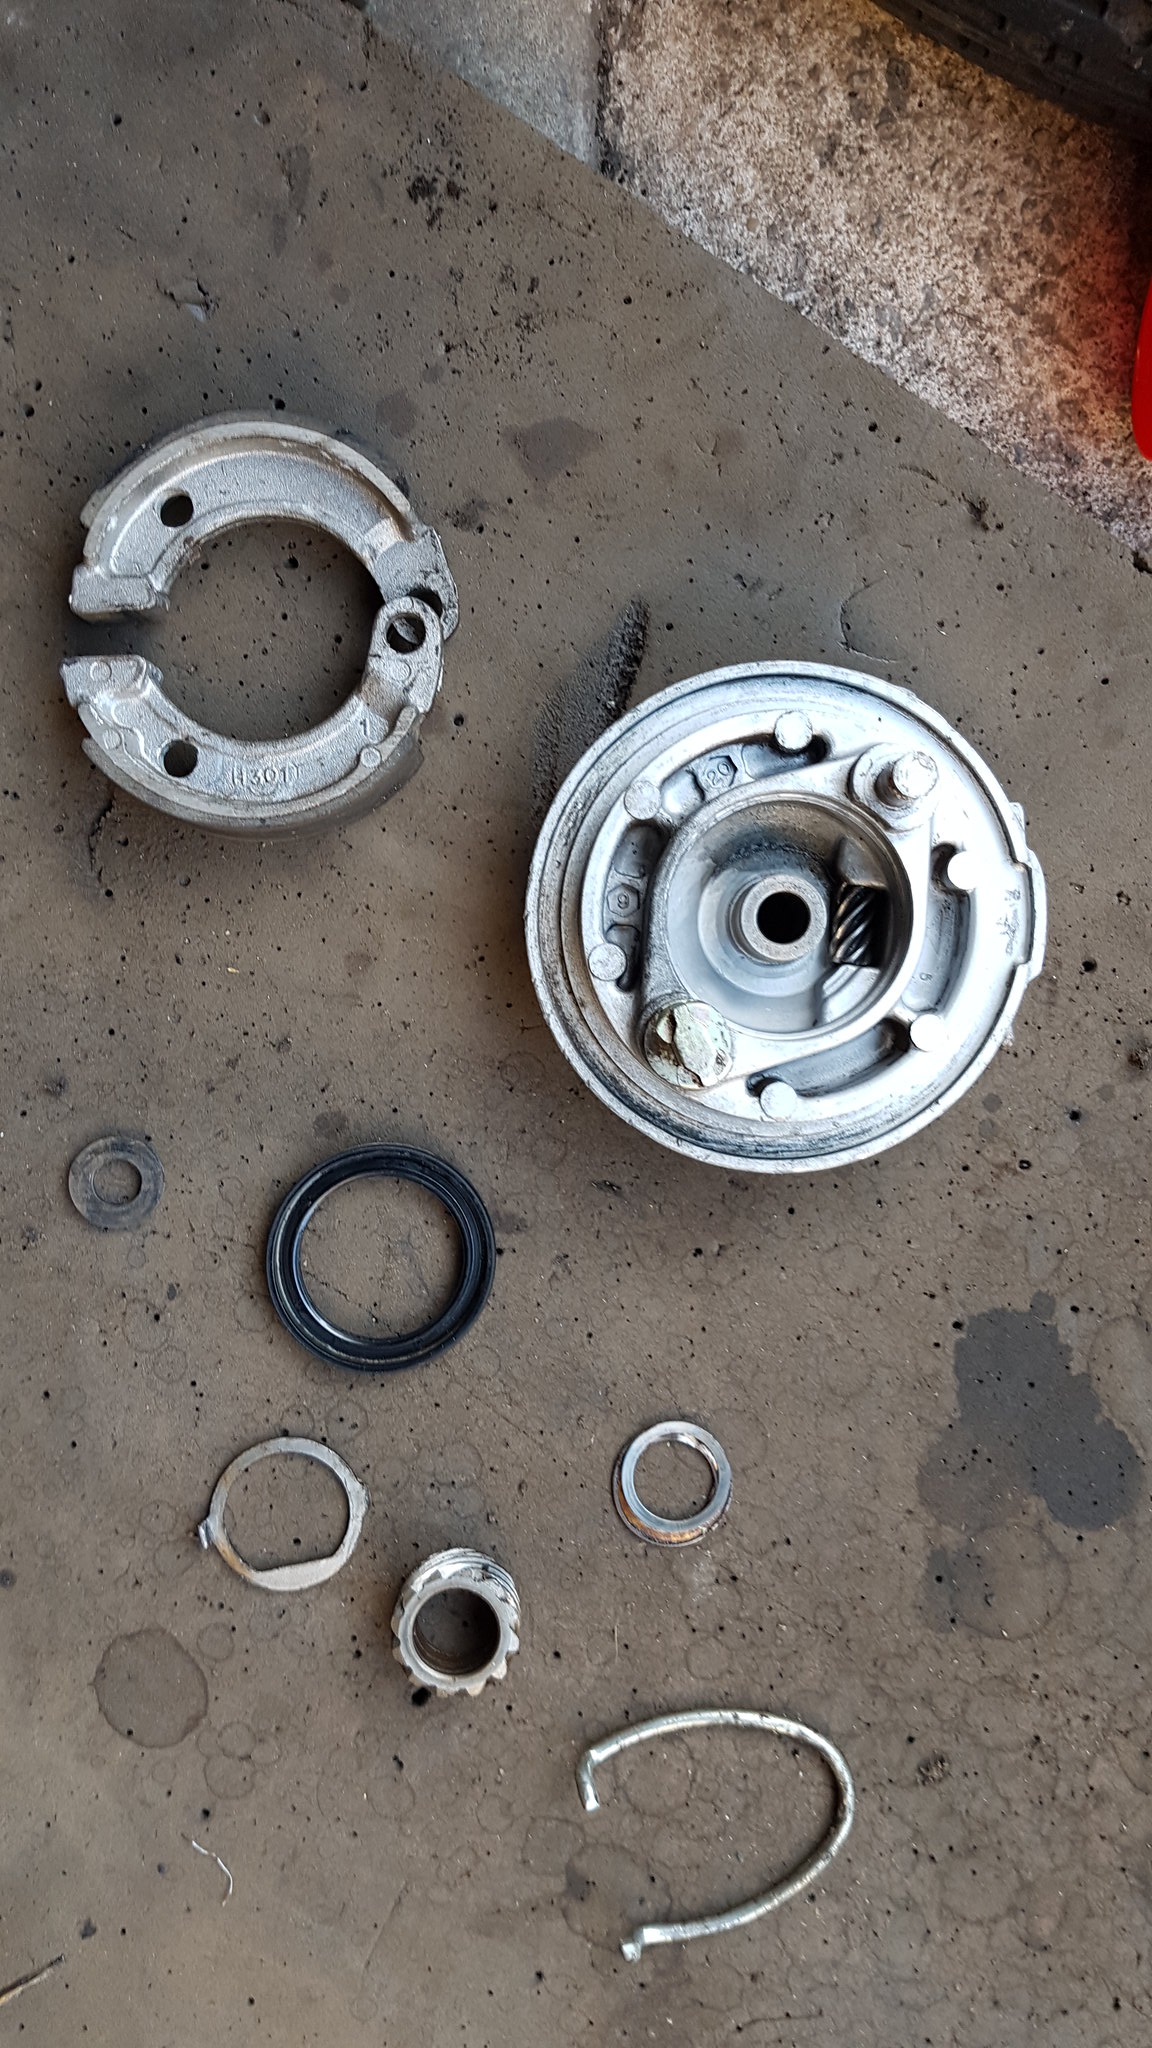
Next was the ignition side of the engine, this looked really bad and maybe had water sat in it at some point.
 Nc50 by Bean Beano, on Flickr
I couldnt find a whole new stator to repalce it all so i just had to clean it up a bit.
 Updates by Bean Beano, on Flickr
 Updates by Bean Beano, on Flickr
 Updates by Bean Beano, on Flickr
I cleaned up the casing and fitted a new extreme crank seal but cant find any pics of that.
I finally managed to find a site to order parts from and came across some nos bits and bobs.
i got these new and my mate was good enough to spray them again for me. they came out perfect.
 Updates by Bean Beano, on Flickr
Now im just waiting for some new fork lowers, the other crank seal, new piston rings and random bits and bobs. Also got a genuine honda basket coming from Japan for it at some point.
Ive also done my CBT for when its back on the road, that was great fun and a really good laugh.
-
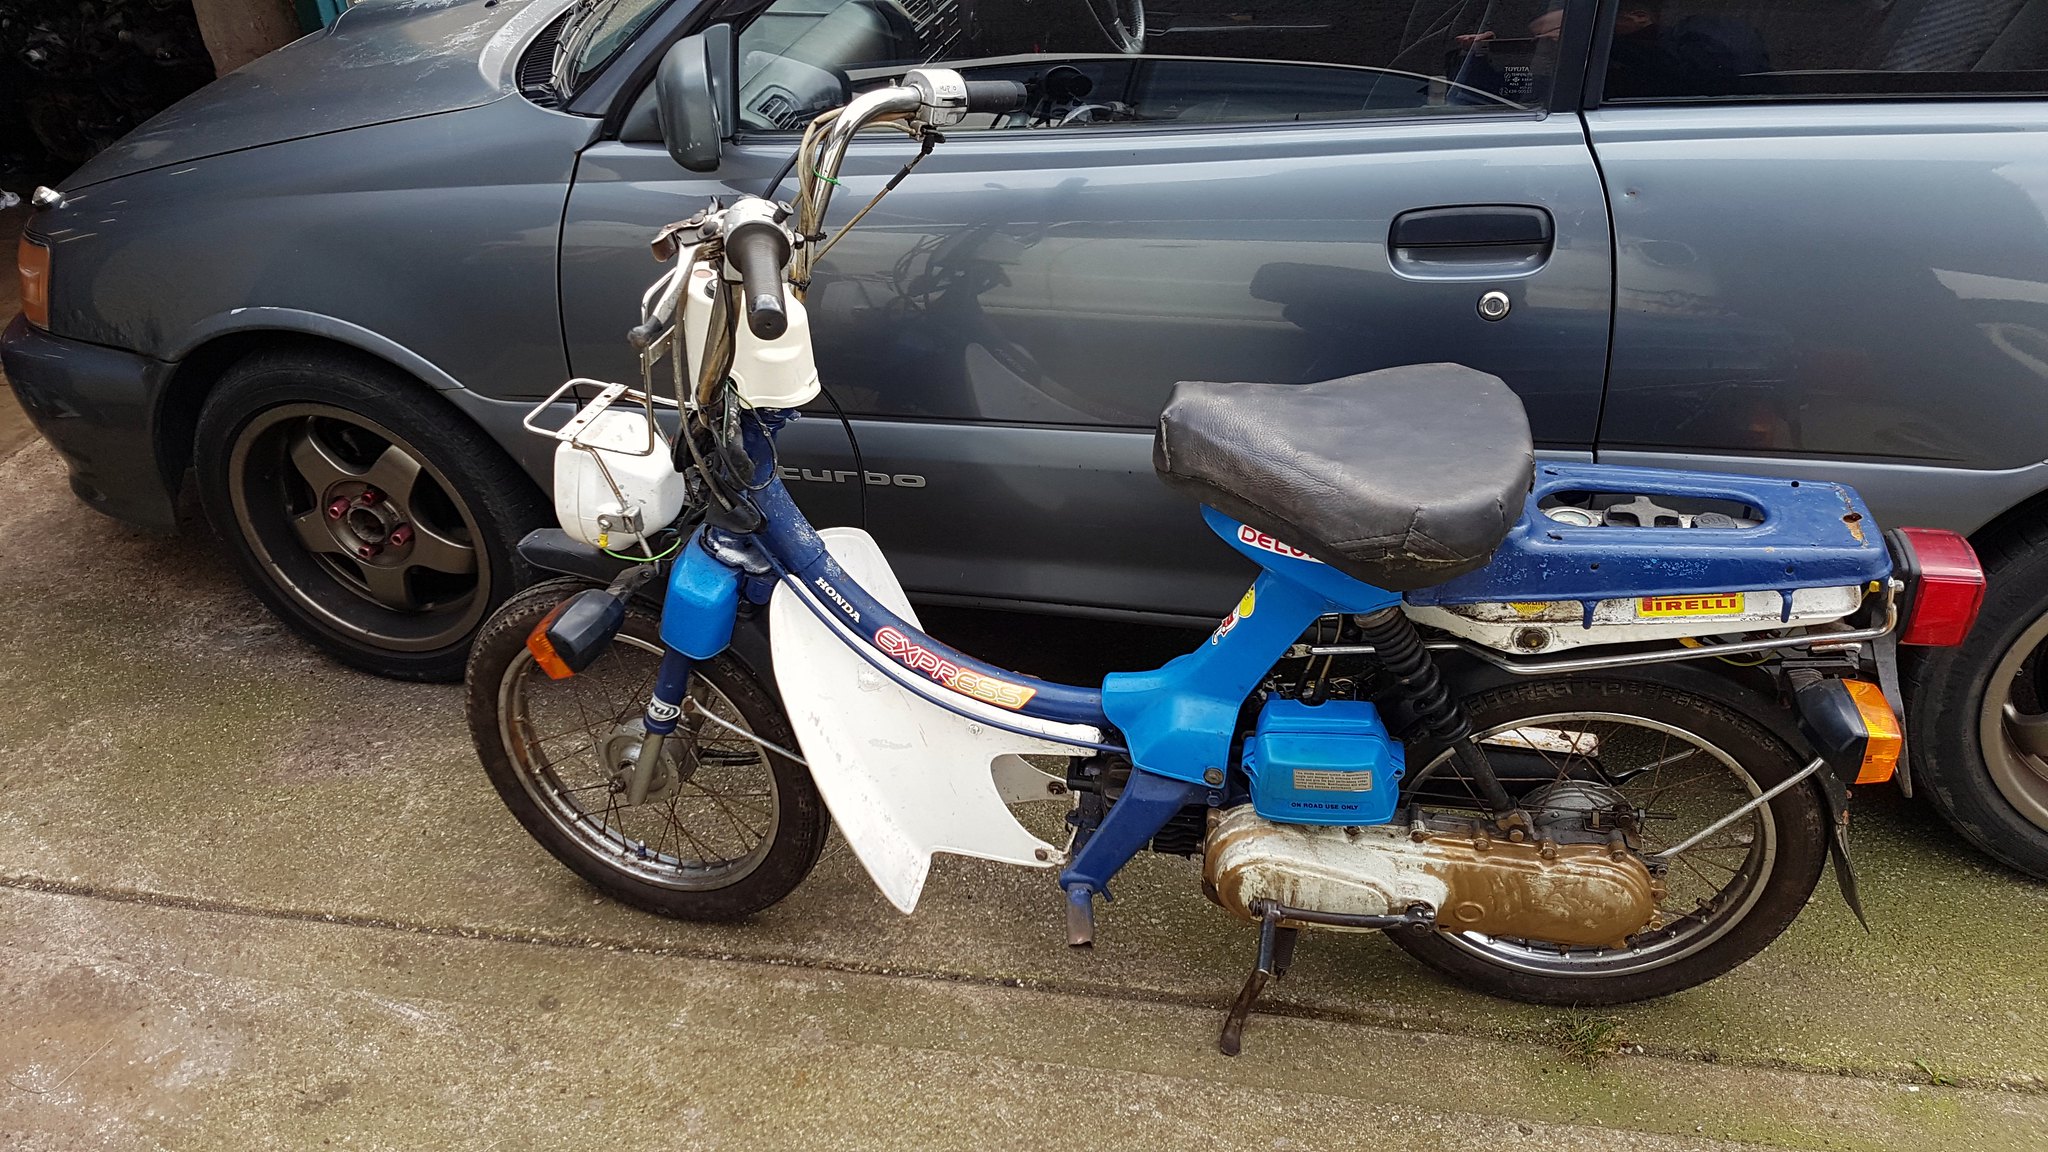
A little thread for my NC50 rebuild.
To start off ive never owned a road going motorbike, just a couple of suzuki RM125's
Starting with this one, something like an 84-86 i think it was, basically it was a pile of shite with the wrong engine and welded frame, never ran but had fuel spark and compression and i sold it on.
Then i bought this 99 rm125 about 13 years ago. it ran ok but not quite right but was all there and in not bad condition and was a decent price. I still own this one but the engine is in bits.

So after never been interested in a road bike i spot this little honda no on facebook just a few miles from my house.
 Advert by Bean Beano, on Flickr
I went to see it with a mate and a trailer, it wouldnt start and looked a bit rough so i left it. then over the weekend the old guy messaged me a video of it running. So i went back and got it. he wouldnt budge on the price but he did give me loads of other spares from another older nc50 he had stripped for parts.
I got all the electrics working on it, and starrted taking it out at night on private roads, it was good fun but mega slow, but each time i went out it seemed to get a little faster. top speed after i fixed the speedo seemed to be 24mph uphill.
a few more pics
 Nc50 by Bean Beano, on Flickr
 Nc50 by Bean Beano, on Flickr
This turned into a project between projects as i was sick of working on the integra and shitty jobs, i enjoyed messing with the scooter as it was so easy to work on and hardly any parts make it up.
i fitted a new bigger battery as the old one was dead and causing the healights to blow as there is no voltage regulator. I also refitted the airbox with a new filter i ordered from japan.
 Nc50 by Bean Beano, on Flickr
 Nc50 by Bean Beano, on Flickr
Managed to pick up a haynes manual for the beast
 Nc50 by Bean Beano, on Flickr
It was an ex scotish library book with stamps starting from 1982
 Nc50 by Bean Beano, on Flickr
under the dials was someones love of bullet connectors.
 Nc50 by Bean Beano, on Flickr
new parts, the speedo cable was seized and so was the front brake cable, they got fixed early on with a new speedo drive gear
 Nc50 by Bean Beano, on Flickr
 Nc50 by Bean Beano, on Flickr
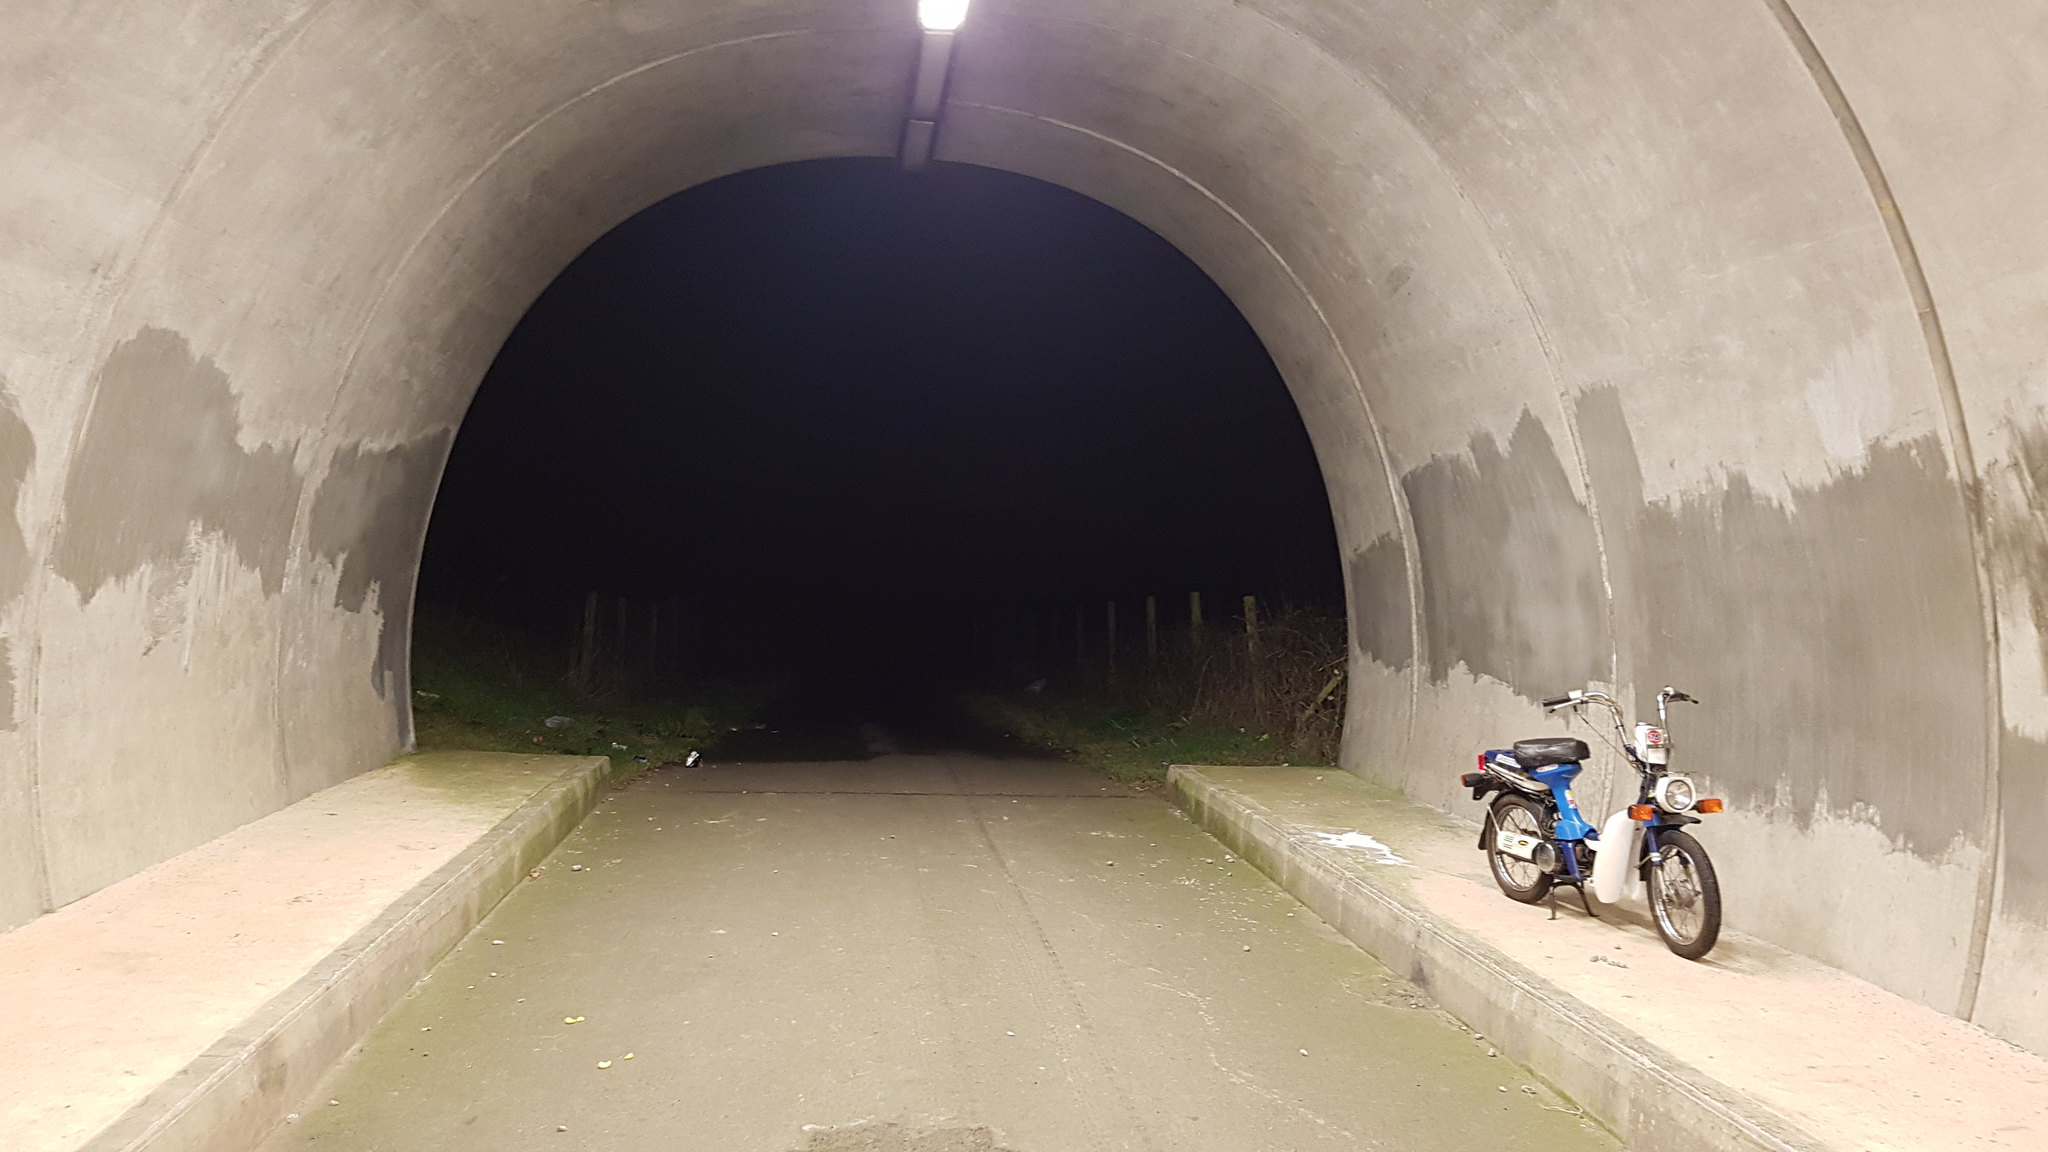
out on a night time ride
 Nc50 by Bean Beano, on Flickr
and back home.
 Nc50 by Bean Beano, on Flickr
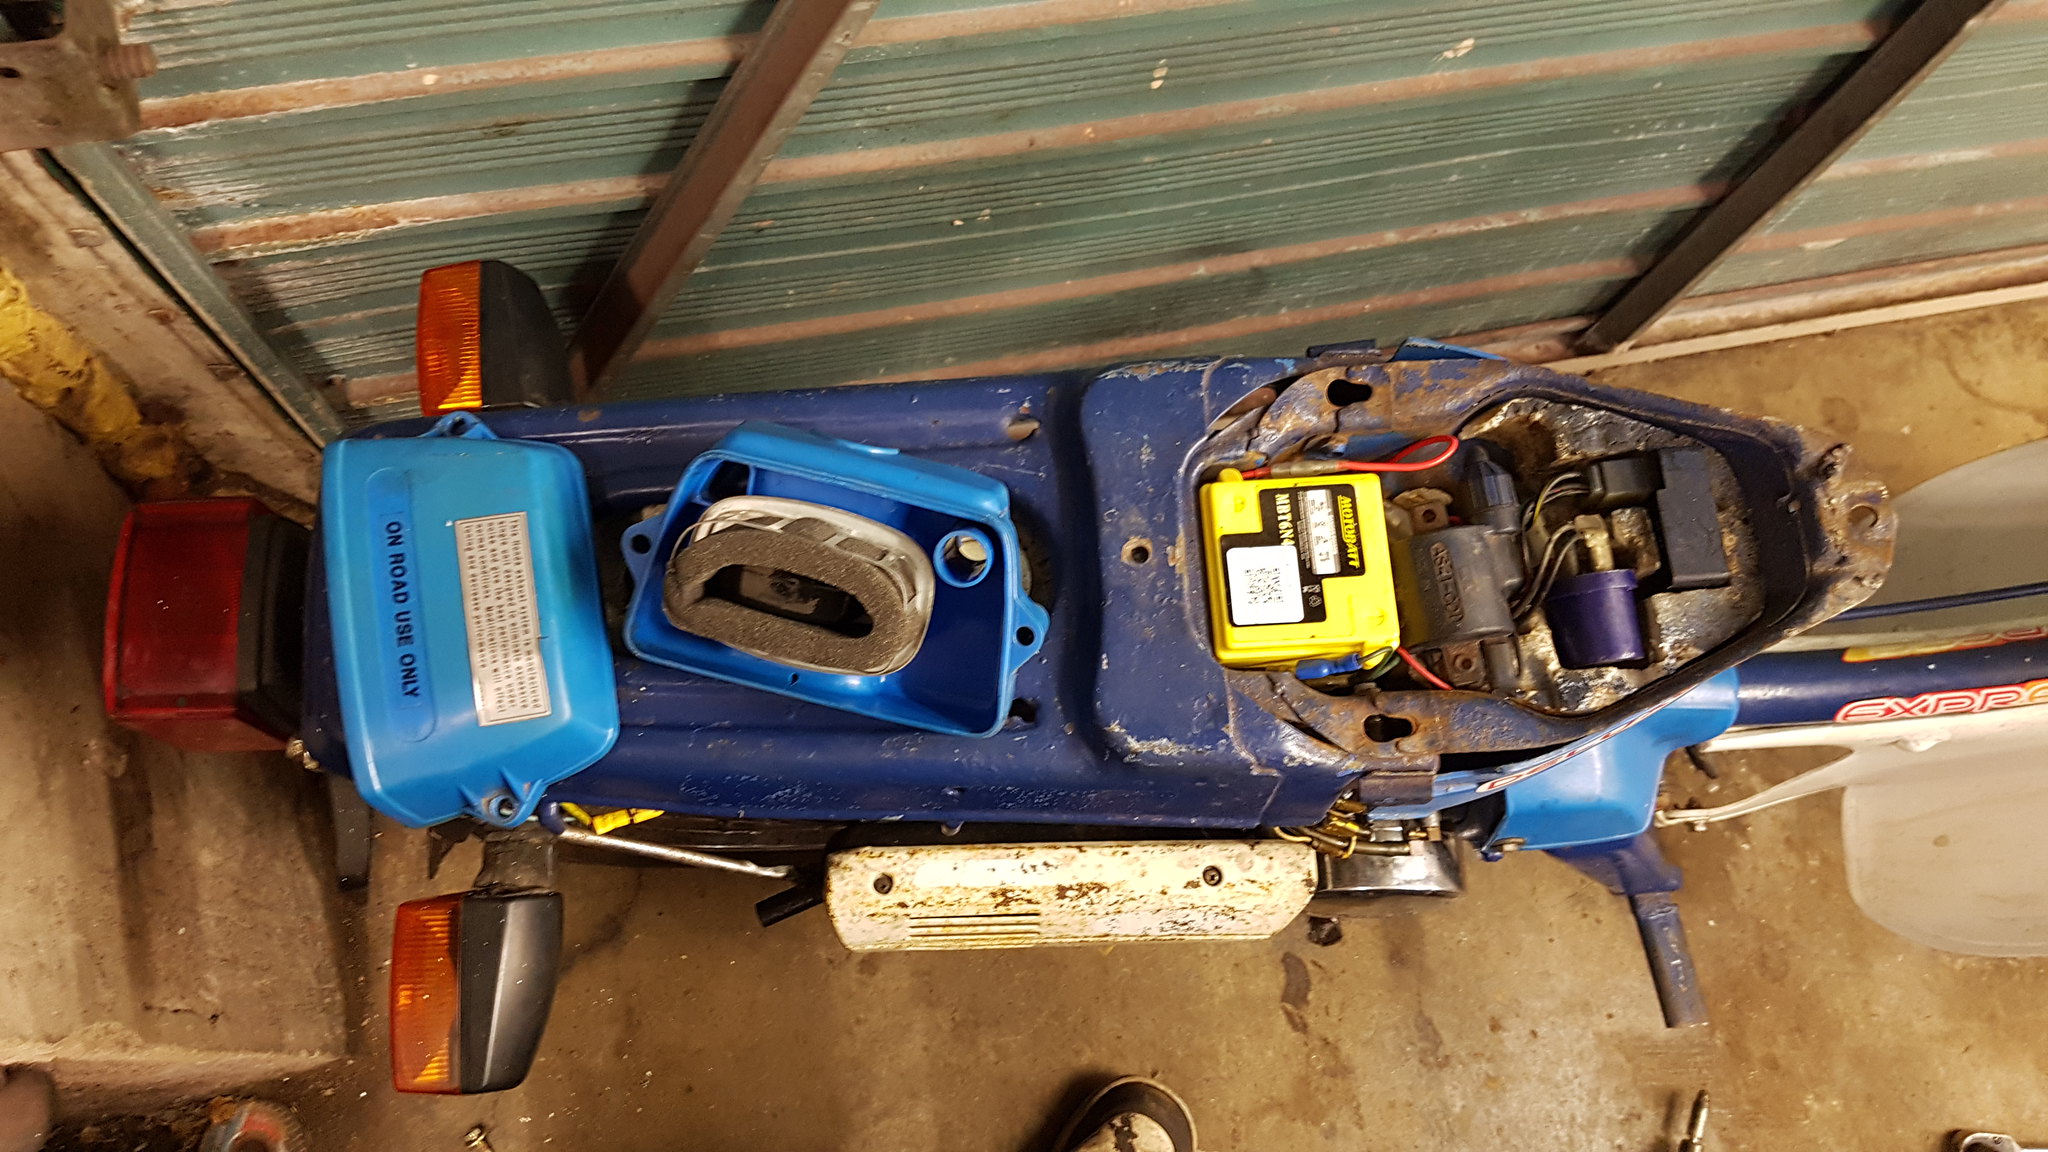
i took the side casing off and stripped it down as it had been painted gold and when petrol spilled on it the paint washed off and looked a right mess.
 Express updates by Bean Beano, on Flickr
 Express updates by Bean Beano, on Flickr
Under the bike you can see the little tool i made to pull the clutch off.
 Express updates by Bean Beano, on Flickr
I picked up another frame as i decided the one i had wasnt good enough as it had been welded and messed about with a little bit.
 Express updates by Bean Beano, on Flickr
This frame came from a guy and he stripped the bike to make a bit of a custom bike using its engine. It was used as a pit bike at Silverstone i believe.
-
Next job!
One thing which has really annoyed me about the car for about 2-3 years now is that the fuel low light is on constantly.
I decided to pull the fuel assembly out of the tank in the nice weather over tha bank holiday weekend.
 Fuel light fix by Bean Beano, on Flickr
I dont think this had ever been removed since fitted at the factory as the protective rubber sticky strip was still over the fuel pump wiring, the bolts all looked untouched and the car was still running the stock fuel pump. I checked the filter and there was only this tiny little patch of debris on it. Nopt bad for 27 years of filtering.
 Fuel light fix by Bean Beano, on Flickr
The tank was mint inside and i run the car low on fuel all the time so no issues there.
So this little metal cyclinder is what causes the fuel light to come on when your running low. it works by containing a thermister inside it and the temperature changes or something when in and out of the fuel in the tank causing the light to come on. So i measured the resistance and compared it to another i had from when i rebuilt the gt4 fuel tank with all new hardware. The gt4 one looked right after a little google search of what it should be but the starlet one was obviously dead. So i desoldered the starlet and gt4 ones and swapped them over, then removed the ring terminal from the starlet one, soldered it on, heat shrinked it and connected it back up.
 Fuel light fix by Bean Beano, on Flickr
 Fuel light fix by Bean Beano, on Flickr
and the replacement soldered back ontop the part which holds it in place.
 Fuel light fix by Bean Beano, on Flickr
I also cleaned up the wires which are used to give the fuel level with some electrical contact cleaner. and connected everything back up.
 Fuel light fix by Bean Beano, on Flickr
I also gave the top of the tank and fittings a good spray with some light grease just to protect it all as it was in really good condition.
 Fuel light fix by Bean Beano, on Flickr
And now i can go back to playing my favourite game of fuel light roulette as the lights off.
 Fuel light fix by Bean Beano, on Flickr
Really happy with this little fix as the fuel light has annoyed me that it didnt work but having not had the problem before i wasnt sure what it was. Im guessing all these cars are getting old now so these sorts of issues will likely become more popular. If your light doesnt come on at all it may also be this issue i think unless you have a damamged wire.
-
Few little jobs ive done recentlyu on EMO.
My distributor was leaking oil and slowly getting worse so i swapped over to another one i had spare. I then came to bridge the diagnostics pins to lock the timing to set it with the timing light but for some reason the revs didnt lower and sit at 750rpm like it should.
I deceided to check the iacv incase it was full of crap. When i stripped it down i found this.
 Emo updates by Bean Beano, on Flickr
The copper disc on the right was broken, i have no idea how long is had been like this but then it clicked in my head that when the car was sat at idle the electric windows were really slow. This was because of the extra load placed on the car but the idle control valve wasnt doing its job or raising up the revs to compensate for this.
Luckily i had a spare iacv as well so i stripped that down and it was still intact. All these spares ive been saving over the years are slowly starting to come in handy!
 Emo updates by Bean Beano, on Flickr
I got the other IACV fitted, fitted the better condition dizzy cap and rotor arm, adjusted the timing andi dont seem to have a leaky dizzy any more.
I also fitted a new set of Mintex 1144 pads ive had for a while in the garage as i knew they were getting down. I fitted the old set 4 years ago so they have lasted well and i think they are a great setup for me for the roads i use.
 Emo updates by Bean Beano, on Flickr
-
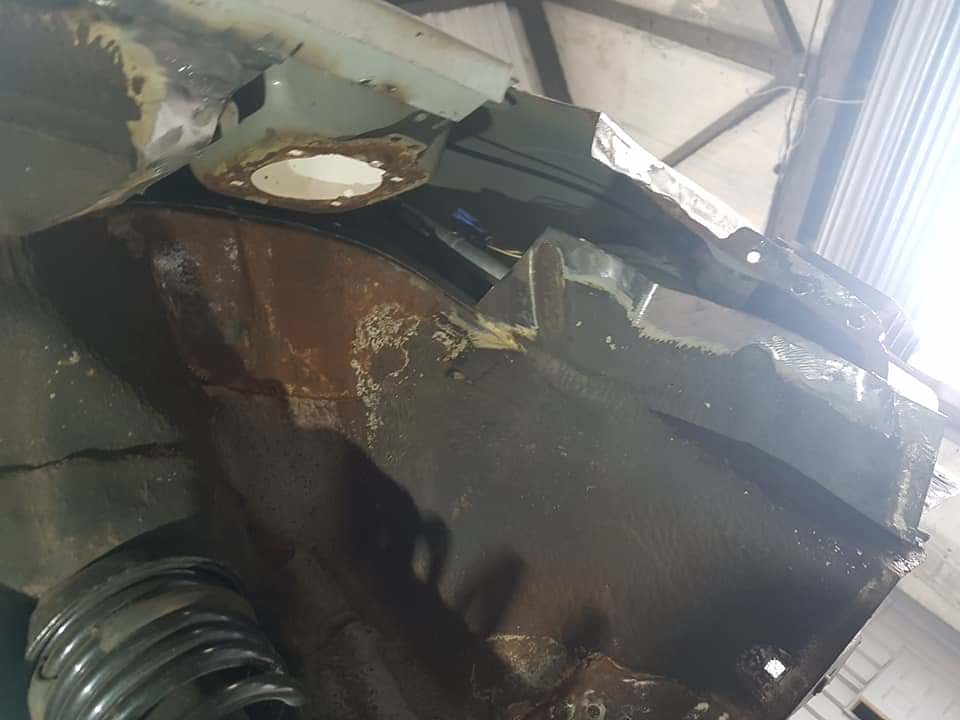
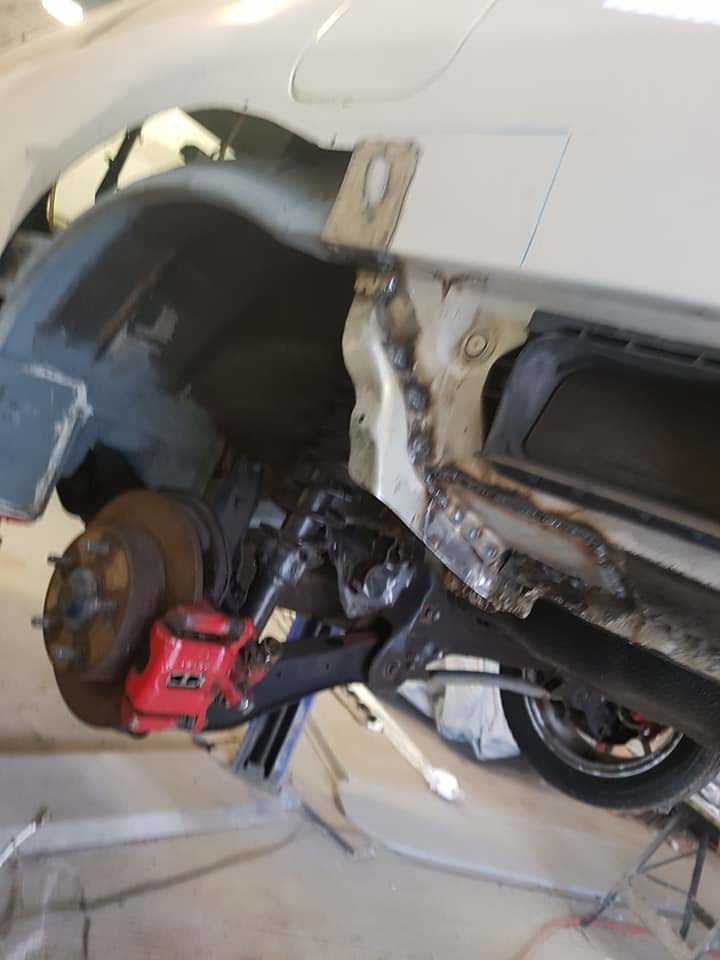
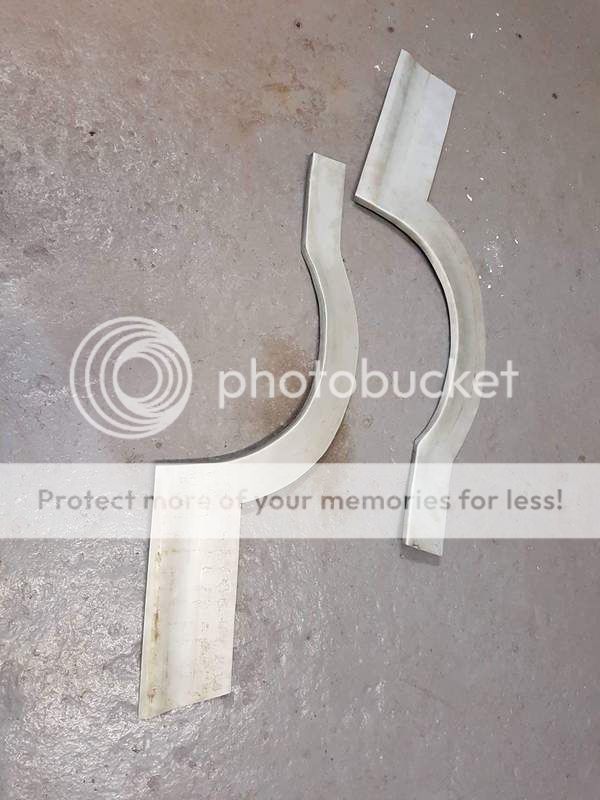
More rot cut out on passenger side
 Teg updates by Bean Beano, on Flickr
 Teg updates by Bean Beano, on Flickr
Not the best pic but behind the bumper bits.
 Teg updates by Bean Beano, on Flickr
and the new arch in.
 Teg updates by Bean Beano, on Flickr
-
On 3/17/2019 at 11:06 PM, Cubertos said:
Really nice metal working
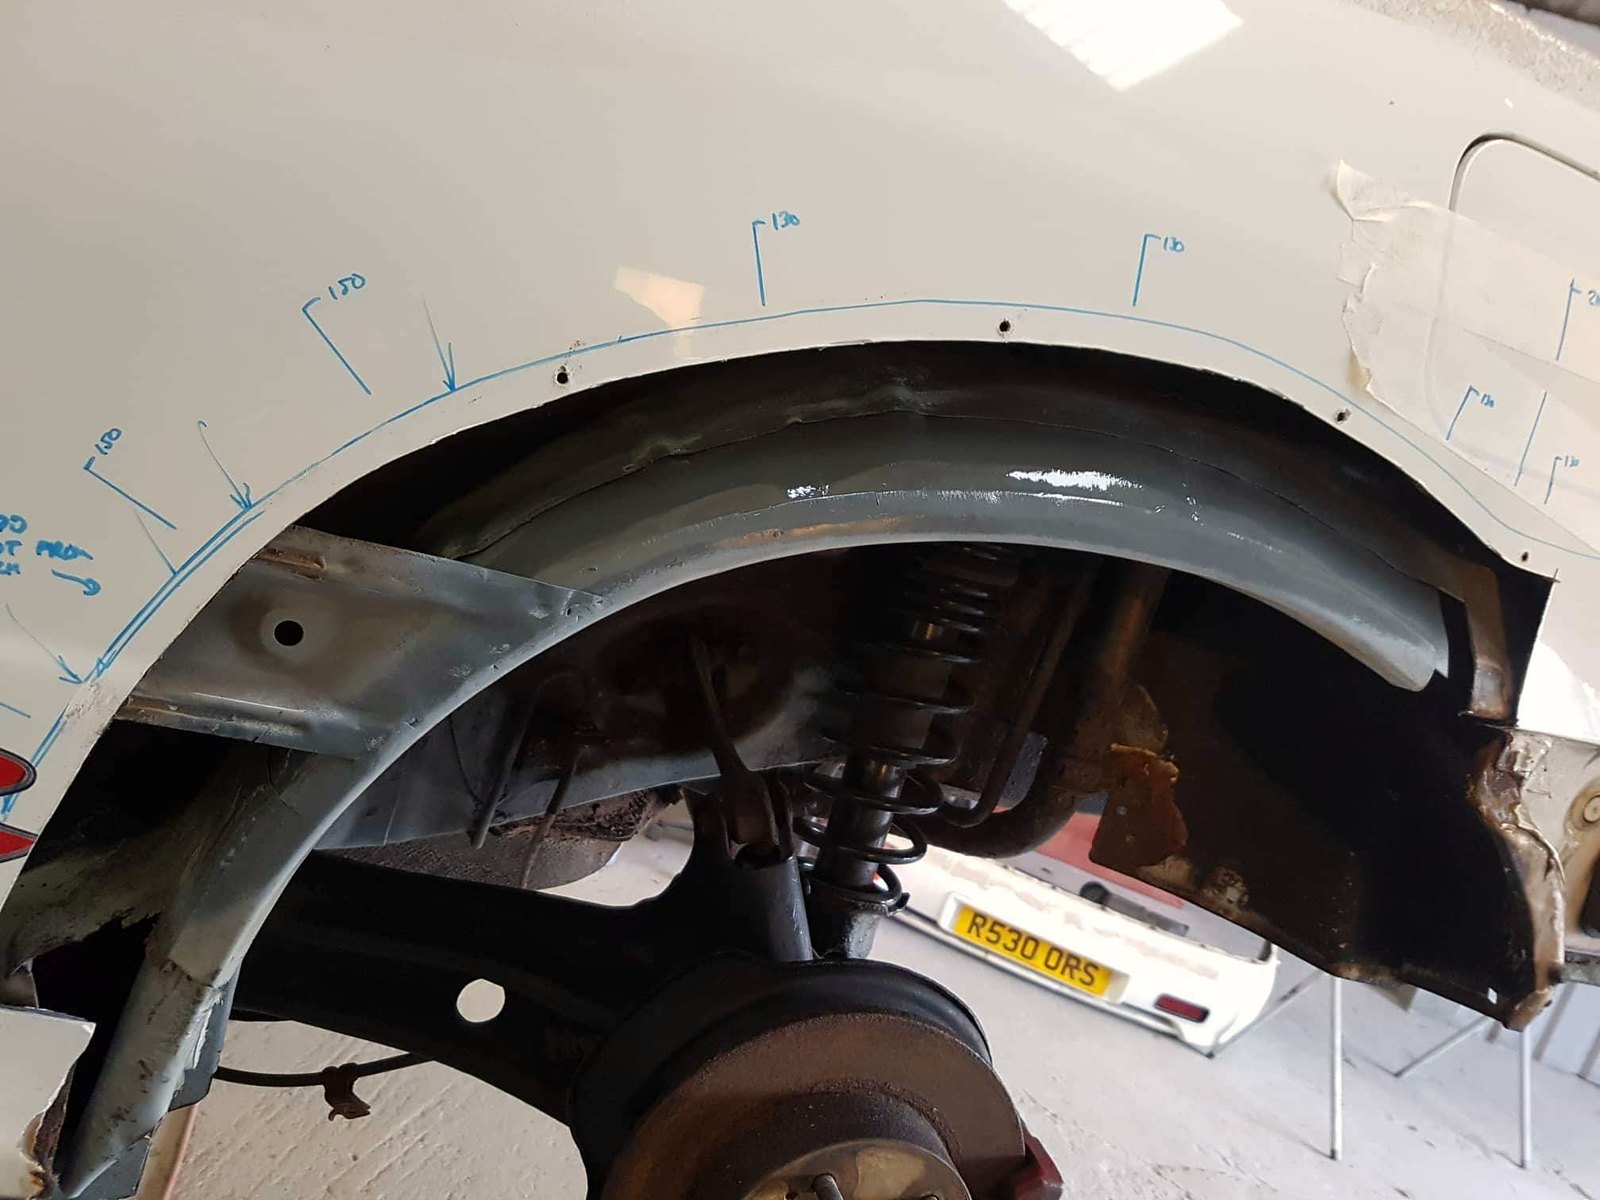
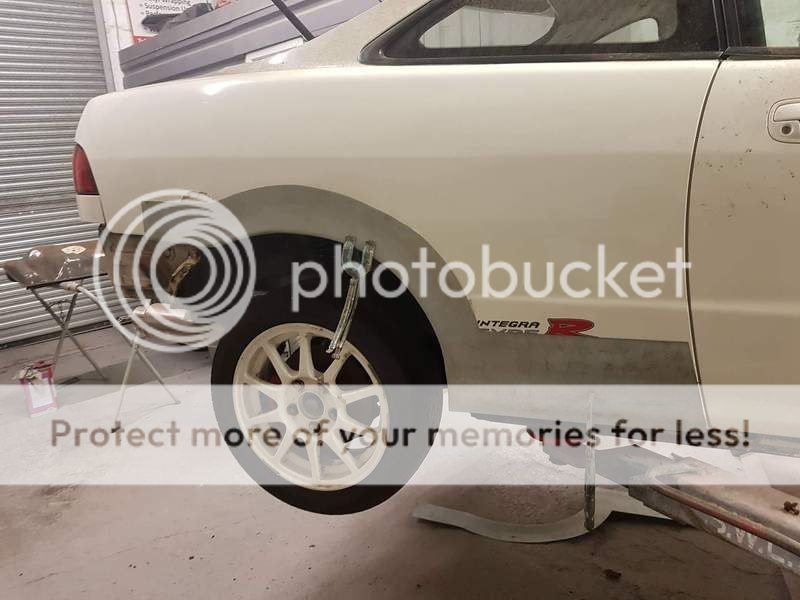
Yeah hes doing a top job.Little update on the passenger side inner arch.
 Teg arch update by Bean Beano, on Flickr
-
alternator charging well?
-
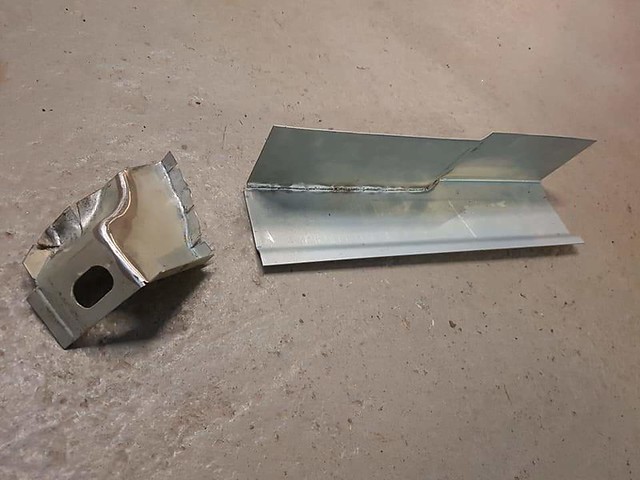
some pieces for underneath including the back of the sill.
 Teg arch update by Bean Beano, on Flickr
and from underneath, you can see hes done a few more pieces including part of the end of the fllor pan, where the rta bush mounts, and that bit on the end of the fllor pan with the strenthener piece in it.
 Teg arch update by Bean Beano, on Flickr
Also redone a bit down from the arch which i think the bumper rests against as it has a rubber bit that sticks out.
 Teg arch update by Bean Beano, on Flickr
-
On 3/2/2019 at 4:52 PM, Calum122 said:
QT50 - Wow, first bike I ever rode that is.
Heres some pics for you mate.
 Qt50 by Bean Beano, on Flickr
 Qt50 by Bean Beano, on Flickr
 Qt50 by Bean Beano, on Flickr
 Qt50 by Bean Beano, on Flickr
-
22 hours ago, Pikey009 said:
I can’t get over how much rot is in that car mate
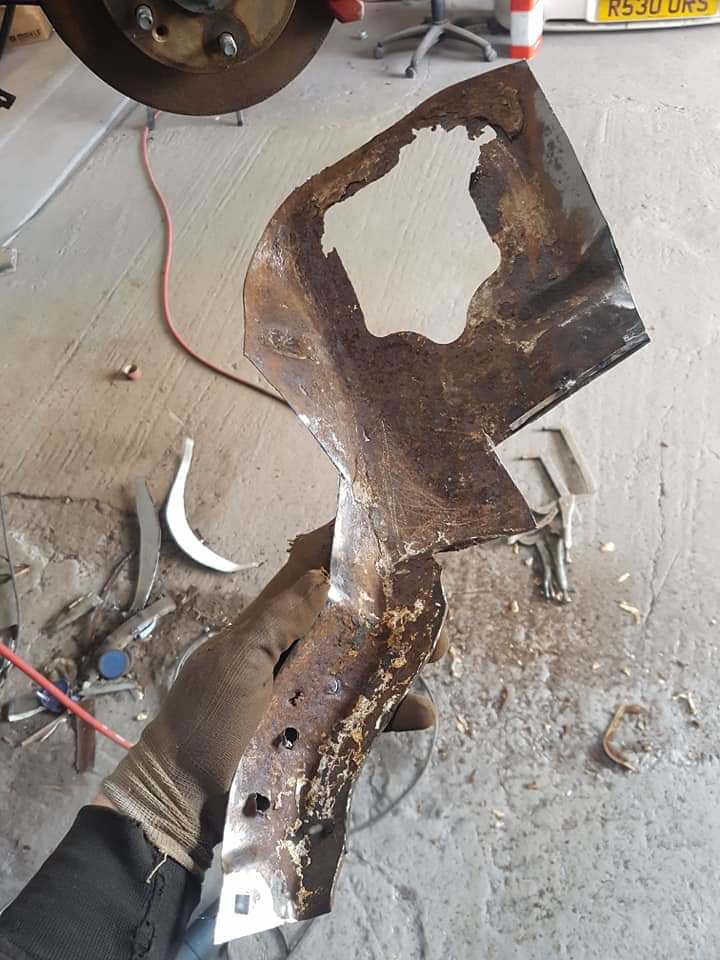
Plenty like this mate, this is what they are like when you cut into them. Most would just get ground back on the arches then lump of filler then looks good for 6 months.
One arch almost finished.
 Arches by Bean Beano, on Flickr
Hes done a great job on this so far even the inner arch hes shaped and done it properly so it looks original.
-
I will give the pics of it for you mate.
-
17 minutes ago, Calum122 said:
Honda Express, lovely! I really want a C90
hahaha yeah. I picked it up from an old guy locally for a good price. Never had a road bike before but it seems fun to fly about on. My dad had a c90 when i was a kid i remember taking it on the beach. My mate had a c70 when we were at 6th form we used to take it out in the fields after they had just been cut in summer, great fun!
I can see the express turning into a full resto job!
My mates got a mint qt 50 with under 1k miles on it, looks very similar to the express.
-
46 minutes ago, Calum122 said:
WOW, that's savage! Mental work going on here fair play to you!
I cant take credit for this my mates doing it now, ive seen my arse with it. Costing a few quid mind, but it will be great to get it back all solid without killing myself underneath it.
Im on with this little project for now, a bit of a break from cars.
 Nc50 by Bean Beano, on Flickr
 Nc50 by Bean Beano, on Flickr
-
Bit more rust guys!!!


new sill clamped in place and a start on the inner arch/ inner sill end

inner arch made and mostly welded in.

i think the inner arch is all finished now but no more updated pics.
-
yeah made from sheet steel with an english wheel, swager, dolly ect.
-
We have updates

-
I only ever took the sump off and there was metal swarf in the bottom of it. Its still sat in the garage though, with a few other engines next to it now haha. Maybe one day, the head was meant to be ported and polished so I could maybe get a bit of a look at that to check.
On the dc2 I messaged my mate yesterday to see how he's getting on and the steel hadn't landed yet
 I asked for him to use Zintec sheet steel rather than the usual steel sheet you can get anywhere so it is taking a bit longer. The Zintec stuff has a light zinc coating on it, like galv but not as thick so that it still welds nice. Its much more resistant to corrosion and better than spraying zinc primer on steel your self. I've left off cuts outside for months before and they don't rust. Its more expensive but its the stuff to use if you want a proper job.


Jam manifold
in Intake, Turbo & Exhaust
Posted
Yes ive got one that was heavily cracked. repairing them is a time consuming job as the cracks all need ground out completely, then it needs preheated, then welded with high nickel content filler wire or rod. then you need to let it cool down slowly then grind anything else back and repeat each time.
I think ive got pictures somewhere, but just had a quick look but not quite sure where they are. however a cracked jam manifold looks just like a normal cracked ct9 manifold i guess.