

navrallystarlet
-
Posts
44 -
Joined
-
Last visited
Content Type
Profiles
Forums
Wiki
Media Demo
Events
Everything posted by navrallystarlet
-

Short Shifter / Quick Shift (C's / TC?)
navrallystarlet replied to navrallystarlet's topic in Starlet Parts For Sale
Now sold, thanks. -
Item For Sale: Quick Shift Item Condition & Description: Used but working. Bought from these forums a couple of years ago, sold to me as C's but may be TC - am open to correction, if you can tell from the photos I'd love to know! Am pretty confident it isnt TRD anyway. Either way, it works well, gives a nice slick shift and snappy throw, and is a straight swap to for EP91 and I believe EP82. Uses original selector fittings, literally a 5 minute job. Price: Last one on here went for I believe £145 asking and seems to have sold within a day, this stands me £115 ovno including the postage. Pictures: Payment & Shipping Details: Paypal or BACS, will be shipped including signed for delivery. Collection in Belfast or Armagh (Northern Ireland)
-
Just thought I would update this. After the accident we replaced axle and fixed the tank and lost heart in the project. We wanted more power and given that due to the regulations in our sport that you can't run a turbo, we decided to get a new project. So we sold this to a guy who now competes in sprints in it. For all I know the new owner is on here. I do regret selling such a reliable solid car. Our new project is a VVC 145bhp Rover 100 which is full of rust and renowned for reliability issues. But we are enjoying the build so far. I do still have a quick shift and whiteline arb that I'm looking to sell. So if anyones interested pm me. I'll get a for sale thread up for these soon.
-
When I did mine I tried using this guide and it didn't work out. Best way is to sit down with both clocks and trace the circuit boards on the back and work it out from scratch yourself. I spent 2 day trying to use a couple of different guides and none of them were perfect. But 10mins at the kitchen table doing my own wiring diagram from scratch and it worked.
-
Any Irish Starlet owners out ther?
navrallystarlet replied to monty1991's topic in The Irish Quarter
I'm from Armagh, Wouldn't exactly have a "show" car though. More of n/a rally slag. -
So an update. After a bit to work to get through MOT (huge hole in the rear n/s arch), we entered our first night navigation in just under a year. It was tight goin at times, trying to get into the swing of keeping regularity again. And we had alot of braking and understeer issues with cheap tyres on the front but we managed a class win. Then I had her out on Saturday past for a lanes event. Some great stages, had a rather close moment with a set of tyres. It was taking me a while to get used to the car being more tail happy as we now have a rear arb fitted and its hardest setting. So the times I was setting weren't great but about half way through we were in a stage in a car park and everything was going so nicely, hitting every apex, very little wheel spin and controlling the slides, UNTILL....... I slid sideways straight into a kerb. That was us out. I managed to shift the axle across to the right by about 3inches, bending the panhard rod which in turn pierced our petrol tank. As always, photos... MOT Prep The Rally The Damage
-
PM sent
-
My last post was removed for some reason........possibly due to having to check the breakers yard first but I should have noted I'm looking to source the parts in N.Ireland. I'm looking a N/S rear stub axle and Panhard rod. And also a decent petrol tank. All to fit a 97' n/a starlet. As far as I can tell all these parts are interchangeable with the glanza. Hoping someone can help me out asap. I have two rallies on Saturday so I need to get the parts by tomorrow at the latest. Would settle for the whole rear axle assembly if no-one wants to split it.
-
Is there any difference between a glanza tank and a n/a starlet tank? I need a new tank for a 97 n/a. Will a Glanza one fit? And will I be able to use the standard pump with the glanza tank? Cheers, Phil
-
Just to show off the new and inproved in-car camera... http://youtu.be/H3IYJS9RZzA
-
Damage to sump guard.... Sad to see something we spent so much time on in flitters but still glad it was there in the first place or we could have been a lot worse off!!!
-
Not good. We had a fairly substantial sump guard on. I'll have to throw some photos of it up. Its totally wrecked. Thinking cap is now on to come up with something stronger but no heavier.
-
Just to keep this up to date. I have a few photos of how we tidied up the rear for storage, a few of the damage to the sump (can't believe its not leaking) and few photos of the new wing and glanza clocks. Just a wee note, regarding the dials I read on here that you cannot swap the trip from a sportif to a glanza. You can, it fiddily work but its far handier than winding the clocks back or forth.
-
I am trying to use the diagram in the link below http://www.ukstarletclub.com/forums/index....showtopic=23508 Not quite sure how to link the earths on socket one. And I can't find this solid green wire. Any help at all would be useful, I have had a look through the tutorials but most of the stuff is for the paseo dials conversion.
-
So yesterday we drove about 90 miles down to North Dublin for an endurance trial. A multi venue event which consists of various special stages at different locations. After only one stage we hit a sturdy gate post in a tight section. Along with the cosmetic damage it bent and twisted the wishbone. Two stages later we bottomed out in a quarry and pushed the sump guard up against the front pipe which gave up a huge blow out at the manifold. But we hammered on and completed another ten stages before driving the 90 mile home again. Proof that these wee cars are bullet proof.
-
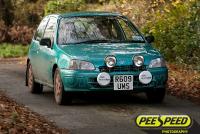
Something a bit different but fairly standard: Rally starlet
-
Spent last 2 days making a sump guard. Problem with these cars is the front pipe hangs low and there is no great place for mounting it at the back. But we took some inspiration from the Paseo Rally car build on here and used a similar design/method. It was an awkward job with a lot of guess work and welding in place under the car, but another job down. Pictures speak louder than words. Now thinking of a possible change of colour for the wheels. Our metallic bronze turned out rather brown, so looking something non metallic and....well....in your face. Red?
-
Glanza Breaking All the parts i have left
navrallystarlet replied to Simon's topic in Breaker's Yard
Do you still have the MPH dials with cover? -
Cheers, not sure what the plans are now. Just sumpguard, new camera mount, possibly better timing gear and then just use her and get more good footage. There is a momo steering wheel lying here that my brother bought for it, but it needs restitched before its used.
-
Update. So I stripped more of the rear trim out to allow access to the rear arches. then drove her 70miles up the road to a mate who fitted a rear cage. Collected her on Thursday night past only to find the hoop was quite close to my head as I drove it home. So I spent yesterday making a new seat subframe for the drivers side. The original one that came on the buckets was made with 10mm think mild steel. Totally unnecessary. I built a lighter frame and took the opportunity to lower the seating position about an inch to give more head clearance. Managed to get it fabricated, painted and fitted yesterday. Also removed the front seat belts to save a bit of weight now that they are surplus to requirements. Also removed rear wiper and motor. We have an event in two weeks, so just have to get a sump guard sorted and we will be sorted. Photos.... The original brute Token MOT shot.... Had her out at a local quarry last night just to check the handbrake still worked. Didn't look too dirty in the dark, but woke up to this, this morning...
-
Rear cage now in. Will get pictures up tomorrow.
-
Basically so long as its road legal you can enter. If you go to the link below it gives the regulations for an upcoming event we are competing in. There are different classes as with any motorsport. The endurance class means the car has to stay almost unmodified and all trim must remain in the car. But we enter the Navigation trial car class which means we can strip a bit more out. ALMC Endurance Rally Regulations
-
Passed the MOT this evening
-
Bad choice of words there by my brother. We didn't actually lose it. The hanger broke mid-stage, and it was bouncing about on the rear axle. So it was unbolted and lay in the back of the car for the rest of the event. Back on now though. We are lucky it didn't get damaged. Got an MOT cancellation, so should be legally back on the road this evening.
-
Yea that is all we use it for. At the start we had stripped out as little as possible so that it would be easy enough to put back together and sell on. But she's for staying, so plans are to continue stripping the trim out. We also compete in night navigation rallies which can last through the night so the heater and some sound insulation has to stay.