

Trevstar
-
Content Count
258 -
Joined
-
Last visited
Content Type
Profiles
Forums
Wiki
Media Demo
Store
Calendar
Posts posted by Trevstar
-
-
8 hours ago, RoyalDutchie said:
The quotes are there for a reason, I do not trust every company on there opinions about things, of course I do not know everything just yet myself.
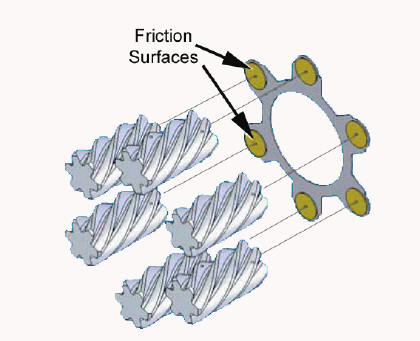
Wavetrac doesn't add a coating to the gear but rather adds a surface between the housing and the gears displayed in the image below(the yellow bits are carbon😞
I'll get back on this topic by about July once I have graduated on the topic of embed engineering🎓🤓. I'm pretty interested in the laws of nature and chemistry. Pretty sure torque is based on friction, but can't guarantee this. Let's postpone this for later.
Ohh right right right, apologies, I see where you're coming from now, I thought you meant they put a carbon coating onto the faces of the worm gears to increase friction between two metal surfaces 😅 that carbon fiber plate is to create preload, but as far as I know preload is something that's more for clutch type LSD's, I wasnt aware that a helical can be preloaded in that way
Torque, friction & traction I will leave to be explained by someone else that understands it better and can explain it better than I can, but in terms of LSD's it's the traction or slip at the wheel/tire that determines where it sends torque. A limited slip differential is how much torque the diff is willing to 'slip' through the wheel with the least amount of traction, at least that's how it was taught
In both of our cases, the mechanism inside our helical differentials doesn't rely on friction of the internals like a viscous or clutch type differential does (friction between the plates when one wheel begins to spin faster than the other because its slipping/losing traction, and sends that torque to the other side). Instead ours just re-routes the torque via the worm gears when one wheel spins faster than the other. So by reducing friction with the superfinishing, I mean reducing the friction of metal on metal components such as the worm gears and sun gears which is where the majority of the wear can take place with prolonged hard use. Basically all I'm saying at is superfinishing and WPC treatment will be fine for our diffs and it won't adversely affect their operation because they don't rely on friction inside the differential, and the worm gears are effectively free floating
But it's different in the case of the wavetrac because its a slightly different setup and uses the carbon fiber plate to add a defined amount of preload, which separates the ends of the worm gears from the casing so it removes metal on metal contact in that area, but the gear teeth are still in contact with each other which can wear over time. But I see what you mean now with plate by if the gears were superfinished, that might affect the preload if the plate is trying to add resistance to the gears turning. But this doesn't apply to us
But like I said, superfinishing is not totally necessary for a diff but it will help extend its working life. I'd recommend it more for the actual gearbox gears though as they're more likely to fail way before a differential, especially if it's used for fast road regularly but it definitely won't save you if you put too much power through it! That's where WPC may help
I'm surprised that wavetrac don't make anything for toyota's though, would be nice to have more options available to choose from if they did
Anyway, sorry for the long post again, I'll leave you alone now 😂 keep up the good work

-
Ahhh see this is where things start to get confusing, where you have 2 companies that recommend different things 🤔
As Quaife suggests the opposite - https://shop.quaife.co.uk/rem
I've had a few conversations with Nova racing (that does my superfinishing), plus a couple with Quaife themselves, and from my understanding with the research I've done, I don't understand why you would want to add friction to a gear when that's not quite how a helical type diff operates (Toyota, TRD, Quaife, wavetrac or otherwise), but especially with a coating that adds friction, surely that means the coating will wear off fairly quickly? And where surfaces are in contact with each other, wouldn't you want both surfaces to work together as best as possible rather than against each other? In my mind it's like rubbing 2 bits of sandpaper together lol
And I guess that also means you wouldn't be able to apply the WPC either if you wanted to as it will effectively blast the coating off, unless they can mask it off or do the process by hand
Adding friction to any gear is not something that I have heard of being recommended in any research I've done or found offered as an after-treatment.
Wavetrac is a slightly different take on a helical type of LSD where they add in a kind of mechanical lock to stop it acting like a open diff when one wheel looses all traction which I can definitely see as being beneficial (although they don't make anything for toyota's for some reason?), but to go on and say Quaife as an OEM manufacturer has inconsistent performance is a little bold, but then again both wavetrac and Quaife have lifetime warranties, they both have a long standing rivalry, and they both have people that swear by them, so perhaps we are being sold bullshit from both sides?

-
Yeah, superfinishing isn't really something you can do at home lol
The gears inside your diff don't work by friction but by torque biasing by design of the worm gears which sends torque to the wheel with the most resistance when they start to spin at different speeds, provided both driven wheels have some resistance, otherwise if one wheel has zero resistance (if one wheel was off the ground for example), it will act as an open diff
In a diff, when you travel in a straight line everything inside the diff is spinning together as one, but once you start to take a corner and things start spinning at different rates, that's where the wear starts in the diff
The helical LSD you have is ideal for road use because its less harsh, has smoother engagement and it can be fitted and forgotten about because doesn't need special maintenance or special oils. If it relied on friction you would need oil with friction modifiers that need changing more regularly.
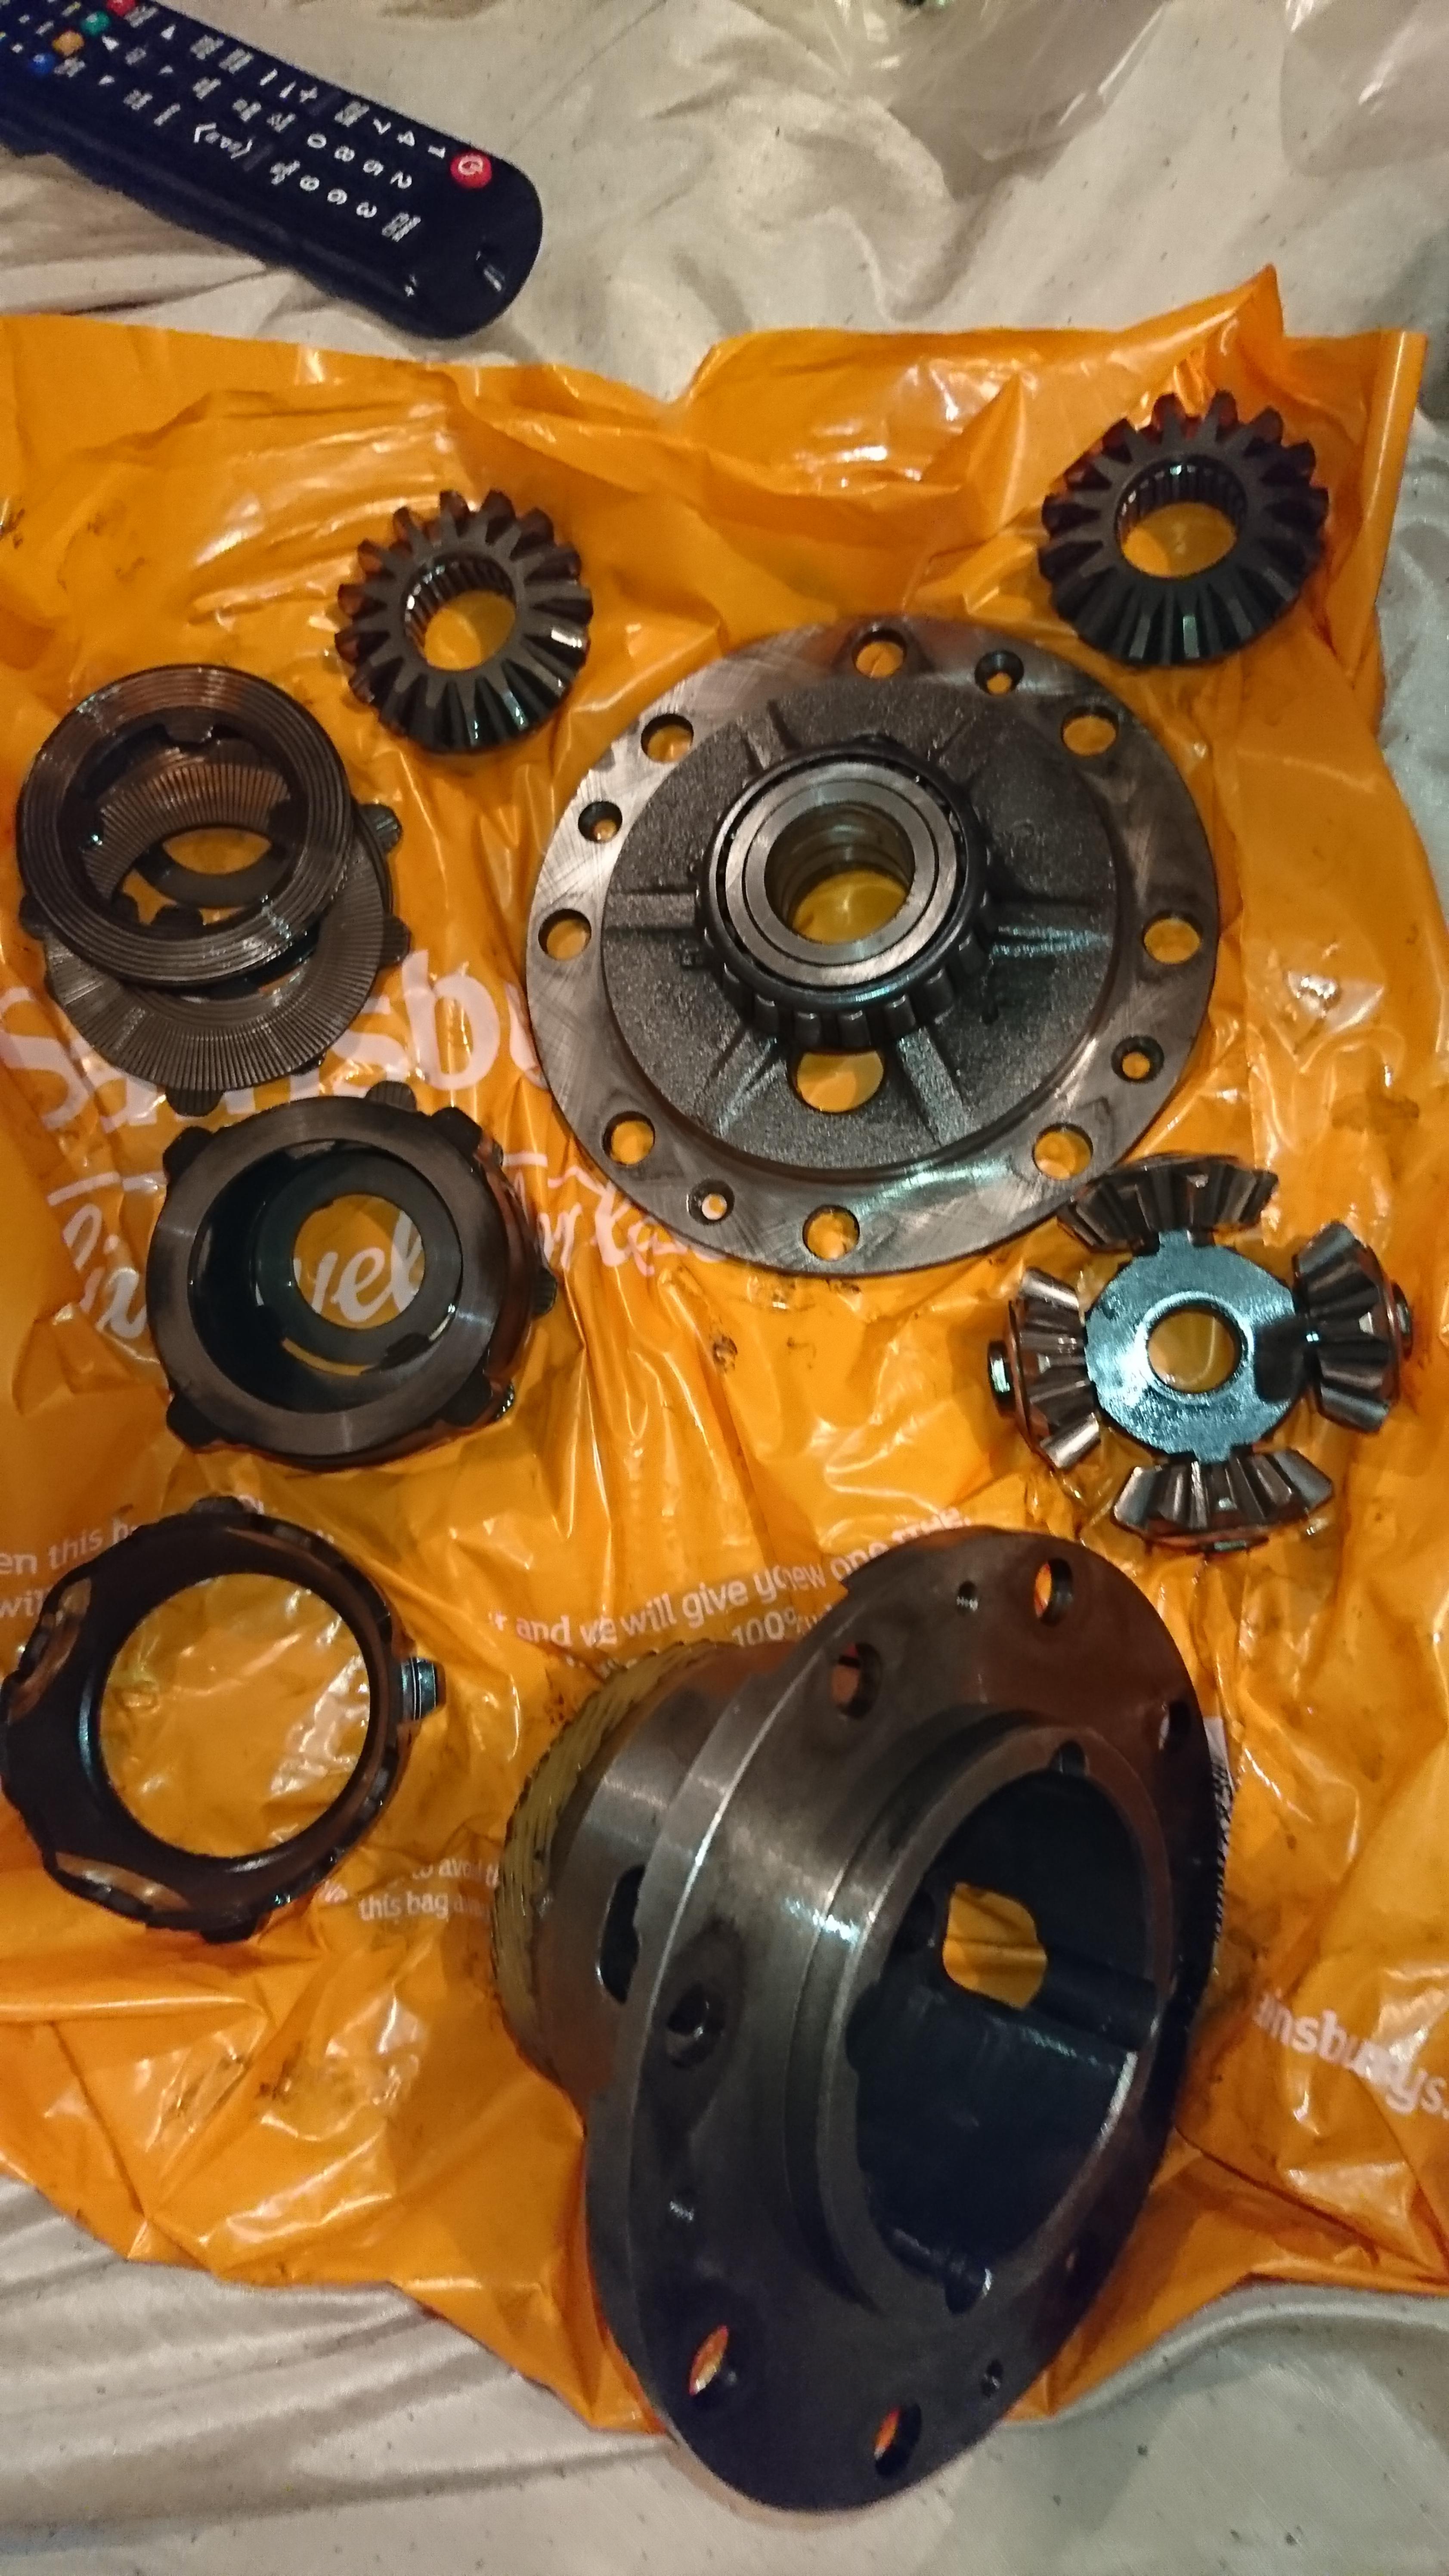
A clutch type LSD (like the one pictured in my post above) on the other hand are best suited for racing, and you definitely do not want to polish the clutch plates because these do rely on friction (hence why they need special oil and eventually wear out & need rebuilding. This is why I sold it and got a Quaife LSD) but the planetary gears certainly would benefit from being superfinished
If we were talking about a viscous LSD then that's a totally different story
Anything metal that spins at high speed and high torque, whether it be a gear in a gearbox, crankshaft, or even a camshaft would benefit from superfinishing since it reduces friction (= less wear, less stress/metal fatigue, and lower temperature), which makes it turn with less effort and have better oil retention to maintain a barrier between the two surfaces, but in terms of a gear, it also makes it engage smoother. I mean we're talking about chunks of metal teeth forcing against each other while spinning however fast. The only reason that it's not often done by manufacturers is because it takes time, and time is money
Imagine you have put in hours of designing & development to make the components for a diff or a gearbox, you got to get the raw materials which has to go through heat treatment or a forge which takes some time, machining which takes even more time, then assembly, but this could be done in a day or 2 for a major manufacturer. Then add superfinishing into the mix where you got to put all the pieces through a machine that has to run for 12 hours at least, and large pieces have to be put in separately otherwise they can damage the other pieces. Then add in WPC treatment which I imagine would take a little while also
End of the day though, if you're unsure, the best thing you can do is ask someone that actually does the process you're considering and/or someone from a company that knows differentials. But truth be told, the chances are it will probably last many years & miles without any kind of treatment necessary, just depends on the amount of abuse & miles it receives, how much you care for it, and if its something you can afford. Ideally all the gears in the gearbox should be done to get the true benefit anyway
(apologies for the long rambling post, this is just my educated view on it 😅)
-
4 hours ago, RoyalDutchie said:
I'll check the super finish, is it about the same as WPC or does it go about the treatment in a different way?
It is similar to WPC although it doesn't increase strength as such, basically they put it in a tub of extremely fine abrasive stones and vibrate the tub over night and it leaves a highly polished & extremely smooth finish that reduces friction (less wear and fatigue, which can cause cracks), which in turn reduces drag meaning less effort to turn the gears (less wasted power in other words). And it only removes a tiny miniscule amount of material
Given the choice between WPC or superfinishing, ideally I'd actually say a combination of both (WPC can be done over superfinishing), especially if your putting a decent amount of power through it than normal. But I would recommend to anyone to get superfinishing done at the bare minimum if they have the gearbox apart just to increase the longevity of the gears
I've had my gears superfinished on my C52 gearbox but not WPC treated since I can't find anyone near me that does it, and mine is a non turbo build so I won't be putting a mega amount of power through it to really need extra strength
-
Yeah the quality control of the cams will forever be a mystery, but I can't say I've personally ever heard of any breaking or having any issues

Once you have removed the screws, get something like a chisel then gently & evenly tap around the edges of two halves to wedge them apart and separate them

Not that your LSD is likely to wear out any time soon, but if you can, once it's apart I'd suggest looking into getting the gears super finished so that they mesh with each other more smoothly to give them an easier life and last longer, same with the gearbox gears
-
@snails ep91 @Sam44 Cheers guys!
The cylinder head probably has a couple weeks worth of hours put into it, even the dremel I bought specifically to do the job is starting to act up and make strange noises so I don't think it can take much more 😂
But if something is gonna be done, it's got to be done properly! Especially when most of the time people give up tuning n/a's.
And I think it's good to document everything to share information for others that might want to do something similar, or even if (and thats a very strong if) the car ended up in someone else's hands one day, they can easily look back through a more much more detailed history than just some stamps & a pile of receipts
-
To get the diff apart you'll need an impact driver that you hit with a hammer like THIS to get the screws out (and do the reverse when you re-install them), and then tap around it to get it to separate 👍🏻
And don't worry about the chipping on the camshafts, they're all more or less like that from the factory
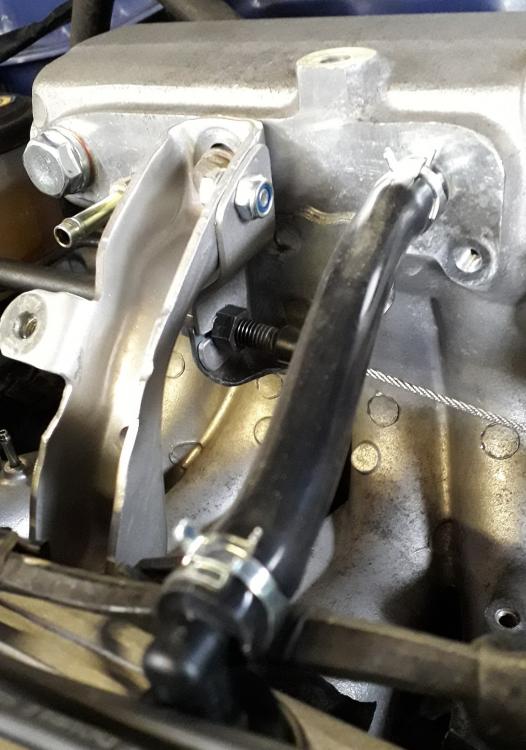
I like what you've done with your catch can, and good job with the model 😎
-
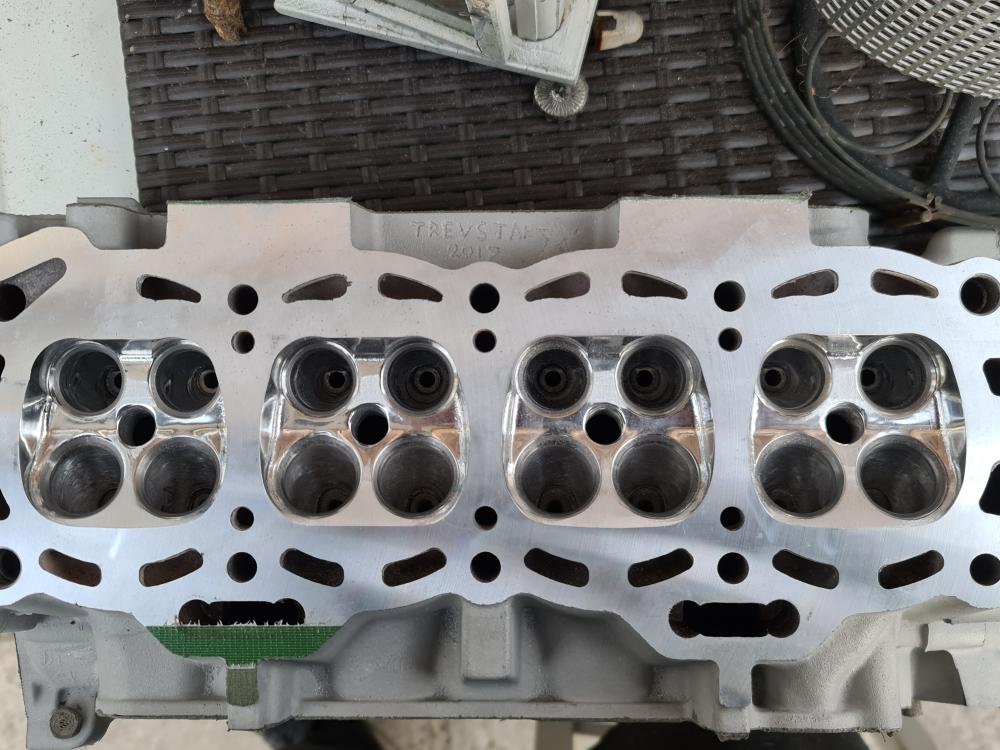
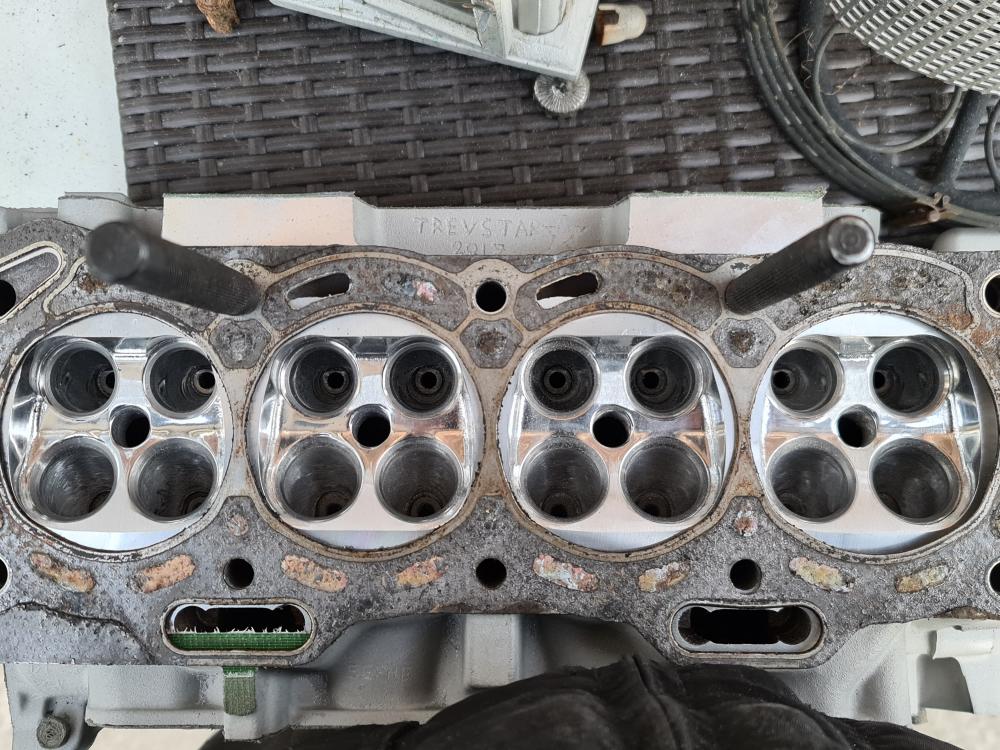
26/4/2021
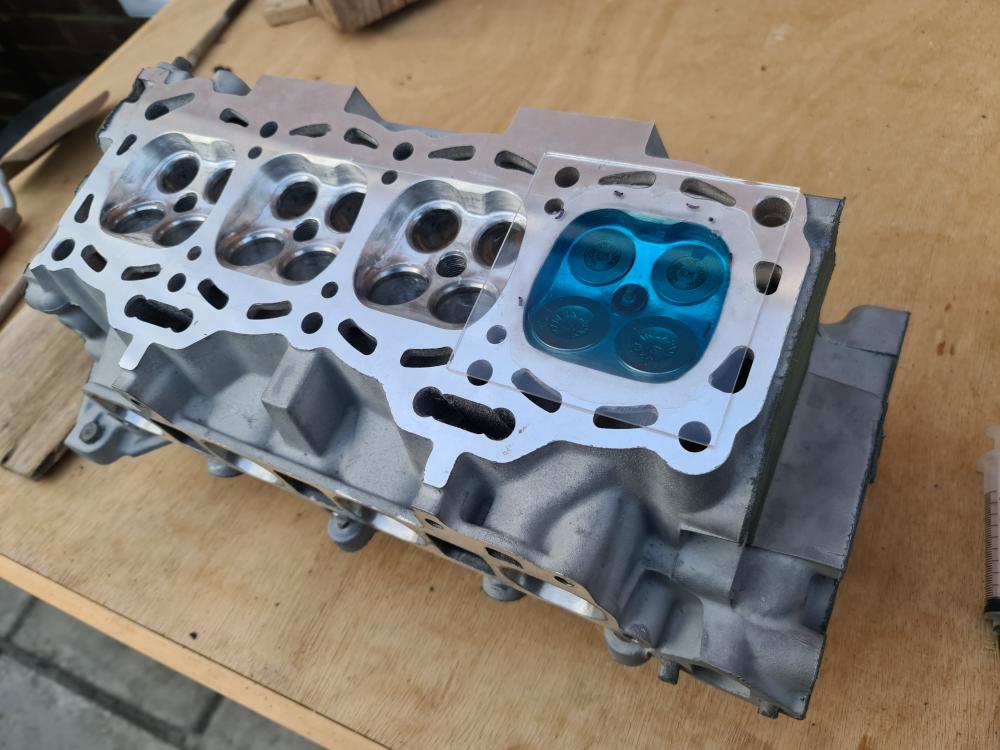
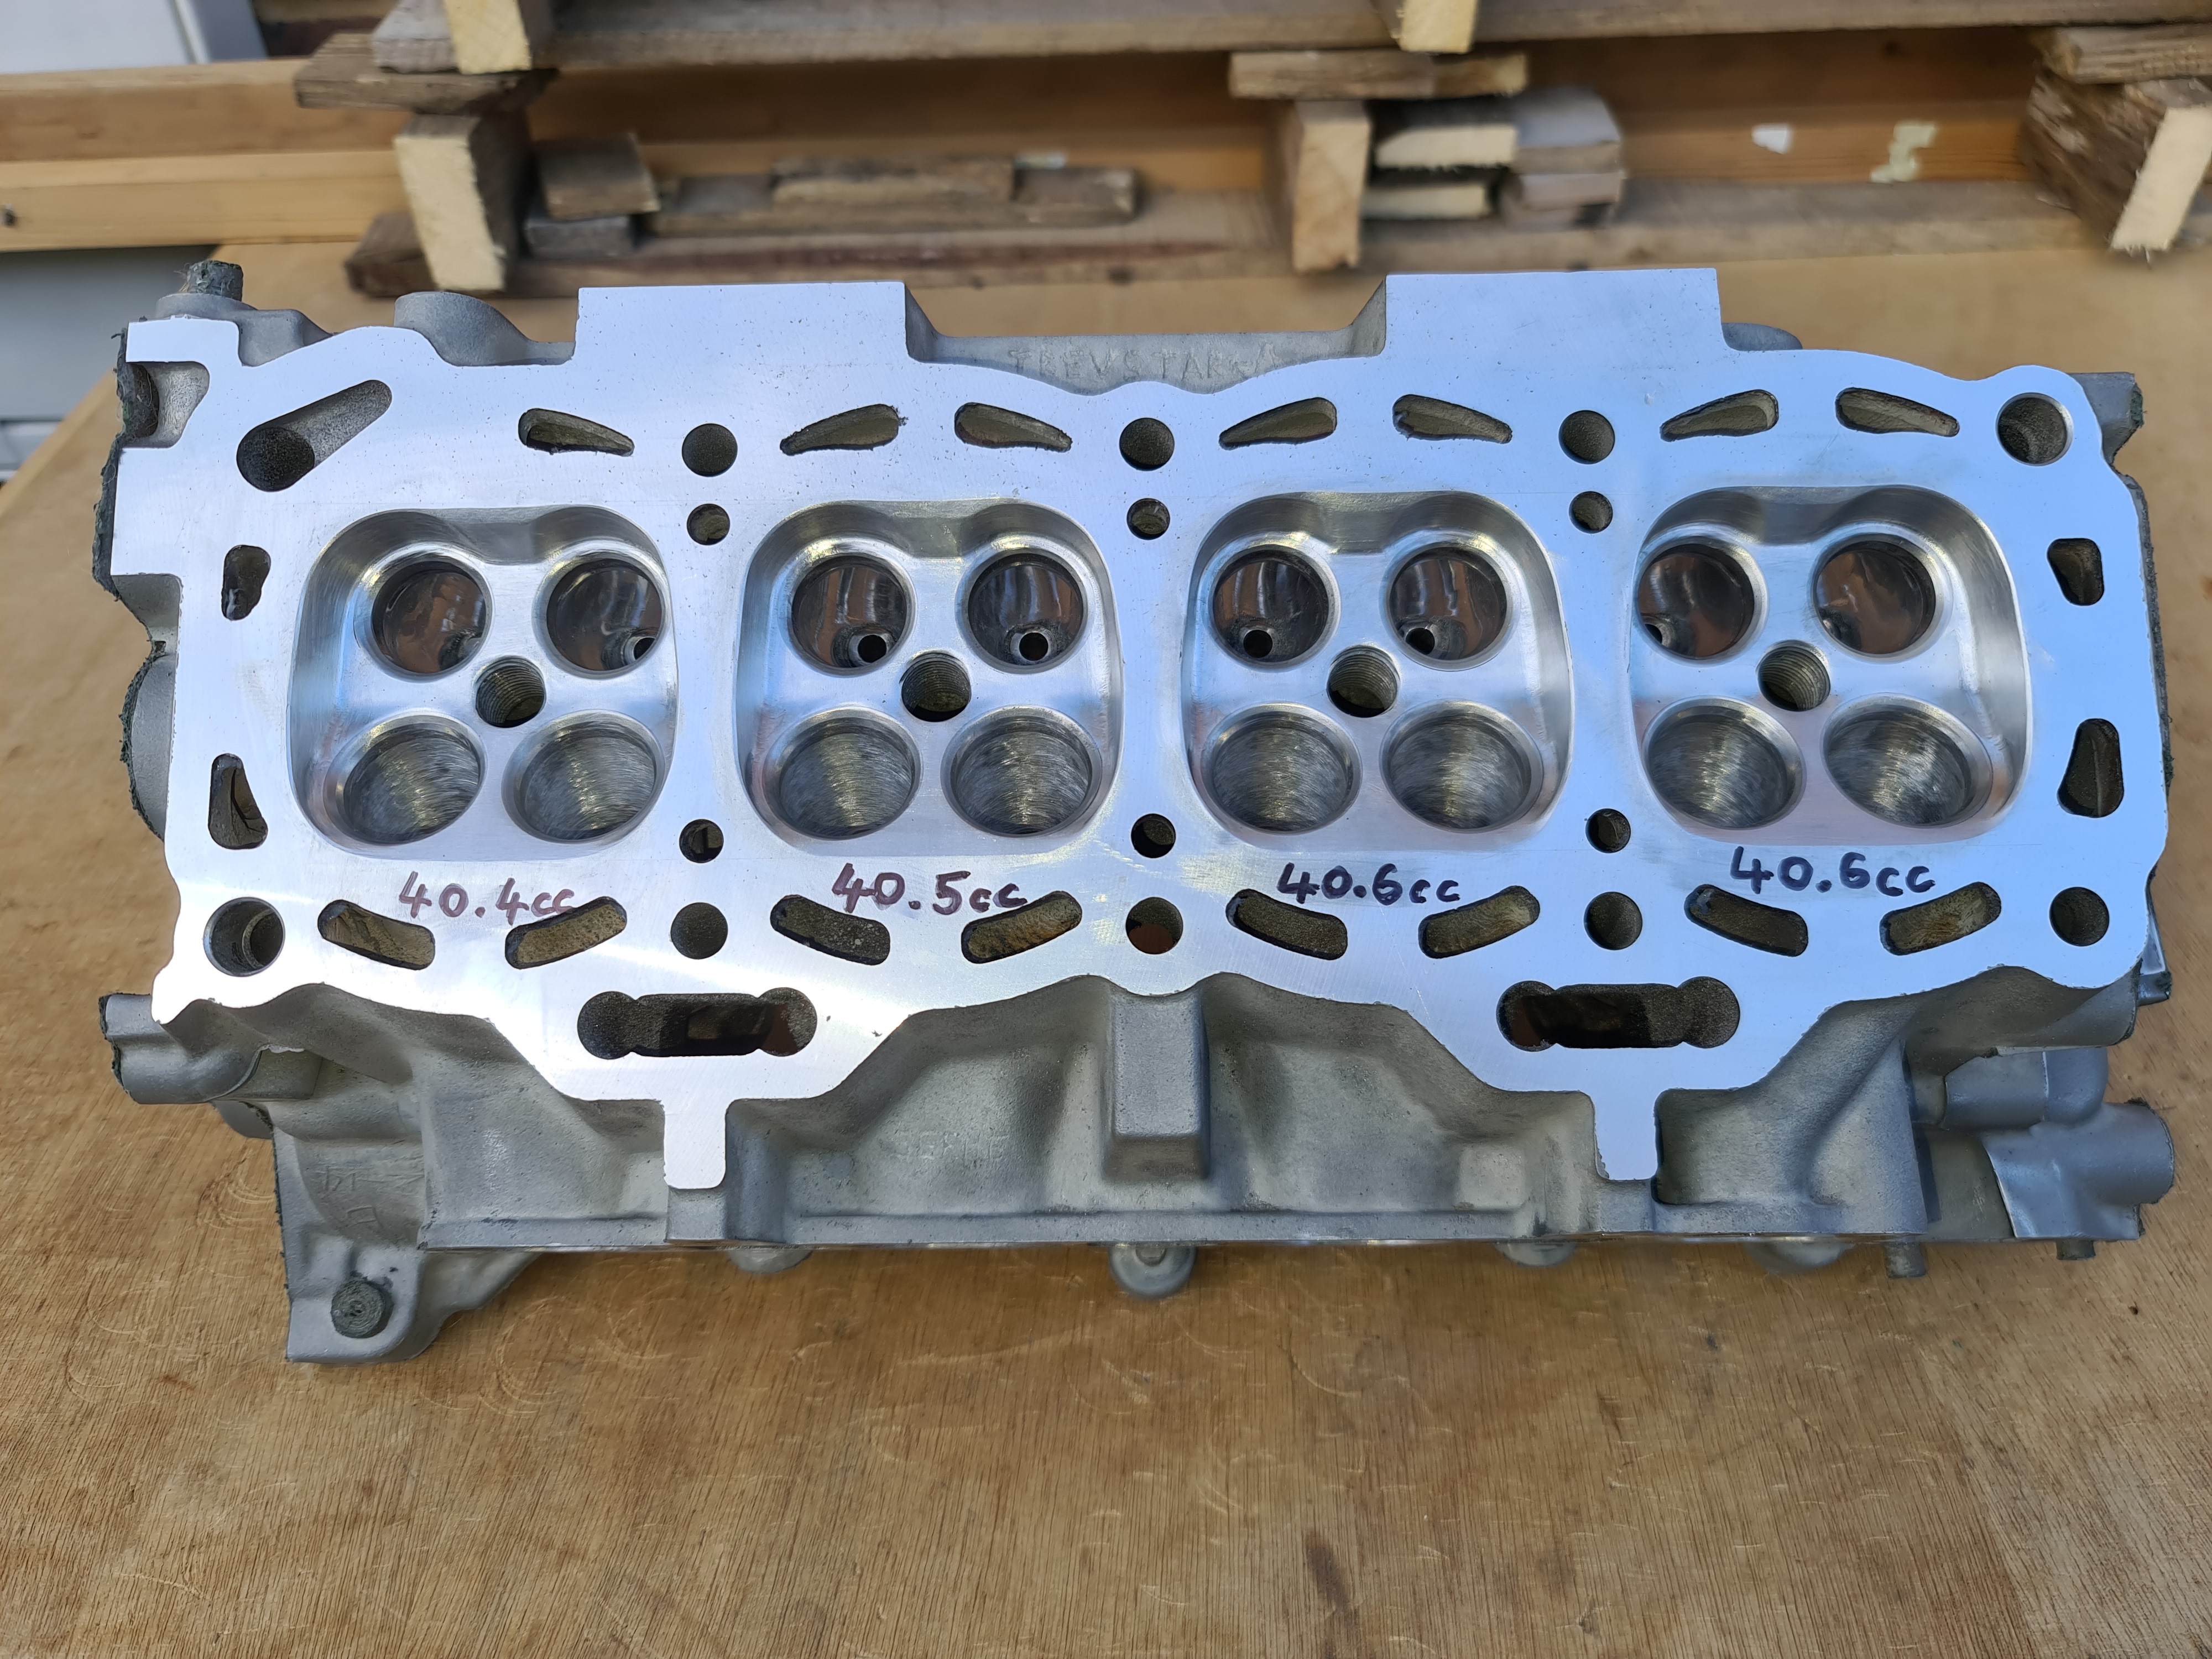
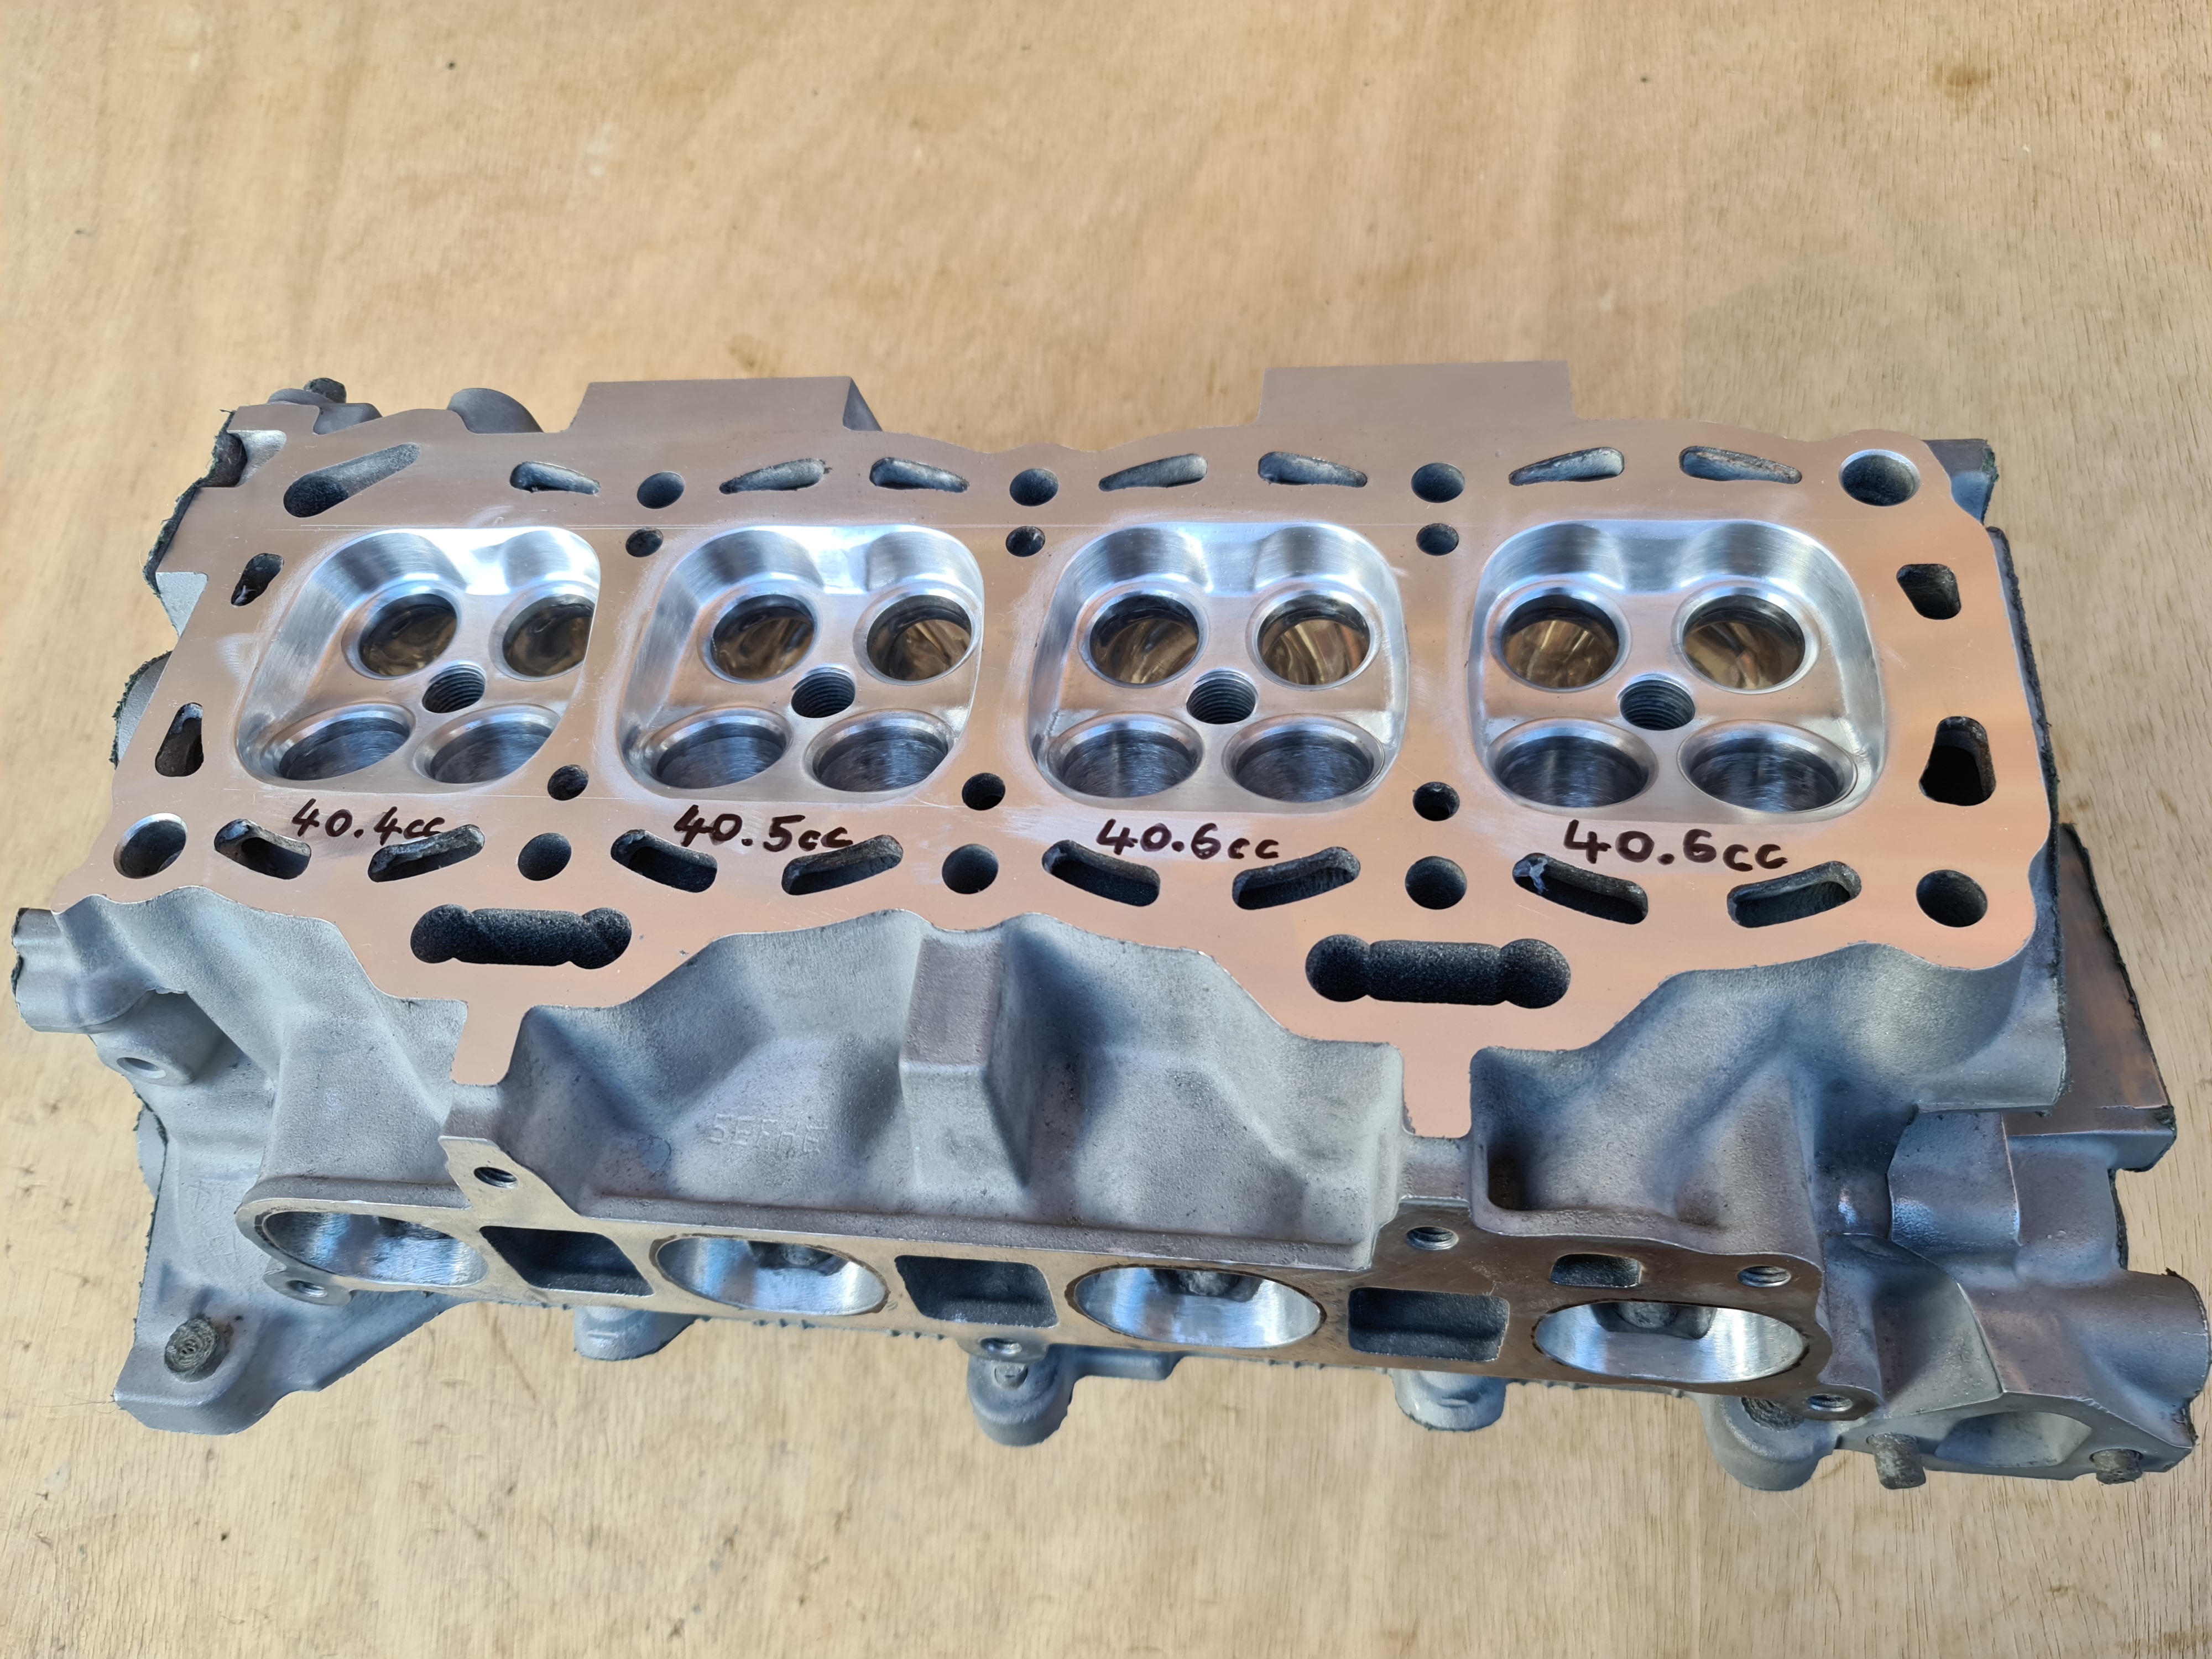
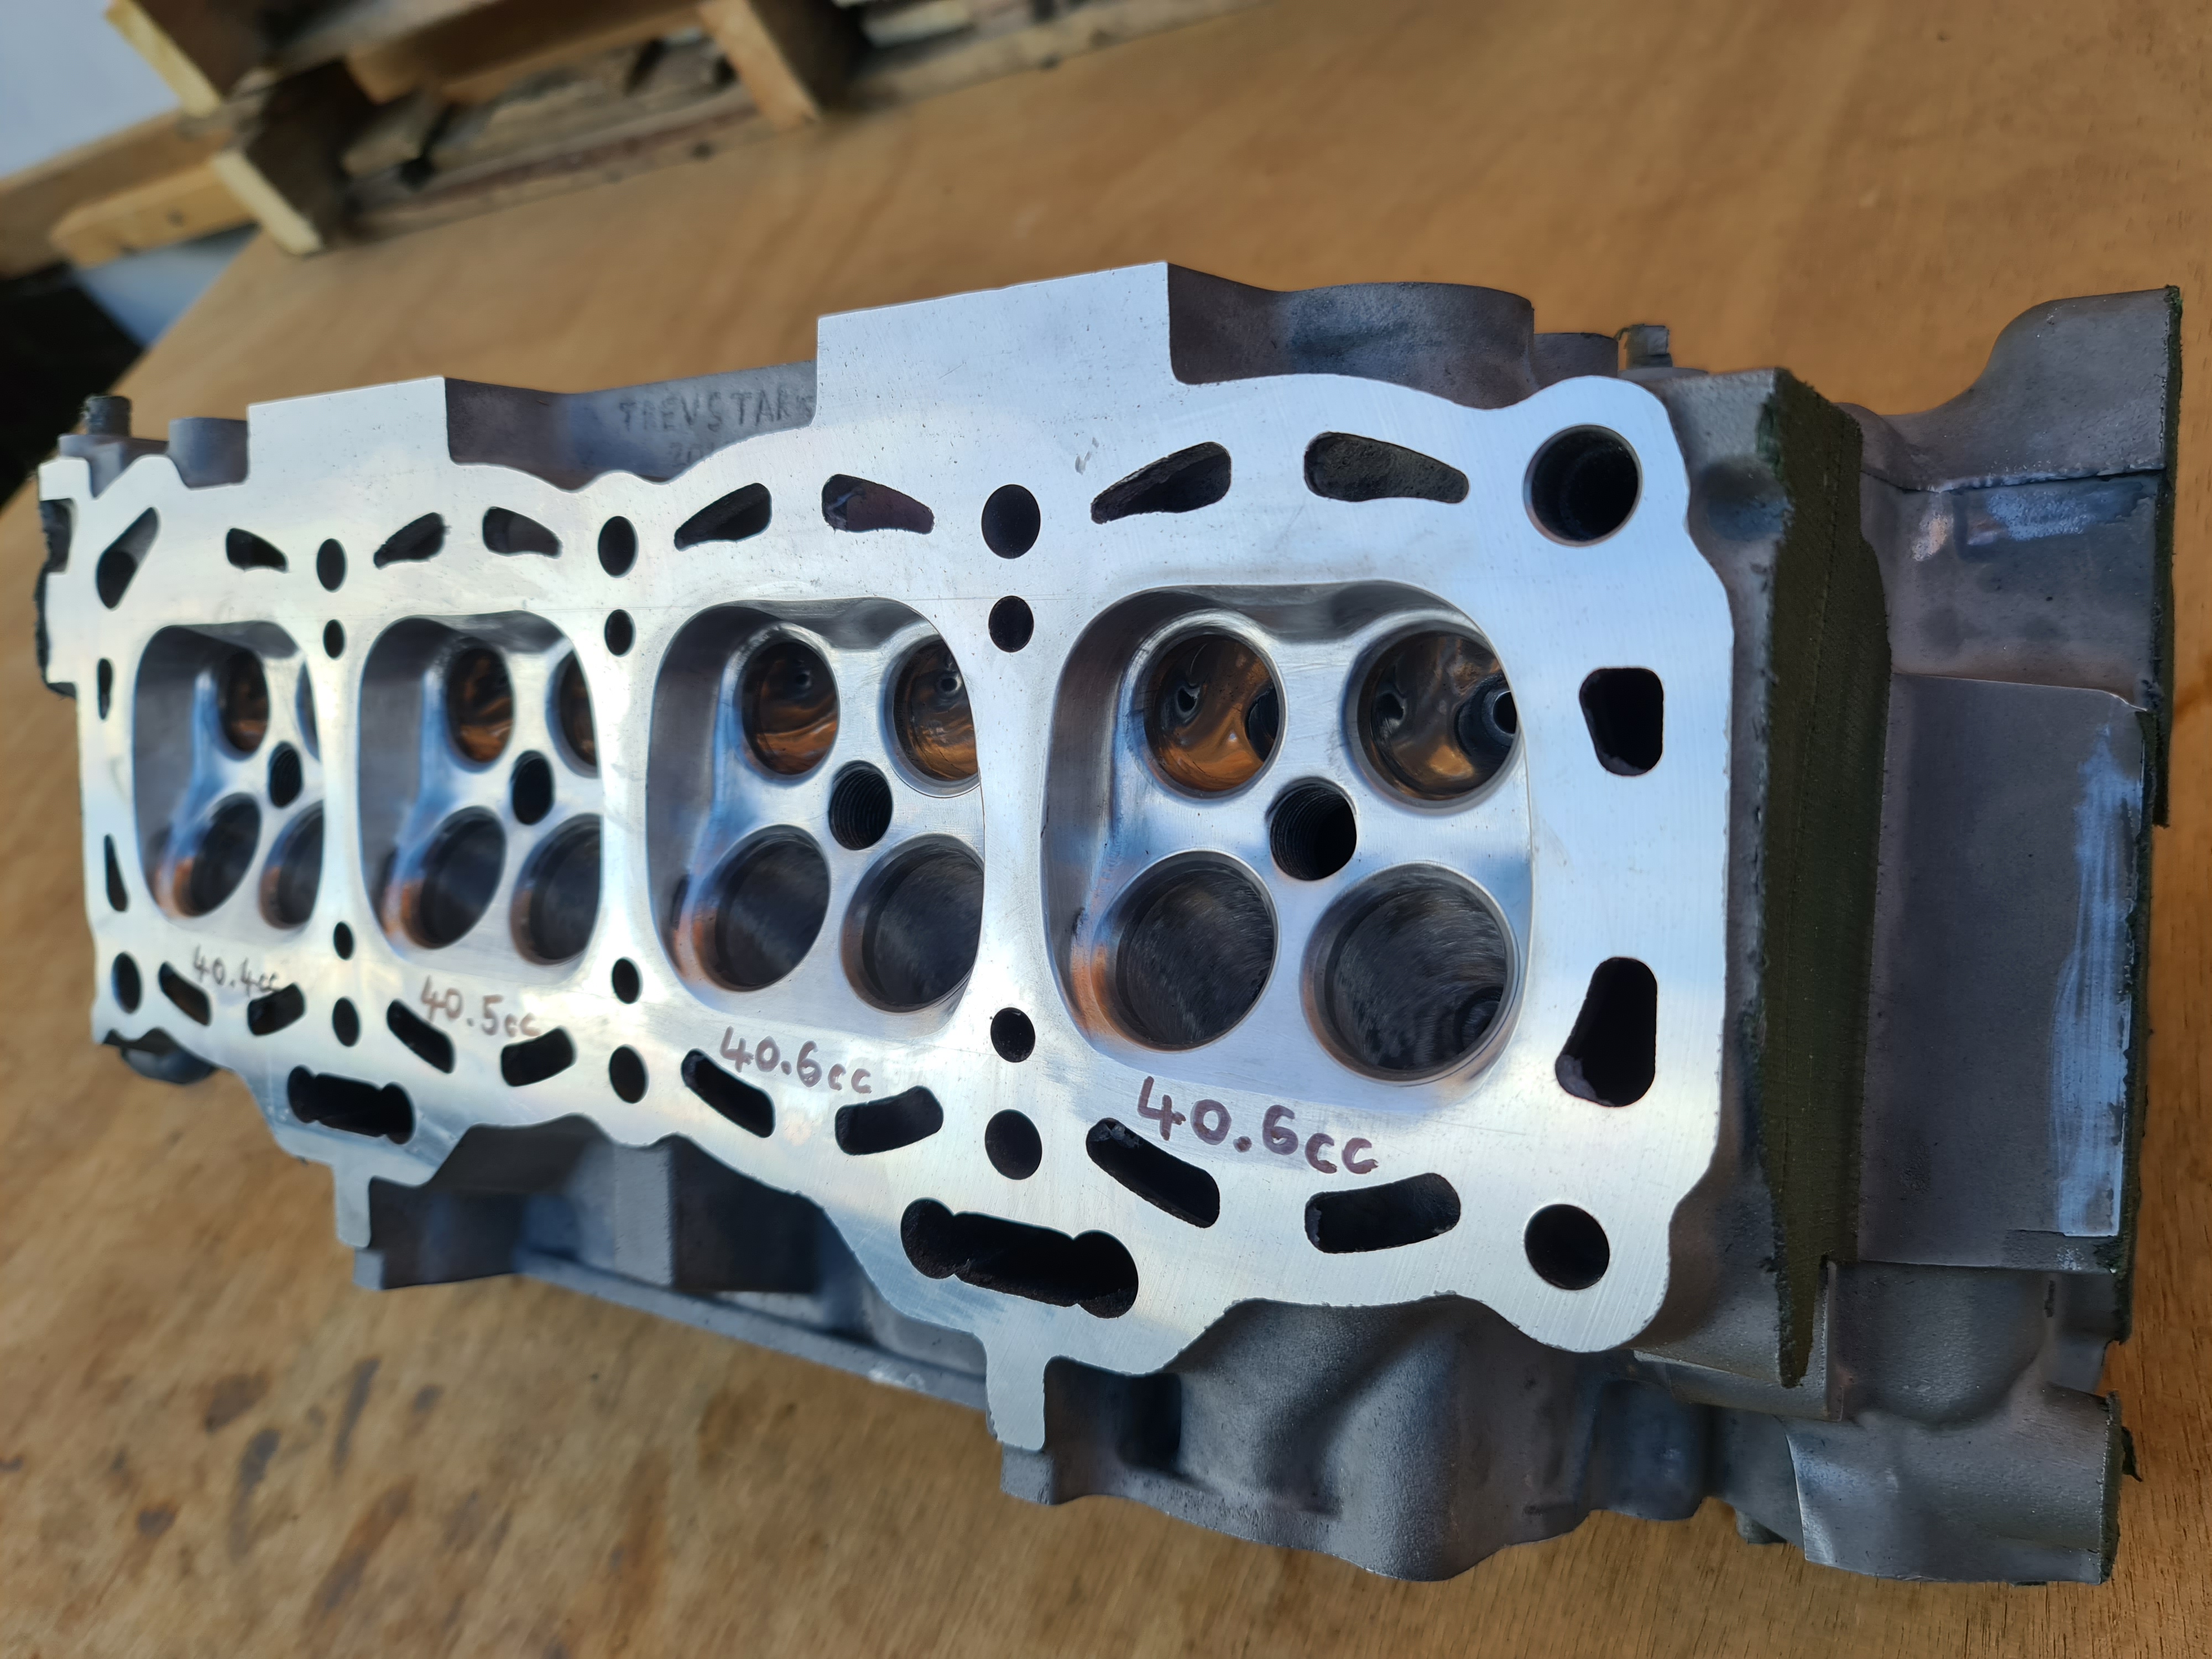
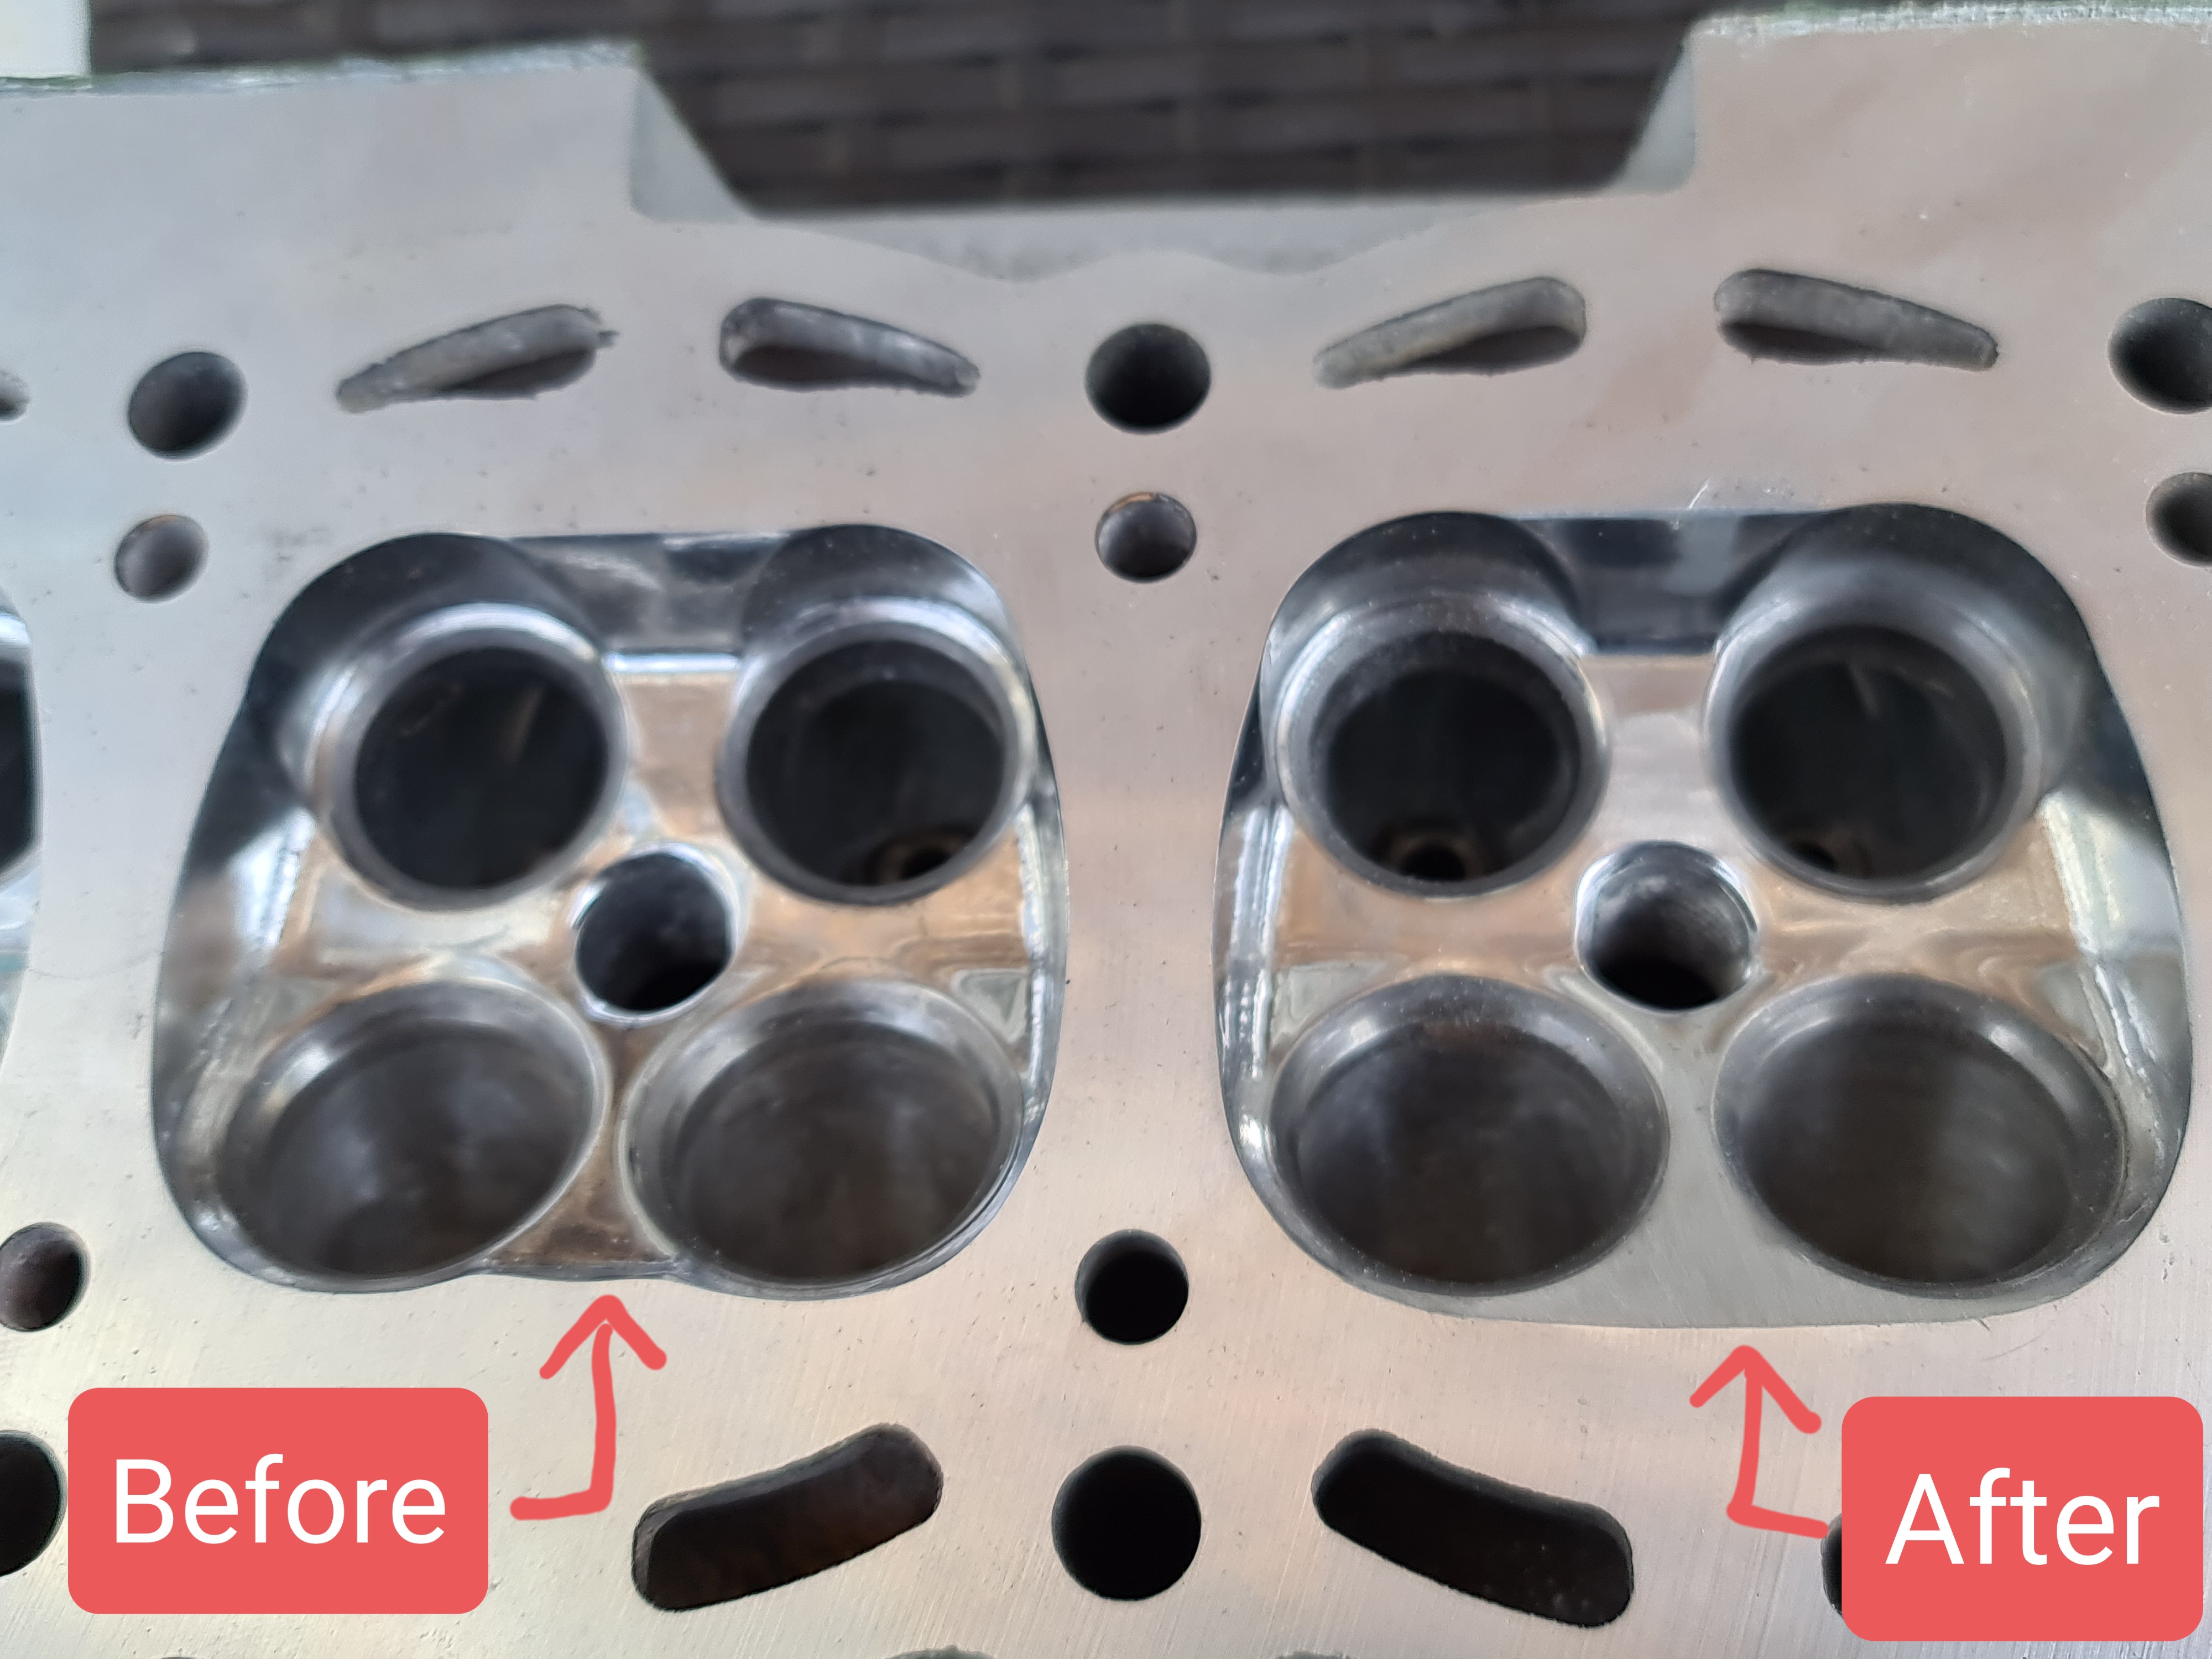
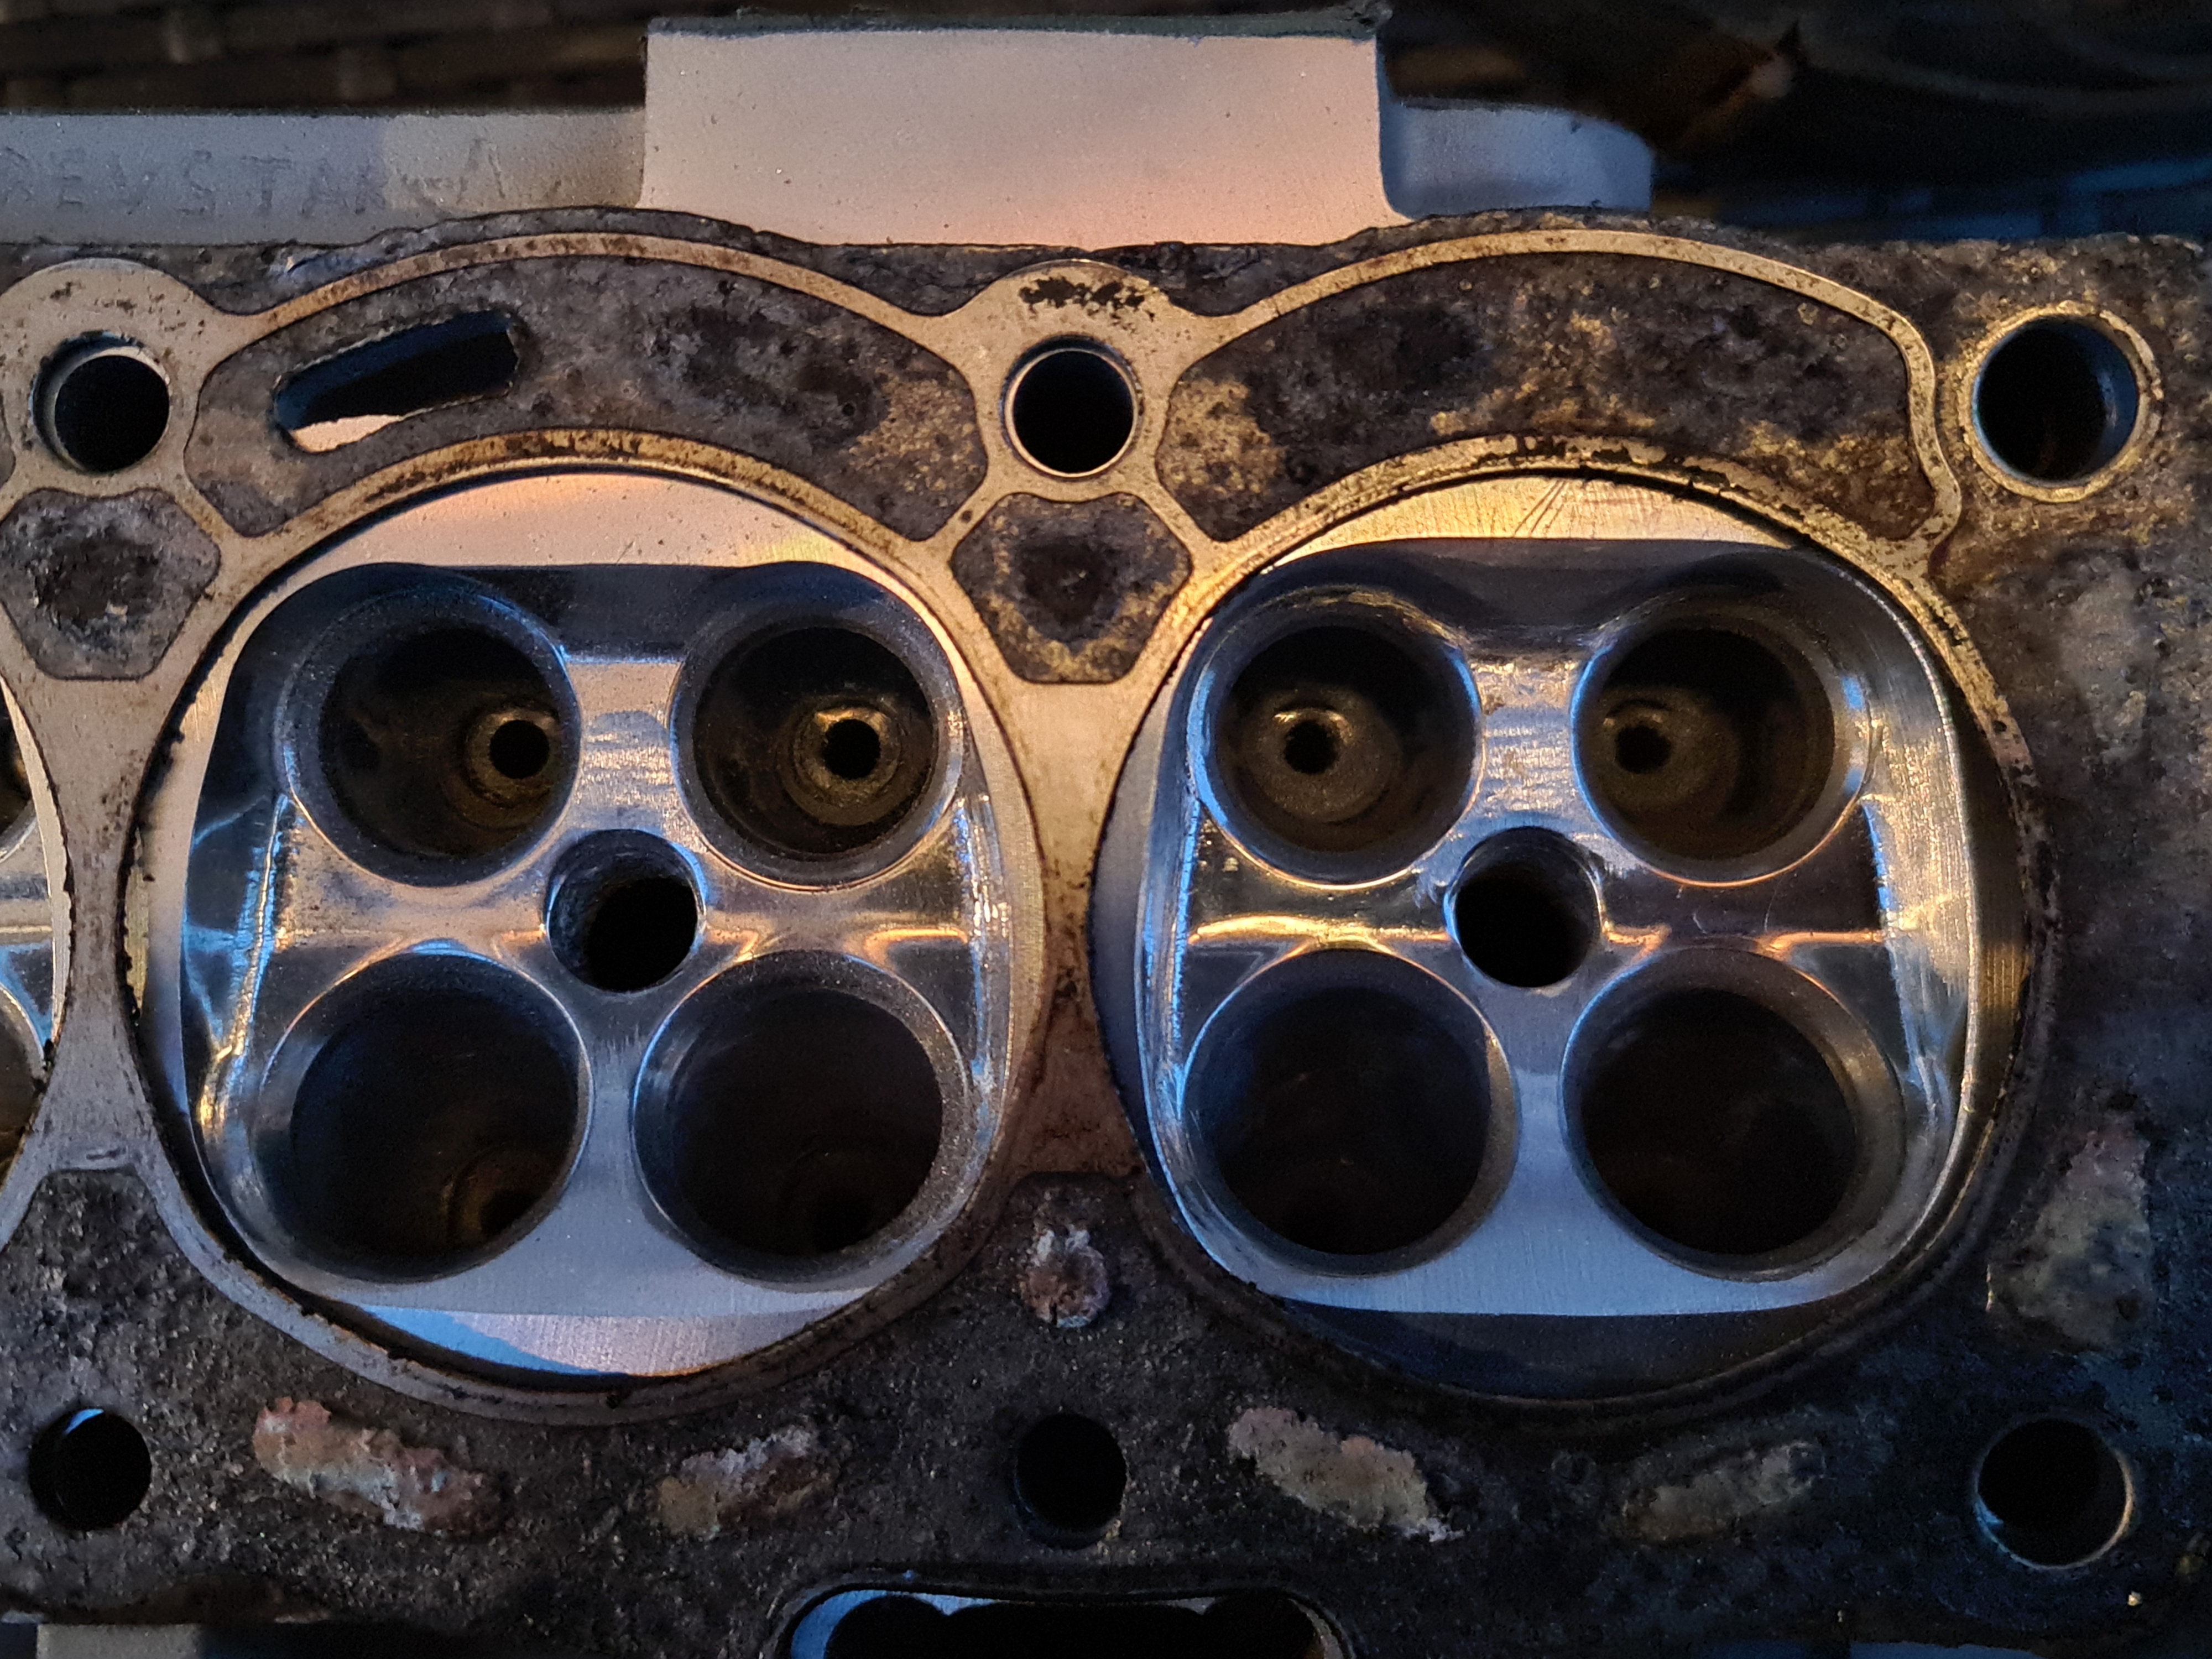
So ive finished the work inside the combustion chambers and measured their volume. They were all within 0.5cc of each other but I wanted to try to bring this closer, so I did a little more trimming inside two of the chambers and re-measured them
I also done the gasket matching on the inlet side


The final result:
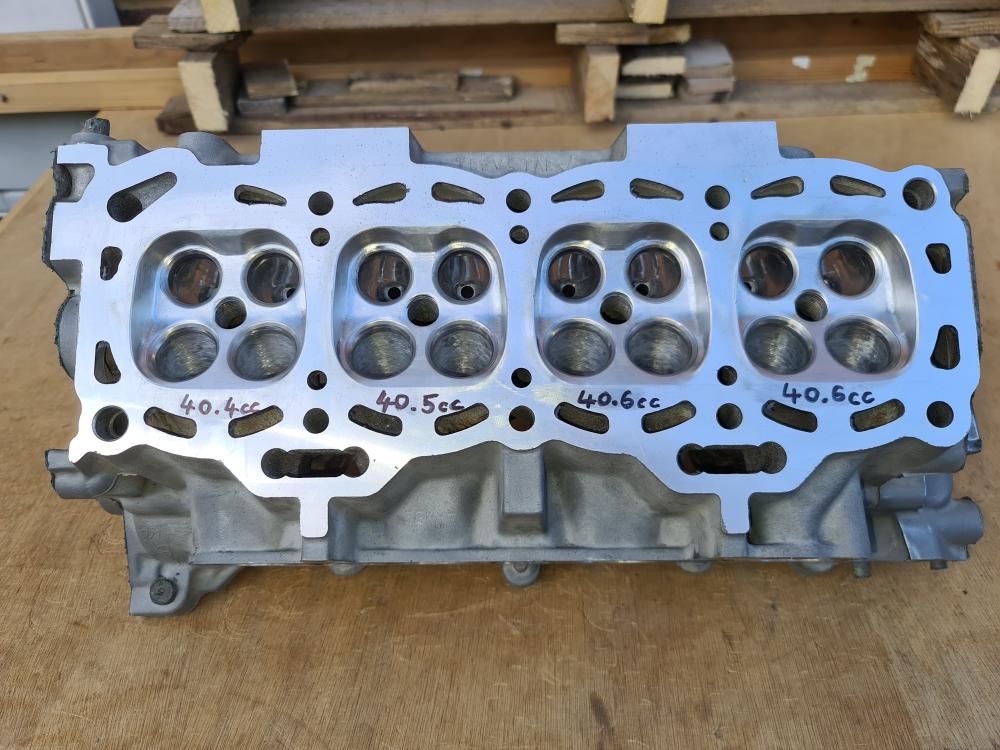

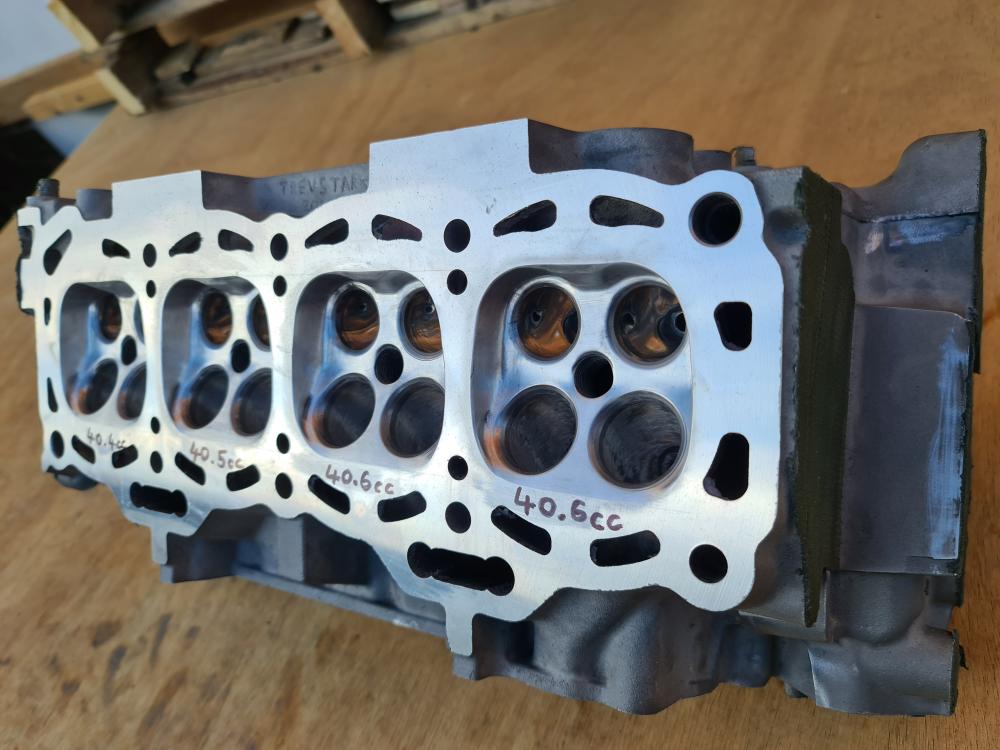


I measured the chambers several times and on average (taking into account any measurement errors) they're all within 0.3cc of each other 😎 not bad for a back garden combustion chamber re-profiling
I used the dokuro valves I had previously bought to make the measurements as I only wanted to check they were all the same size, but I have decided not to use these valves for my build because these have a deeper dish in the valve face than the standard valves which lowers the compression slightly and I have removed quite a bit of material from the combustion chambers which will have reduced compression by a fair amount already, plus when I get the valve seats cut that will further drop compression by a tiny bit more. So to combat the loss in compression I will have to get the head skimmed even further but I need to check piston to valve clearances etc.
In addition to the head skimming, I have been looking to into some custom flat faced stainless steel valves from a company called G&S Valves which used to manufacture valves for cosworth and some British F1 teams, so they should know their shit! They already have the technical drawings for 4e-fte valves, so they already have something to work from and I was on the phone with them for over half an hour and had a very good & informative chat
They said that a flat faced valve will allow for a more complete burn whilst upping the compression slightly and they reckon they can design the back of the valve faces to suit the downdraft of the intake ports to have better flow characteristics to suit my needs (being n/a) which will compliment all the cylinder head work and they reckon they can design them in such a way that they'll still be almost, or as light as a standard valve
This however, is fucking expensive. Like over £800 expensive 😐 but again, as I'm in the pursuit of trying to squeeze the absolute most out of it as possible for the sake of curiosity, so for that reason, I am considering it.
For now though, I have taken the cylinder head back to be ceramic coated.
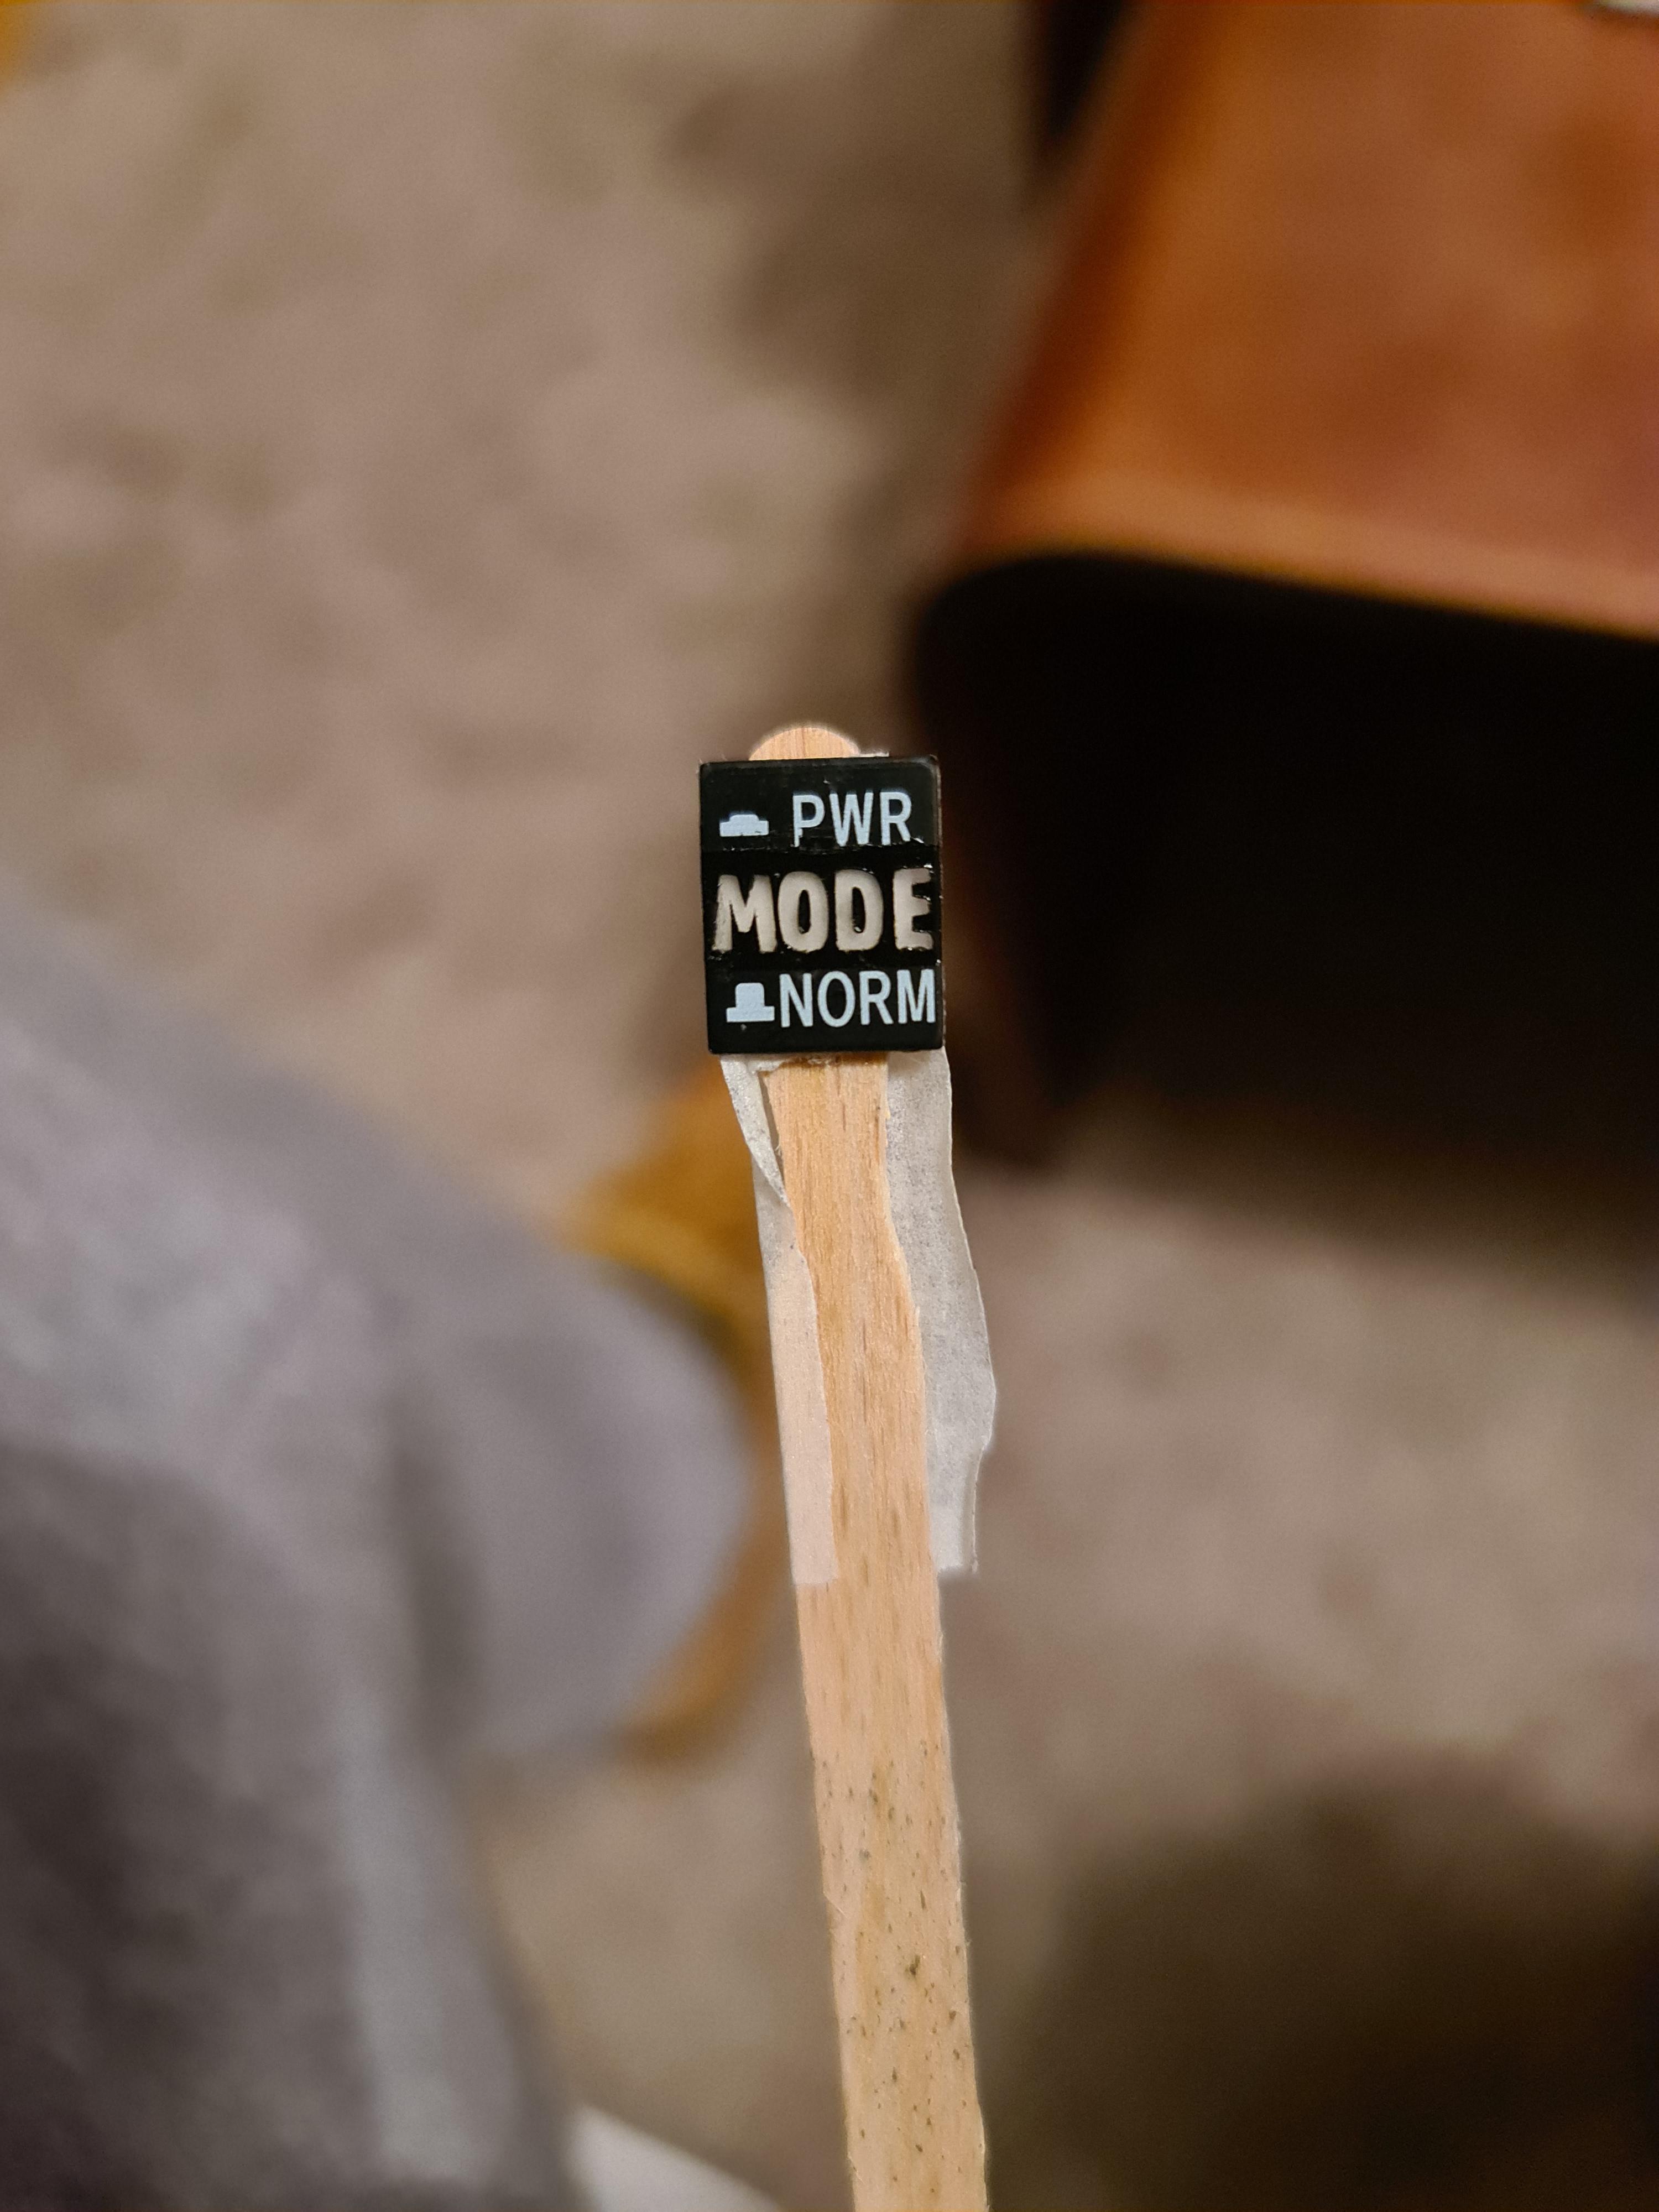
If you've been reading you'll probably remember the 'ECT' button I was gonna turn into a mode/map switch?
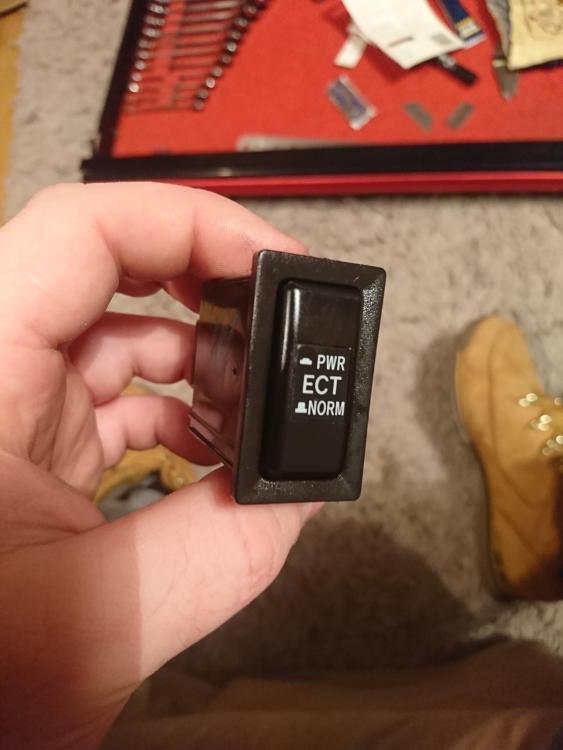
Well, it's finished and ready to go! And I have to say I'm well pleased with it!
After very carefully sanding away the 'ECT' text and letting it sit there for ages, I finally made myself a stencil with the word 'MODE', masked up 'PWR' & 'NORM' and airbrushed matte black over it which left me with this

The final product: (off)
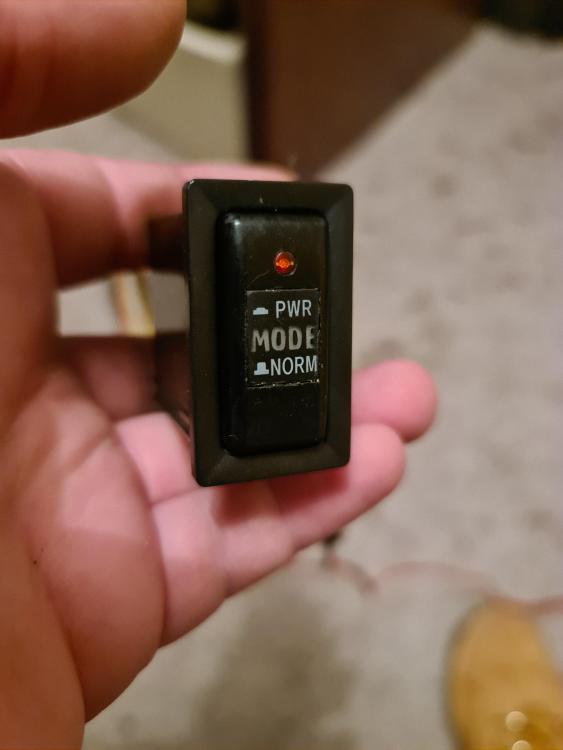
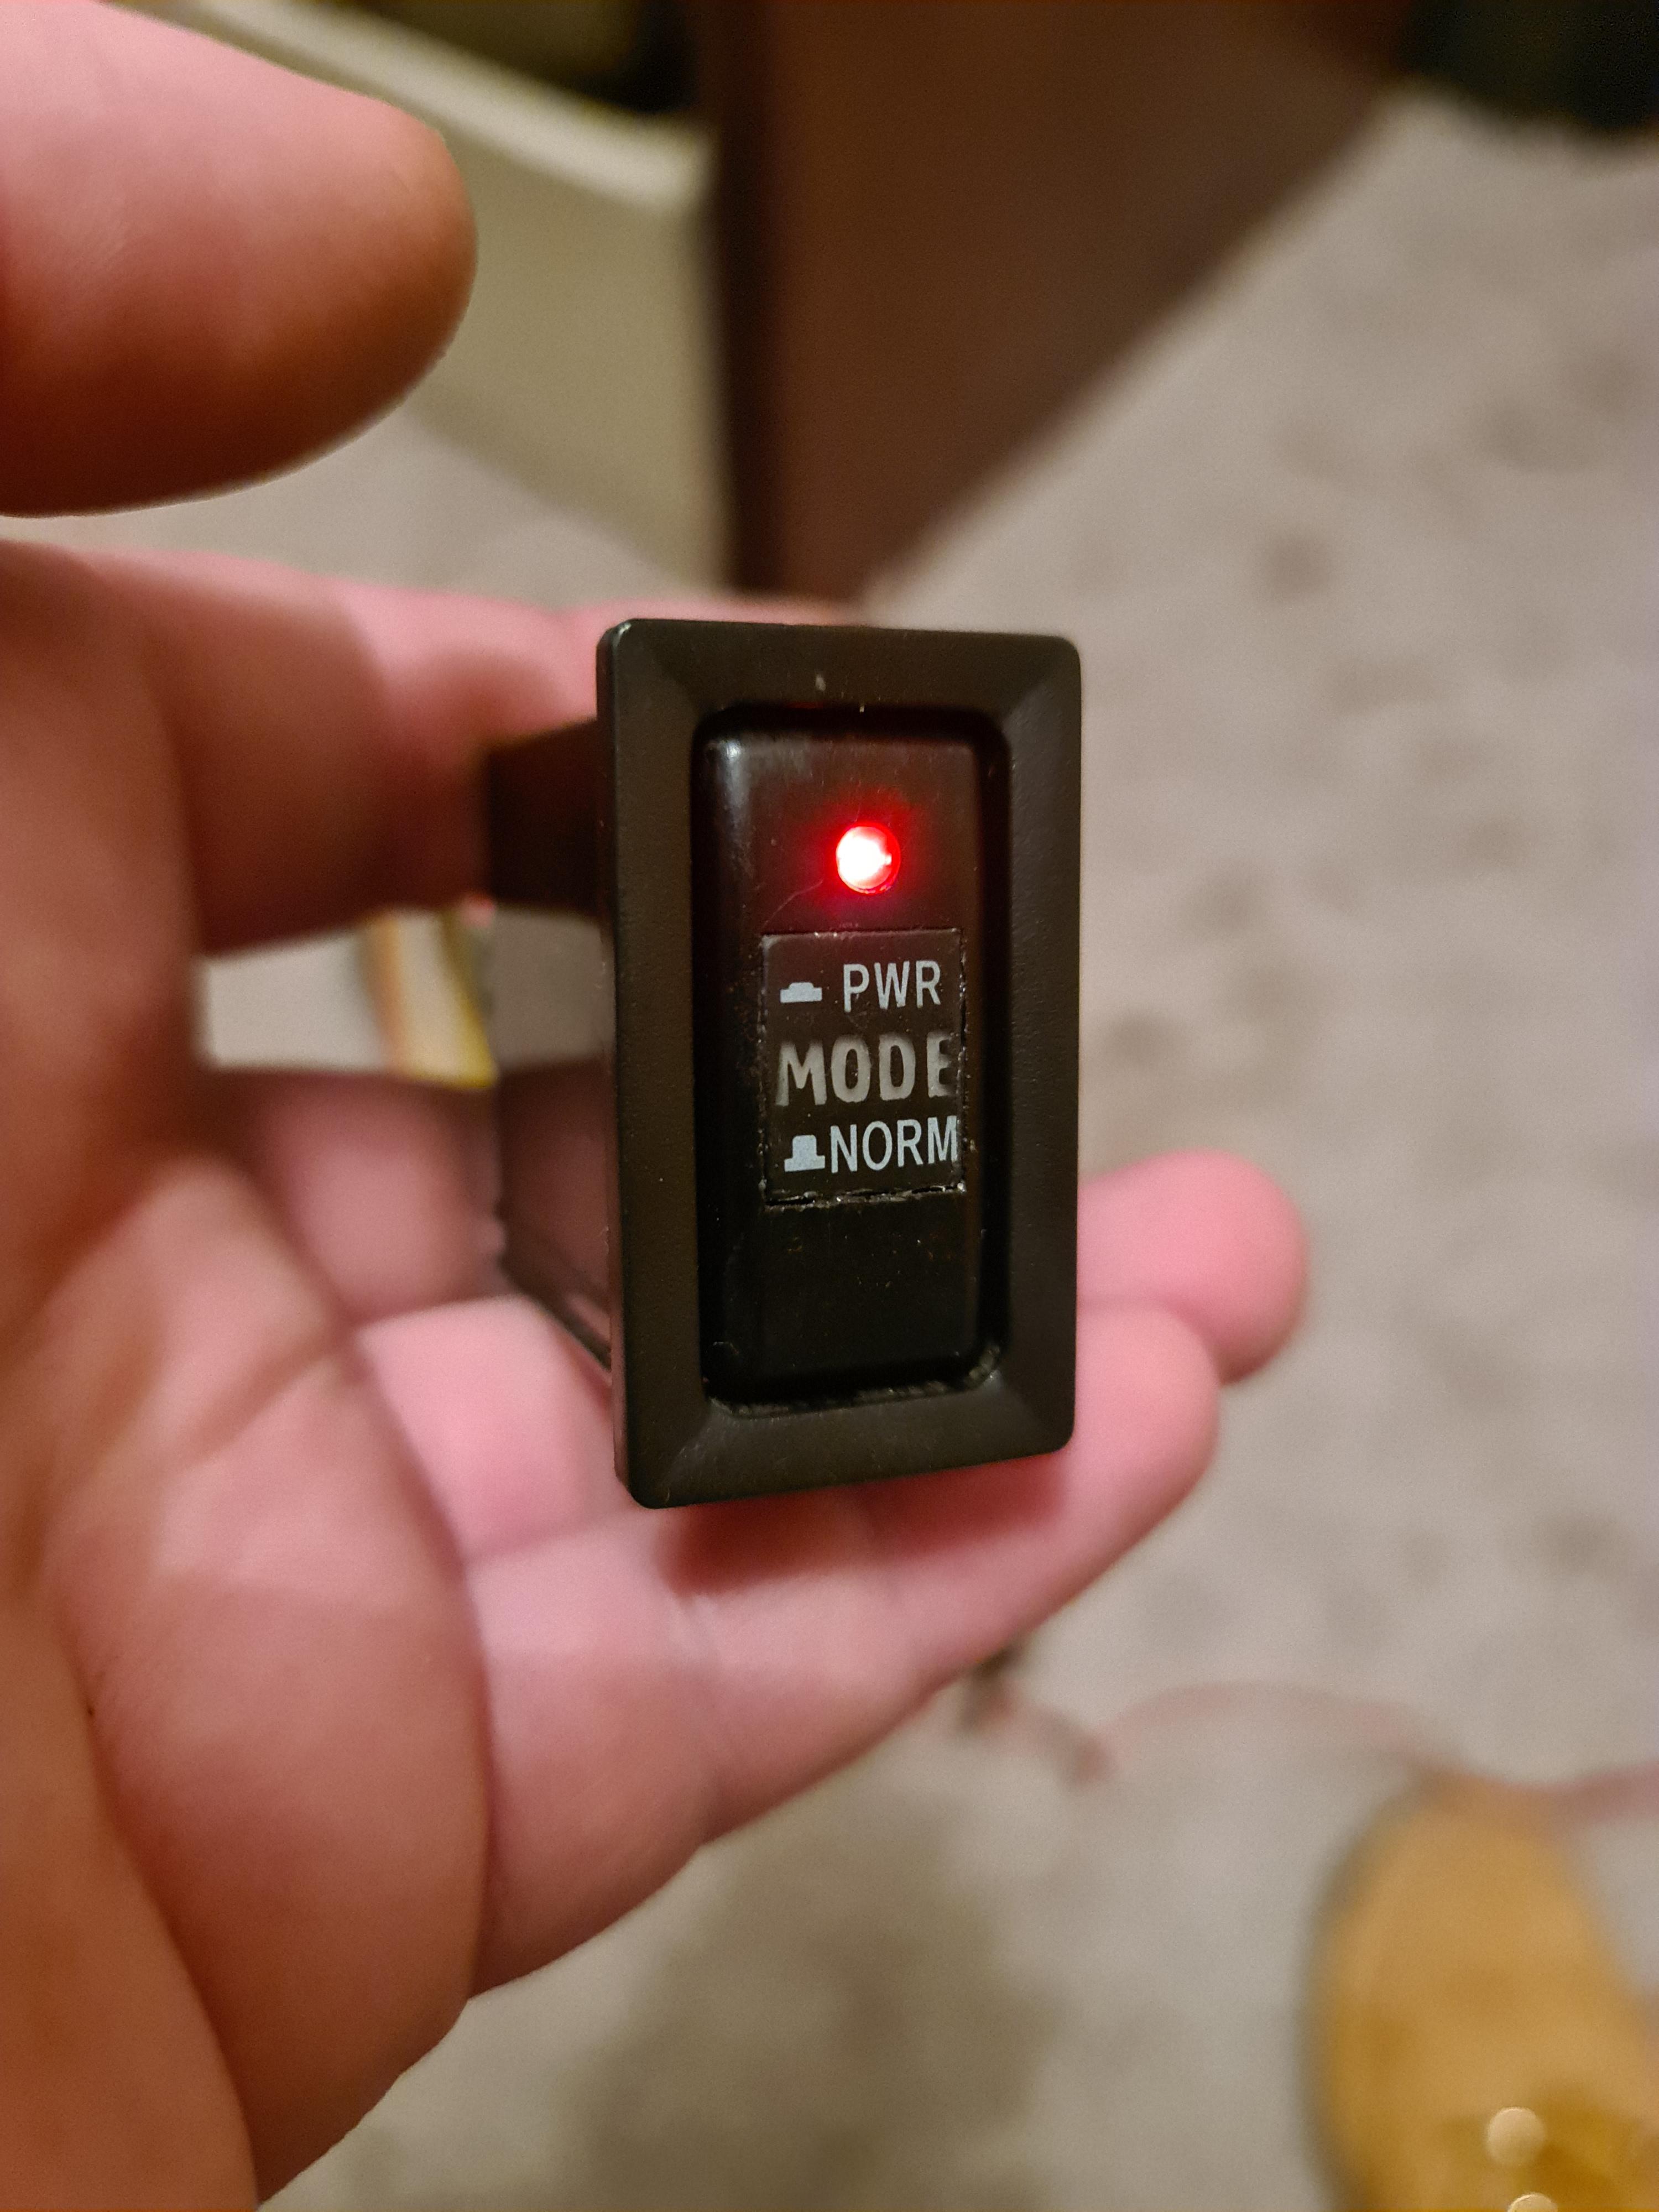
On with backlight off
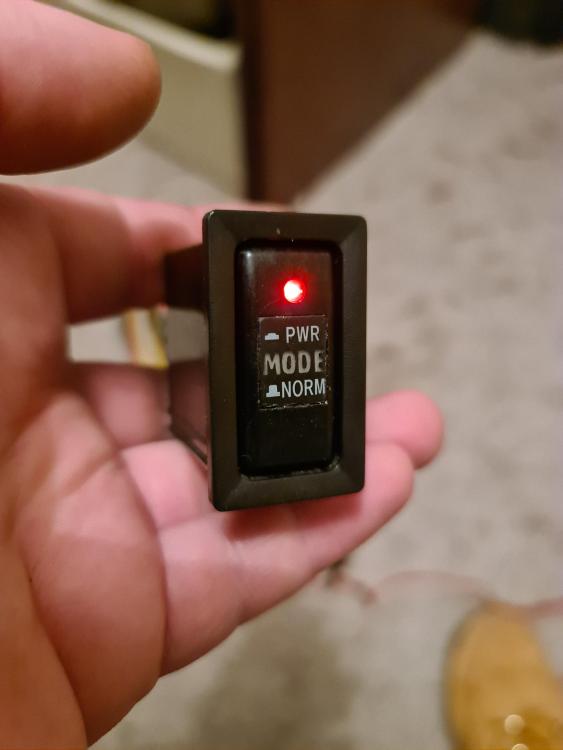
Off with backlight on

On with backlight

-
Your very welcome mate, glad your pleased with it 😎👍🏻
-
Cheers lads! Never any half arsed BS here! 😉
Hopefully should help it breath better than just the porting alone
-
1 hour ago, Starletson said:
So she just had MOT and she rusty. Had a bit of work done to get her through. Not much life left in her though 😥
Rust in the sills in front of the rear wheels by any chance?
I really hope that having it restored/repaired is something viable for you 🙏🏻🤞🏻
-
27 minutes ago, Sam44 said:
lovely job. the gains here are some of the best. you can cleaerly see now as the valve head lifts off the seat it flows across 80 to 90% of the inlet valve circumference. there is only 1 place/person i know does this to these heads and now you. keep up the great work. this is very similar to the head im running with the exception that my valve guilds have not been ground back.
have you port matched the inlet manifold to head?. you can use the gasket as a guild.
Thanks again for your advise, if it weren't for you it would never have been done!
Was scared to touch the chambers first time round as I didn't have the knowledge of what to remove. Do wonder about my valve guides now though from what we talked about
I haven't gasket matched the inlet ports as of yet as I didn't have a gasket so I was going to revisit that once I had a gasket to match it to, but I found an old one the other day so I shall get on and do that once I finish sorting the chambers!
-
8/04/2021
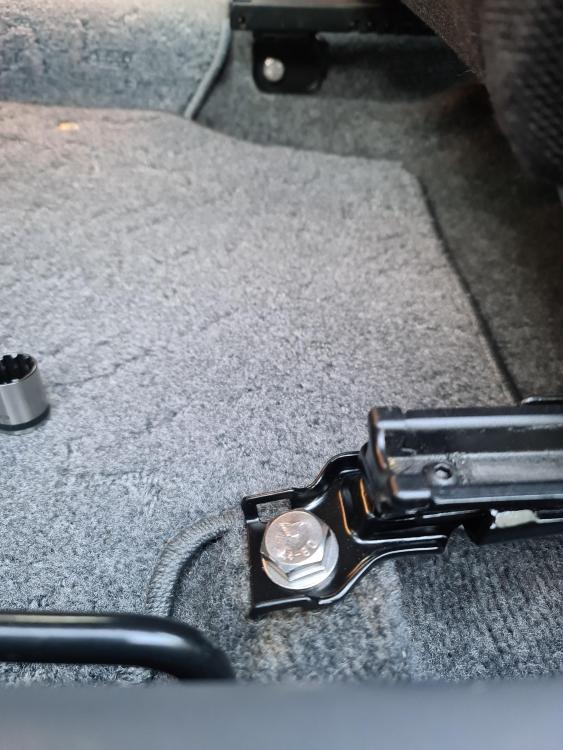
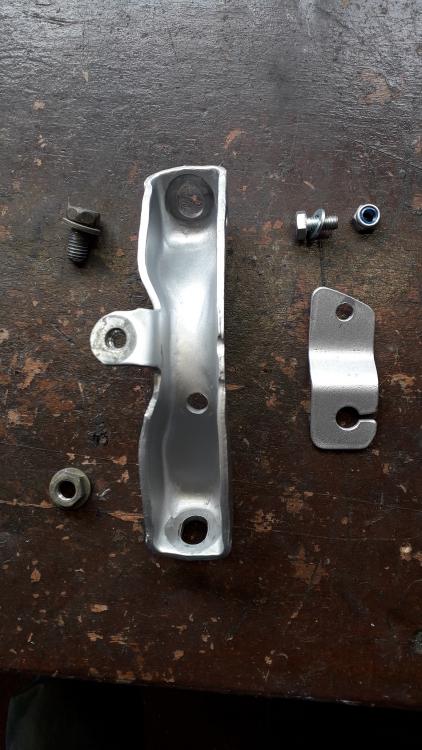
So lately I got the driver seat out to paint the rails. Did that, and re-fitted them and the seat.
However the threads on one of the bolt holes decided to shit itself, so out of frustration I decided to re-tap them and fitted some nice beefy M12 stainless steel bolts

So a few weeks ago I had taken my cylinder head to have the exterior coated with cerakote (ceramic coating) to reduce engine bay temps by reducing radiating heat.
At the same time I was going to have the combustion chambers coated with a ceramic piston coating but after hours of reading/research I've kinda decided against it. No one seems to have any clear answers on whether it would be beneficial or not for a naturally aspirated, high compression, street driven engine, but from what I've read i get the feeling that it might not be that beneficial in my case.
This is because the coating retains the heat and reflects it rather than allow it to pass through the piston, keeping the piston cool & the heat in the cylinder. There are quite a few pros to ceramic piston coatings, but there's no such thing as a free lunch, and in my case I have concerns over the retained heat in the cylinder actually adding to the possibility of causing knock that high compression engines are susceptible to. I will try to do some further digging and try to actually ask some experts, but for now I may only have the valves done to keep them cooler.
But big thanks to @Sam44 for his advice on improving the flow of the chambers, I went and collected the head just before they started so that I can make the changes suggested by Sam and then take it back to be coated.
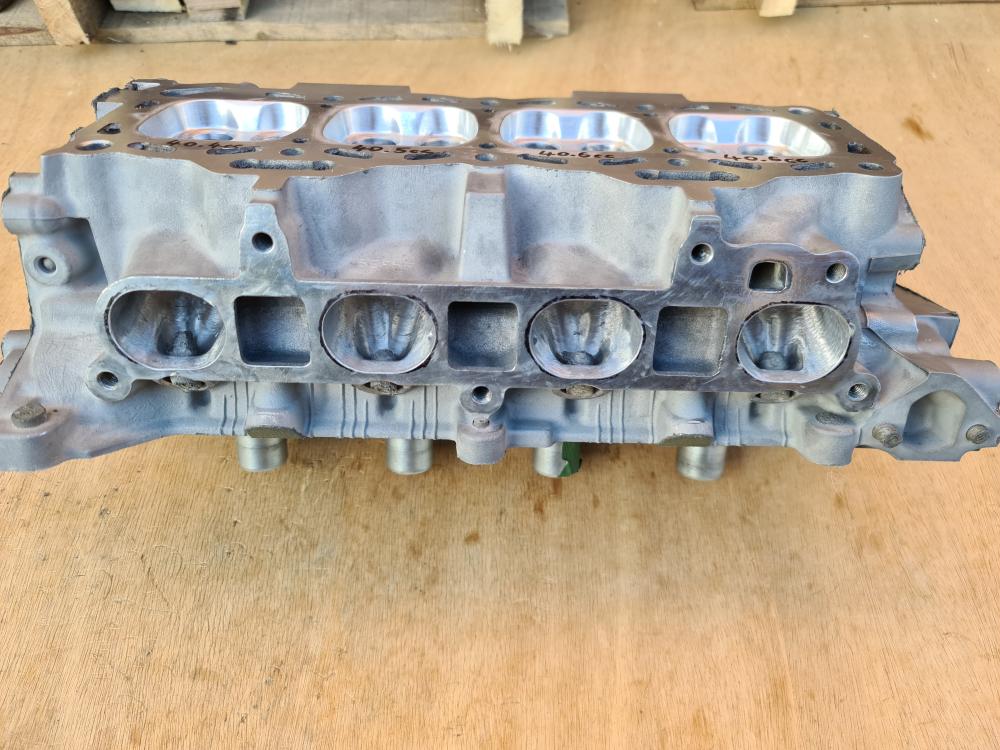
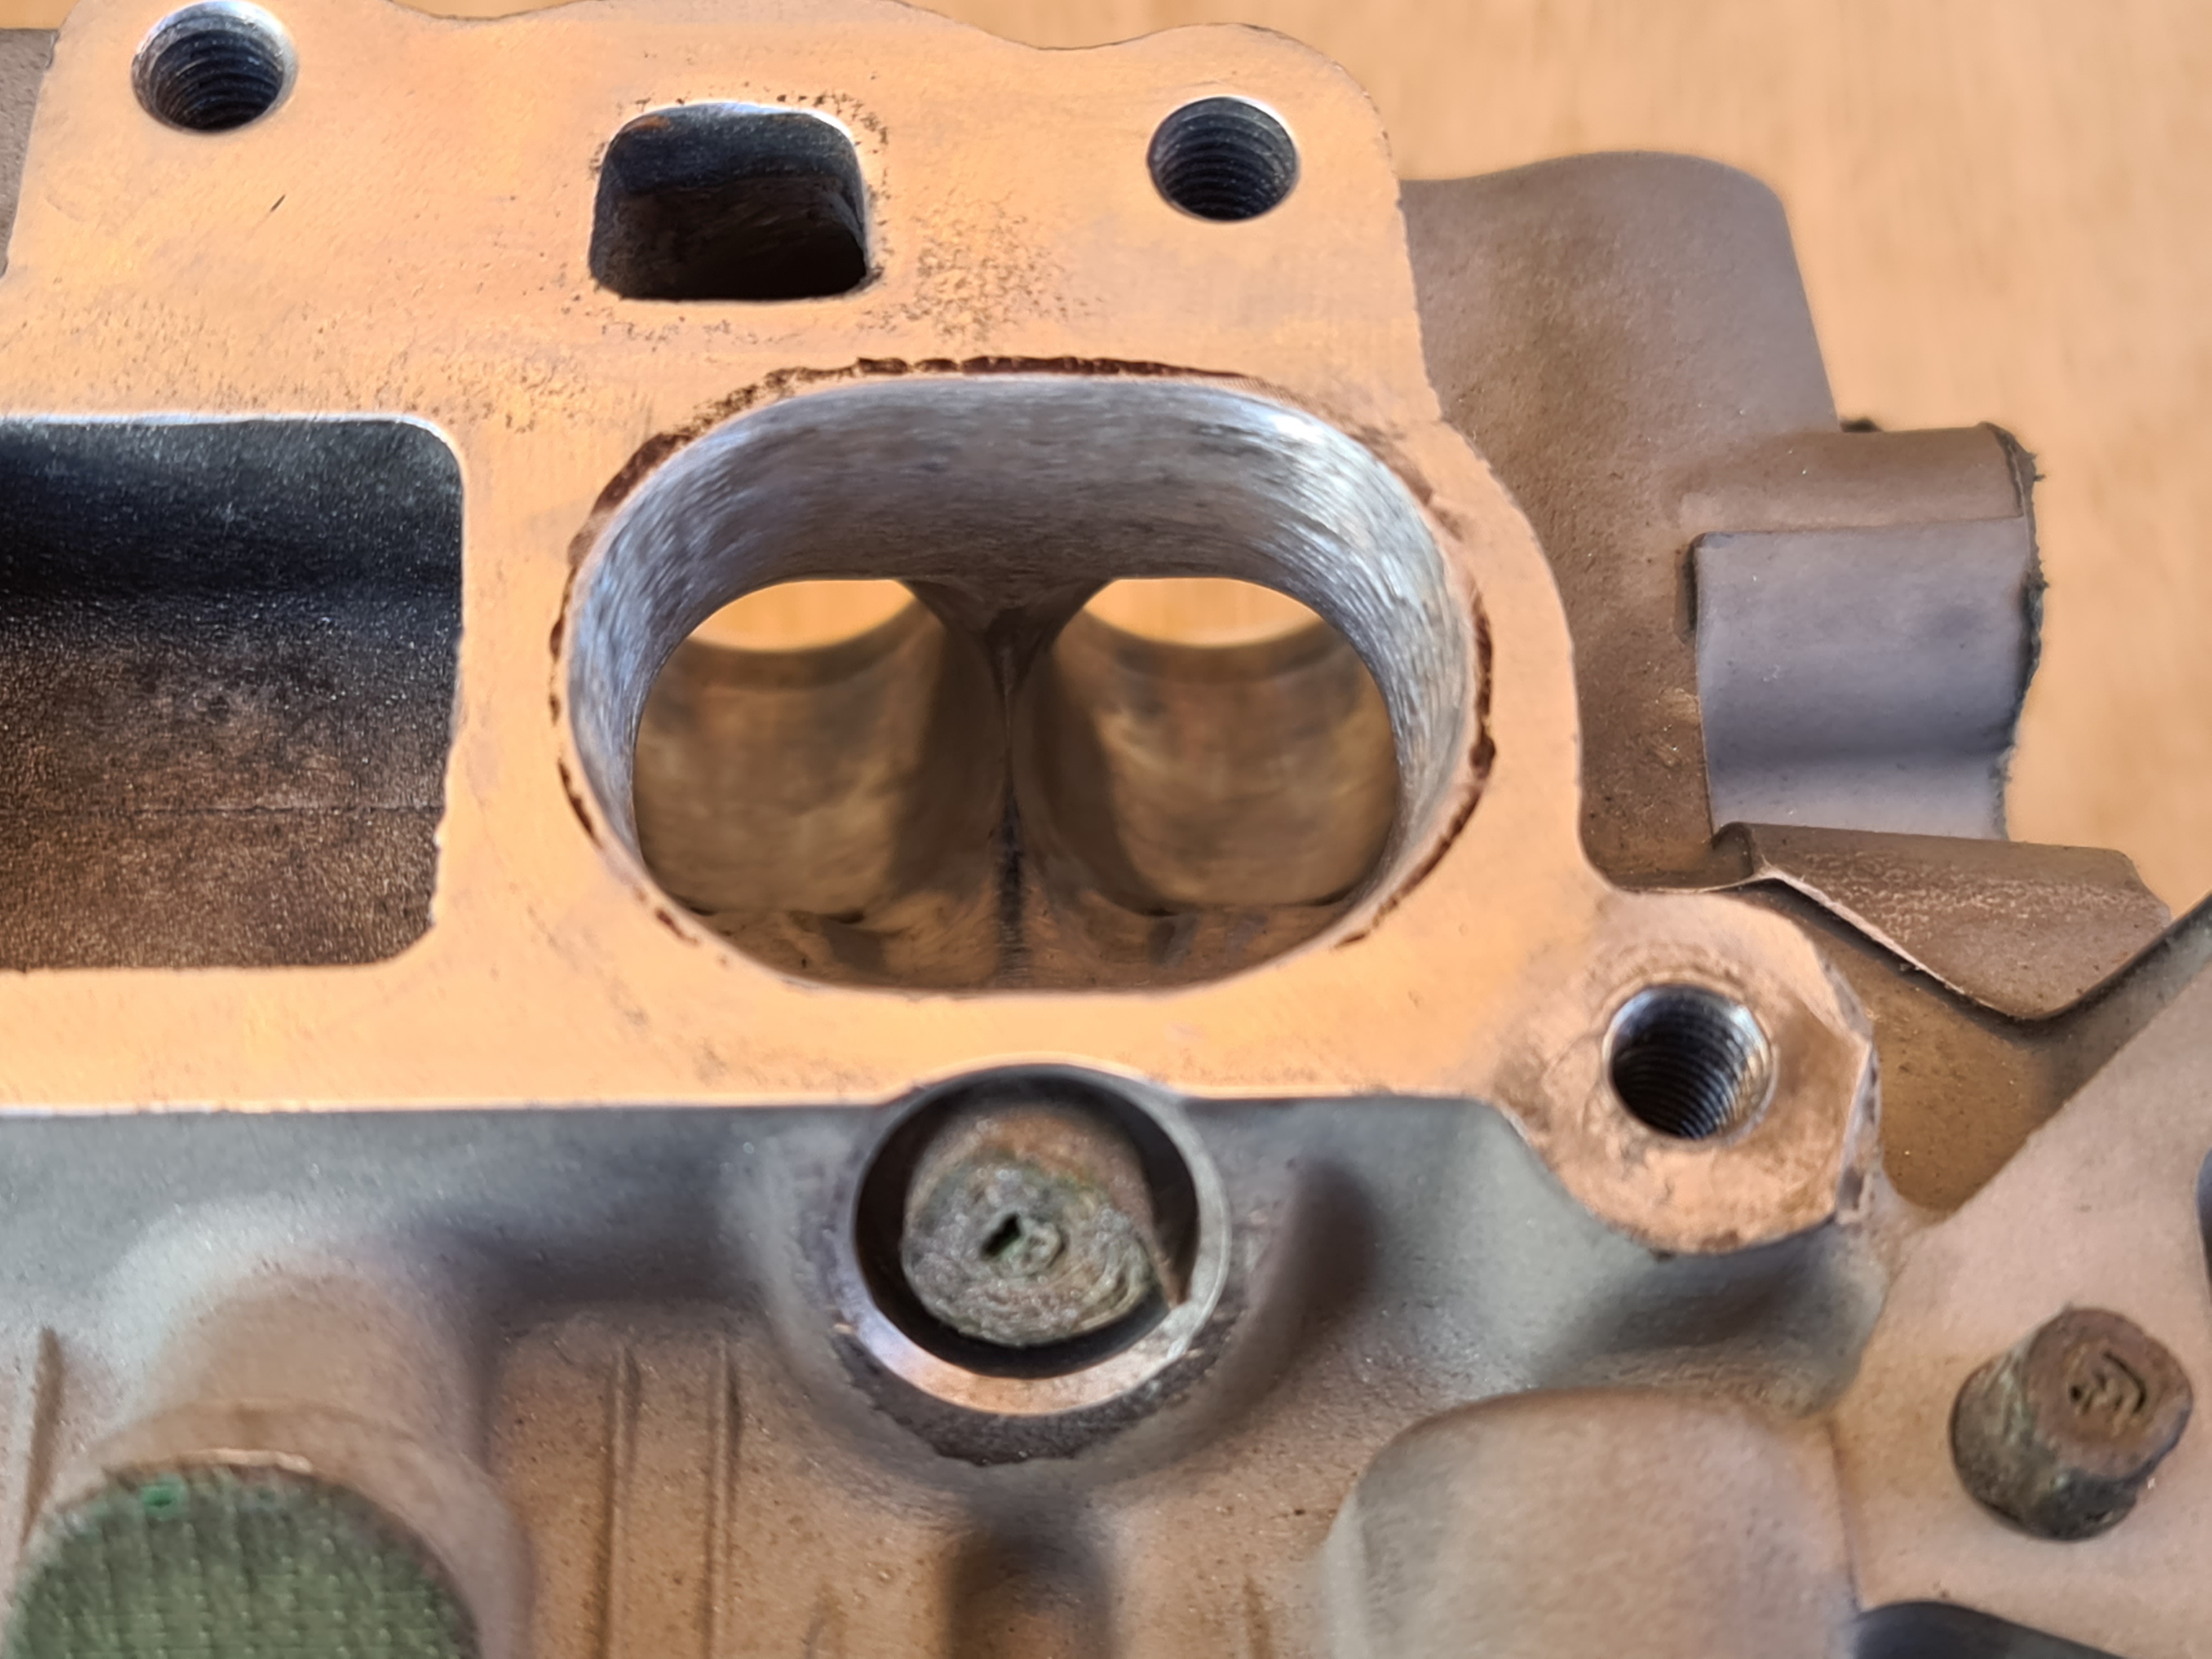
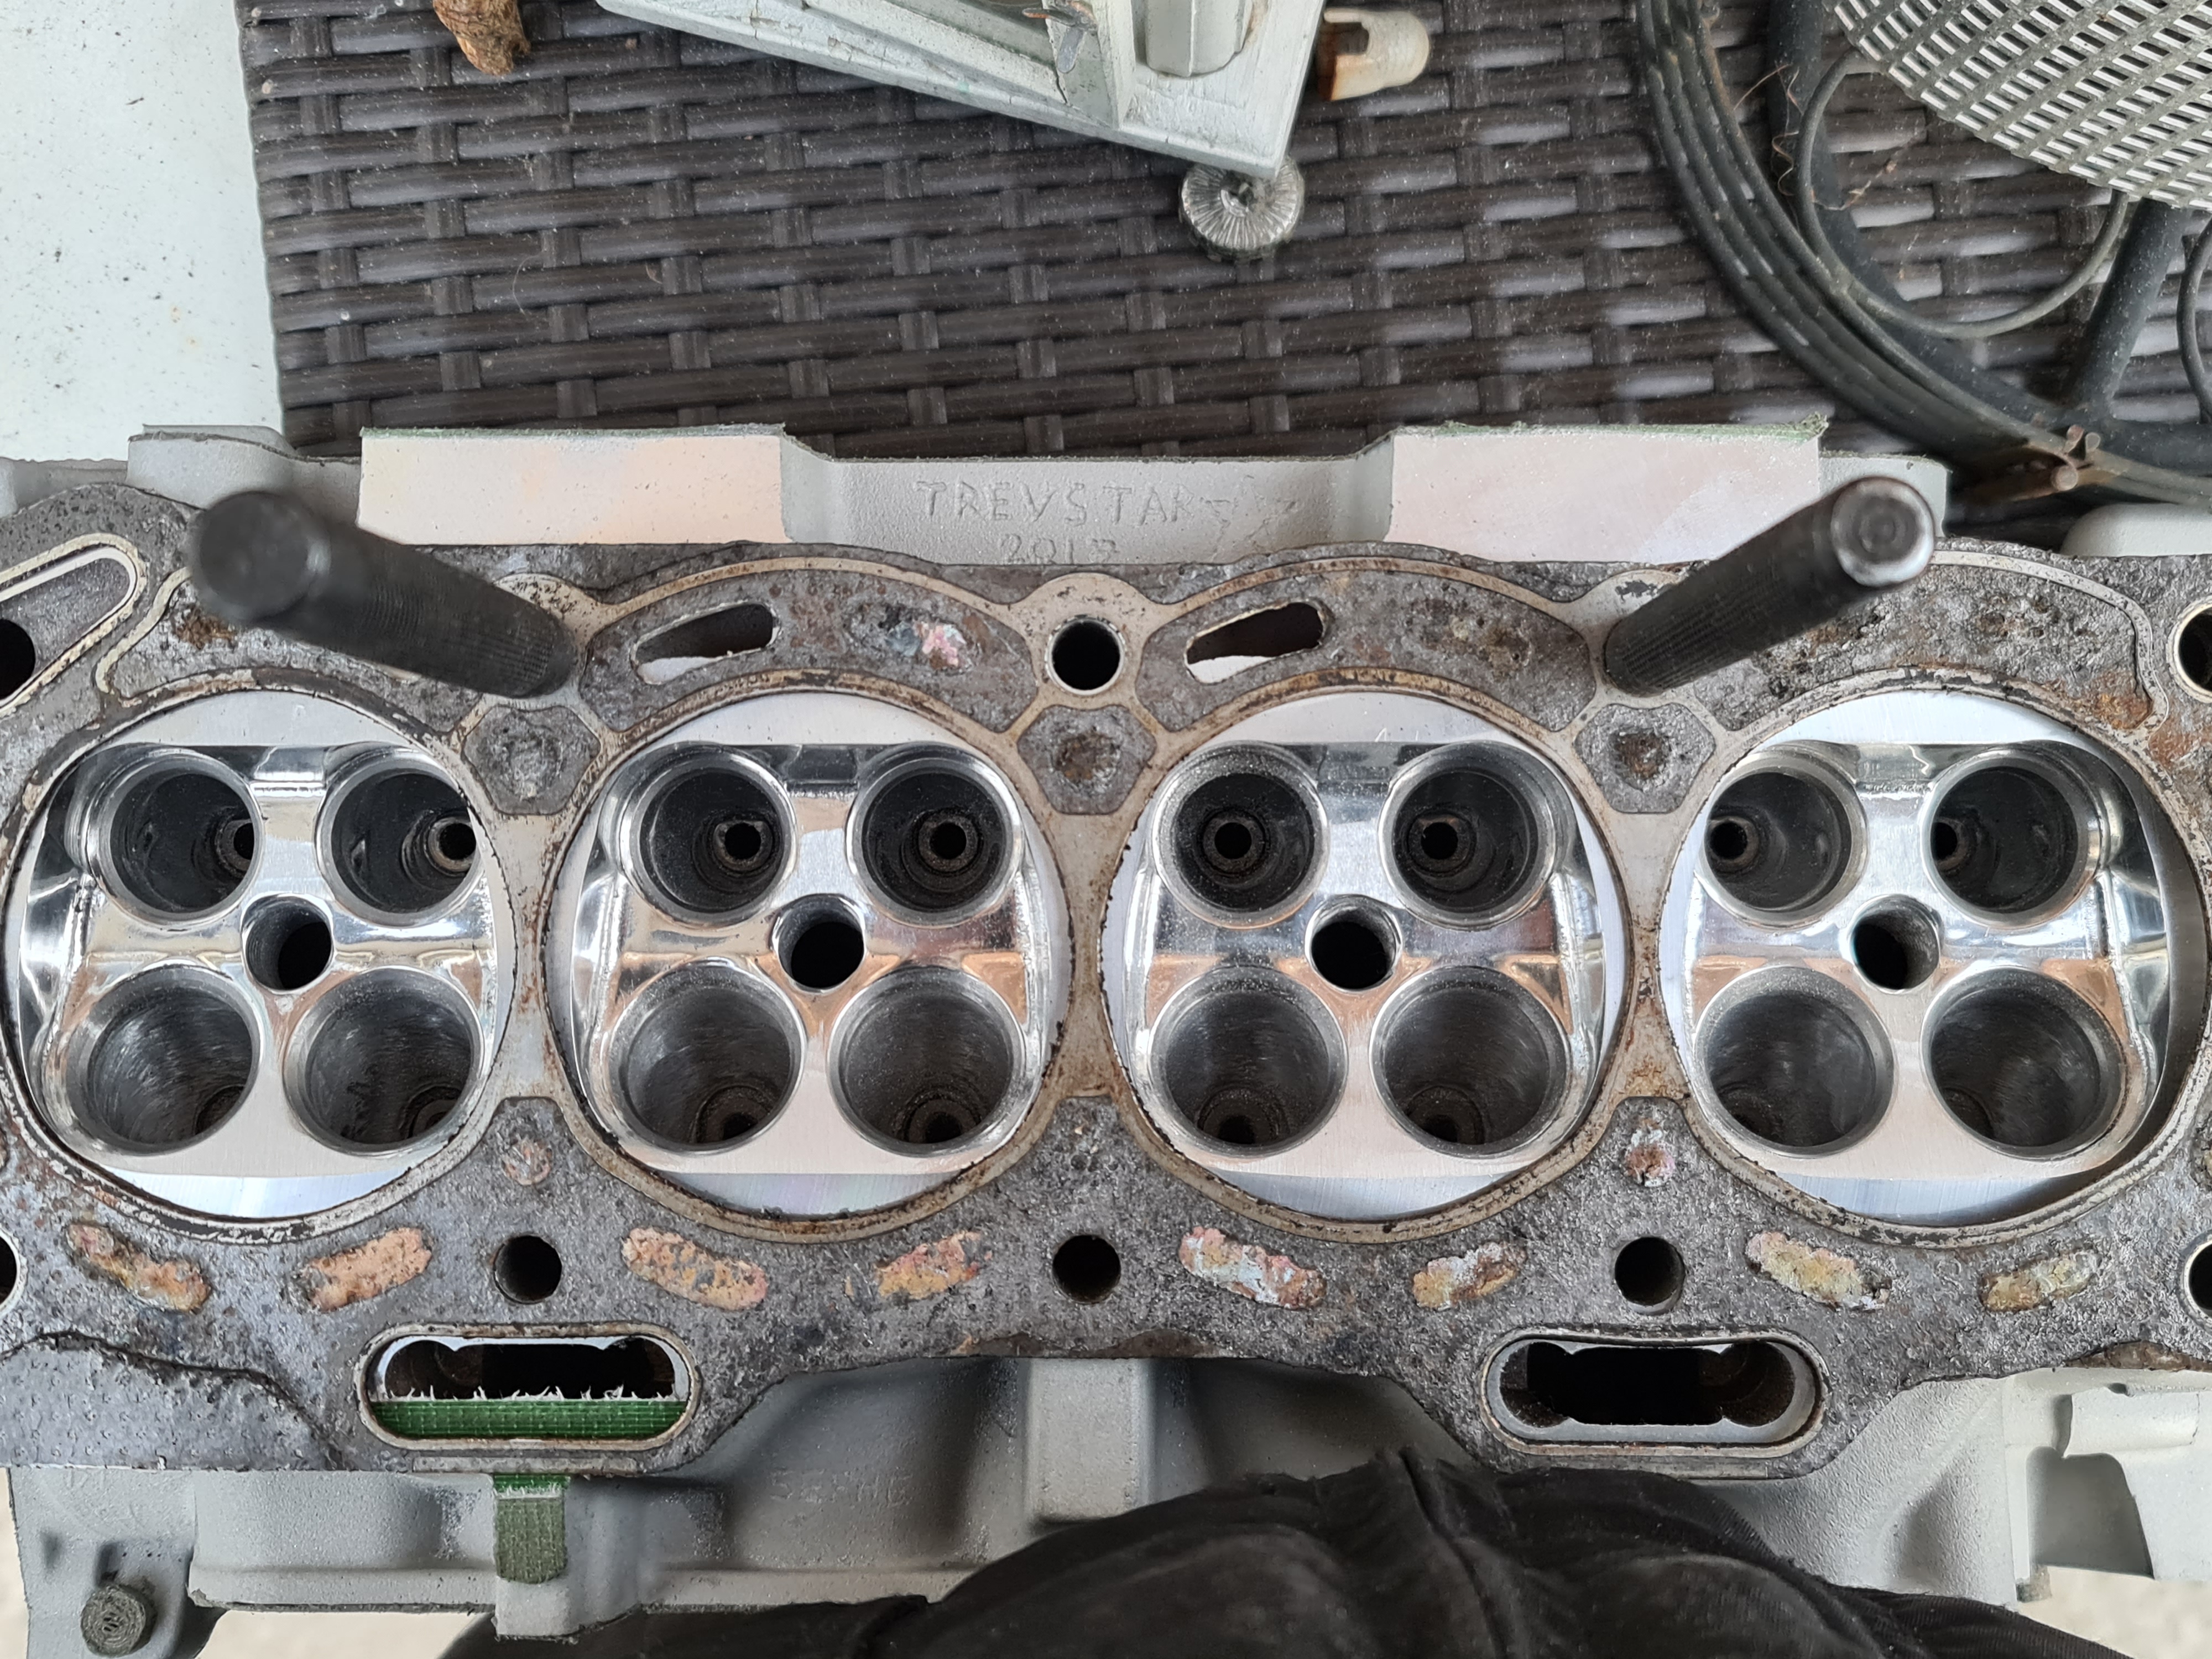
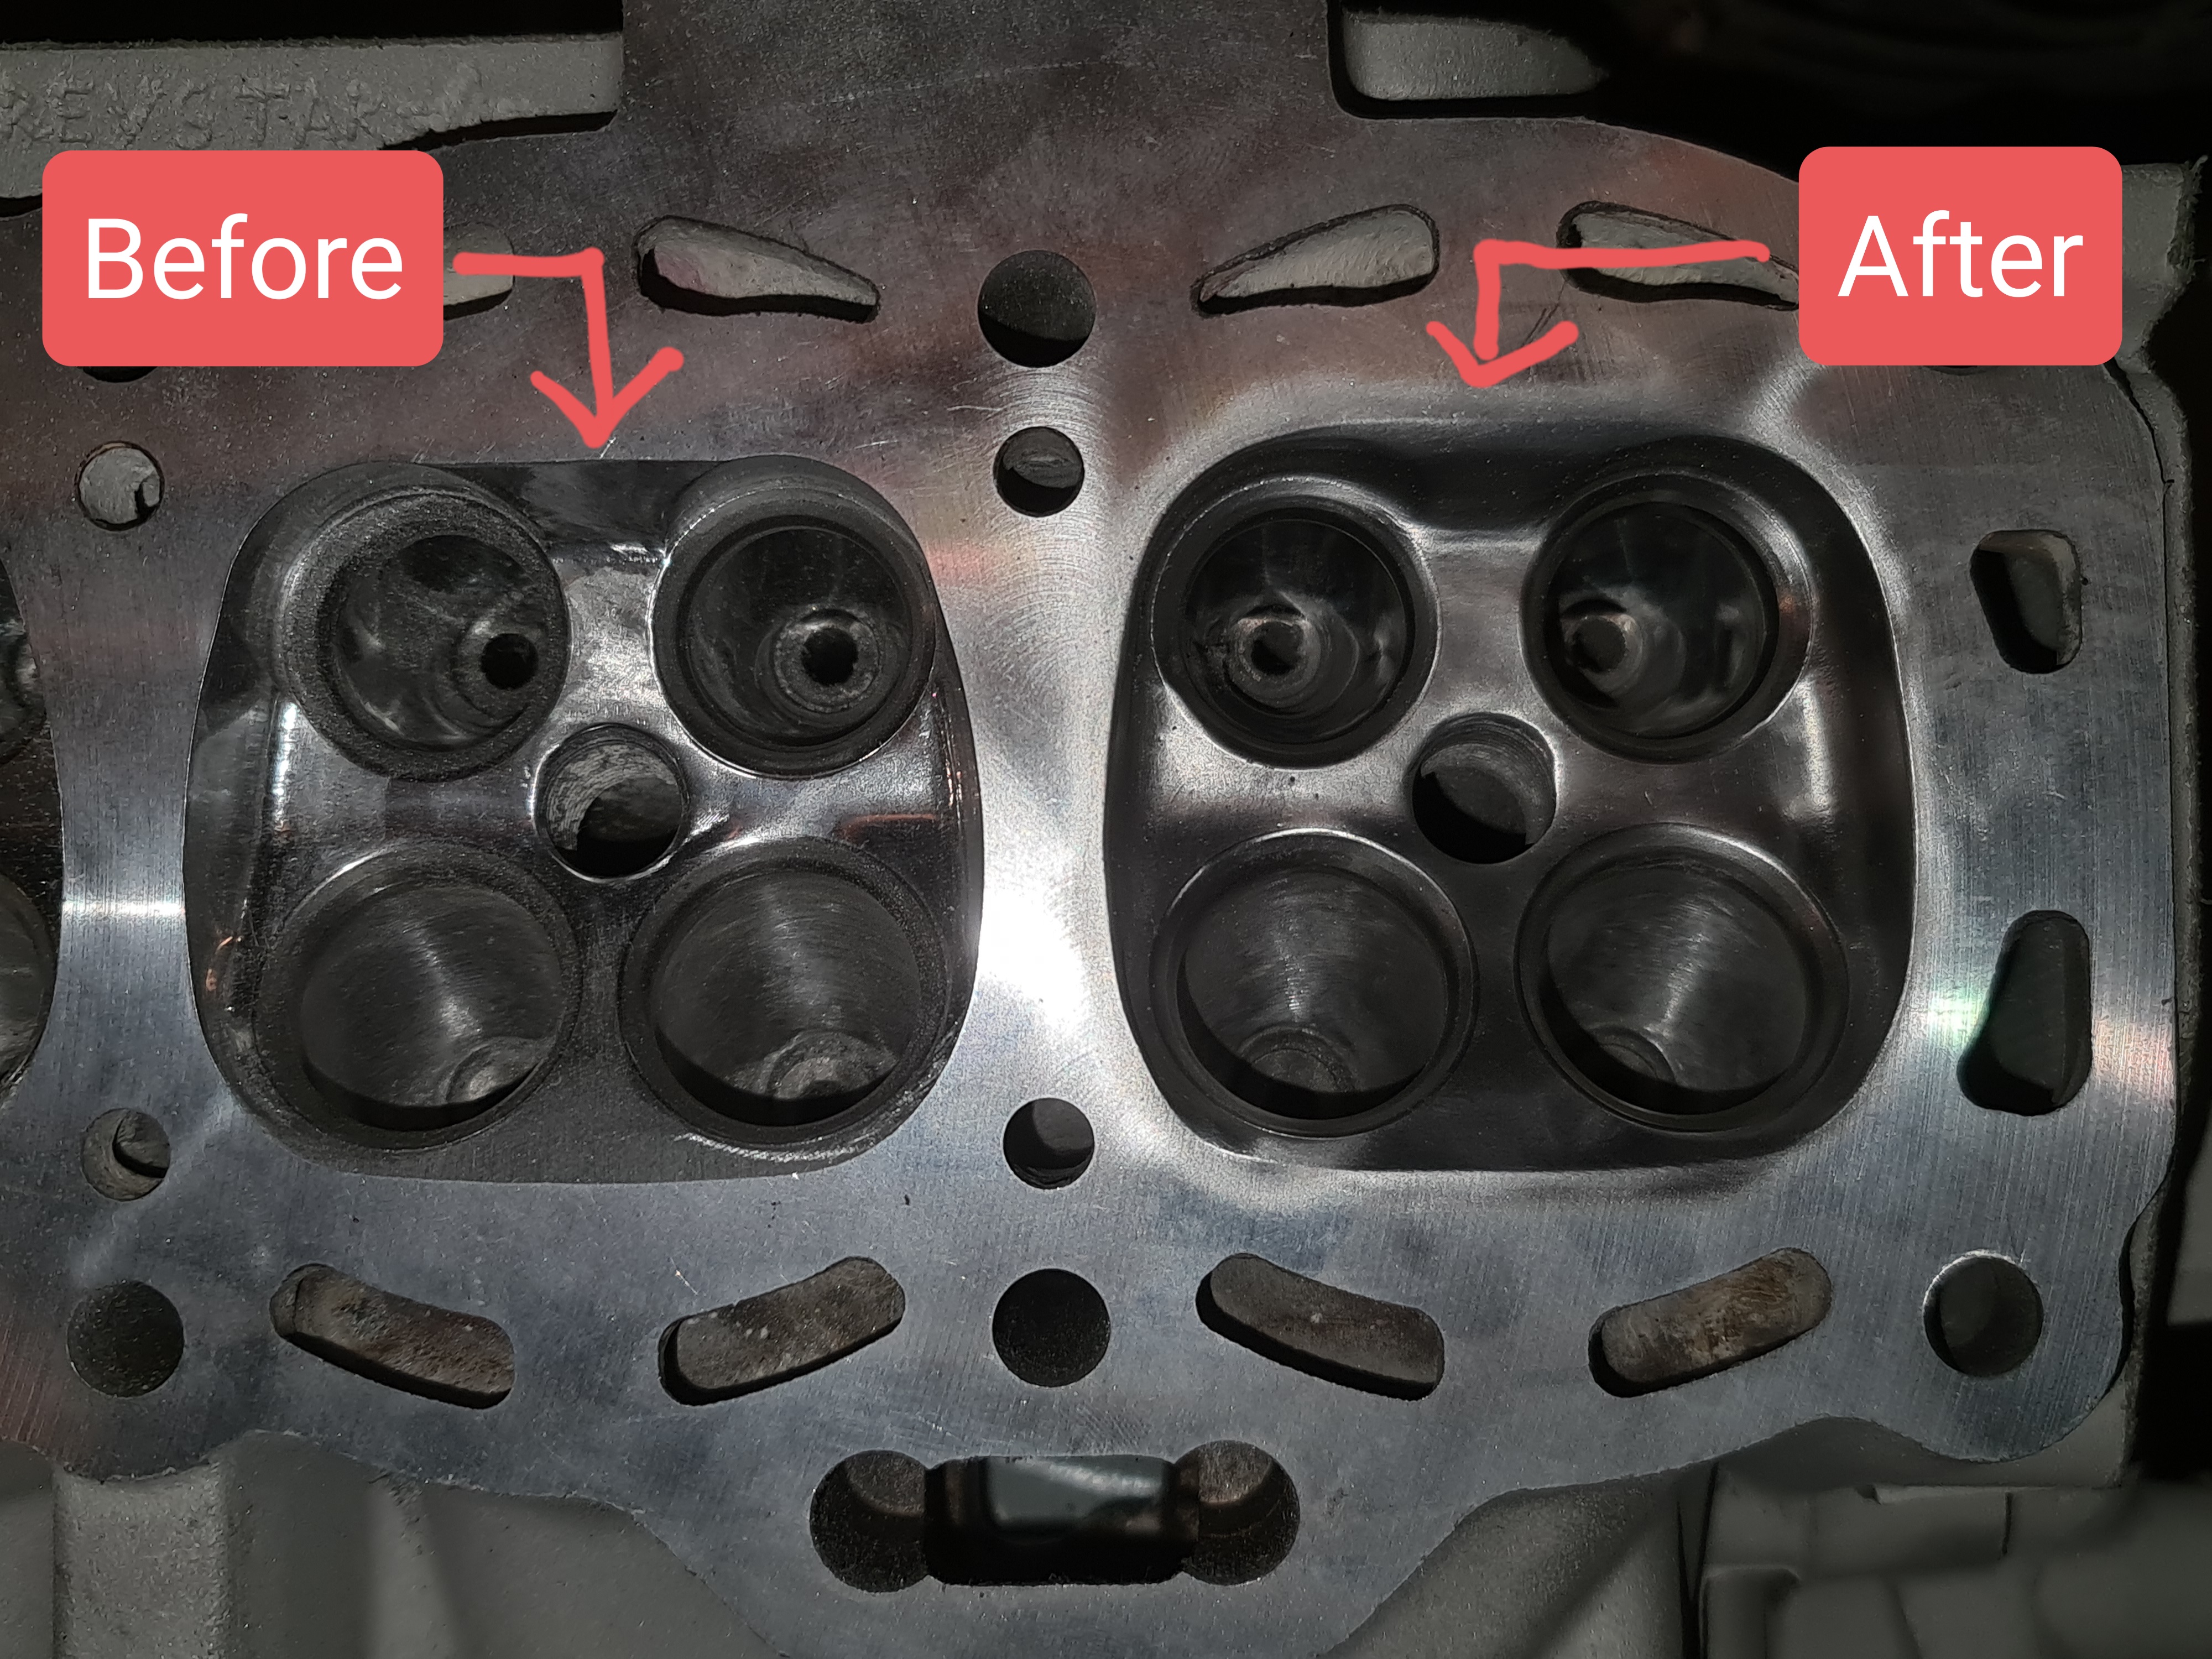
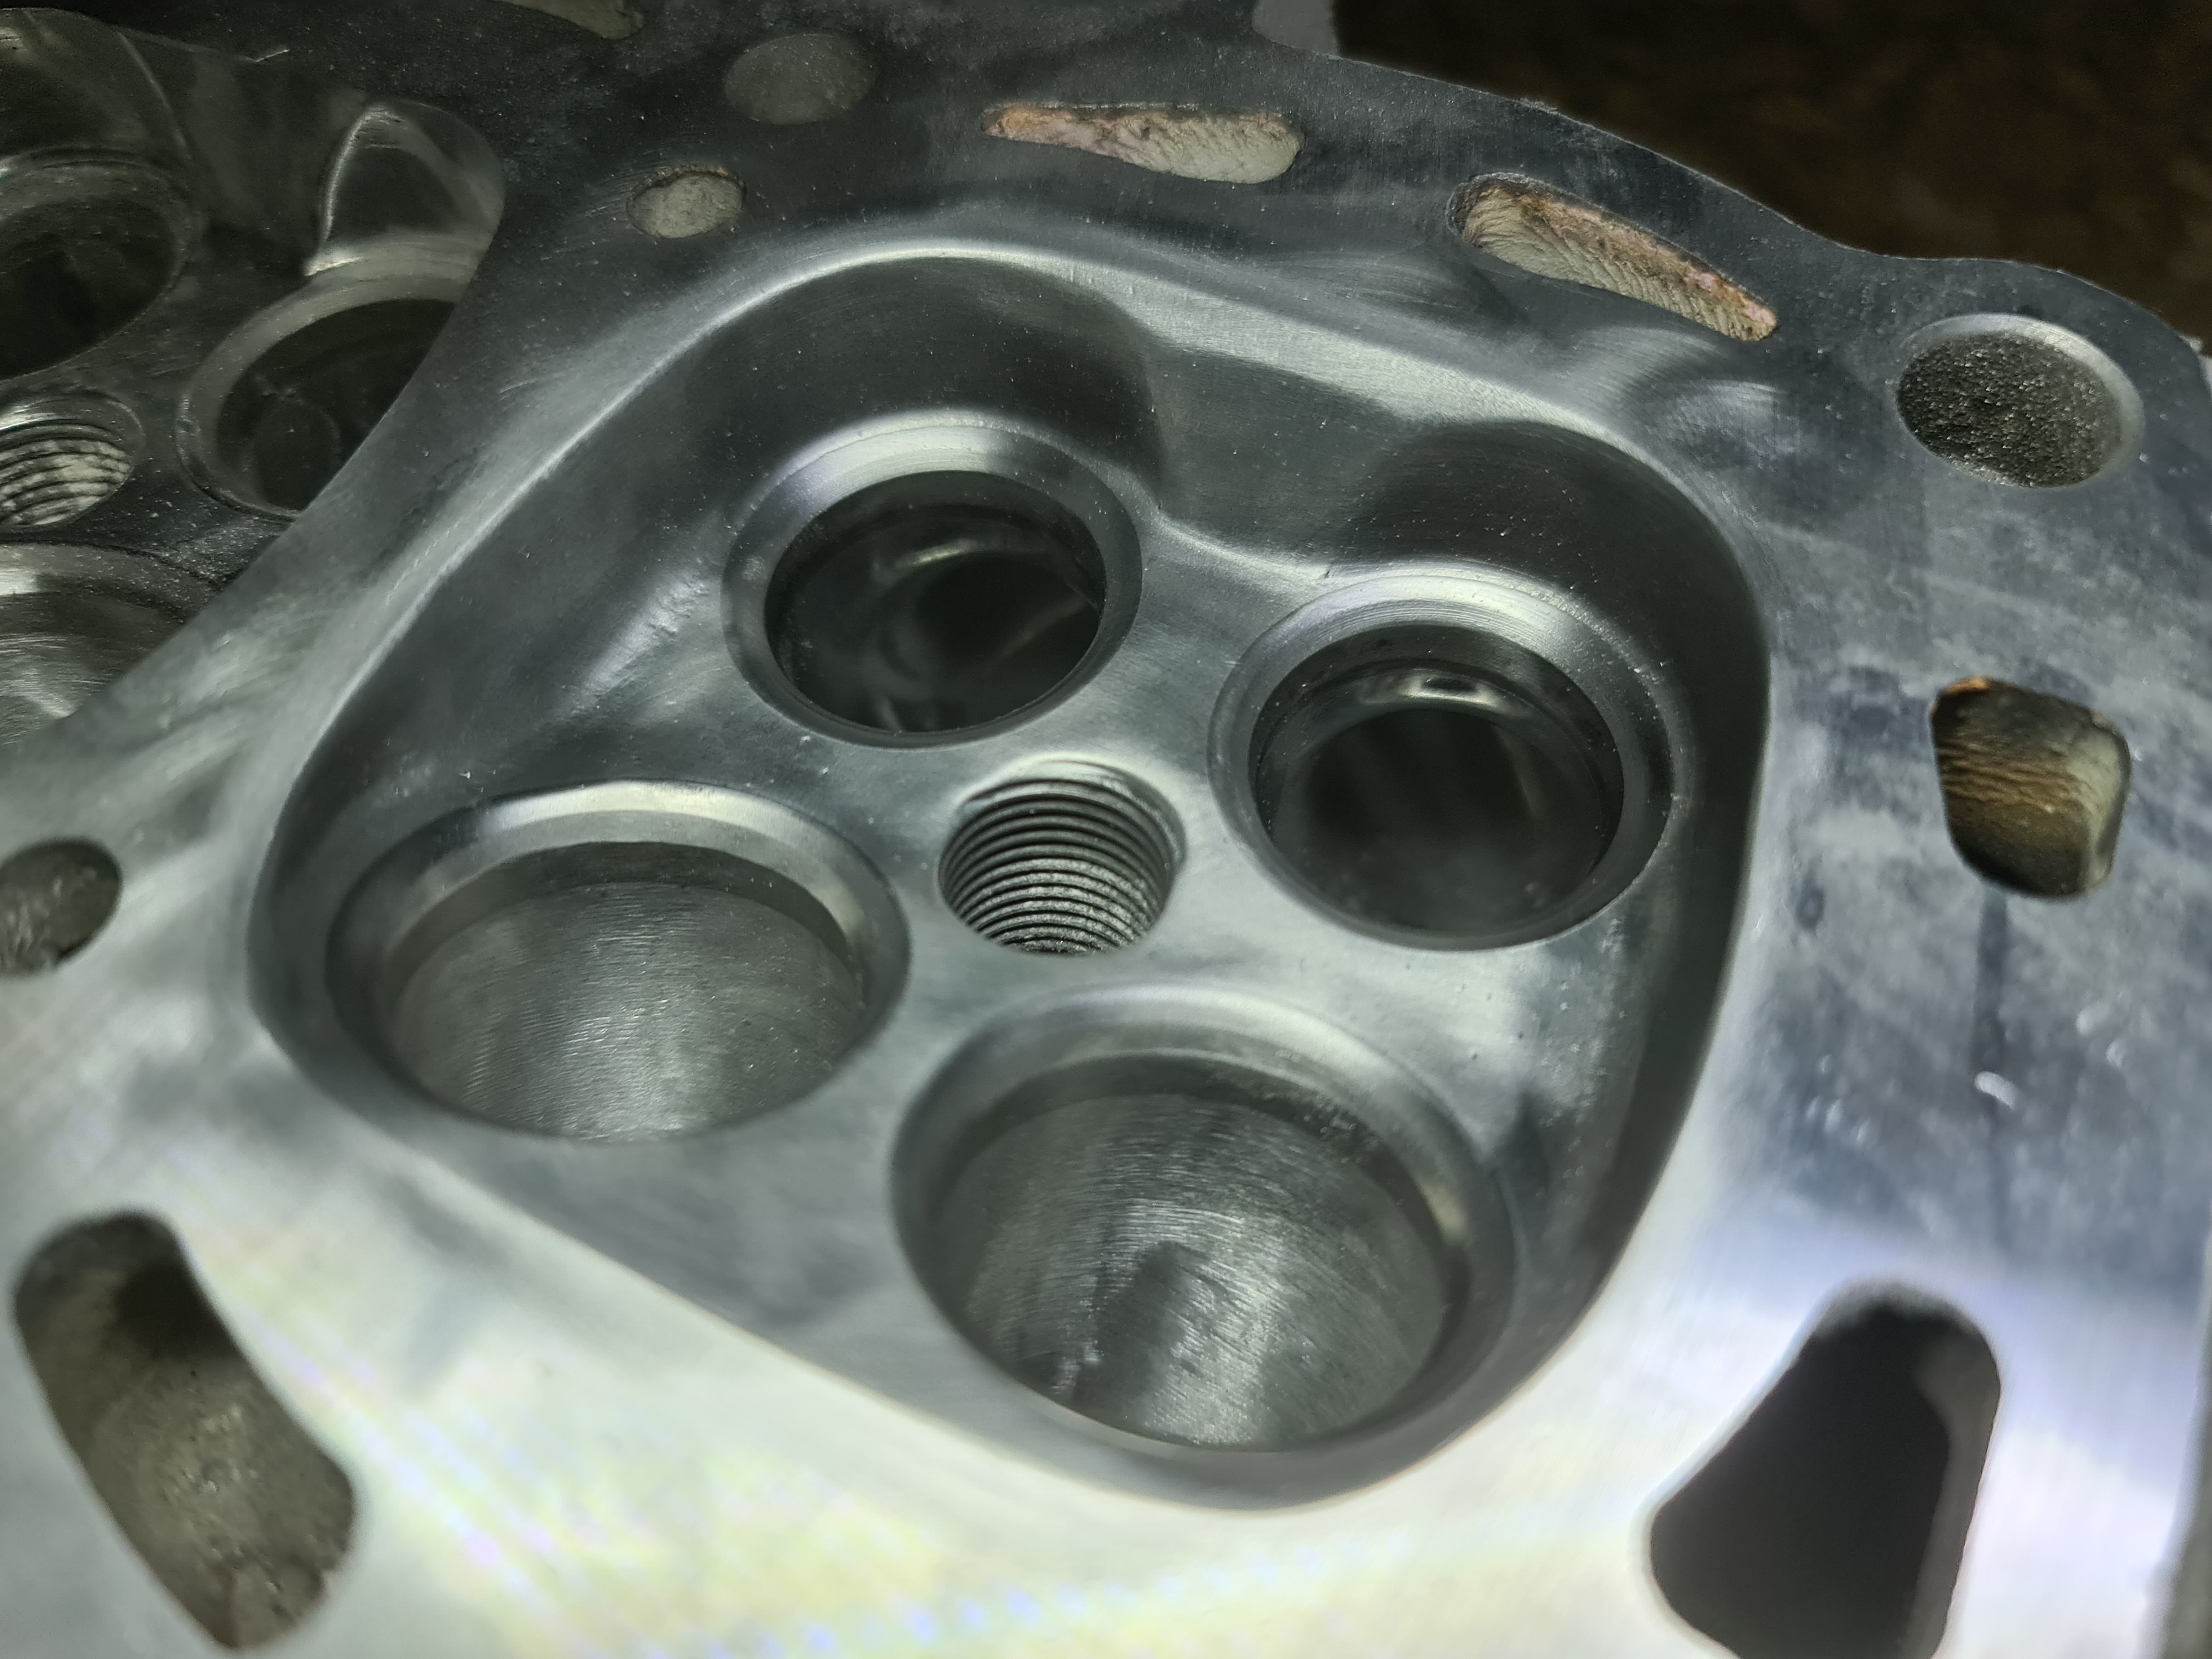
Started with the lip on the intake side:

And below is all lips on all 4 Chambers removed:
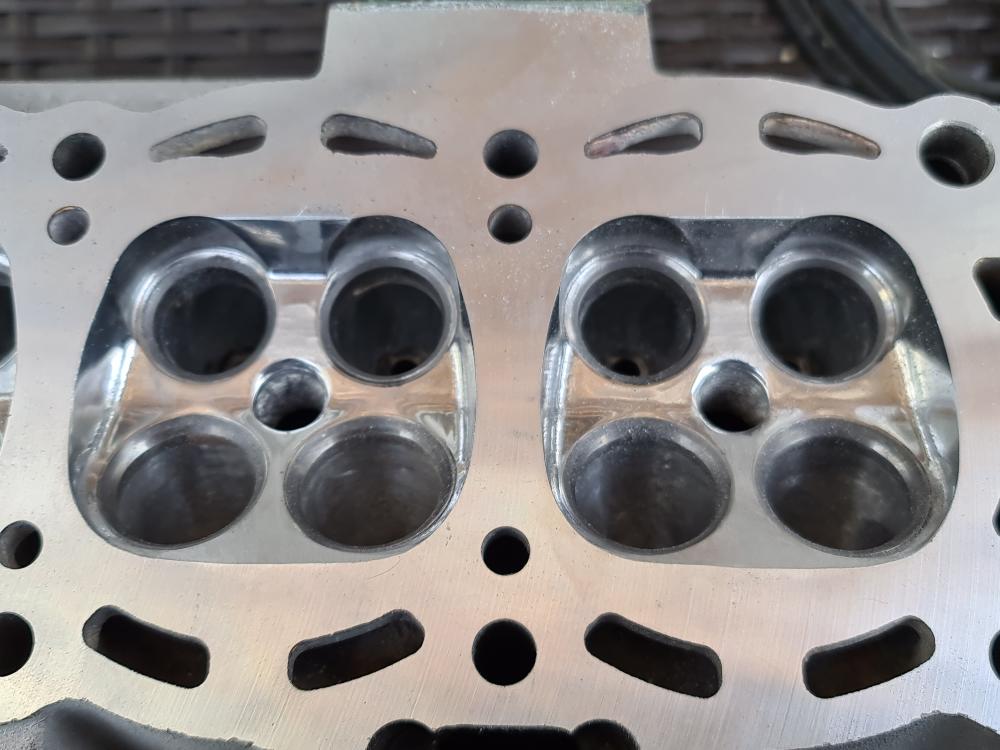
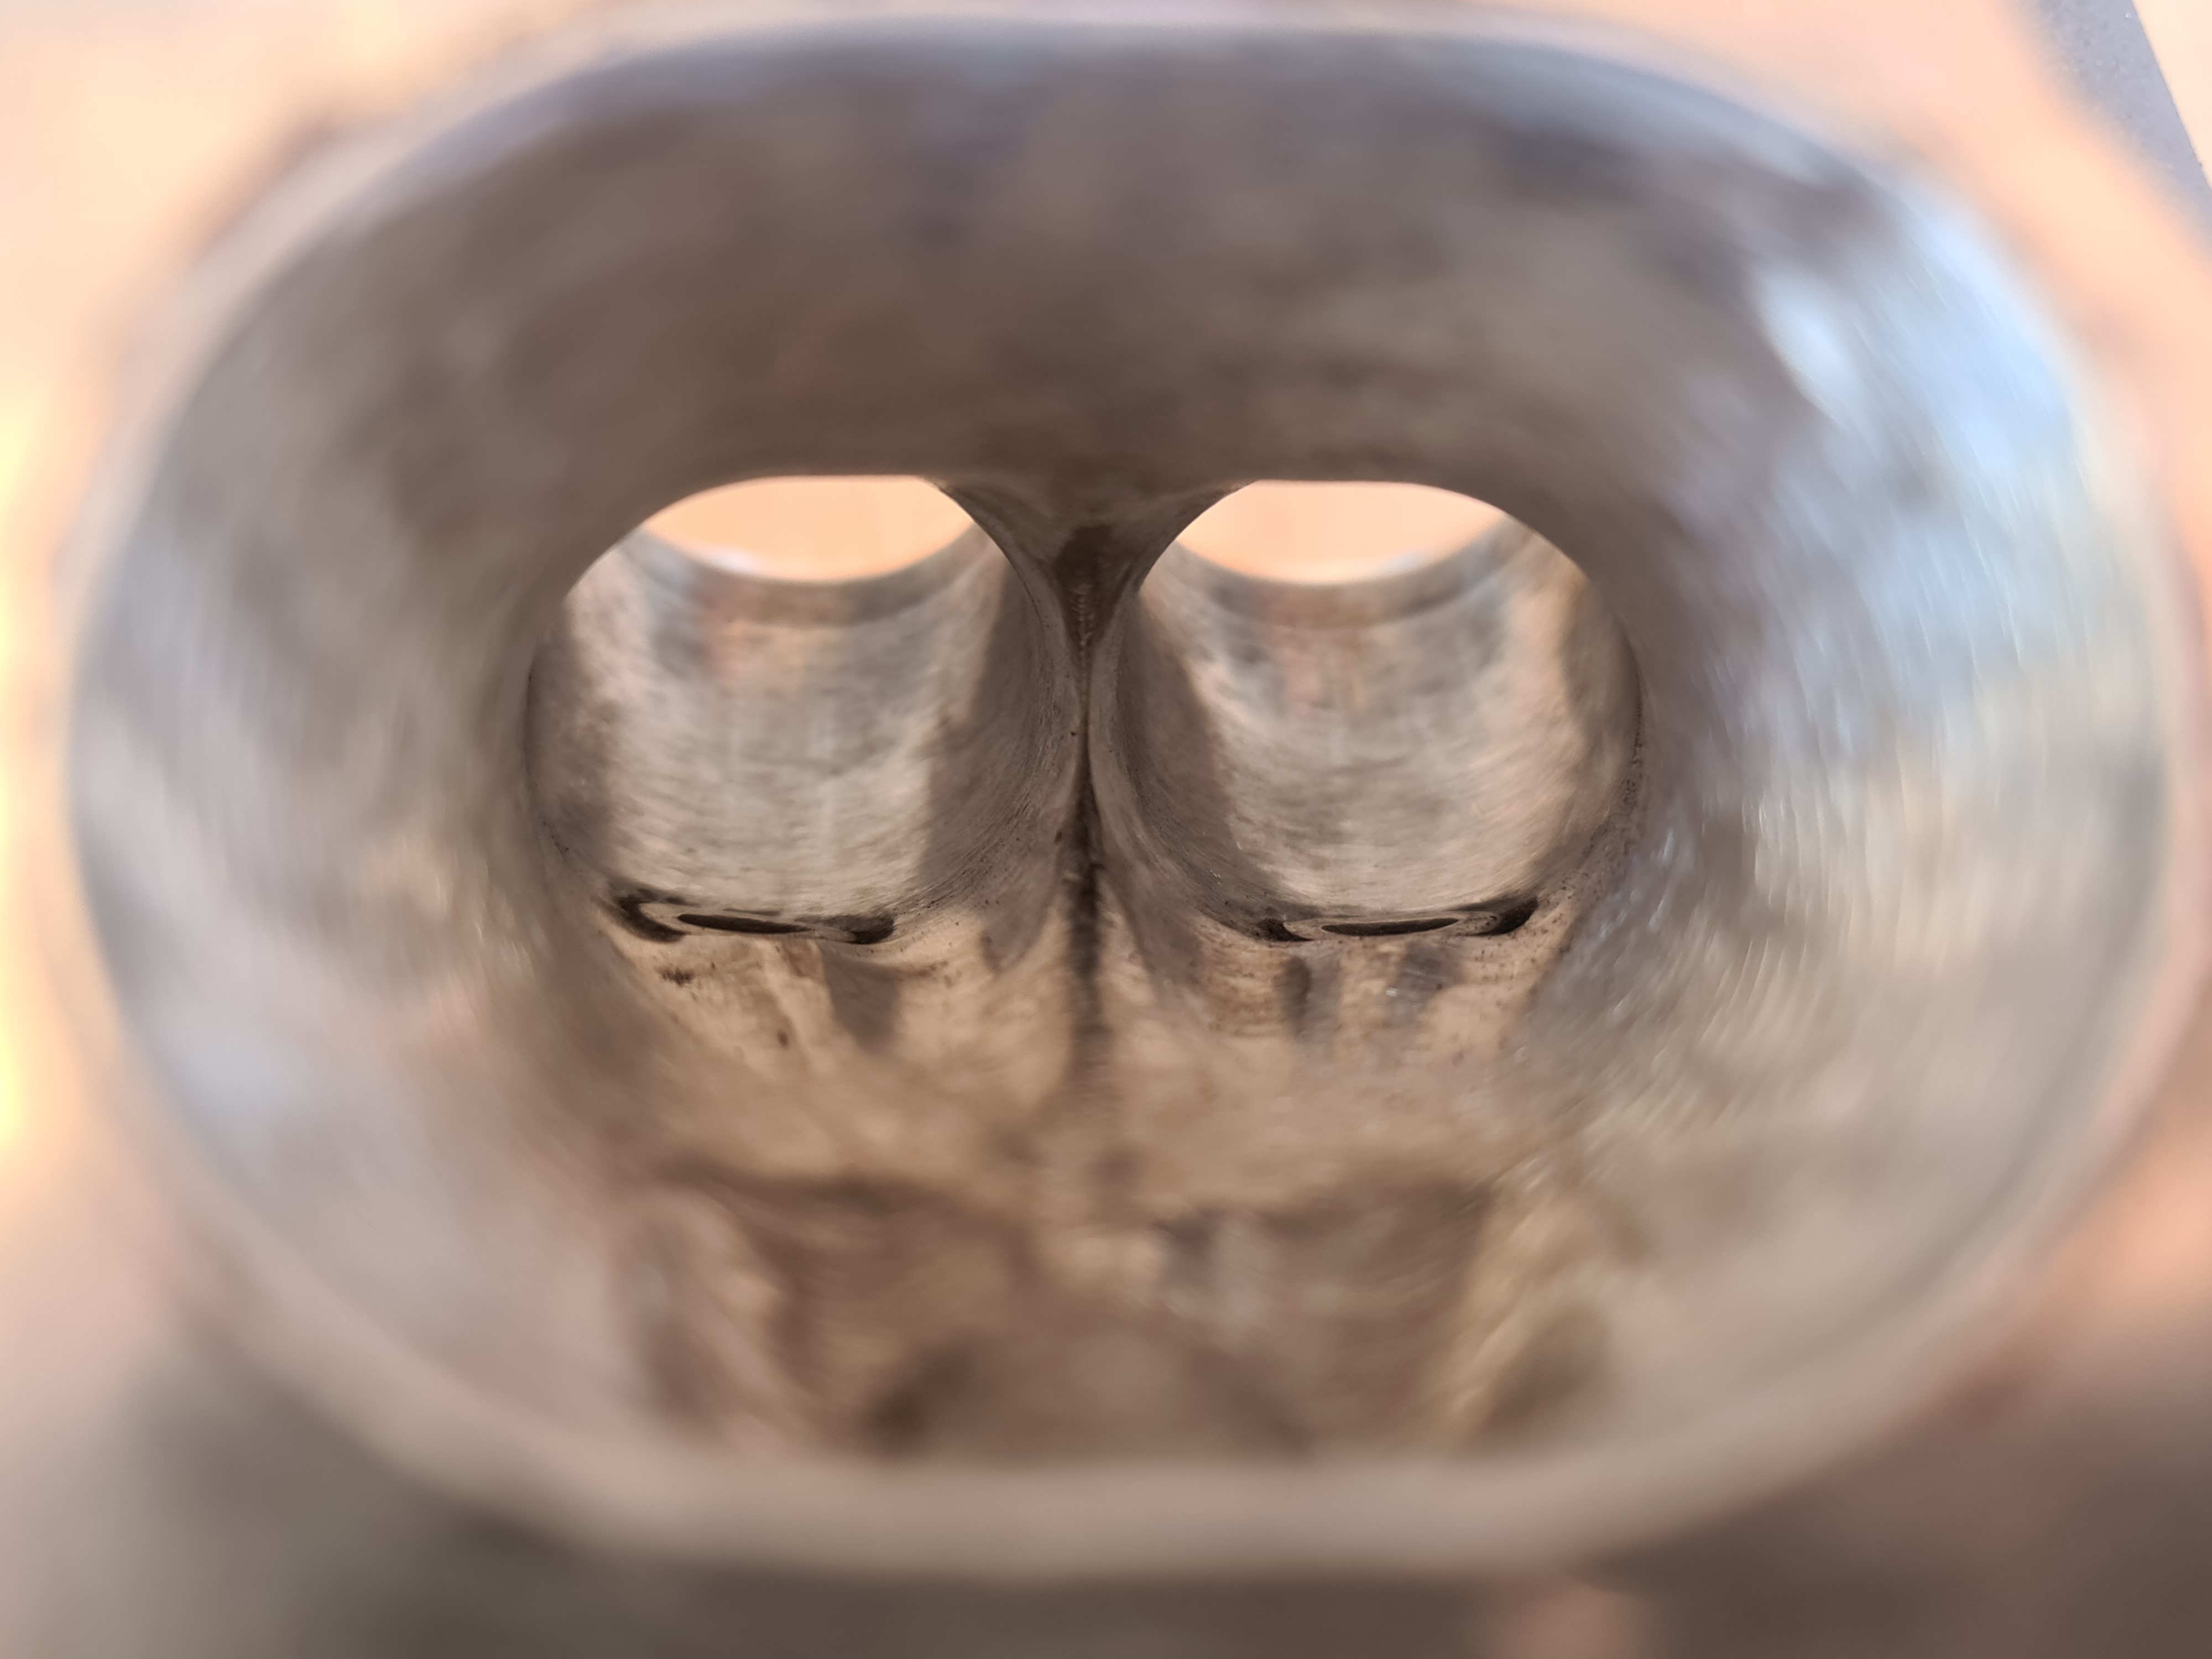
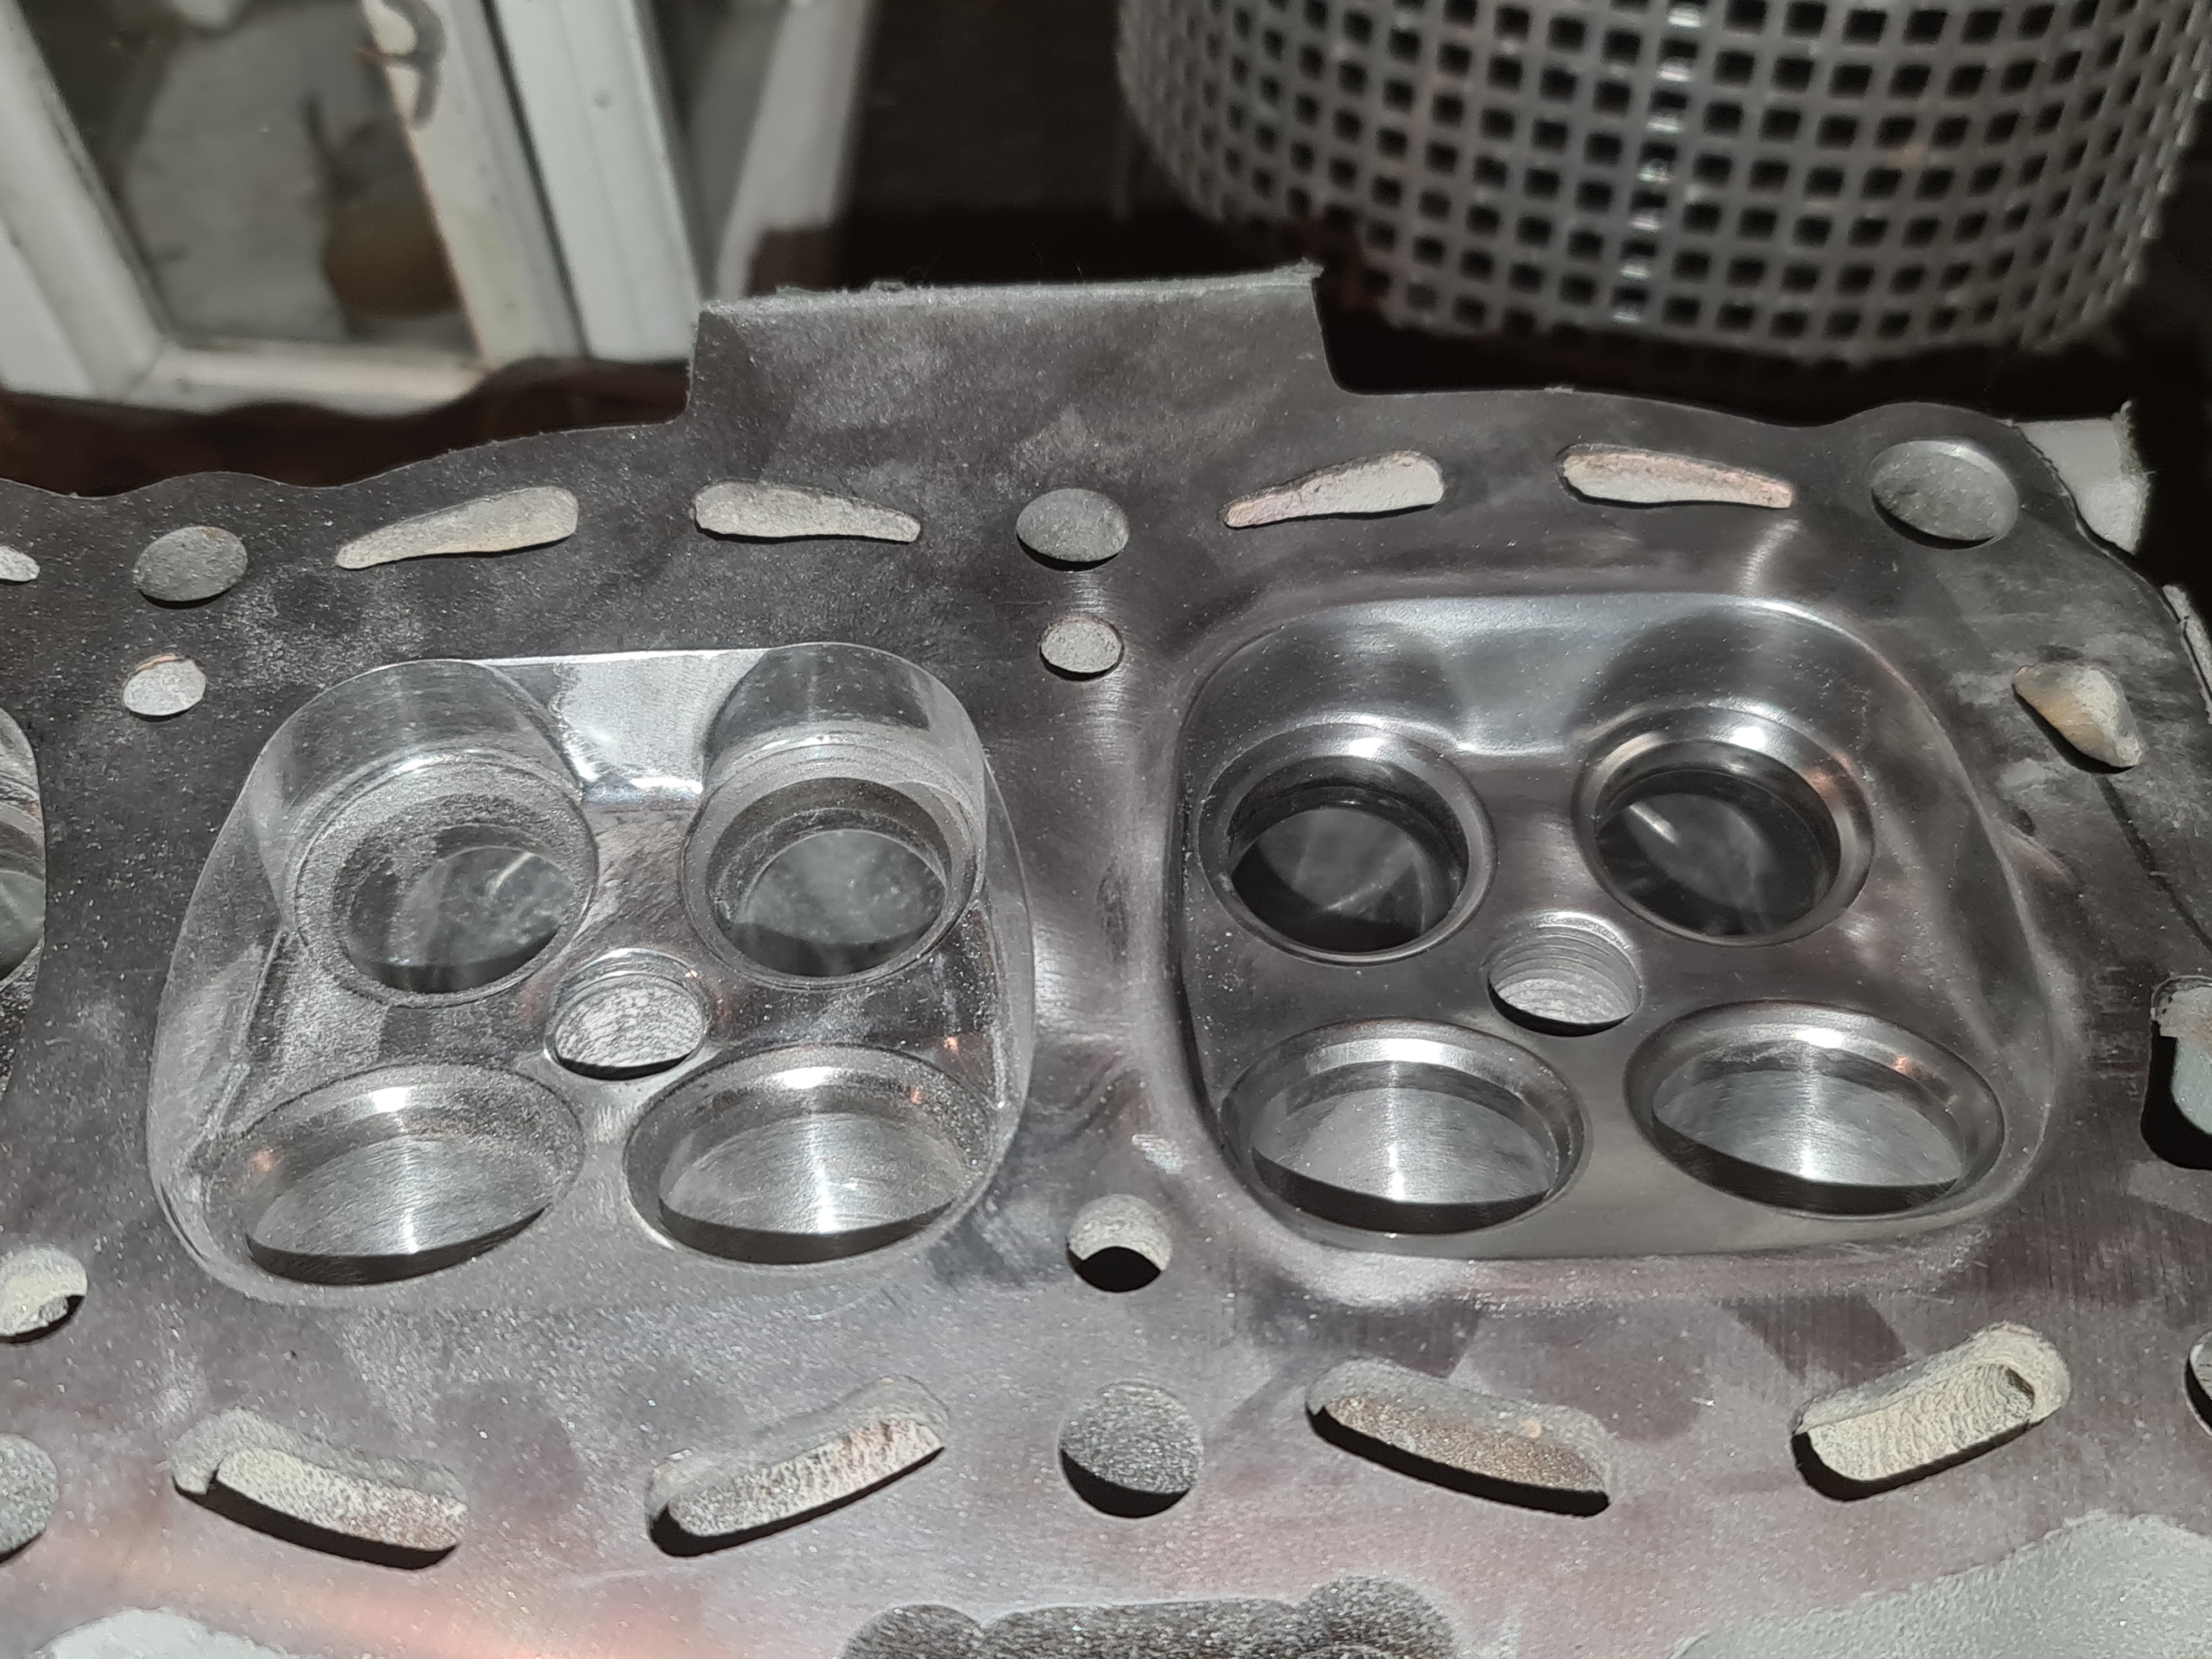
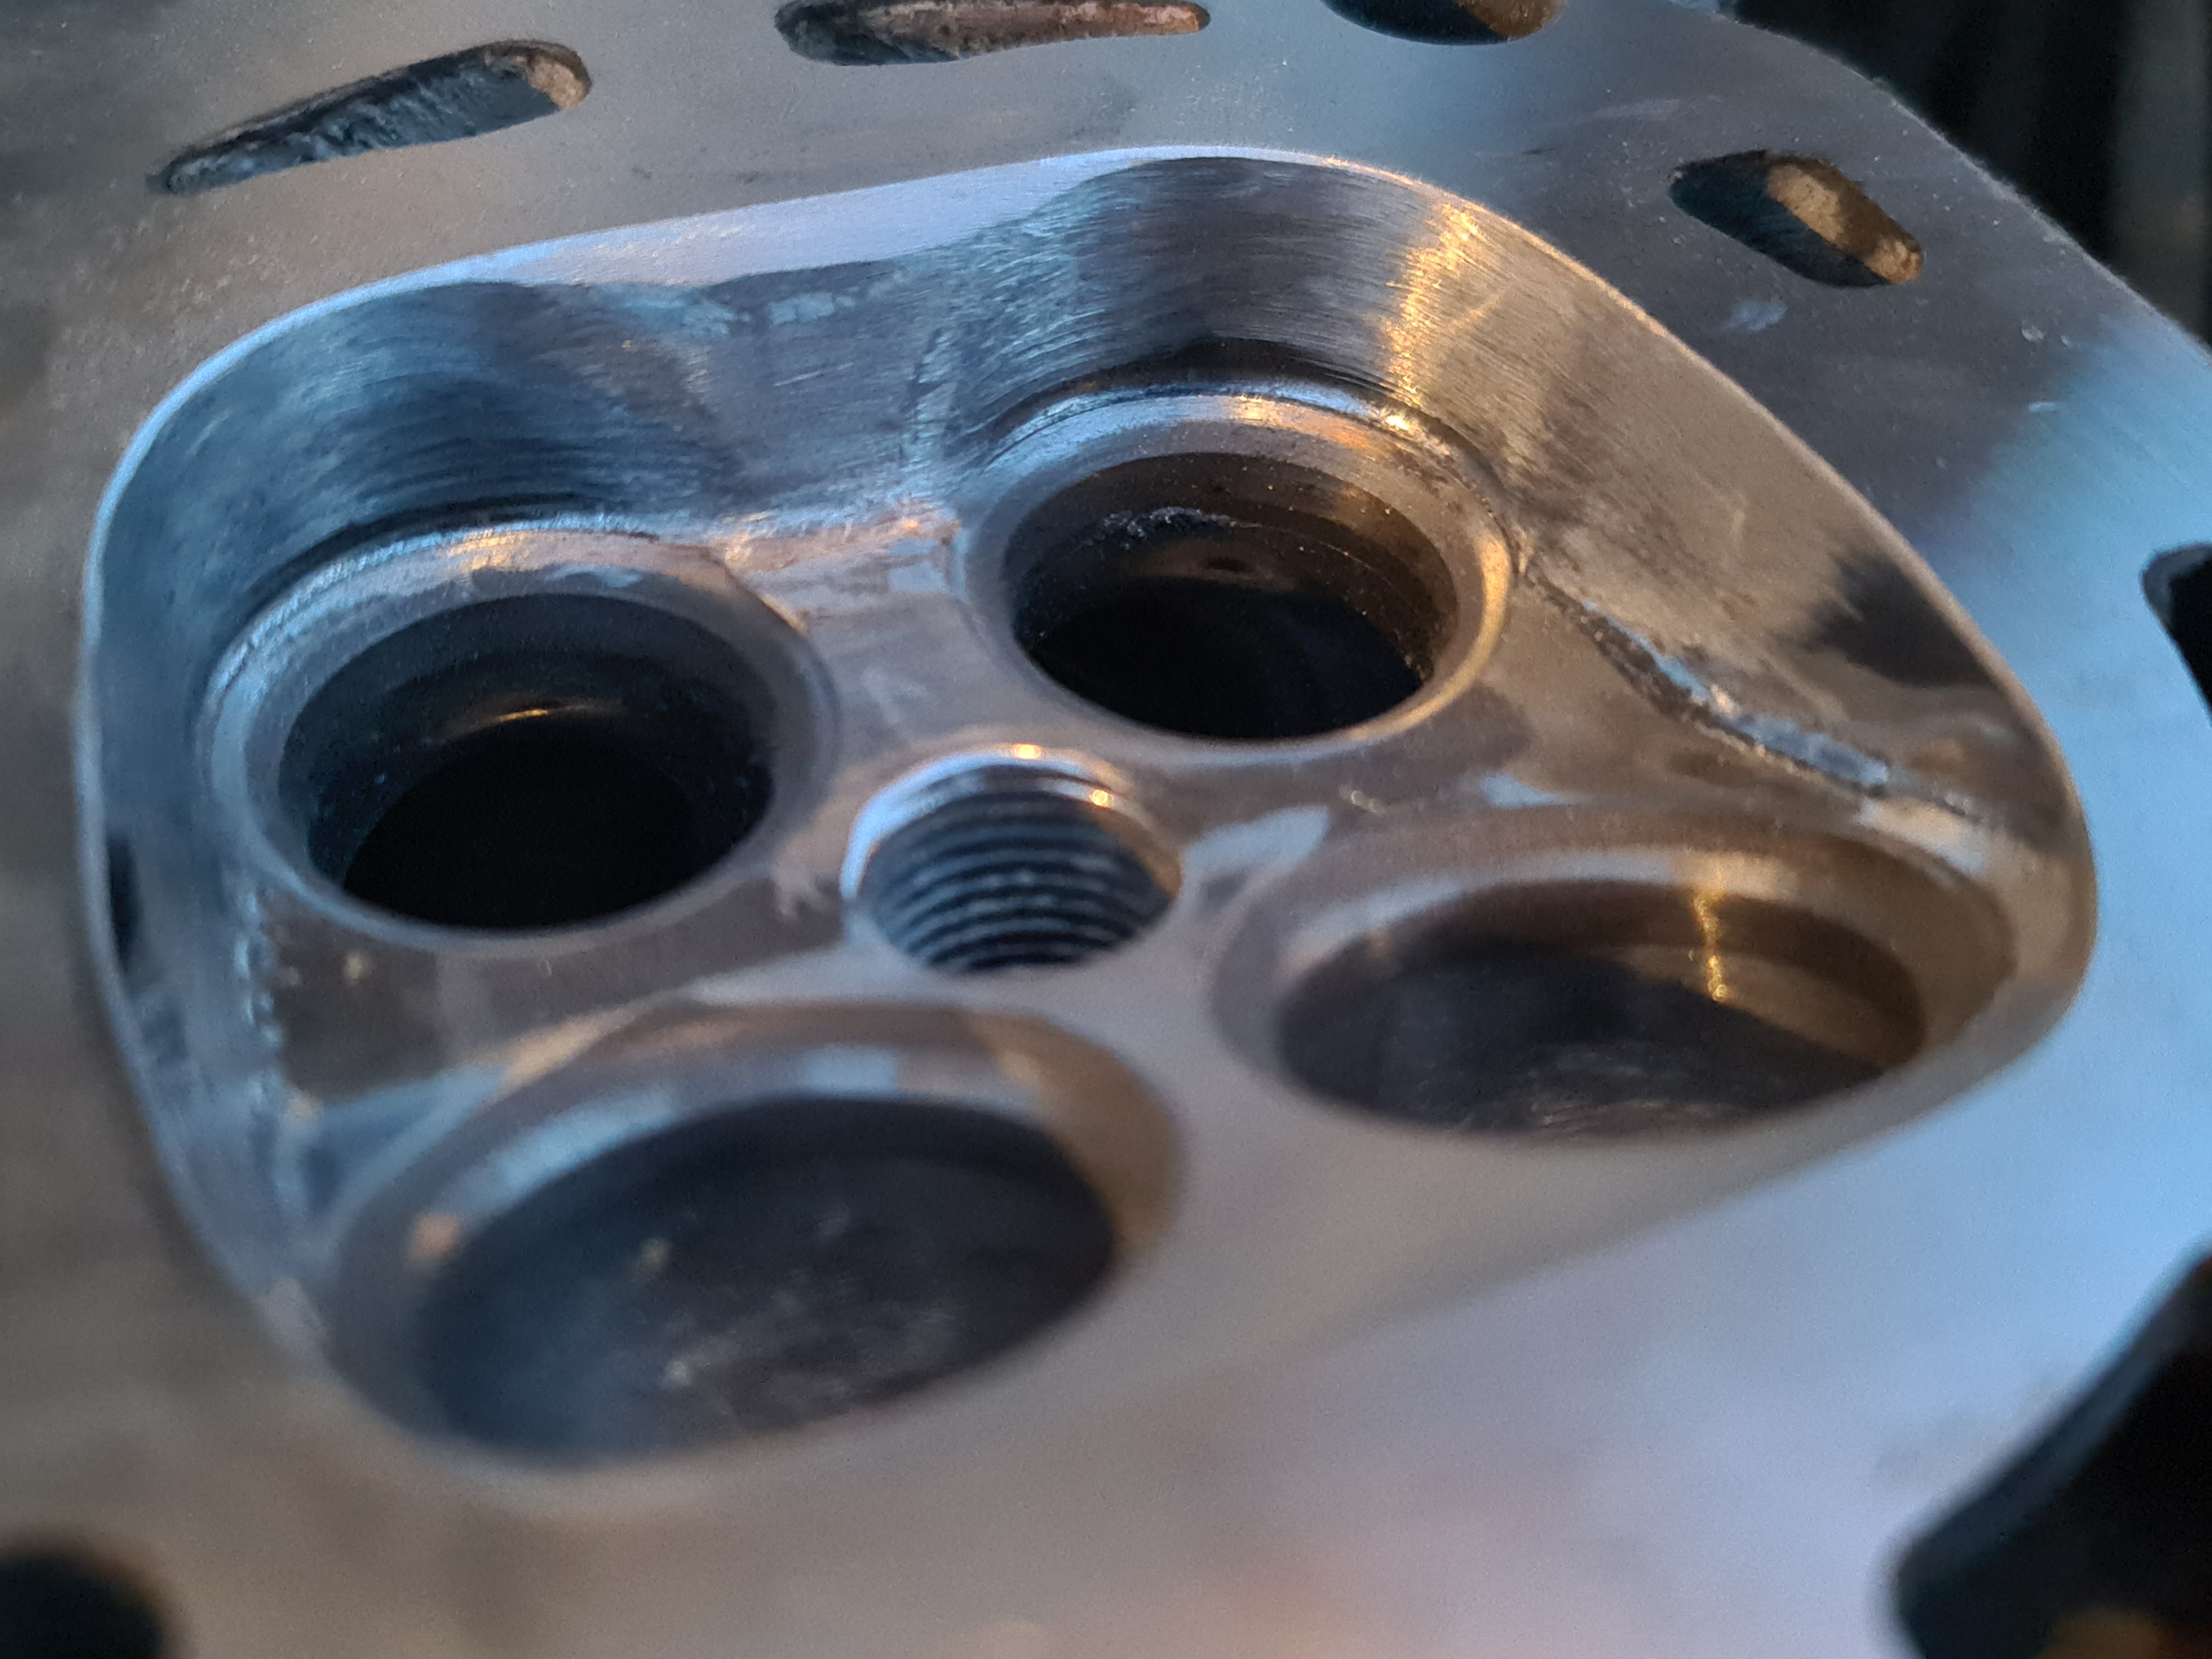
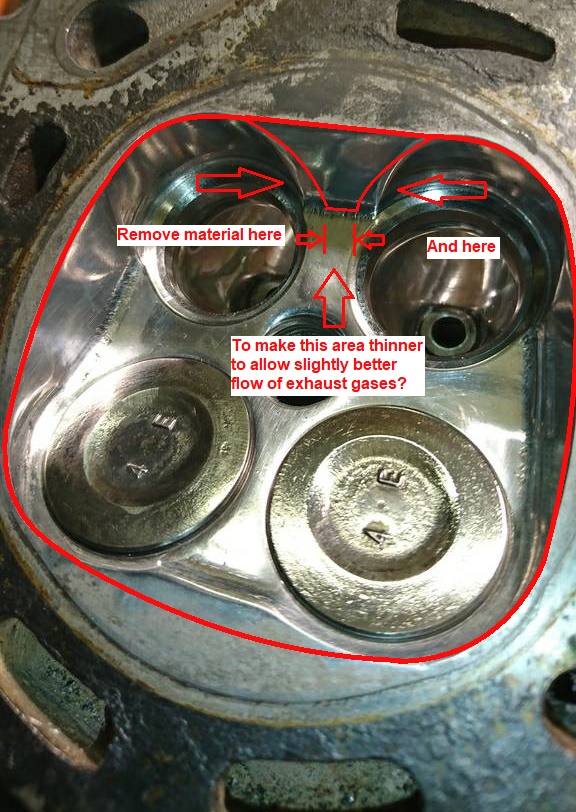
After that was done I turn focused to the portion of material between the 2 exhaust valves. Only done the one chamber today, but I will continue tomorrow, but you can compare the one I've done to the one next to it:

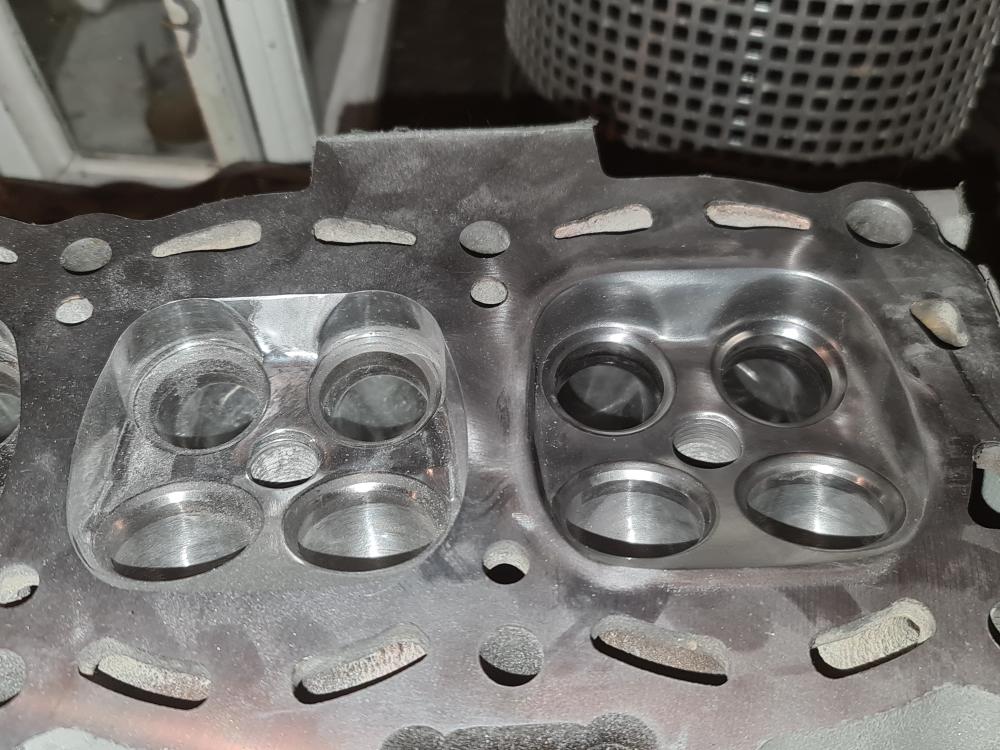
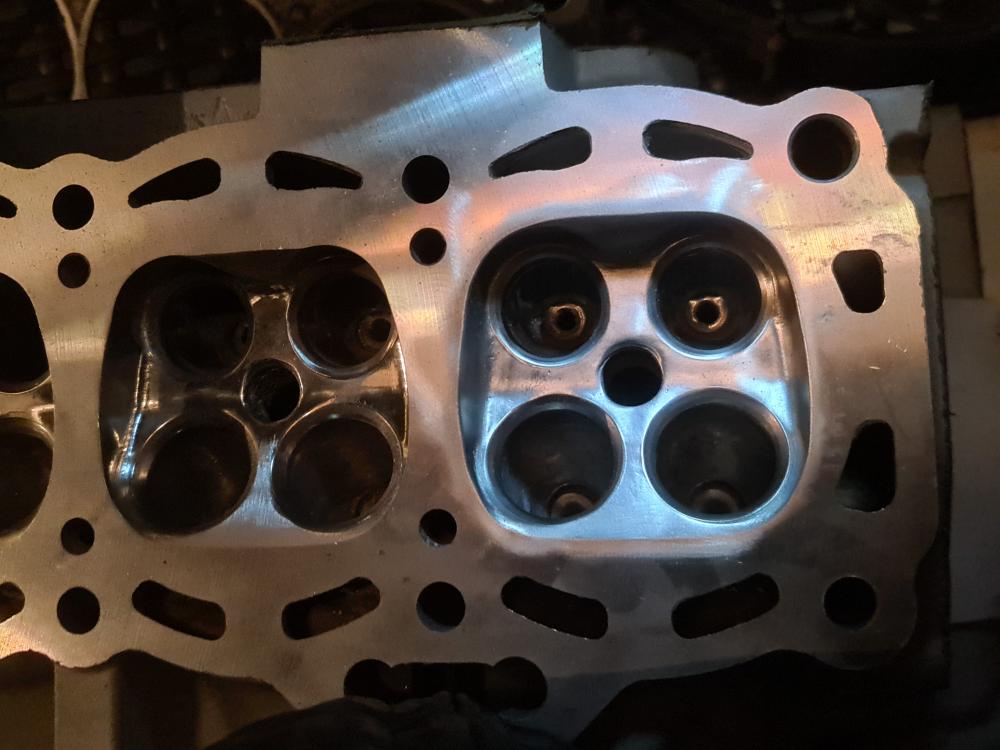


This should hopefully help exhaust gasses flow a little better around and out the exhaust valves
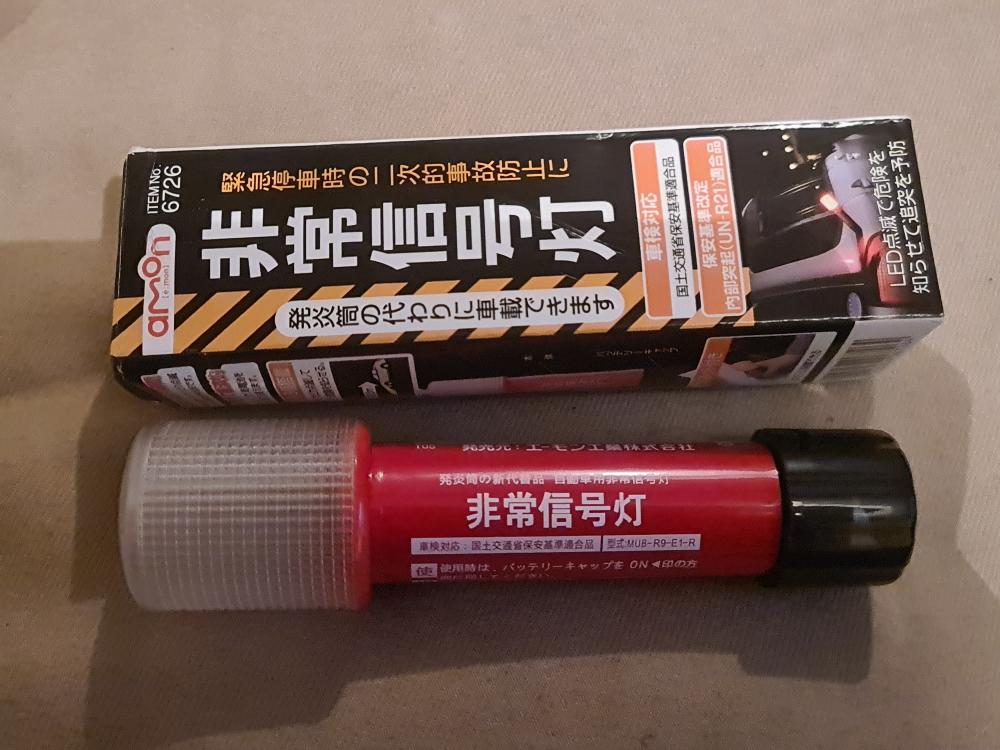
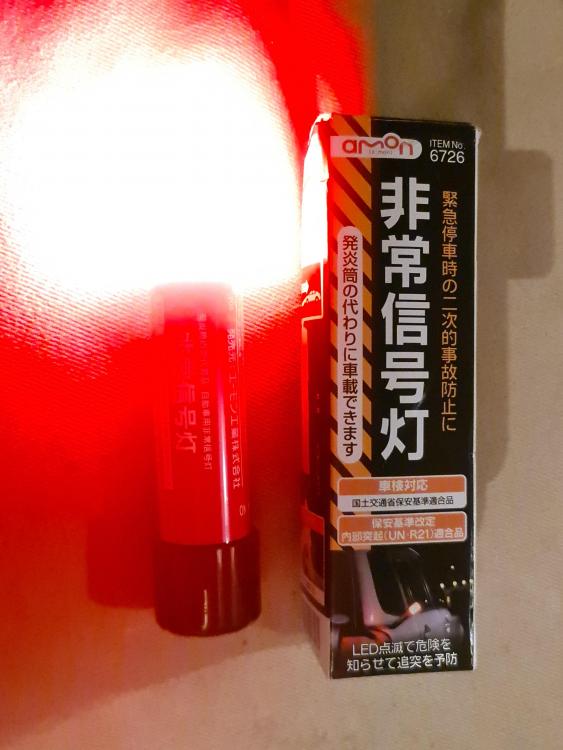
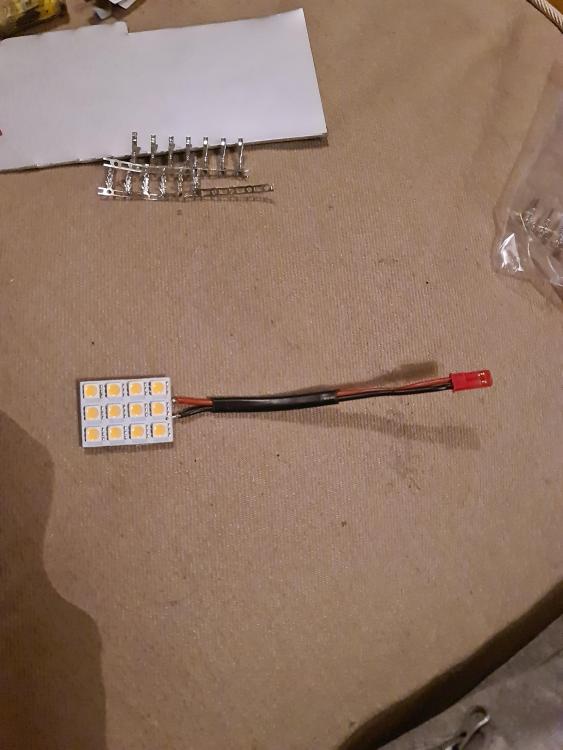
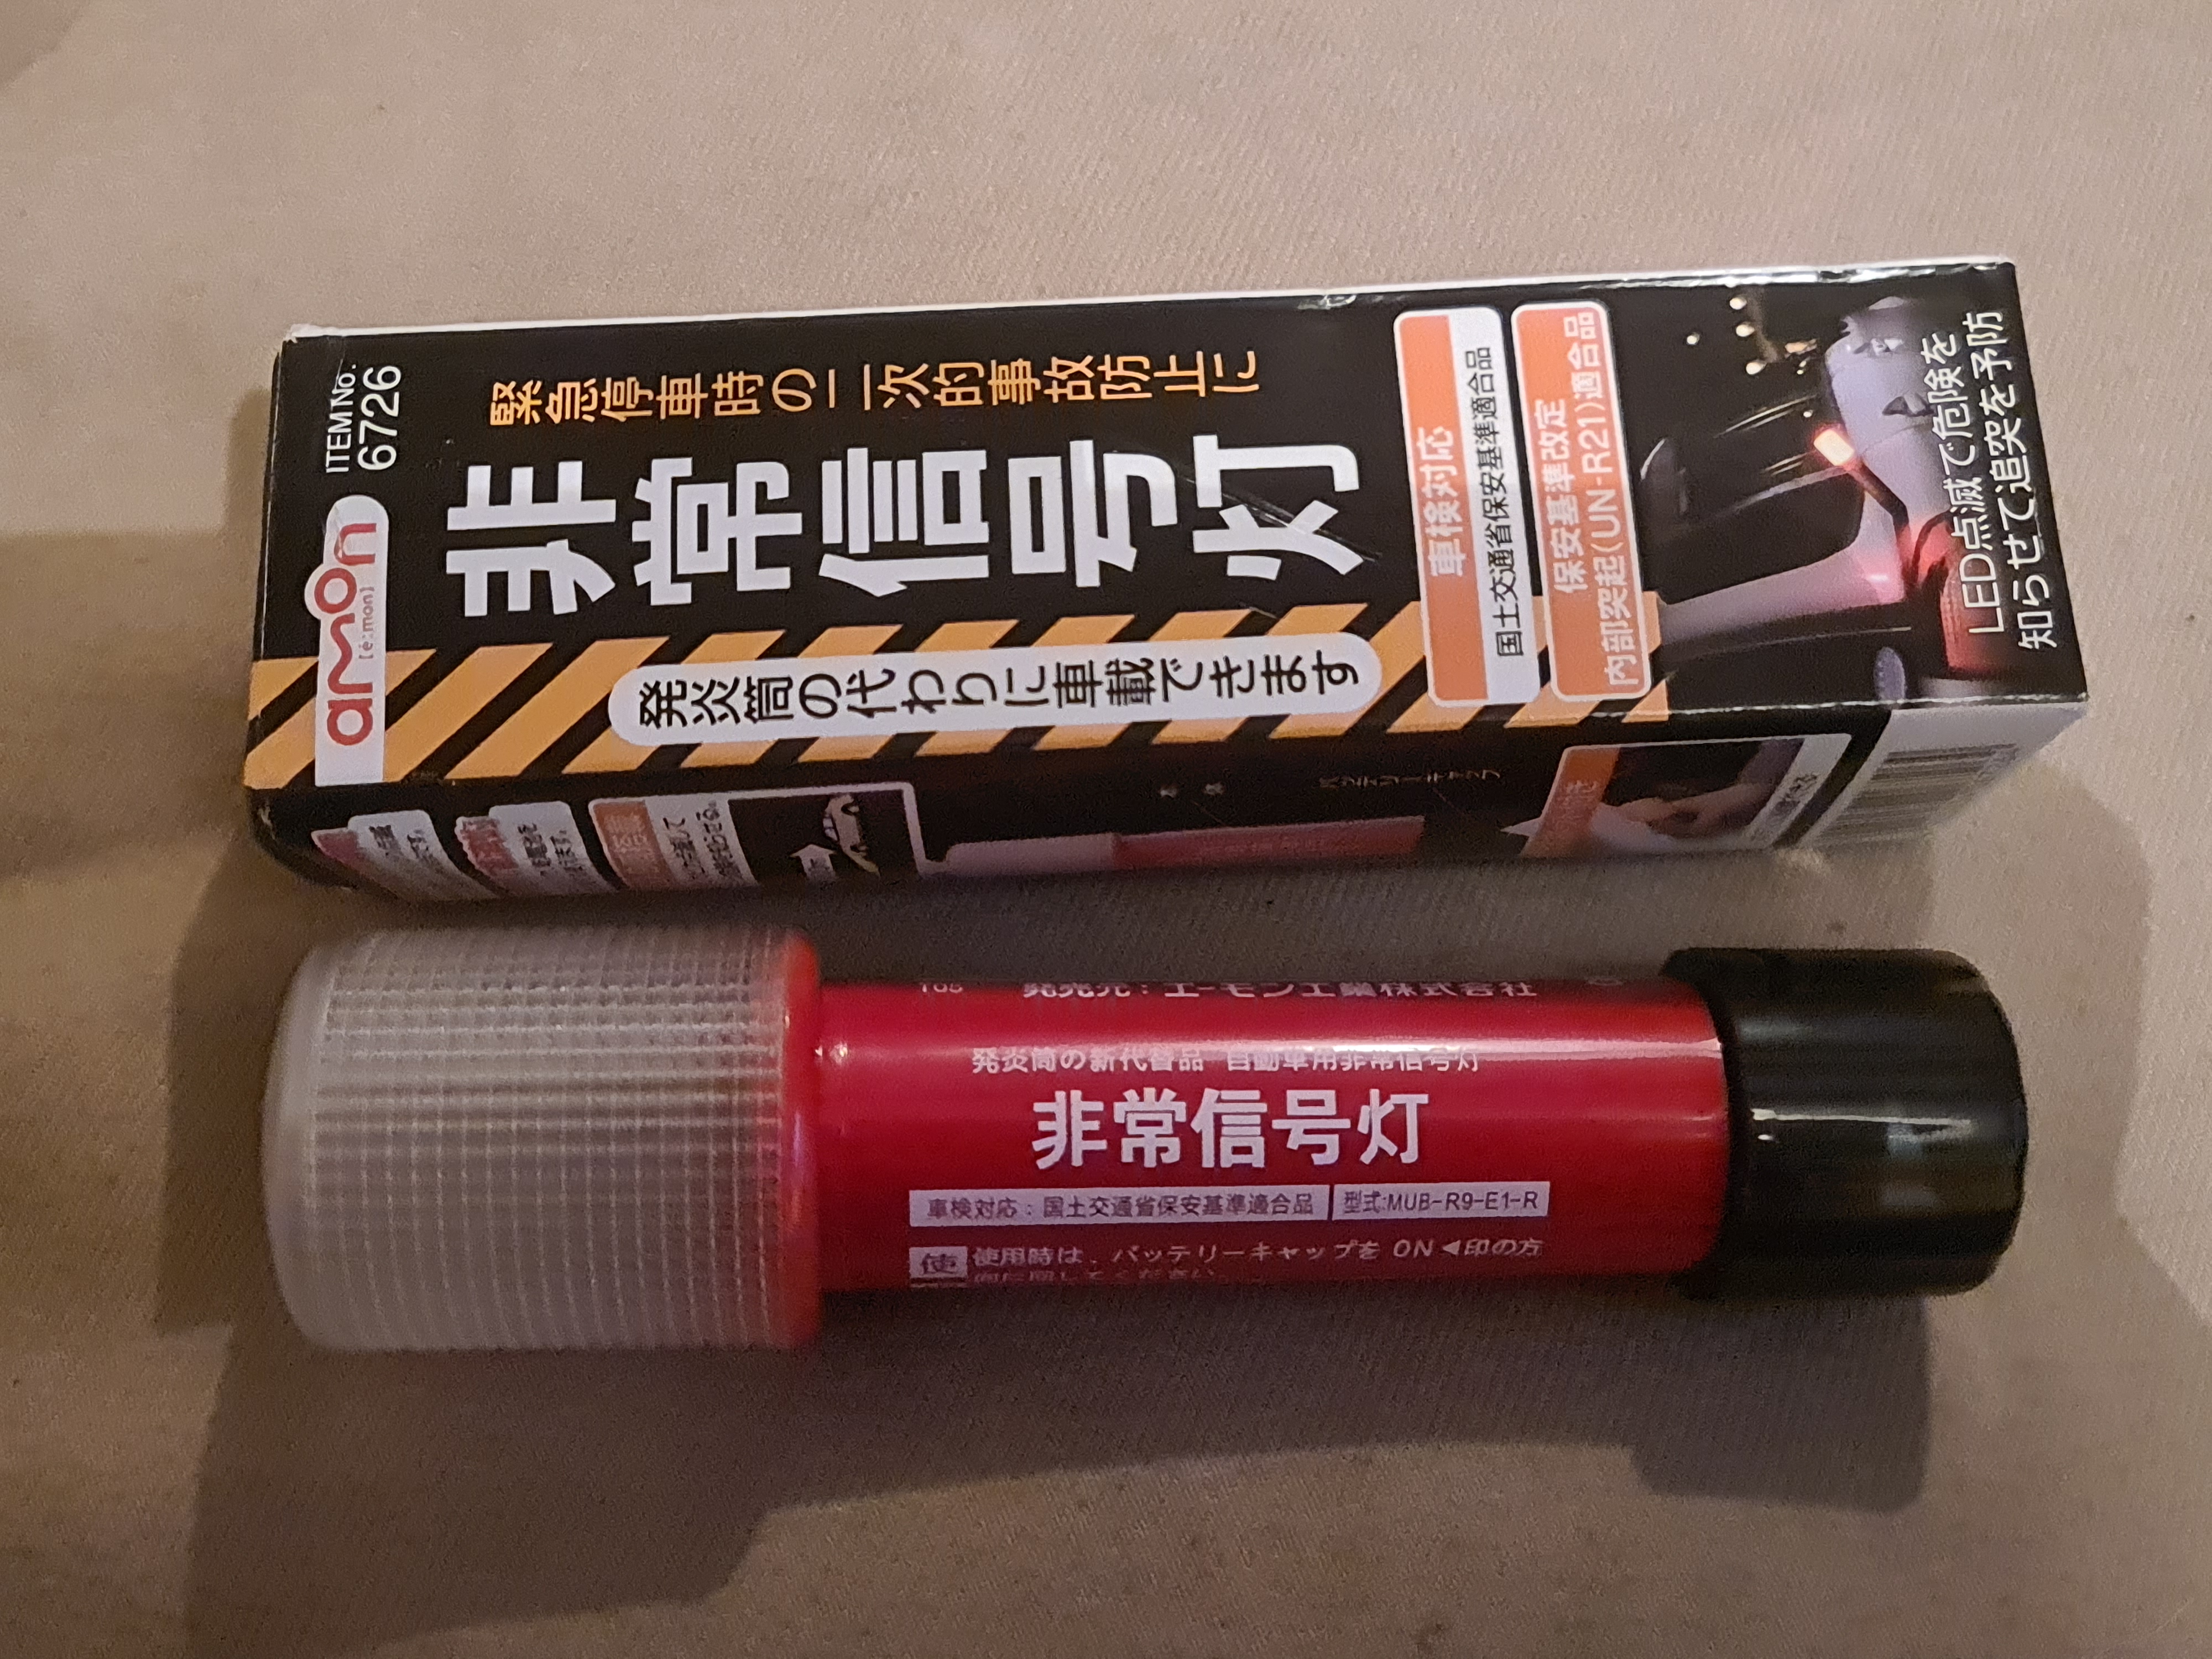
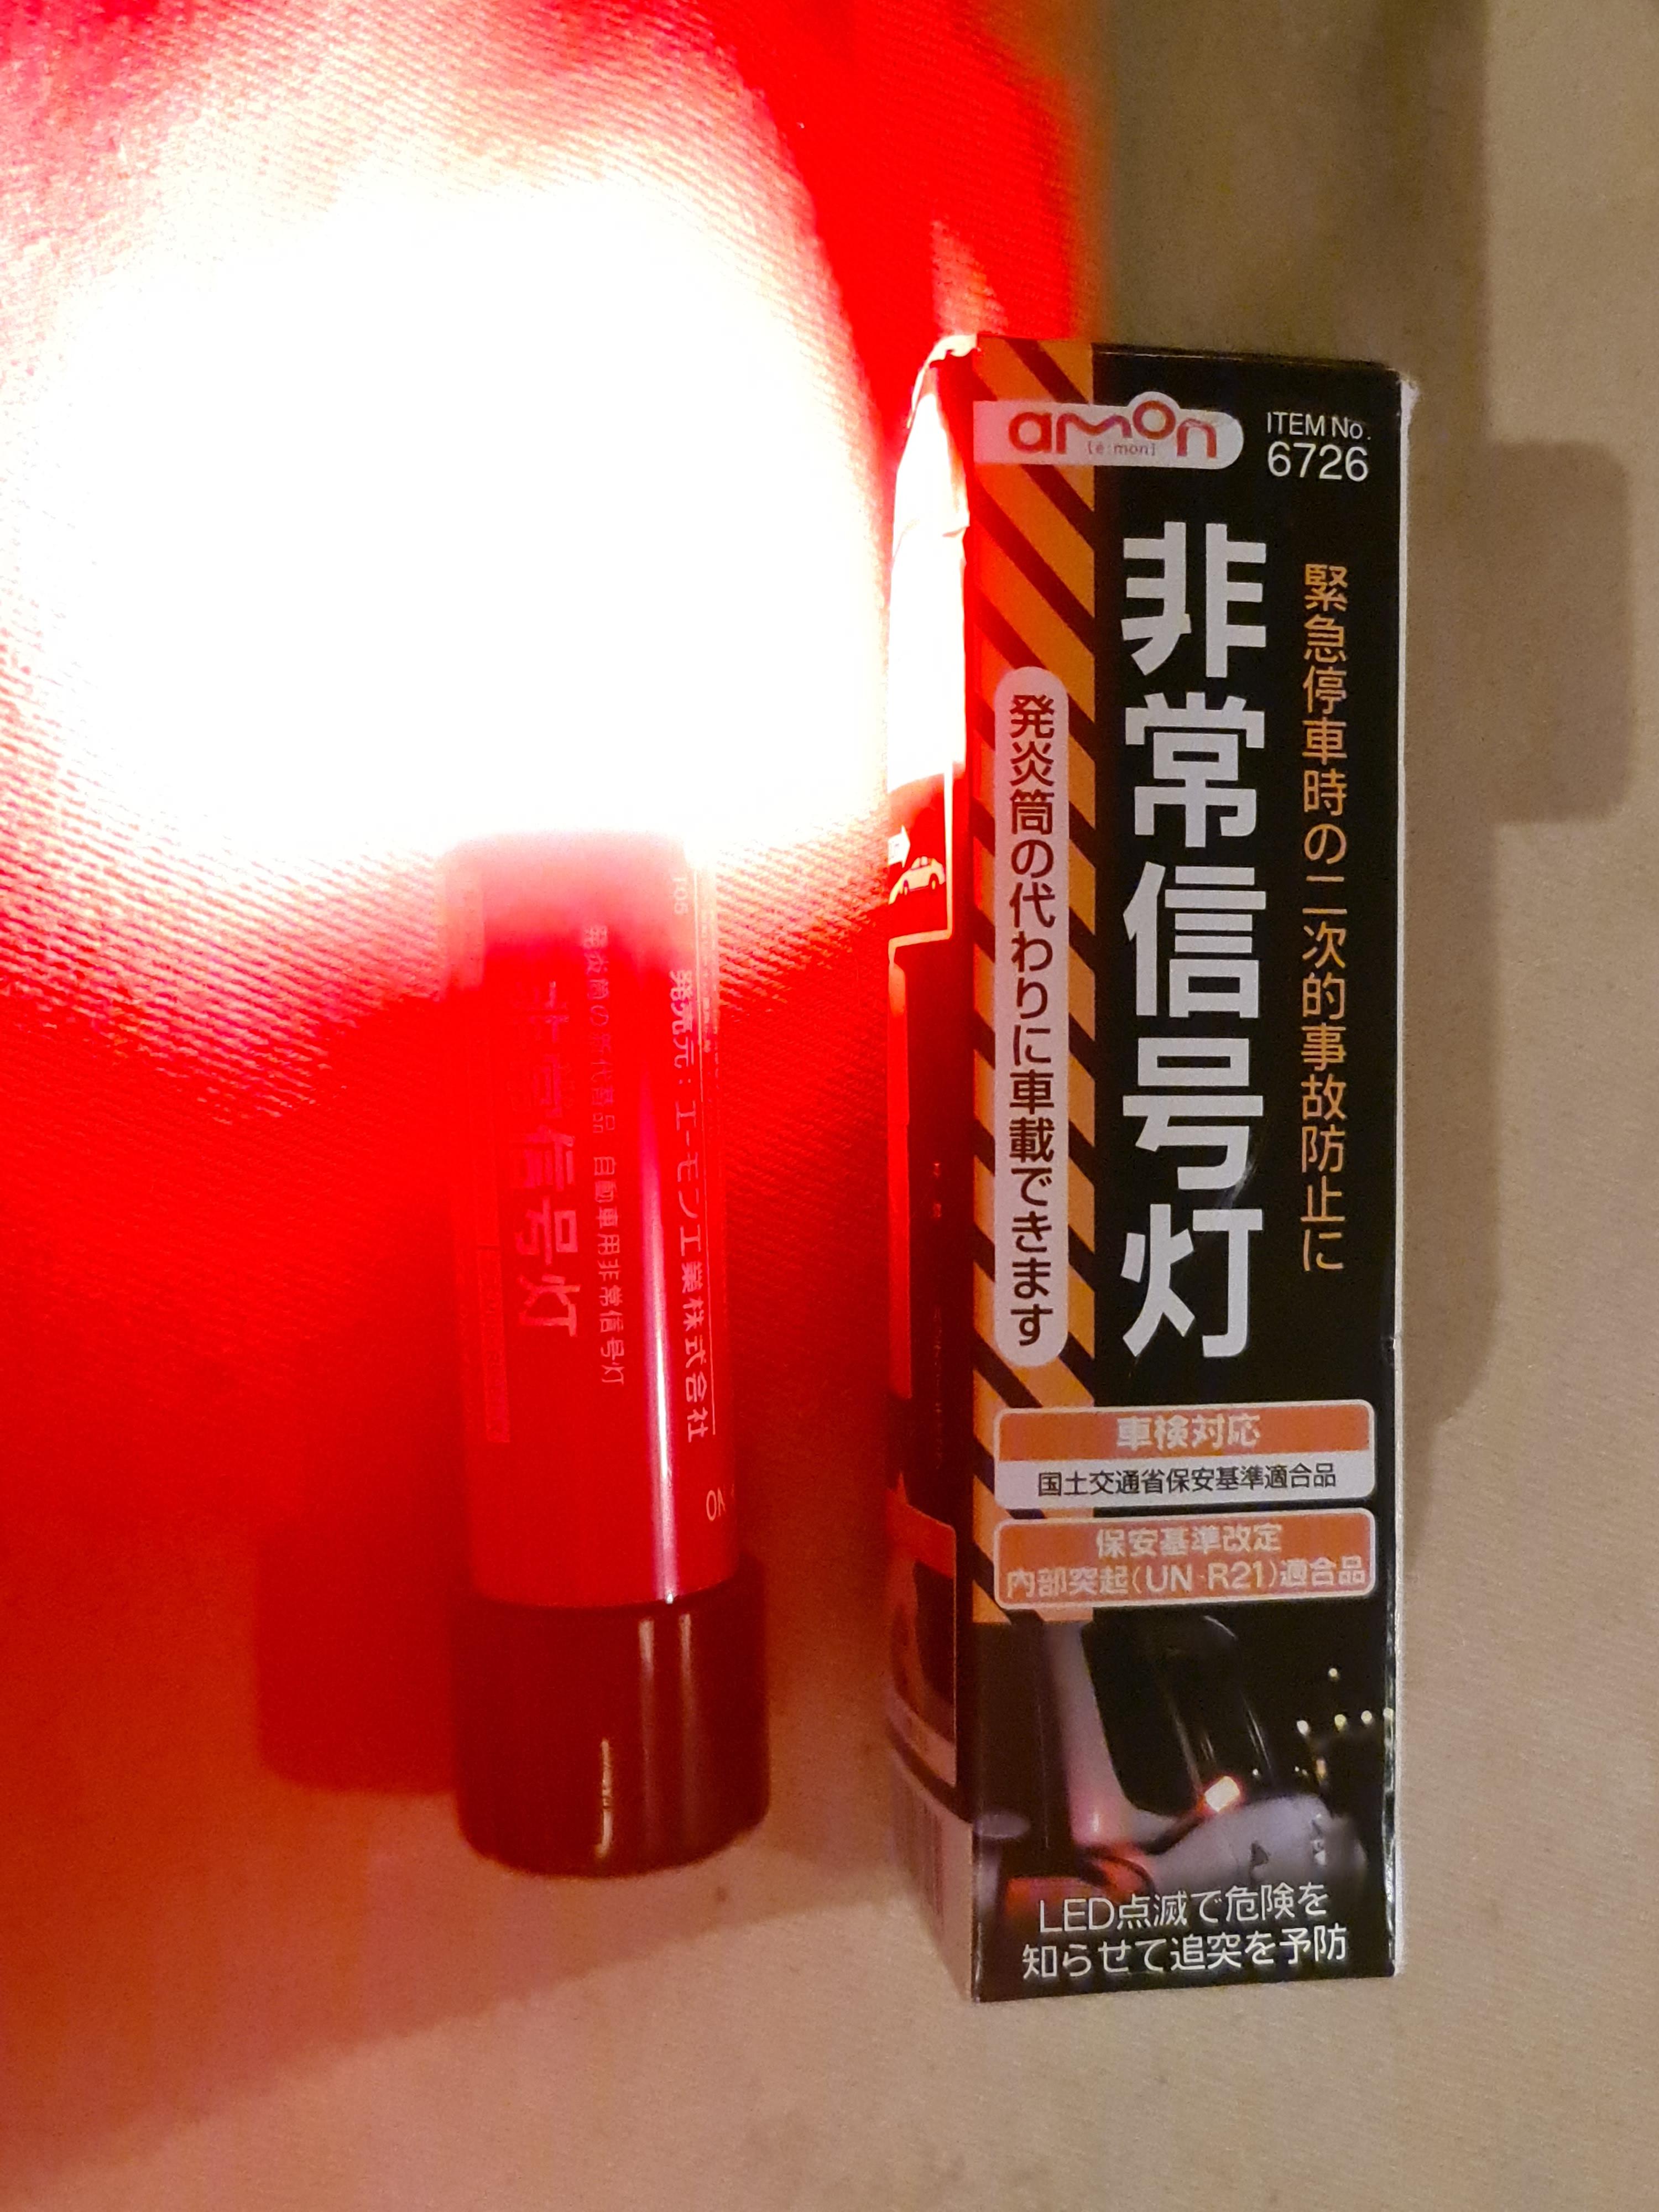
I also got myself a brand new JDM led road flare from DJR Imports, so many thanks to him for that! You can check him out on Instagram HERE, he's often got some decent goodies for sale
Just need to order myself some clips
-
😯 Always nice to see an SR being saved, super nice it's got an LSD!
Wishing you luck with it! Will be watching this
-
6 hours ago, Sam44 said:
Your welcome.
Here to help if I can. With what you have done and are doing I was thinking it would be best to tell you so you can extract the full potential
Much appreciated!
Especially since I'm staying naturally asperated I need to squeeze out as much as I possibly can of it, so everything I'm doing that has even the smallest of benefits will all add up (at least I'm hoping it will!)
-
@Sam44 nice one buddy! Some real good info here, thank you! I shall go about making these changes at some stage
Already got the 0.3mm (although its sold as a 0.5mm? 🤔) headgasket ready to rock, plus the 0.15mm head skim. When I get round to building it I shall check the piston to valve clearances, as well as the overall CC and compression ratio
And good note about the bracing, everything that comes off during the rebuild I shall put back on 👍🏻 thanks again!
-
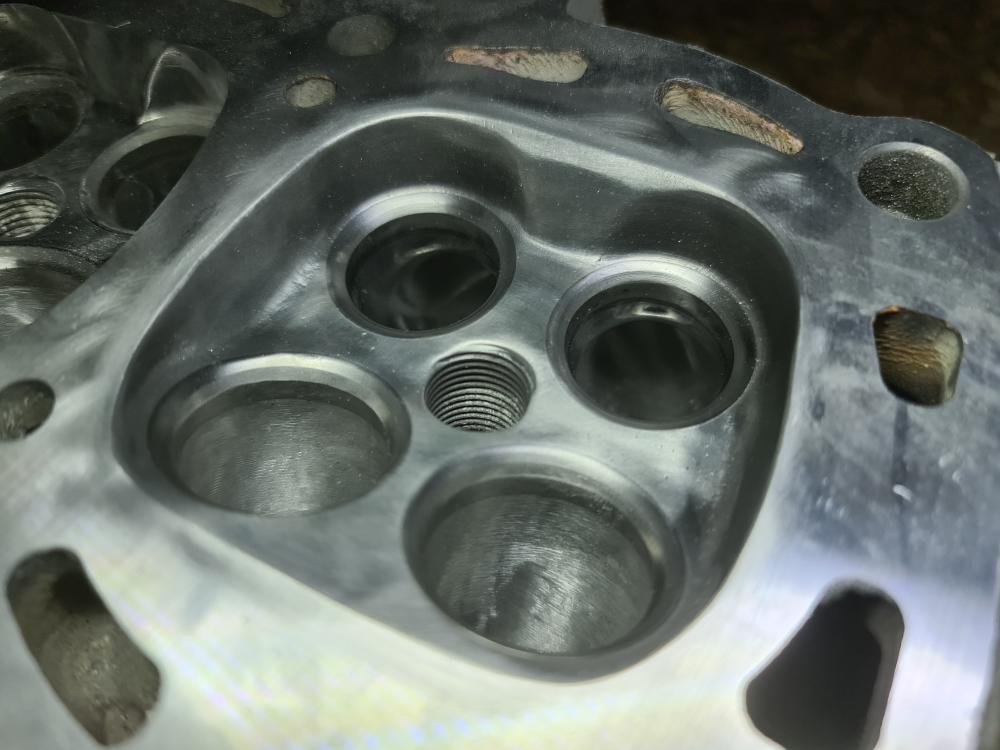
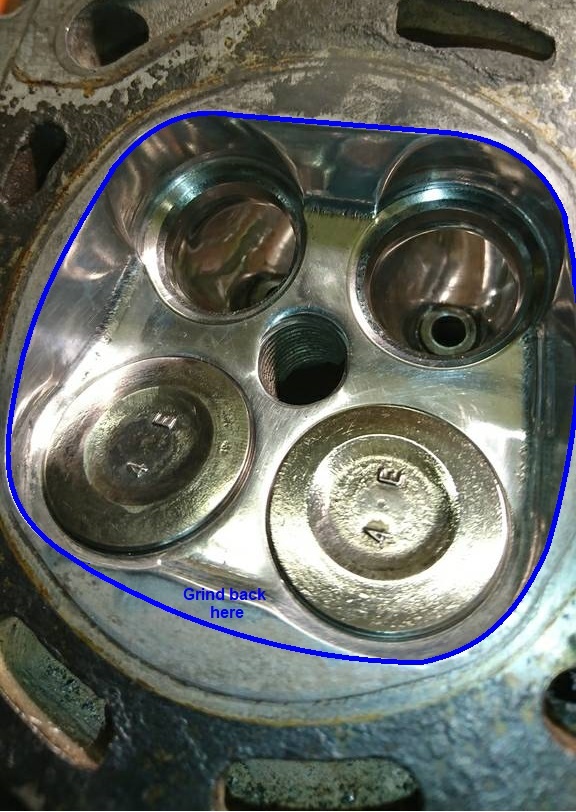
@sam44 ohh okay, I think im with you. So essentially it would look like this?:
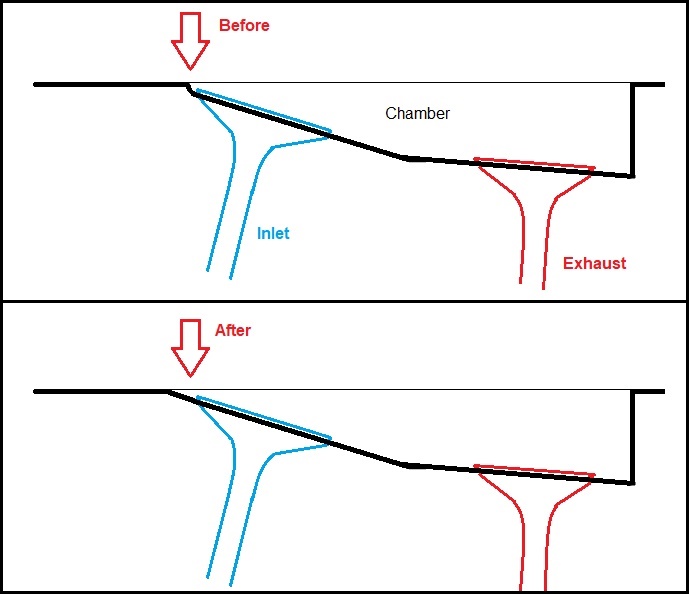

Also while im there, do you think it would be worth removing a bit of material from around the exhaust valves like so?:

-
@Sam44 cheers mate!
Could you send me a picture highlighting the lip you mean?
I've ground back the lips on the back of where the inlet valve seats sit in the head so it's nice and smooth there, but since you said combustion chamber side I don't think this is what you mean?
-
On 3/24/2021 at 11:24 AM, Claymore said:

Much more secure / reliable.
Dead smart! Might have to copy what you've done here as well 😅 good stuff mate! 👍🏻
-
22 hours ago, Dale SR said:
The boot mat is a genuine toyota optional extra they made them for the Glanza but also made them for UK starlets and those ones are super rare its mostly the Glanza ones that come up, I've got a UK one and a Glanza one so I'll double check the difference and let you know.
That's good to know! I wasn't sure if it were a genuine Toyota item or an aftermarket item. I personally like the look of this one I sold to burty but the rubber one was more suitable for my setup, I'm guessing the rubber one is the Jap version?
I'm looking forward to the day we can all have a proper meet!
-
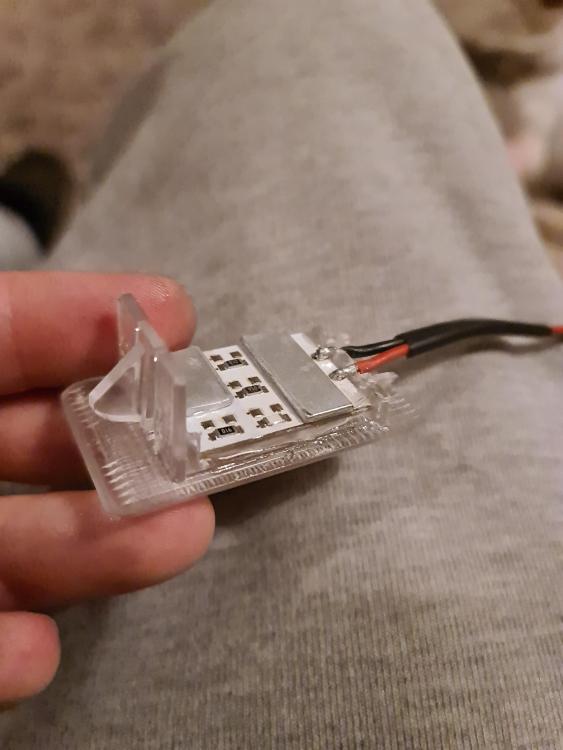
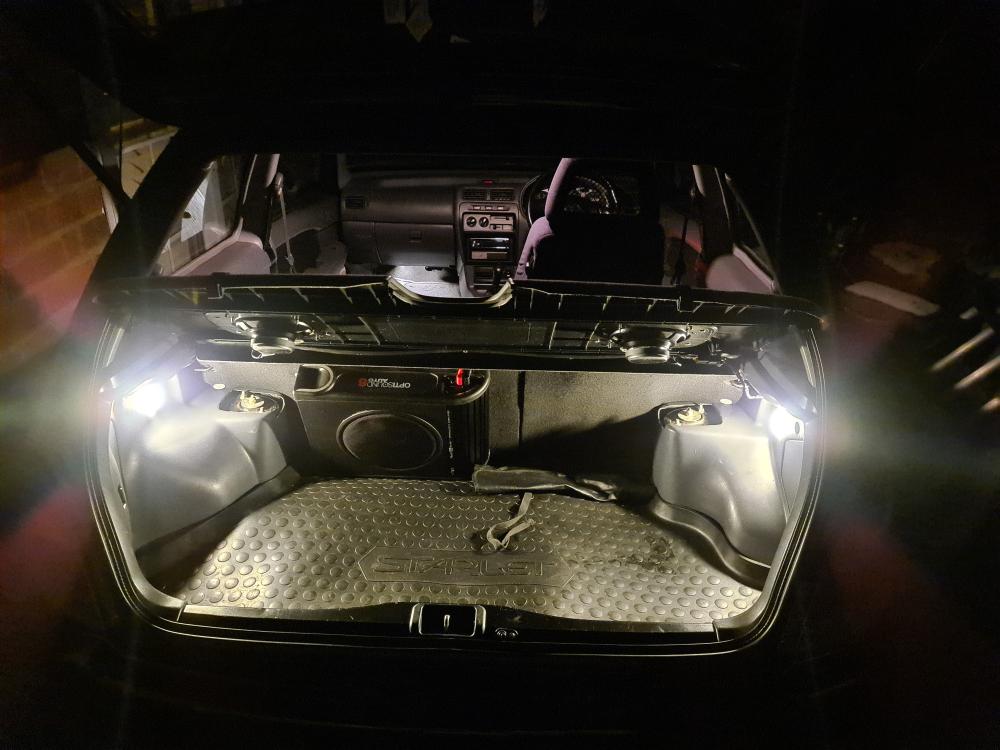
20/03/2021
Finished the boot lights - glued the LEDs into the plastic lense thing and stuck some aluminium strips onto the back of the LED board to act as a bit of a heatsink but in actual practice it's probably not needed
Although if I was going to do this again, I would probably place the lights differently as the clearance between the plastics and the chassis is minimal with where they are now but I got lucky with my guess work
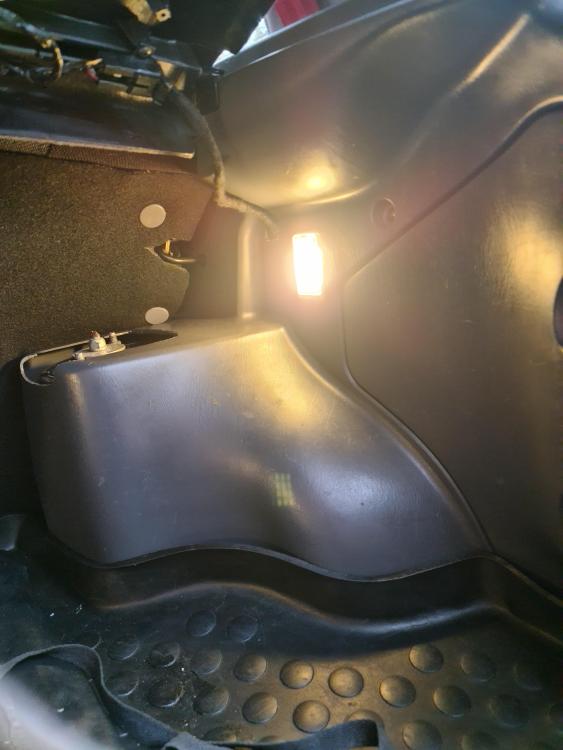
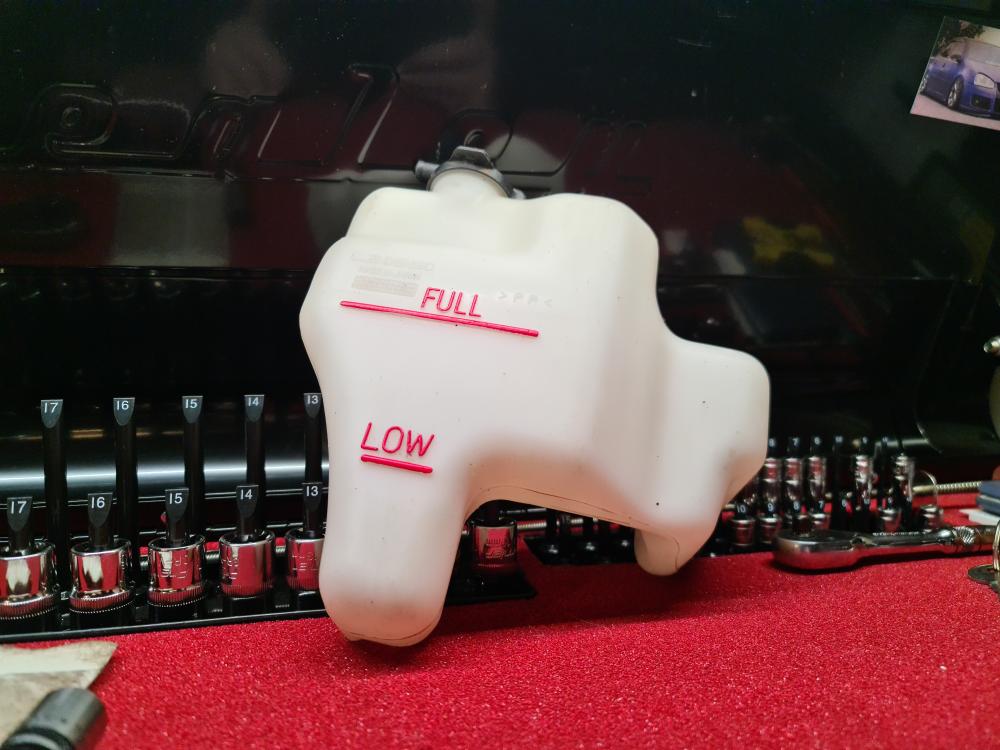
I also copied the idea from @Claymoreand got a Glanza radiator expansion/overflow bottle for use at a later date. Didn't come with a bracket so I will have to make one like Claymore did with his.
Cleaned it up inside and out
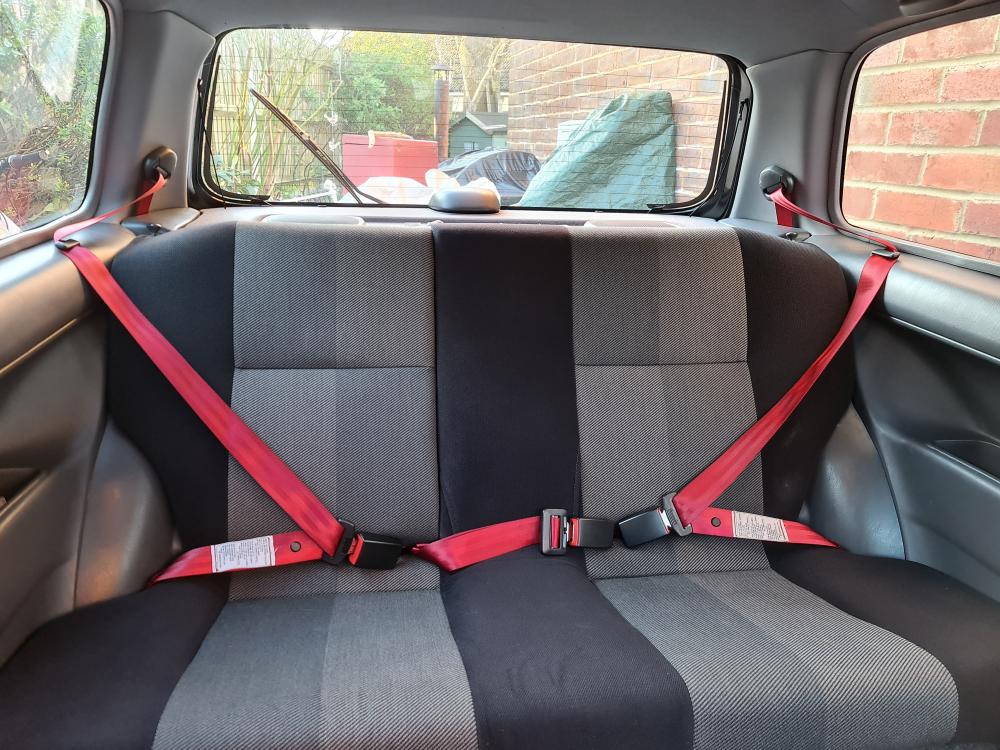
I wanted to replace & renew the seat belt buckles as they are getting on a bit and I don't have full faith in them to be totally honest.
At the same time I decided to spice up the interior, so I had my seatbelts replaced also by a place called FDTS (very friendly & fairly priced, and I would fully recommend them if anyone else would like to look into having theirs done)
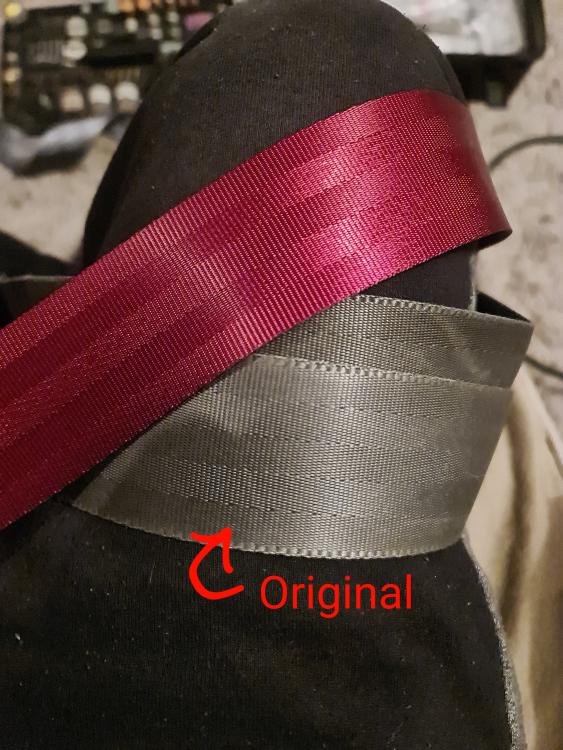
This is the colour I chose, taking inspiration from the Corolla G6R seat belts


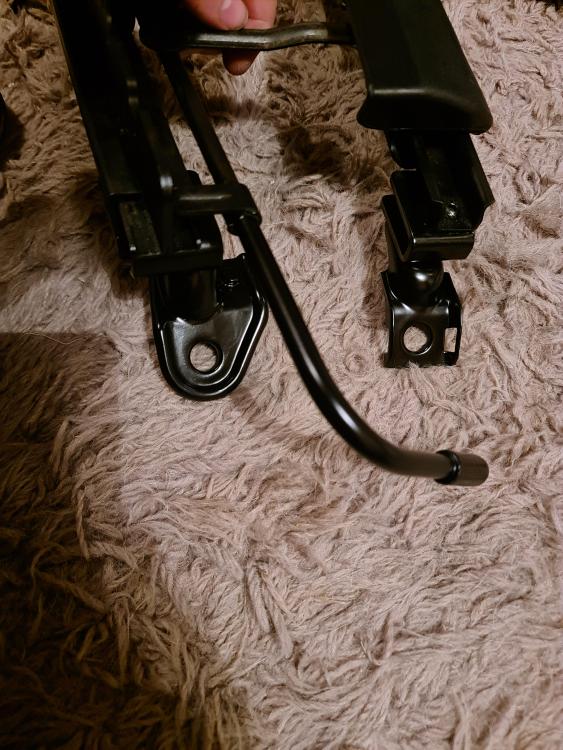
Still need to get the passenger seat retrimmed/repaired, also going to repaint the rails, have actually tried to do this already but the paint went pants so I need to strip them again and redo.
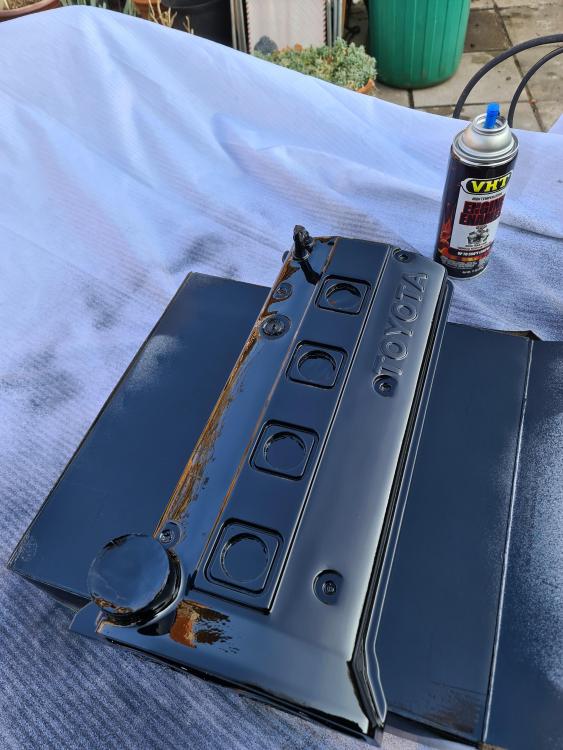
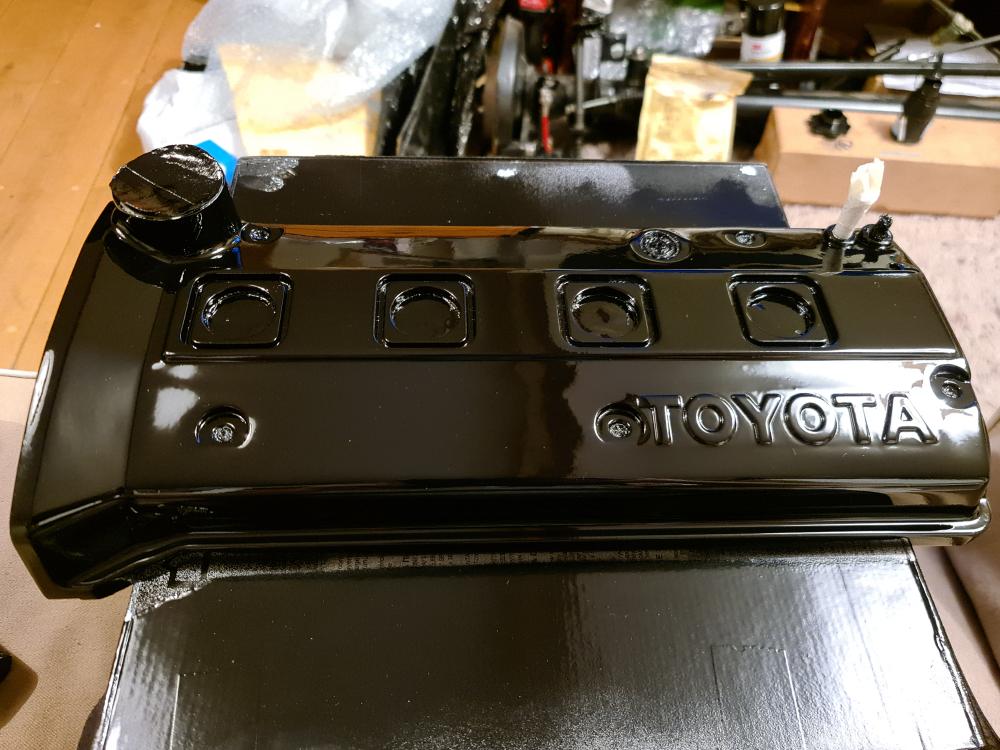
I was going to get the cam cover powder coated but I wouldn't be able to get the desired effect
The 'TOYOTA' lettering will be highlighted in candy red and I have been trying to paint it myself by spray can and airbrushing but this isn't going as smoothly as I would've liked (mainly because of lack of suitable painting environment).
21/03/2021
Resprayed the passenger seat rails with semi gloss black epoxy paint, hopefully should stand up well against any rust, scratches or chips, and fitted the new buckle. Just need to repair the bolster and paint the drivers seat rails


-
-
@Claymore cheers buddy 👍🏻
and lol yeah, reason I like to update the same post is so that its all in big chunks and easier to digest & recap (at least in my mind lol), and then post saying update to bump it once I feel its full enough
Or do you reckon it would be better to just post new posts each time?
-
How has this not sold yet?


Dutchies Glanza V
in EP91 Glanza Progress Blogs
Posted
Please do, I've always loved them, I don't think I will ever know any other car as intimately as these and I enjoy seeing them being restored to a good standard!
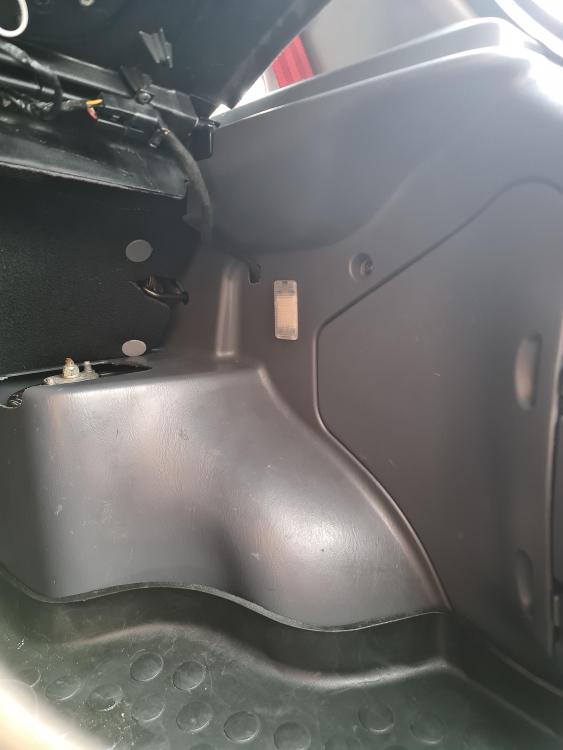
Also, you see where the rear passenger pockets are, pop them out if you can and have a look down into the sills as I'm seeing a lot of them starting to suffer from rust in that area just in front of the rear wheels. If you look underneath, there should be an oval rubber plug there, get yourself a cheap borescope snake camera that you can plug into your phone (unless you already have one) and have a poke around inside where that oval plug is, or pop out the plug and feel around inside with your finger. You'll notice that around where that plug is there are gaps in the metal work which allows water in there (making the plug absolutely pointless..) so rust can collect inside there.
If there is rust in there then obviously it would need attention, and have the gaps welded up to stop any further water getting in there