Trevstar
-
Posts
258 -
Joined
-
Last visited
Content Type
Profiles
Forums
Wiki
Media Demo
Events
Everything posted by Trevstar
-
As title, looking for some N/A ep91 headlight covers/protectors Bought a pair recently but the right hand side (O/S) one is damaged and really need a replacement
-
Look forward to seeing where this goes!
-
Thanks mate, I think that's the plan, no point modifying the engine while it runs on a standard map not set up to suit. I have the ECU from a EP82 Gi (100hp) but I can't get it to run properly, so instead it's either a Megasquirt V3 standalone Ecu (but it's not compatible with the UK spec immobiliser) or a Greddy Emanage piggyback ECU
-
Shhhhit, bloody photobucket! why! Meant to be rebuilding my gearbox soon, and this was the closest thing to a tutorial I could find
-
Taggy! Please see if you can sort the pics out and share them via a different site, really need this tutorial!!!
-
They definitely don't, from experience... Just drive safe mate, shit can suddenly go wrong at any time, I still dont even know what caused the above
-
Told ya id look after it! And I know what you mean, one already had a crack so why not haha, cheers mate!
-
Thanks lads, it's nice to see that people appreciate the effort
-
6/8/17 Cylinder head is done, ready to be bolted up Just waiting to find somewhere to move my old starlet that is currently sitting at my work, so I can get it out their way while I'm off work and I can get a start on removing the engine from that and build that up to then just do a straight swap with the newer one, OR just remove the engine from my current one and rebuild that. Depends on my situation The old SR. Poor thing just sitting there 10/8/17 Now the cylinder head is done, I'm planning to tackle something much harder lol, along with the 5EFHE engine I had in my shed, I also had this C52 GT turbo gearbox that I picked up last Christmas eve. It's supposed to be fitted with a TRD LSD, but I don't know what type So what I want to do is take it apart to see what type it is, if it's mechanical then fantastic! If it's a clutch type then I may have to think about keeping it or not, don't really want one requiring any special type of maintenance. Then while it's apart I will inspect/check out the synchros and bearings, see what their like, maybe replace them, but from what I understand, this would be a very expensive move. [EDIT: the synchros actually seem to be reasonably priced, its the bearings that cost a fair bit] And finished restoring one of the headlight covers (one on the right, as if you couldn't tell) 15/8/17 Got this the other day for the front grill It's a EP95 front badge but as you can see, just like the headlight covers, it's seen better days so I will do what I can to restore it and find a way to attach it, because the ep95 has a part on the bumper for it to clip in to. Managed to remove the front off the badge, I used a bit of scotchbrite to remove the loose paint on the back that was making it look like it had an infection or something, and I will repaint the back white or silver and the front with some matt black on the area where the black paint has come off from stone chips, stick it back together and make some sort of bracket to mount it 23/8/17 Got the mirror covers back today, forgot my friend was on holiday hence why it took so long but I wasnt in a rush anyway. I reassembled them and replaced the rusty bolts with stainless steel ones (there's a pattern emerging here with stainless isn't there? haha), ignore the greasy finger print marks in the pictures I am very pleased them and really happy I now have electric folding mirrors! I think they look better than the manual ones and I believe they are even a bit wider than the originals. After I was done with that, I drew my attention to the starlet grill badge. Waiting on some paint to referb it, but I was trying to figure out how to attach it without the clips molded into the bumper on the EP95. So I bought a small sheet of aluminium and made up this rather crude bracket, but I will probably remake this out of stainless It was a trial and error type of scenario but it works very well, keeps it in place and doesn't wobble about. It doesn't look all that tidy, however you won't even see it when fitted so I'm fine with it as it is 25/08/2017 Picked up this from toyota today to plug up the hole I had left where the old rear fog light switch was. Gave up on the air purifier. I put the part number in the pic so if anyone wants one, its only like £3 Then I got my little paint pots through so can start referbing the grill badge. I painted the back of it metallic silver, then I will paint over it with top coat to try to protect it and do the front matt black Looks much better from the front 31/8/2017 Had a crack at taking the gearbox apart today, started removing all the bolts and split the cases then realised I didn't have a 12mm spanner at hand to get them to split completely Now following a lot of googling I am almost sure it's not fitted with the LSD that I was hoping for, and had a look for a TRD helical LSD but came up with nothing, so once I get it open I'll have a look to confirm what I got, and then I guess I might be buying a Quaife ATB LSD Still would have preferred a TRD helical though 2 of the bolts inside the bell housing decided to round themselves, so I had to drill the heads off, I was actually excited to do that because I got to try out my brand new milwaukee M12 drill and cobalt drill bits I had bought recently which made really light work of it!! Also while trying to restore/polish the other headlight cover, the crack made itself worse (fucking brilliant..) so I am now looking for a new set or even just the drivers side one And as for the grill badge, believe it or not I'm still actually waiting for the paint to dry fully lol, bought a Levin 7/8" brake master cylinder to go with the Levin calipers already fitted to give for even better braking
-
Pair of Osram nightbreaker unlimited H4 bulbs (new in box)
Trevstar replied to tango123's topic in Starlet Parts For Sale
I can vouch for this, these bulbs are the shiz -
Still looking, Rock-kick-ass has one, if anyone is interested, but I need one with this type of switch: Sent from my F8332 using Tapatalk
-
Updated!
-
As I have a lot of time on my hands lately I have been trying to find things to fill my time, so I got myself some electric folding Glanza mirrors and a switch When trying to find information about how to fit them was fairly unsuccessful so with the help of Morgey I thought I would make a how to for those that don't have a glanza loom at their disposal Most of the wiring info came from Morgey so the credits go to him, massive thanks! First up your going to need a fair bit of wire and basic wiring knowledge Down in both kick panels on driver and passenger side you will find a lone plug that looks like this: It will be a 5 wire plug on the driver side and 3 on the passenger side, as it will be missing two wires, so you will have to feed two additional wires through the door rubber (this is a tedious job) into the door, up to the mirror plug *Make sure the wires don't get caught up and interfere with the window runners, give yourself plenty of length to go under the runner Then take your new 2 wires you've added and connect them to the blue and green wires on the mirror through a connector (unless you have some pins to add these to the original plug) Then you will have to make your own wiring loom that will go from the passenger side over to where the switch goes, measure out about 180cm of wire, and you will need 5 wires (I suggest using different colours and/or mark the ends with permanent marker so you know which wire is which) Run the newly made wiring loom through to the drivers side I personally re-pluged the connectors in the footwells, but you could go to a scrap yard and cut out a couple connectors, take the pins/wires out and solder the wires to your newly made loom and add the pins to the original connector to keep it looking as OEM as possible You will need to add a few more wires up from the drivers side connector up to the switch as you did with the passenger side. You will need to also add a positive power wire and a negative. The negative you can just ground to the chassis (where the white/black wires are bolted to the chassis next to the connectors in the footwell/kick panel) And you can tap the positive into the radio & cigarette lighter power wire via the fuse box which is the grey wire, as Morgey has done Doing this will make the mirrors function while ignition is on accessory, Or you can do what I did and wire it up to the wiper power via the fuse box (blue wire, 2 tracers) Doing it this way will only allow the mirrors to function when ignition is on, same way as everything else on the car You should now have something like this For the purpose of the above picture, orange (looks yellow) and light green are connected to both mirrors, the rest are wired individually Now I didn't have the plug that fits the switch so I had to improvise by soldering wires to the pins and adding my own plug, you may have to do the same unless you got the plug Here is the information you will need to wire this up exactly how I did Additional information, credit to Morgey Need to disassemble your mirrors to be painted? Get a screw driver or preferably a plastic trim removal tool and GENTLY lever it up from the bottom edge The mirror glass should pop out and pivot up Then you will need to undo these screws circled. The red screws are attached to the bracket, if the bracket doesn't come lose you will need to undo the green circled screws as there will be more screws underneath the motor One the bracket is loose, you need to remove these screws, make sure your screwdriver fits well because if the screws are rusty then you will strip them, I had to drill one of them out There's a black plastic cap somewhere that I forgot to take a picture of but it should just pop out with a bit of force as it's clipped in (pulls out and down IIRC) Then you will need to undo this screw clamping the wires in place Now with a pick, you will need to take the pins out to remove the plug, then feed the wires through TAKE PICTURES OF THE PLUG AND WIRES BEFORE YOU REMOVE THE PINS!!! To remove the pins you need to open the gate on the side of the plug (looks like a capital E) which pulls out slightly, then using the pick you need to move the tabs down inside the plug under the pins while pulling the wire out Now I will be honest, I left this too long to update and I deleted the rest of the pictures thinking I had already uploaded them But basically thats all there is too it (you should be able to figure it out anything ive missed), just make sure to take pictures of the pins before you remove them and do the reverse to put them back together Or if anyone can PM me pictures of their plugs so I can add them to this, so we can see where the pins go back Trev✪
-
Holy sh*t! This is still going on! LOL
-
Still looking
-
http://www.ebay.co.uk/itm/112461216003
-
Bump
-
Flippidy flop
-
Wonky donkey
-
Stilllllllllll looking
-
Thanks Phil! Definitely fitted by Toyota, it's all their wiring Haha! Cheers buddy Precisely the look I was going for!
-
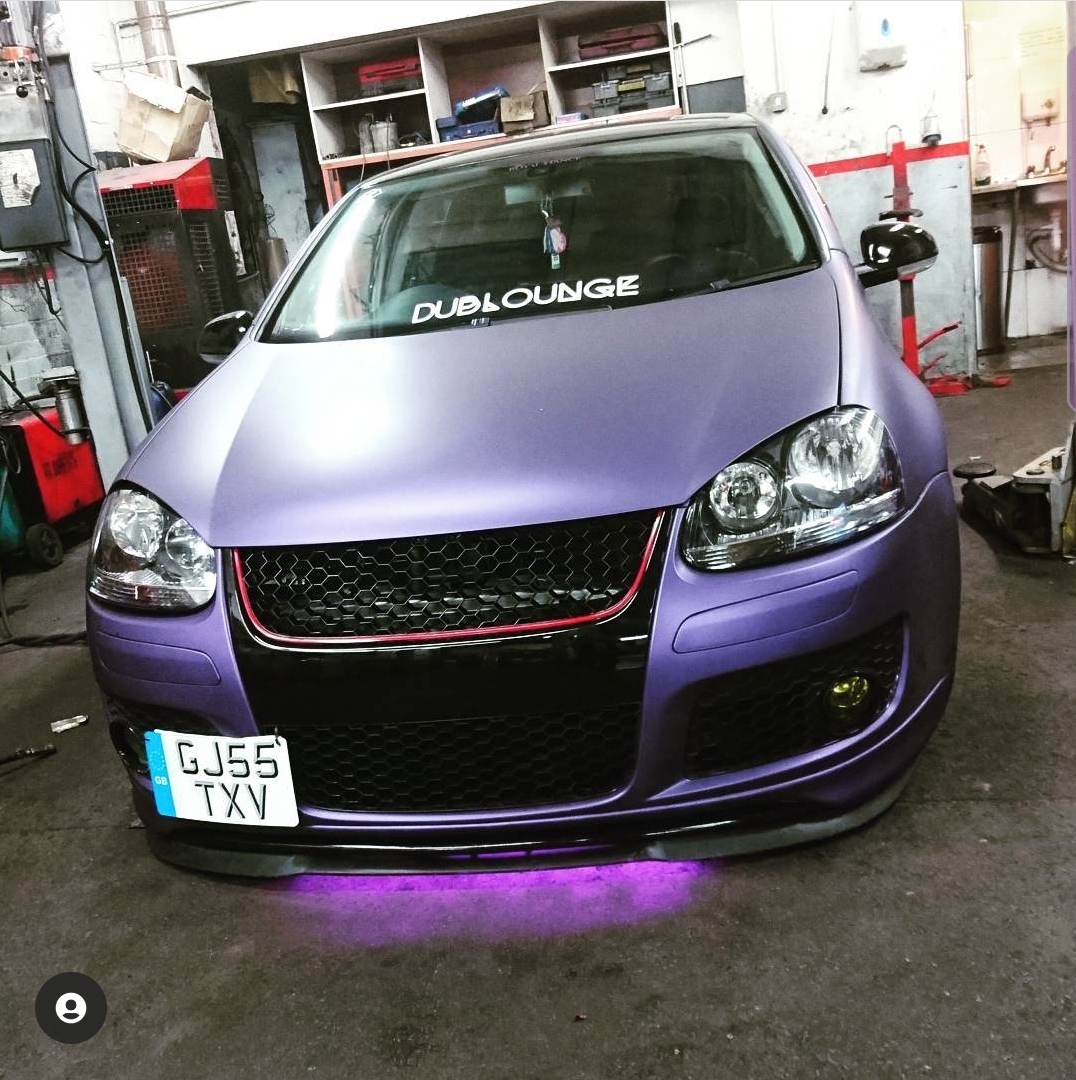
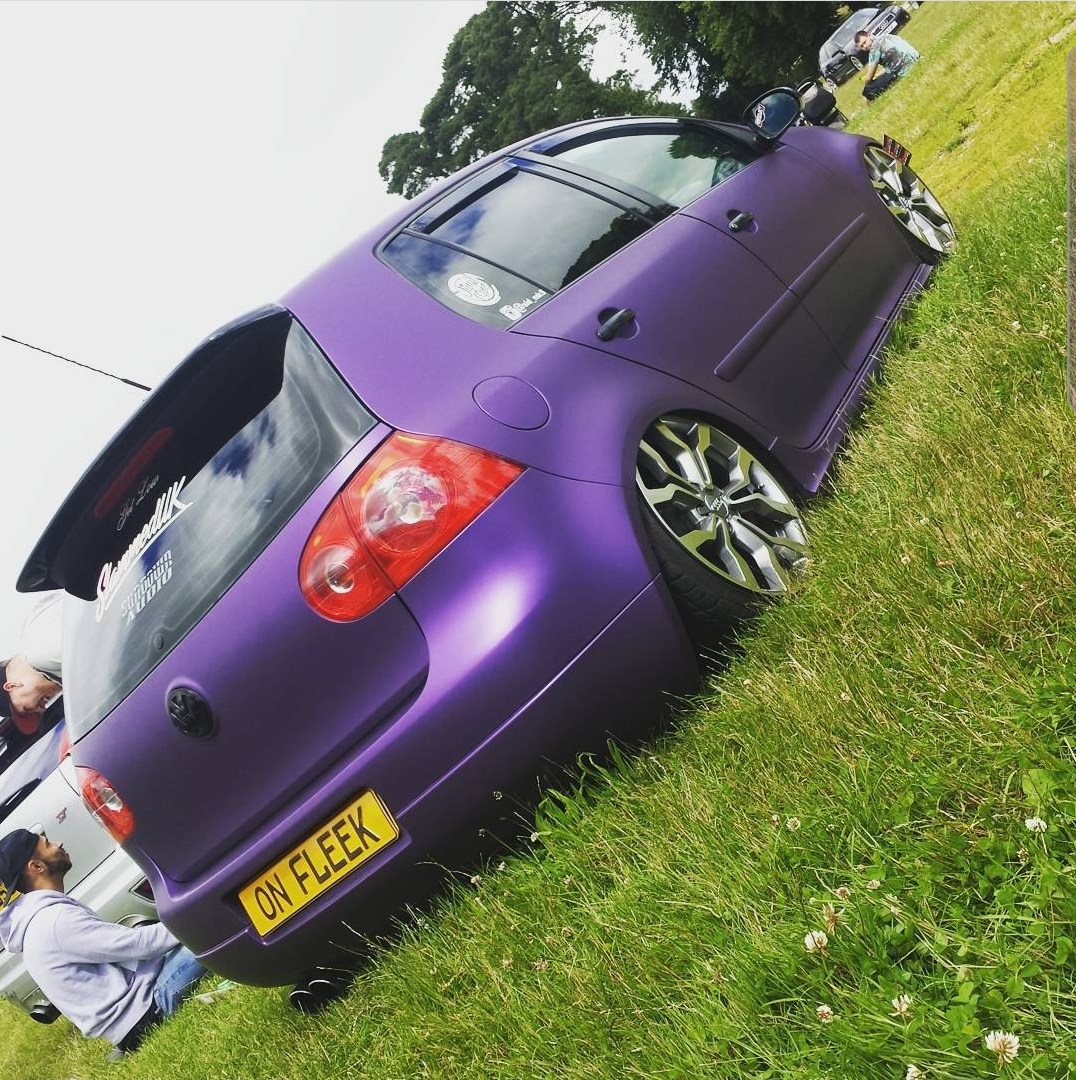
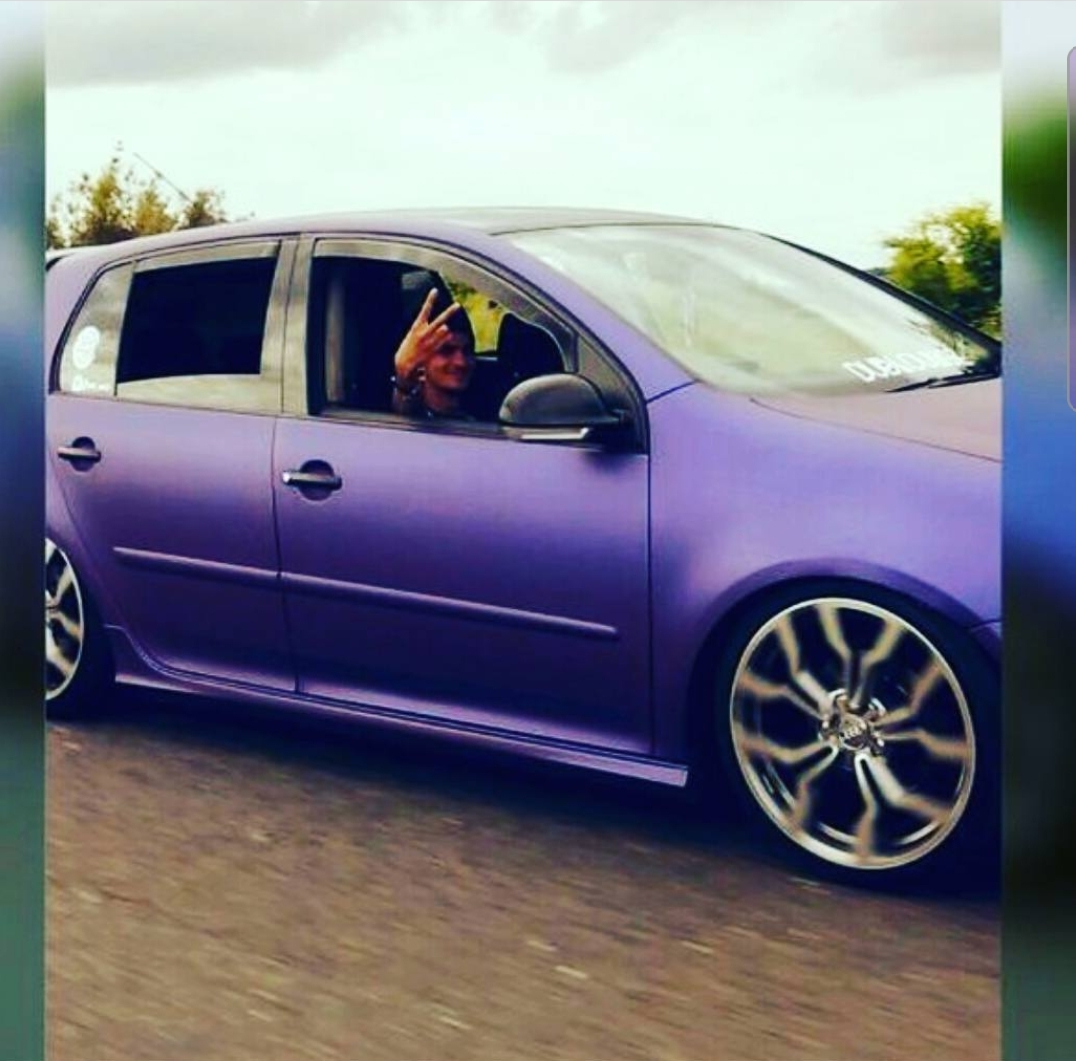
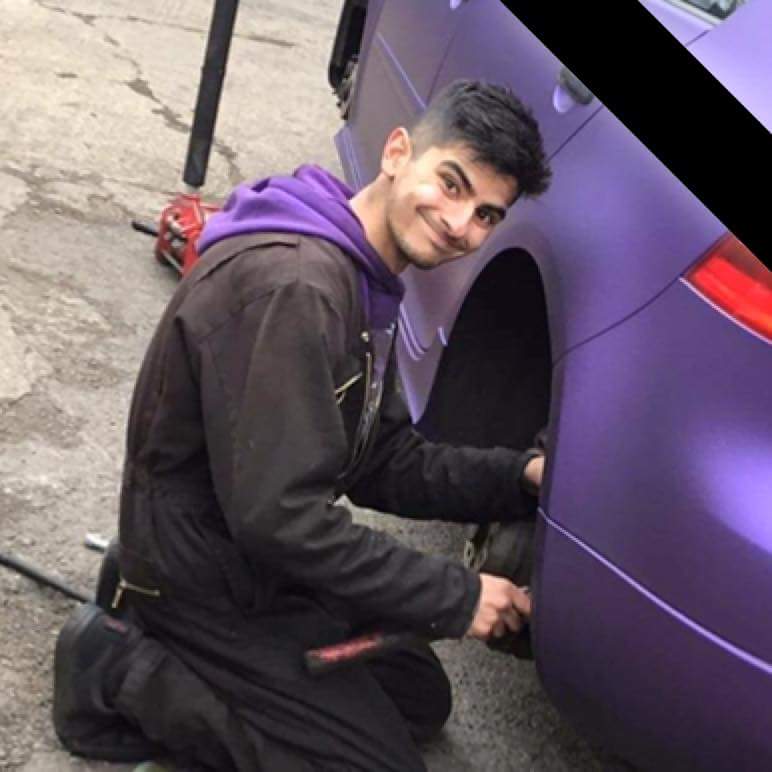
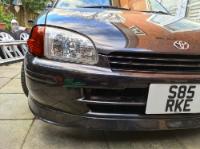
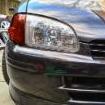
Okay it's about time I made a progress blog! A little about me: I had my first starlet at 14 which was a starlet sportif, with the idea of doing a project with my old man so it was ready for when I was old enough to drive on the road. During that time I made myself very familiar with starlets and had actually been lerking around the forums back in the UKSC days, however the project had to be abandoned. Once I got my car licence there was only 1 car for me, a starlet, but this time I was determined to have something more special than a granny spec sportif, and as a Glanza was out the question due to insurance, there was only one option. A starlet SR! I have actually owned 2 previous black SR's before this one you see before you, and I absolutely adore these things! So when the opportunity came to buy a immaculate SR from Jase (Pikey009) I just had to have it! I arranged with Jase and took a ride over on my KAWASAKI 636 ZX6R to go view it, and I was pleasently pleased to have met someone with the same level of care and similar ideologies of cars as I do. Anyone that has met Jase he's a great guy (he even delivered the car to my house well over an hour away!) and has a lovely family and we have kept in touch since. His thread can be found here: http://www.ukstarletowners.com/topic/97185-black-sr/ Rest assured, this will not be Glanza repped nor be turbo'd. Changes and modifications will be made, however it will be kept as close to original as much as possible, or at least look original to the untrained eye. The idea of the SR (to me at least) is its a bit of a nod towards toyota's rally heritage, and in a round about way is a bit of a holomagation, so any changes will be in that direction and how I think the SR should have left the factory. Call it an SR Special if you will lol When Jase dropped off the car, I almost immediately started fitting parts that I had accumulated and removed off previous starlets I had owned. The car already came with: -Original TTE tailpipe on custom stainless backbox -Corolla Inlet manifold -Refurb'd TRD front strut brace -Cusco rear strut brace -Apexi springs -Eibach camber bolts -Levin twin pot conversion -Optional genuine TTE front splitter -Optional genuine front fogs -Genuine crystal headlights -Wing mirrors body colour coded -Custom one off Starlet SR plaque -98 Glanza front and rear seats -98 Glanza black steering wheel -98 Glanza door cards -Full 98 Glanza plastics -Optional 5 piece luxury mats -TRD gear knob -Custom made from scratch lowered seat frames -Glanza cup holders -Optional audio upgrade with original CD head unit -Aluminium dial cluster surround And after literally a few hours of taking ownership it I fitted it with the following bits I lifted from my previous SR: - Optional Recaro interior - C's short shifter - TRD gear gaiter (non genuine but I like it) - '98 spec indicators - Red LEDs in dials, heater controls, Window switch, even a modified clock to light up red - New single din pioneer radio w/BT + mic, DAB, CD, AUX and USB - Black boot carpet to match Recaro seats - Vibe 8" shallow sub mounted to back of rear seat - LED tail & brake light bulbs Had to remove the Cusco rear strut brace to make way for the sub, but don't worry, I only wanted a small one, just wanted to have better quality music and not piss off the town or lose my boot space 14/10/2016 - the worst day of my life. At around 8pm I was driving my friends Glanza with him in the passenger seat, when we had a major accident and hit a tree on a duel carriage way at 60mph (in a 70mph zone). Unfortunately, my friend Shahid lost his life at the scene and we were trapped in the car for 2 hours. I was in critical condition for a time and had severe leg Injuries. I'm lucky to be alive, let alone keep the use of my legs. After 4 months I am just about able to walk but have to live with what happened for the rest of my life, as well as 3 titanium rods in my legs, plates in my arm, ligament reconstruction in my knee, as well as the loss of my friend. I won't go into too much detail in this thread, because it's an on going mess and not what you came here for. As this incident is still on going, the police are trying to charge me with causing death by dangerous driving and causing death whilst uninsured (although I did have a fully comp policy on my own car with documents that suggested & lead me to believe I was covered to drive third party vehicles at the time). It's easy for myself to say that I wasn't to blame and point fingers, however there is a fair bit of evidence that strongly suggests that I wasn't the cause of the crash and didn't do anything wrong that night. However, the police have totally ignored all of this because it didn't fit their version of events and have even twisted and exaggerated some details to make it fit, purely because they decided it was easier to blame me than look at the facts and see the red flags from the very beginning because of some of my previous bad behavior while on my motorbike, which were totally separate issues. To me this is a total disrespect not only to myself, but to my friends family & his legacy. Naturally I feel guilt, who wouldn't given similar circumstances? I have to live with this and I have to put up with all the very shitty comments from ill-informed people that are quick to judge me based on what they've heard from one side of the story and aren't actually interested in hearing my side of it, the shit stirrers adding further bullshit so they feel apart of the story, and those who, no matter what you tell them, will believe whatever the fuck they want to believe, when they actually know very little about the situation, what happened, who else was involved or consider what me, my family and his family have had to go through, or they simply couldn't actually care if they tried as long as they feel good about themselves giving other people shit and spread hate. Others believe in this false reality that 'the police can't lie, they're the police! They're the good guys!' and just can't seem to fathom or wrap their heads around the idea that the police and crown prosecution service can & do target even the innocent. I'm not saying every single police officer is a wrongen and don't deserve to wear the uniform, most of they time they get it right, sometimes they can get it wrong as an honest mistake, sometimes by circumstances, or even by clouded judgement because of their training and/or experience. Other times they will ignore evidence that isn't in their favour, and they will even lie if they think they have a good enough chance of getting away with it by building their own story using 'police experts' and putting on a display to show 'their doing something' in the community, all for the sake of a statistic & their yearly bonuses. I will never shy away from this or pretend it never happened. If it suits you to judge me by the cover then that's what you'll do. But if you are open with me, then I am an open book. I've done some stupid things for stupid reasons, but who hasn't. Those that know me, know I'm not a bad or selfish person. I'm honest and up front, and I help people the best I can, when & where I can, and I will continue to do so despite being stabbed in the back or let down by people numerous times over the years, and I hope that this community is the one place I wont find the same treatment. Im truly thankful to the paramedics, fire crews, air ambulance and the NHS for saving my life, enabling me to keep the use of my legs and doing what they could for my friend Shahid. Despite the true reason for the crash, I have to try and remember that at the end of the day, it was an accident, no one set out that day to cause what happened. Its all of us have lost a good friend, a son, a brother, a cousin, a fellow car enthusiast and Starlet owner. What happened has scarred me physically and mentally for the rest of my life. The hardest thing to do is not get angry or feel bitter towards those who have lied for varying reasons, and those that have stabbed me in the back. To be honest, one of the only things keeping me going at this point is working on my Starlet to the best of my current physical abilities to get it to where I envision it to be. At times in my life where I have gone through phases of depression or generally shit times, I have always had cars or bikes to fall back & work on to take my mind off it and get me through it. I miss my friend Shahid everyday, he was truly an absolutely great guy. Sadly our friendship was only really just beginning to take shape, but one thing that was apparent even then was he one of the only true friends I actually had and it was a real pleasure to have known him. Rest In Peace Shahid Moghal 02/10/1994 - 14/10/2016 6 months on, I started to get back to work on the starlet. As I had been sitting in a bed for months, there is only soo much Netflix that I can watch and the boredom got soo bad, I had to do something. So I started cracking on with wiring up the Footwell & ignition lights. I had managed to fit the footwell lights without much problem, apart from the wiring jungle and my obsession with soldering everything and keeping everything tidy and looking as OEM as pos, it took a while. However the ignition barrel light was a bitch, as N/A's have immobilisers, the plastic ring doesn't fit, and I tried to make it fit but kinda ended up ruining it I was determined to have an ignition barrel light but naturally I didn't want to give up the immobiliser. So I made my own! I had to get a clear plastic tube, bore it out to the right size to fit around the immobiliser, then I wired up 3 tiny LEDs and glued them round the sides, then added a few resistors as it was a bit bright, but this is what I ended up with! Then I had to bore out the black Glanza shroud i bought to fit the new ignition barrel light Sweet as! After, I bought some new pioneer speakers for the front and back, and I have made them fit nicely in the original grills. One day at work a while back I was doing some work on an old avensis, and I noticed that the light stalk looked very similar to the one in my starlet, except it had an additional switch for the front and rear fog lights. This got me thinking.. Will it fit? So seeing as I have a lot of time off work while recovering from my injuries, I bought a stalk from an avensis and compared it to the indicator stalk from my starlet. Did it fit? Of course not. But me being me, I made it fit! The next problem was wiring, the front fog lights were easy, as the existing wiring was a relatively simple wiring setup. The rear fog light though... Well, that wasn't soo easy! The rear fog light switch was too complex for me to understand and grasp at the time, but if you remove the rear fog switch the headlights won't work at all, tried bridging connections but after many fuses later I came to the conclusion that the circuit board inside the switch was needed. Thing is with all my medication I'm currently on it has really effected my concentration, but finally after a few hours of staring at the circuit board I figured out roughly how it works. I removed the relay from the circuit board and soldered some wires in its place and ran those to a relay I added (to the right of the dials behind the dash) which would connect to the light stalk and back to the circuit board to function as normal And finally we have a full functioning light stalk with switches for front and rear fog lights! I also done the wiper mod while I was there that lukEp made a good write up about in the tutorial section (HERE) that make the front wipers wipe when you spray the windscreen rather than wiping manually Problem is now I have 2 empty slots where the switches were. I am looking to buy one of those air purifiers that go on the parcel shelf as the switch for it will fit in one of the empty slots and probably get some Glanza electric mirrors and put that switch in place of the other. Next! Since I fitted LEDs behind the dials, the dimmer switch (that's designed for incandescent bulbs) only dims LEDs the most tiniest bit, this bugged me massively. I just didn't see the point of having a switch that does nothing. Yeah I could have just bypass & removed it but where would the fun be in that! So I bought a PWM controller that adjusts electric motor speeds but also acts as a dimmer switch for LEDs Thing is the controller won't just fit in its place. It's too small, plus if you turn it down far enough the LEDs switch off, and I didn't want that plus I liked that the original dimmer had notches and wanted to use the original knob. So to over come this I cut the back off the original dimmer and after fucking about with the dremel for ages I adapted the two to fit together Then I added some extra notches inside the newly modified dimmer switch to give a slightly wider range of adjustability I had to bypass the wires for the original dimmer and tapped in directly to the positive and negative on the back of the cluster. The good thing about this is that if the new circuit board on the back part of the switch happened to fail or break, it can be completely disassembled to replace the circuit board Rather than build a new switch totally from scratch, or it can be bypassed at the plug I put in And now the dimmer works as it should with LEDs! To be fair, the lights seem brighter in general in pictures than they actually are. While I had the dials out I thought I'd add a little something special. I had some stickers made to put inside the cluster Although Jase (the previous owner) doesn't approve lol Had a little issue with the short shifter on my last starlet, if you had the cup holders out, the stick would hit the cup holder and nearly make your Fanta no ice from McDonald's explode all over the centre console, so I bent it back to where it only just taps the cup holder now which is better. Then I bought a nice TRD gear knob from sosolid, which is different type from the one I already had fitted Now for something different... Before my crash I made a trip up to Birmingham to pick up a complete 5EFHE and it had been sitting in my shed ever since. I'm not doing an engine swap though. The plan: It will remain 1.3L, but it will be a high compression build using as many oem parts as possible, call it a 4E-FHE I guess? The target.. 130bhp That means that as many Toyota parts will be used for tuning where possible, I.E 5EFHE cams, Corolla manifold etc. My reasoning behind wanting to stay N/A, apart from wanting to be different lol, some of you are aware of the EP82 Gi that was a 1.3L N/A with 100bhp (of which I have an ECU from one), and considering a standard GT or Glanza puts out around 136bhp, how much will it take to get a extra 30bhp and have turbo power without the turbo? And of course I have read all the comments from over the years where others in the past have asked how to tune an N/A and make more power, ans sure maaany people say that 'it's not worth it for the gains', 'just throw a 4EFTE in there' etc. I get it, but look, I know and I don't care, I wanna be different and I want to build this car how I feel an SR could/should have left the factory. Plus very few people have actually properly tuned the N/A's, or even tried. Aren't you curious to know how much power they can make naturally aspirated? I know I am! Ecu wise, the JDM 100hp EP82 Gi ecu is going to take way too much effort to get working properly, so I have been considering either a Emanage with the standard UK 4E-FE ecu, or a standalone unit (although it won't support an immobiliser that I would like to retain). I have already bought stronger con rods from a GT, a 4EFTE flywheel for larger clutch, 5EFE 0.5 head gasket plus an entire 5EFHE to steal bits off So I thought that it might be a good idea to take the time to do some engine work, took a lot of effort, especially in my wounded state so I had a double dose of morphine, and after having to drilling out one of the cylinder head bolts (which are hardened steel) with a tungsten drill bit, I managed to remove the 5E-FHE cylinder head I will probably then sell the bottom end to someone that needs it Measured the valve clearances and shims Then I went and chucked all of it into a tub of engine cleaner, and a few hours later a steam clean in the back garden at 4AM (the neighbours love me lol) End result looked like this Then over the next few weeks, on and off, I polished up the cams slightly and coated them in oil, and I used the dremel to grind away any rough casting marks or sharp edges that could potentially break off in the area around the camshafts, probably didn't need to be done but did it anyway Followed by a shit load of dremeling around inside the runners in the cylinder head, I went from this To this Exhaust ports mirror finished And the chambers And polished up the valve faces and backs but left rough on the backs of the inlets I'm yet to finish up one last cylinder and check if a valve job is required or if I can get away with just lapping them in. I haven't ported it as such because it's just unnecessary, it was more or less just smoothing it out Sort of having a break from finishing the cylinder head while I get my personal shit together, however I did fit some Optional Starlet door sills, only done the passenger side for now but will do the drivers soon, but what a bastard to stick down! I was thinking the other day if I got a Emanage or standalone ecu then what about a power mode button/map switch? Was searching eBay for genuine Toyota switches & buttons, but with no luck I stumbled across a switch from an old Jaguar which looked about right. So I bought it to see where it could go and if it will fit anywhere. Haven't actually fitted it, just a test fit. Fits almost perfectly 3/7/17 Realised I probably could have put the dates of the updates but oh well, we're here now lol Been continuing with the cylinder head, finishing up the polishing and reshimming the valves with new shims 5/7/17 Today I have FINALLY finished all the polishing and just need to lap in 6 more intake valves and it will be off to be skimmed. As for how much though I'm not too sure, bearing in mind this will be a high compression 4EFE and I already have a 0.5mm 5EFE head gasket, so I was feeling having it skimmed 0.3mm or less maybe?? Not sure, I'm not sure what the piston to valve clearances are, I will have a chat with the engineers and see what they suggest. But for now here's the pics as of now Then I had these delivered, should be more fun trying to wire up and make functional lol, will obviously have to be painted before fitting 13/7/17 Just got the head back from being skimmed, so clean! I had the head skimmed by 0.15mm (6 thou), combined with the 0.5mm 5EFE gasket should provide a nice compression increase, will use the 4E-FE pistons as these have the highest compression out of all the standard 4e & 5e pistons But until then I will just put all the valves back in, waiting for some stainless steel fasteners to replace the zinc coated ones and then it will sit there until I build the bottom half (that I don't quite yet have to hand because its in the car lol) I also spent the last few days making a wiring loom and wiring up the electric mirrors and with much help from Morgey I got them working! Now I am in the process of having the mirrors painted to match the car, and I also need the blank mirror trims for the interior also, I have now had the registration transferred over from my old SR 'S85 RKE' to the new one. Why? Dunno lol I just prefer that plate 19/7/17 Special thanks to Morgey, he had some mirror trims which I bought off him and he's been extremely helpful! Still waiting for the mirrors to be painted, but a mate of mine is doing it for me and I'm not in a terrible rush - can't physically drive the car at the moment anyway lol Been doing yet even more bloody wiring, started getting everything in place ready to fit a 2 into 1 alarm system Still haven't got round to putting the valves back in yet, but I've replaced the fasteners with stainless ones, exhaust studs, Inlet studs, thermostat housing studs and all stainless locking nuts 27/7/17 Been fiddling about the last few days wiring up the alarm, and it's all wired up and works as it should just need to tidy up the wires under the dash and put it back together Today I've been doing some grinding/sanding on the 5EFHE valve cover and the fuel rail, smoothing them out ready for powder coating or painting at a later date 28/07/17 Finally sat my arse down to put the valves back in Also finished all the wiring, the 2 into 1 alarm is now fully working, tidied up all the wiring, everything has been soldered, used good quality loom tape that manufacturers use so it's not totally obvious is been messed with 2/8/17 Bought some Optional headlight covers which arrived today 😁 There not bad but to be fair they have seen better days They have a few minor scuffs and micro scratches, but I will Polish them and restore them as best as I can! One does have a crack in it but isn't much I can do about that unfortunately And I replaced most of the fuses for LED 'glow' fuses, might as well so if any fuses blow in the future it's easier to know which one


-
Still looking
-
Positive feedback from me! Arrived in good time and provided tracking, no mucking about! Thanks again mate
-
Humpty bumpy