

Patches
-
Content Count
688 -
Joined
-
Last visited
Content Type
Profiles
Forums
Wiki
Media Demo
Store
Calendar
Posts posted by Patches
-
-
How much would you be looking for it?
-
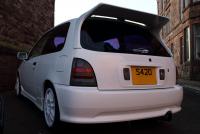
Looking for one of these with the air bag. Must be good condition
-
PMed. I have a couple of questions.
Do the seats easily fold down? like the standard glanza seats (designed for a 3 door car)
and could you upload a picture of the loose fabric part?
Cheers!
-
What could you do the ct9 delivered for? PM me
-
I'm sure I saw a set on here for 500 not long ago real good price glws
Pretty sure they didnt sell. Personally I wouldnt pay more than 300 unless they were mint
-
Fuck knows man. Big front mount on show. Was pretty drunk cant remember ha. I shouted "i've got one of those!" Haha
-
Driving down gordon street last night about 11-12 last night
-
to be fair the guys who wired mine up only used 2-3 cables.
This might have your answer
-
Free bump!
the car is awesome man! Wish this was for sale when i bought mine! Wish i had the money for the engine
GLWTS
-
http://www.ukstarletowners.com/index.php?showtopic=59611
Have a look at this guide i made. Hope it helps
-
if you sell up it should be for some boost...just sayin
Aye get a gt or glanza. I had a fiesta before my glanza and i wouldn't go back to ford.
-
How, whats wrong with her jacket like ? LOL ;-)

-
Patches...cannot help to notice, tyres...185/55/r15 ?..how did it ride on those?...i have 195/50/r15 Parada spec 2's & ain't too impressed with these...there like new & was going to change them for a better tyre that actually handles damp roads & rain etc.
Yes i know Yoko's stick like crap to a blanket on 22+ degree' days & dry etc...but we rarely get decent days like that..& our summers are mainly a washout!!.
Did you stick with that size on the Toyo's?...or go for 195's?.
Cheers
I went for 195 Toyos, only on the front 2 tyres. They are alright, but i've got the boost restriction taken off in all gears so in the wet i cant floor it till 3rd gear. I've always had t1r proxies or budget so couldnt really say how they compare to other good brands
-
-
Placing an order very soon thanks guys! Which ones above are the Evolution manifold??
Dunno if your aware or not but theres a 25% discount if you order from TGTT
-
I'll be up for it
-
They residents need a slap, would pump that posh birds daughter though for a laugh haha
Only if she took that jacket off
-
Iamlegend told me he had to remove his to get it say right with his 98 bumper i think.
Your kit looks like a toyosports with modified short pipe work, you will need to rotate your turbo looking at those pics
Yeah i have a wepr ct9 power up kit coming which requires me to do that anyway so not an issue
-
It will fit between the crash bar , mine did

Rob.
Thats what im hoping for.
Anyone have any ideas what make mine is?
-
I just bought a GFB respons, which personally i love the sound of. You would have to get a universal one but you could buy silicone reducers and the likes to get it to fit.
-
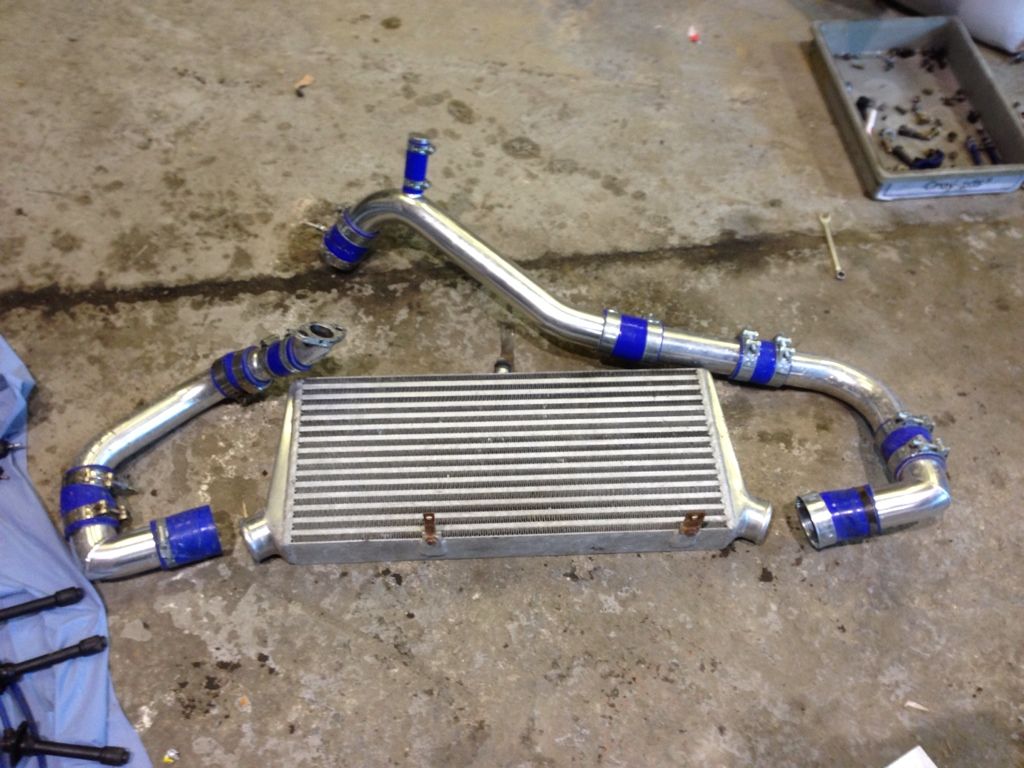
Im getting this delivered on monday so just wanting to see how much cutting people have done to their bumpers, im not sure on the make of the intercooler and i will be removing my air con this weekend to help with fitting.
Cheers!
-
Will this fit EP70?
Dunno mate check the whiteline website. Think it might just be ep82/91
-
We will be taking payments shortly, the last payment date will be the 21st of january, ive put a pic in of them fitted to rob bowers conversion on the first post

Add me to the list then for a red set! cheers!
-
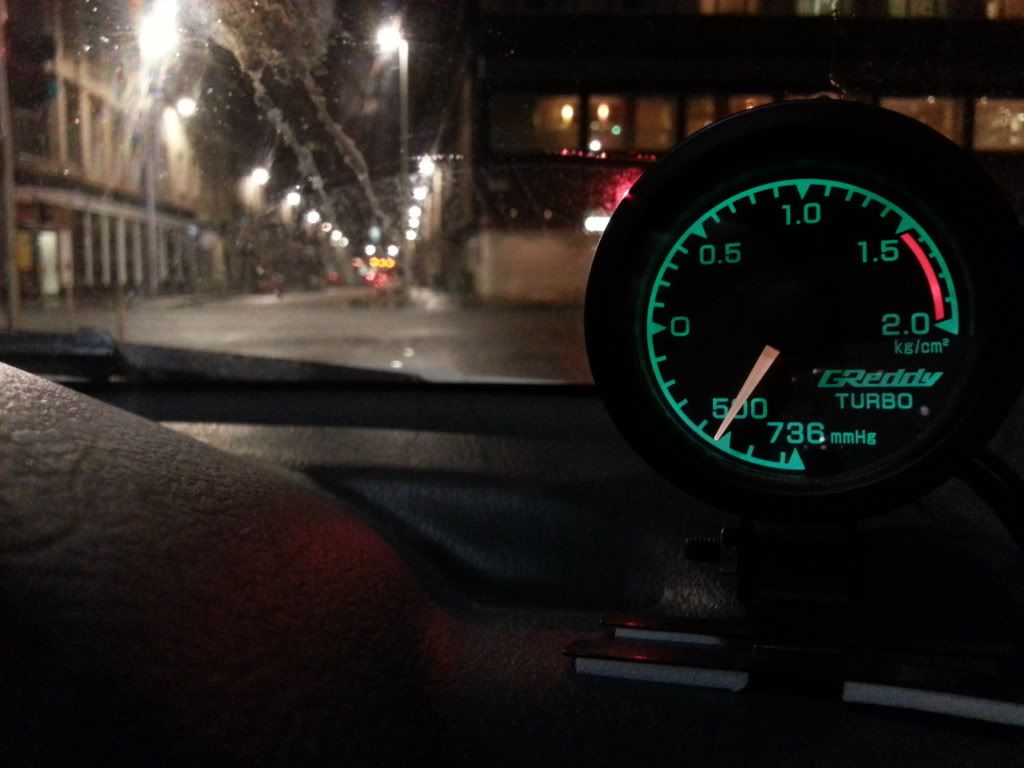
I've just wired up my boost gauge after weeks of putting it off because i could not find a guide, turns out its pretty easy so i took photos to show you how I did it. I have assumed that you have connected the vacuum line to your sensor/gauge, this tutorial is only focusing on how to wire the power, lights, ignition and ground from the back of your head unit.
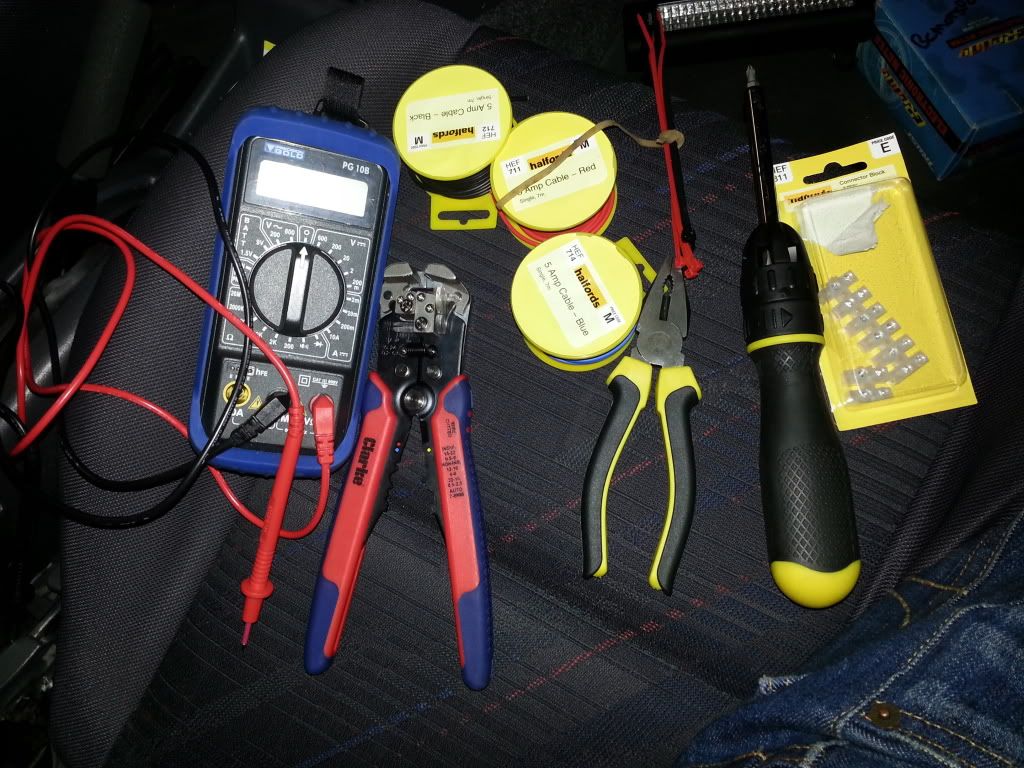
Tools needed
- Screw driver (both flat and philips)
- Wire cutters
- A way of connecting the wires together, I used connecting block and crimping connectors supplied with my gauge (you can solder the wires if your confident)
Helpful extras
- Multimeter
- Automatic cable strippers
- Spare wire, i got rolls of 5 amp cable from halford for around £3 each. (The cables supplied with my gauge were too short to reach the back of the head unit)
- Cable ties (keeps everything tidy)
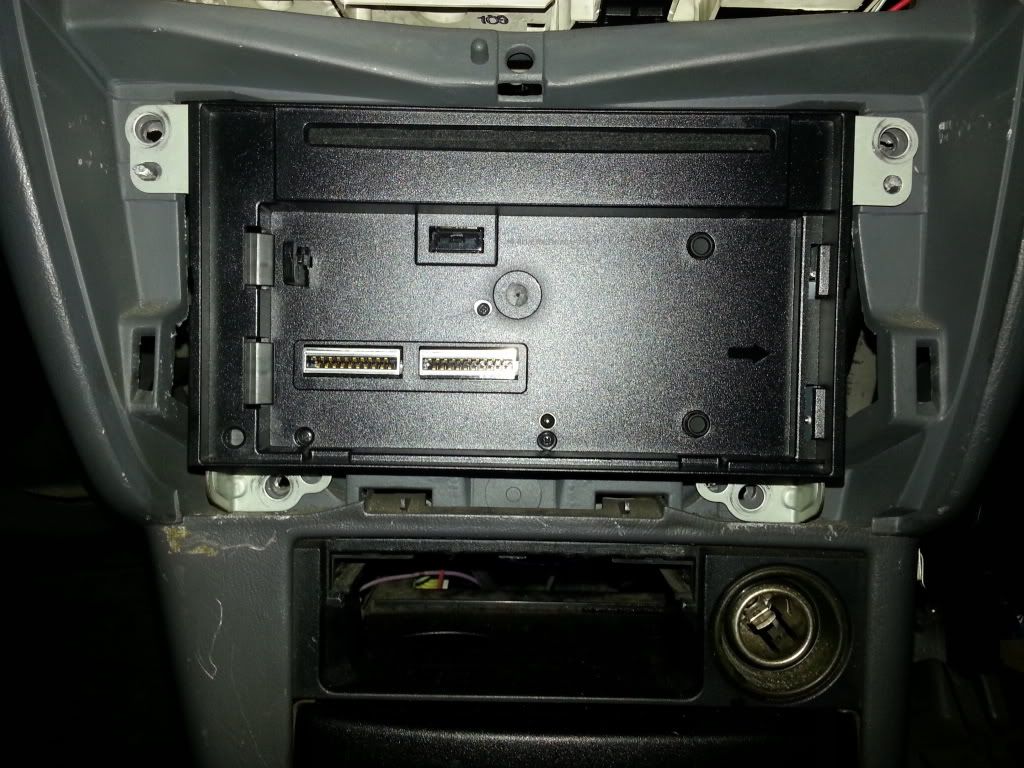
Step 1 - Removing the head unit
To prevent damage to my screen i popped it off first. There may be 2 screws just above the climate controls (mine didnt have any but yours might) remove them if they exist. Then take a flat head screwdriver and carefully pop the fascia off. This takes very little force and wont fully come off at first as u will have to unplug some cables.
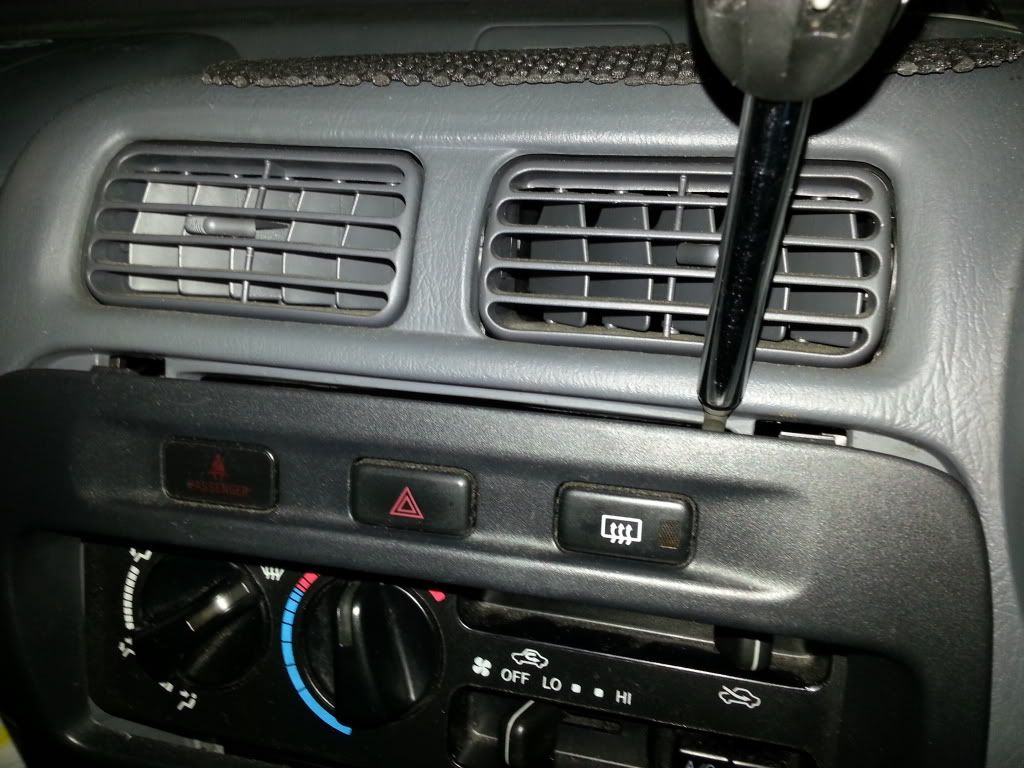
Unplug these cables and the fascia will come off
Next unscrew the 4 screws surrounding the headunit (mine are already out in photo)
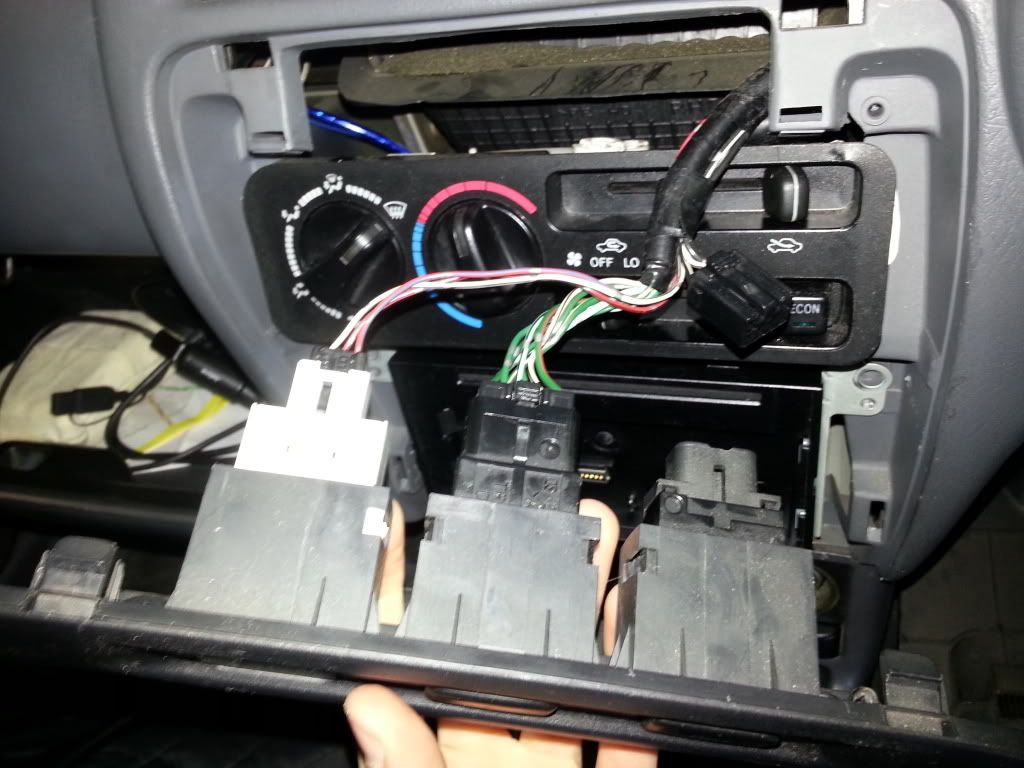
Pull the headunit towards you, being carefully as to not pull on the cables at the back. I rested my headunit just in-front of the gear stick while allowing access to the cables at the back.
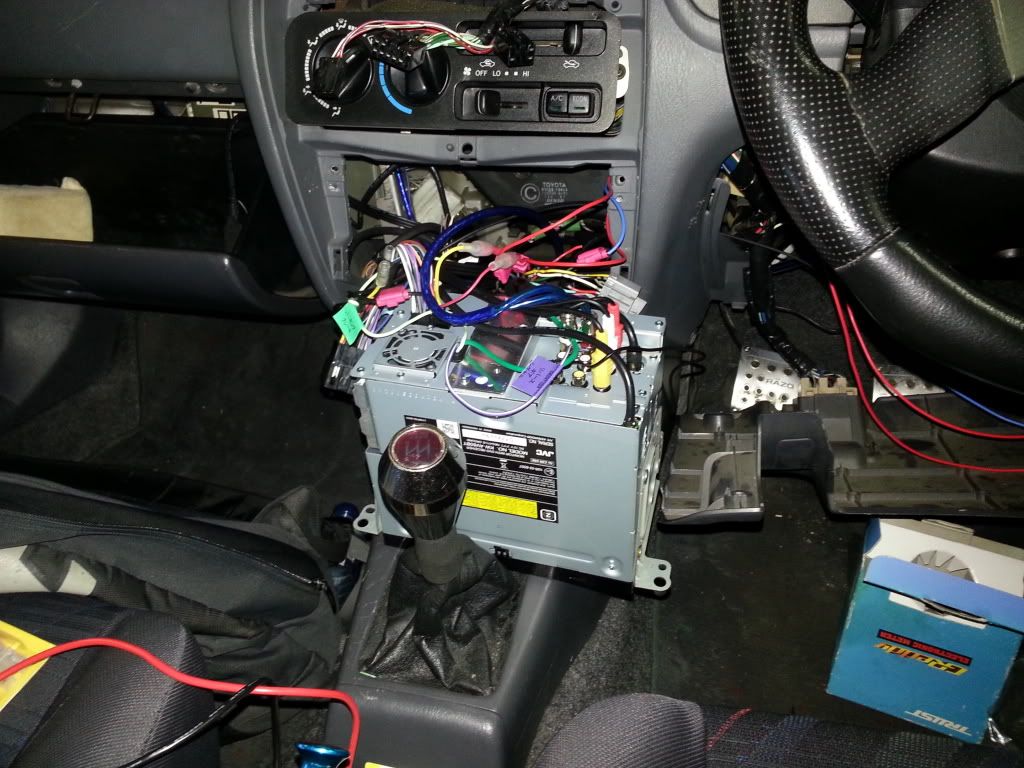
Step 2 - Finding which wires to use and connecting them.
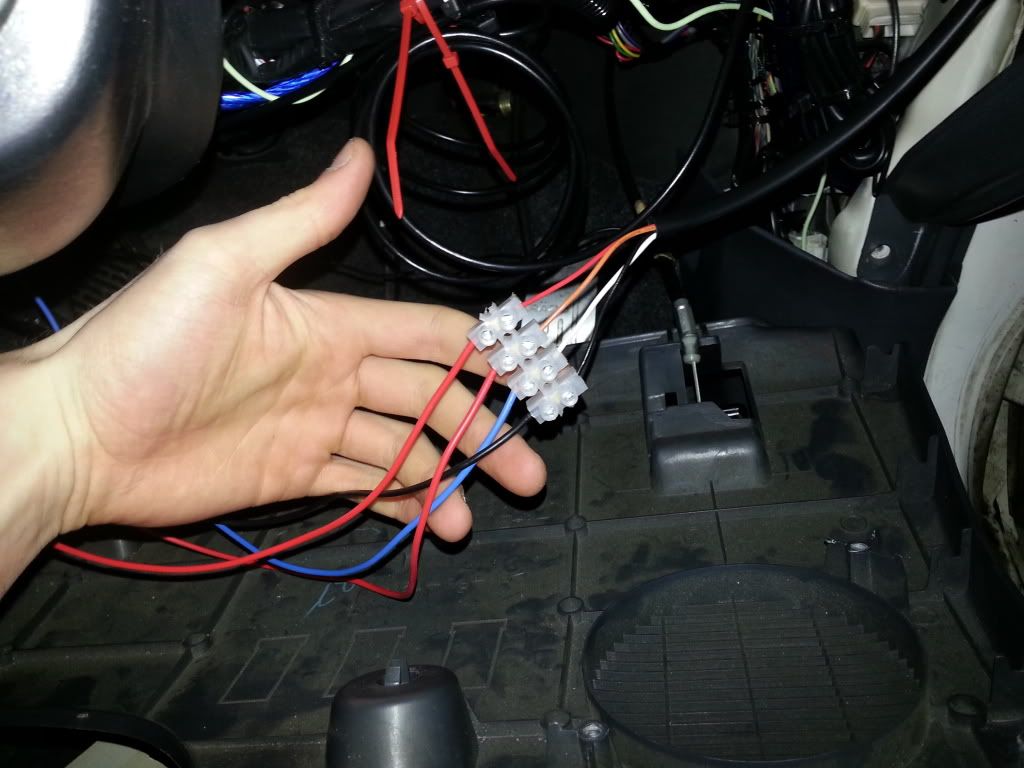
I have an aftermarket head unit connected and the people who connected it butchered my original head unit cables so this made it easy for me to spot the power and ignition cables as they were the only ones they used.
These are the cables you are going to be using
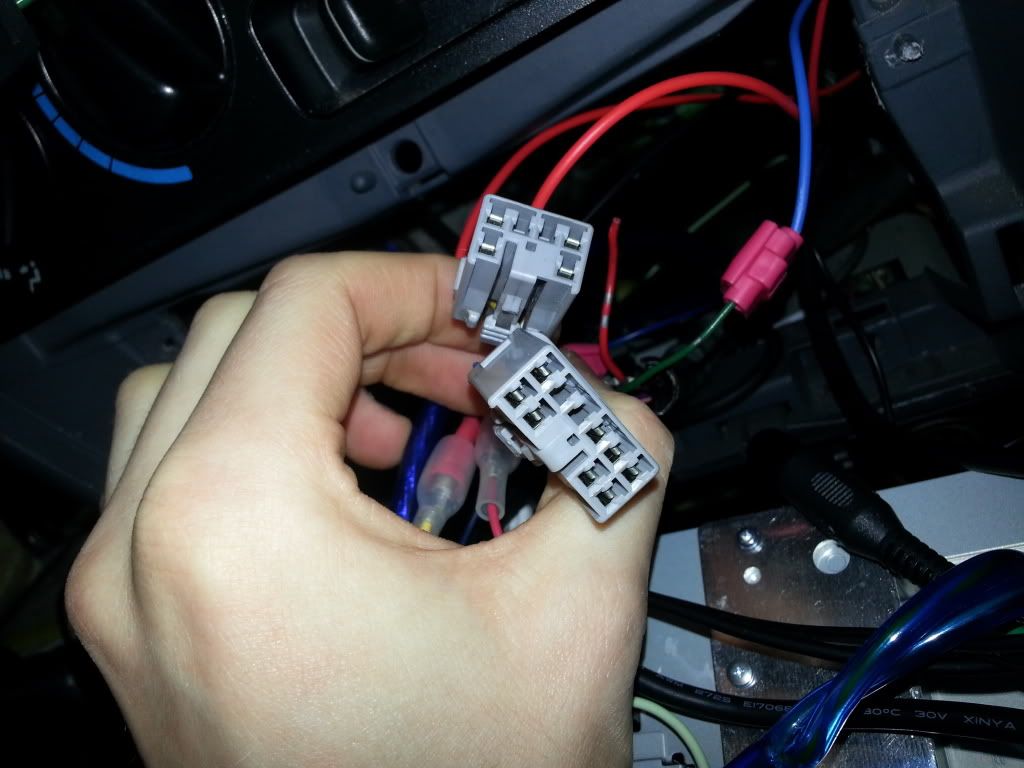
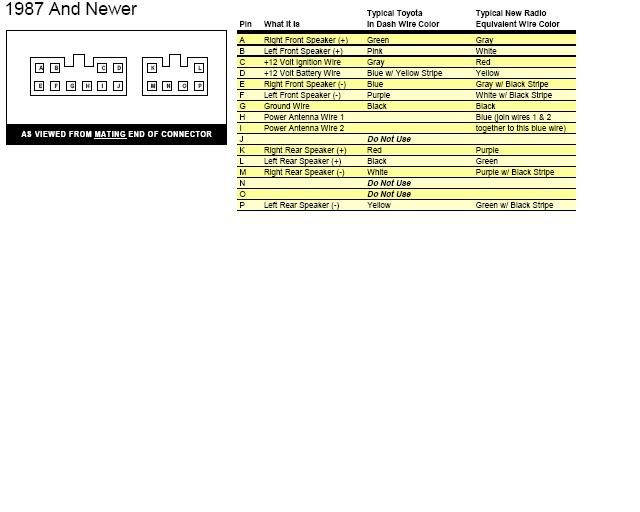
The colours of cables which you will need to use are as follows.
Blue - Constant 12V
Gray - Ignition
Green - Lights
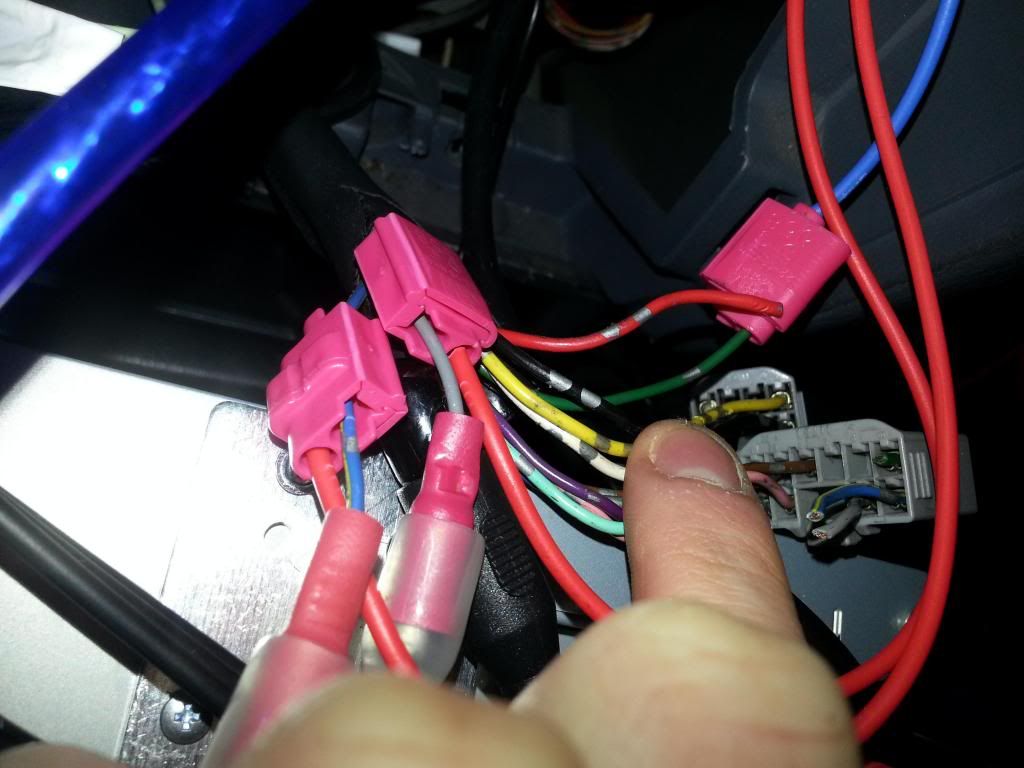
You can see where i have connected the pink crimping connectors in the photo above.
I had to use a black cable from the headunit for ground. Any metal part of the headunit should work as a ground if you are stuck. (multimeter is handy at this point)
Now connect your cables to these using crimping connectors or soldering (i personally think the greddy crimping connectors were really easy to use and meant the cables did not need to be cut) The automatic wire strippers were really handy here for stripping cables without cutting them.
Run the cables to your gauge, i mounted mine on top of the dash at the right hand side of the steering wheel, to access the panel underneath the steering wheel it was 4 screws at each corner.
I used connector block to help extend my cables. The Greddy ones would not reach behind the headunit.
Tidy everything up with cable ties and job done.
Any questions feel free to pm me.
- Screw driver (both flat and philips)
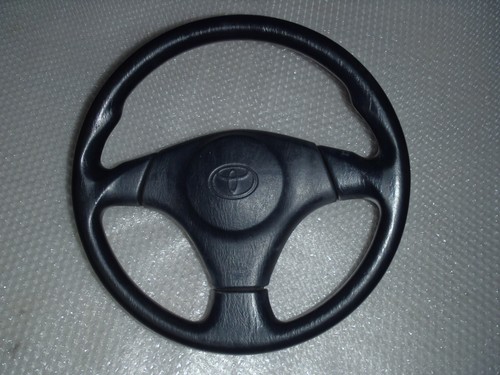
98-99 spec steering wheel
in Wanted
Posted
Already bought sock's