Sam44 Posted August 13, 2020 Share Posted August 13, 2020 (edited) 14 hours ago, Claymore said: I guess that why they offer higher pressure rad caps like 1.2 bar etc. It looks from your description of the system that I understand the coolant flow when hot and cold. My only concern was that in swapping the hoses at the thermostat this reverses the flow through the radiator when the system is up to temp. The top hose thermo housing outlet is now attached to the bottom hose feeding hot coolant into the bottom rad tank and the bottom hose thermo housing inlet is now attached to the top of the rad. The coolant flows from bottom to top now, I think I'll leave it as Toyota intended. The best cap on the market for these seems to be the cosworth cap from demon tweeks. Most of the track starlets run this cap. It's the cap I'm running. I also run a restrictor cap/plate in the top hose to keep the block pressure up and in the block. When running higher cap pressures be mindful of the plastic radiators and factory old spring type hose clips!!!!. This area of the engine was the first thing I was warned about when becoming interested in the vehicle. As well as being told this is the main reason of engine failure low block pressure overheating internals, especially cast alloy pistons. When you look threw the site all the warning signs are there. I'm surprised it's not more commonly know about. All proformance engines I know of run a 30psi minimum block pressure that would mean a 2bar pressure cap using a standard Toyota e series system. First warning signs to look out for is ring filings in the engine oil, this looks like a metallic black paint, very fine filings (overheating piston crowns), poor ring seal (piston to bore contact) this is what removes/transfers the heat from the crown to the coolant, crank case air pressure might also increase (leaking engine oil seals), increased oil pump wear and seized little end will follow shortly after. Edited August 14, 2020 by Sam44 Quote Link to post Share on other sites
RoyalDutchie Posted August 13, 2020 Share Posted August 13, 2020 (edited) Cosworth seems to go to 1.5 bar right. Mishimoto is also an option for 19 psi or 28 psi rad caps for about 23 euro's including shipping. note: verifying your email address should make it possible to send and receive pms. Strang maybe pm an admin or mod about this. Edited August 13, 2020 by RoyalDutchie Quote Link to post Share on other sites
Claymore Posted August 13, 2020 Author Share Posted August 13, 2020 (edited) 25 minutes ago, RoyalDutchie said: Cosworth seems to go to 1.5 bar right. Mishimoto is also an option for 19 psi or 28 psi rad caps for about 23 euro's including shipping. note: verifying your email address should make it possible to send and receive pms. Thanks mate, Think I've verified my email, I can send PM's to some members but not others. I'll try yours. Edit: Nope! Edited August 13, 2020 by Claymore Tried to PM Quote Link to post Share on other sites
Claymore Posted August 14, 2020 Author Share Posted August 14, 2020 13 hours ago, RoyalDutchie said: verifying your email address should make it possible to send and receive pms. Strang maybe pm an admin or mod about this. Thankfully I can PM the admin team and they're looking into it. Quote Link to post Share on other sites
Sam44 Posted August 14, 2020 Share Posted August 14, 2020 14 hours ago, RoyalDutchie said: Cosworth seems to go to 1.5 bar right. Mishimoto is also an option for 19 psi or 28 psi rad caps for about 23 euro's including shipping. note: verifying your email address should make it possible to send and receive pms. Strang maybe pm an admin or mod about this. Yeh 2 of the best caps right there. 13 hours ago, Claymore said: Thanks mate, Think I've verified my email, I can send PM's to some members but not others. I'll try yours. Edit: Nope! Yeh I'm having the same issues. My email has been verified also. Quote Link to post Share on other sites
Claymore Posted August 15, 2020 Author Share Posted August 15, 2020 (edited) Whiteline adjustable rear anti roll bar install: Vehicle was safely set at ride height and the wheels removed. First I assembled the D-bushes to the anti roll bar (arb). They are a new design that is "grease free" having a PTFE fur lining. Stops the need for grease which can attract grit and wear the bushes out faster. Metal saddle clamps pressed over bushes, I marked the centre of the bar and the centre of the rear beam. Installed the arb centrally with the U-bolts over the beam, through the metal clamp blocks to attach through the saddle clamps with 2 x shakeproof flange nuts. I then attached the arb drop links to the central hole on the arb arms with the chassis brackets attached to the top. Rotated the drop links into the most vertical position on the chassis rails I could and marked the position of the mounting hole and the bracket sides in white paint pen. I then tried to insert the drill and found I would need to lower the hole to allow the chuck access. A word of caution: on the drivers side behind the rail is a reinforcement plate which is used to attach the exhaust mounting bracket. I transferred this line to the outside face in pencil to know how far back the hole could be drilled. Any further back would have been a real mess to mount the nut and washer. The passenger side is clear and the drop link can mount vertically, the drivers side is slightly angled forwards. Passenger side position With everything measured and checked it was time to drill the bastard! Centre punched the holes, and started out with a short 5mm bit, then a long 5 x 132mm bit to make it through the box section and opened this out with a 6 x 139mm drill bit finally followed by a 10 x 139mm bit. Light pressure forwards but firm grip to reduce chattering. Long drill bits and small chuck / drill body are essential as space is very limited. Make sure you drill straight and flat. Holes drilled, zinc primed and then top coated. On the drivers side I made a D- shaped washer to fit on the rear face next to the exhaust bracket to bring it all to the same level as the exhaust bracket. Then I attached the large washer and nut to fasten the chassis brackets. Brackets mounted both sides. Don't over tighten as the metal sections are quite soft. Drop links attached, again don't over tighten as the rubbers are soft. I set the length so the arb arms were close to horizontal but slightly higher at the adjustment hole end. Then attached the drop links to the central hole using the bolt, 2 x washers and nylon lock nut provided. All done, wheels on and back on the ground. All in all a good product. Will improve handling and is adjustable to suit different suspension setups, cheap and relatively easy to fit. The down sides are for a road car you lose 50mm of ground clearance. Can't jack up the car under the rear beam anymore. If I was doing it again I would probably look into welding the chassis brackets to the chassis rails instead of bolting as this would allow free placement on the drivers side. Also the rear face of the passenger chassis rail is angled so the nut doesn't sit flat. Not a problem just looks weird, might "dress" the area flat if it bothers me in the future. Please with how it came out. Edited August 15, 2020 by Claymore Quote Link to post Share on other sites
JamesG Posted August 16, 2020 Share Posted August 16, 2020 Looking good, handy little guide. Thinking about putting one of these on mine in the future. Does look a bit daunting drilling the holes in chassis leg but well worth it for the handling gains. Quote Link to post Share on other sites
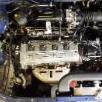
Claymore Posted August 17, 2020 Author Share Posted August 17, 2020 (edited) On 8/16/2020 at 10:40 PM, JamesG said: Looking good, handy little guide. Thinking about putting one of these on mine in the future. Does look a bit daunting drilling the holes in chassis leg but well worth it for the handling gains. Thanks mate. For me the decision was easier! I care about all the cars I've owned (some more than others) but this one was only £850 and I was happy to drill it. If you look at the picture below (seems familiar?) you have already discovered the exhaust reinforcement bracket on the drivers side that I was noting above. As your glanza is one of the cleanest I've seen for a while I don't know if I'd recommend drilling holes in that beautifully clean chassis! I understand it's your car and you can of course do what you want to it, but in the future cars of your level of cleanness will command a price premium. I hate seeing cars as investments but sometimes it can't be ignored. There are alternative arb's like the ultra racing. They're non adjustable but are available in 2 different thickness's. They look to attach to the beam the same way but the arms point forwards and look to pick up on existing chassis points. http://ultraracing.my/ecatalog/index.php/product/toyota-starlet-ep-91-rear-anti-roll-bar-rear-sway-bar-rear-stabilizer-bar-2/ I've not fitted one of the ultra racings and cant seem to find the instructions to confirm this so I'm only going off the photo! Might be an option for you to investigate. I wish all companies made the instructions available on their website. *EDIT* Found a rear photo of the arb drop link mounting bracket installed. Rust repairs immanent! Edited March 24, 2021 by Claymore Photo added Quote Link to post Share on other sites
JamesG Posted August 17, 2020 Share Posted August 17, 2020 9 hours ago, Claymore said: Thanks mate. For me the decision was easier! I care about all the cars I've owned (some more than others) but this one was only £850 and I was happy to drill it. If you look at the picture below (seems familiar?) you have already discovered the exhaust reinforcement bracket on the drivers side that I was noting above. As your glanza is one of the cleanest I've seen for a while I don't know if I'd recommend drilling holes in that beautifully clean chassis! I understand it's your car and you can of course do what you want to it, but in the future cars of your level of cleanness will command a price premium. I hate seeing cars as investments but sometimes it can't be ignored. There are alternative arb's like the ultra racing. They're non adjustable but are available in 2 different thickness's. They look to attach to the beam the same way but the arms point forwards and look to pick up on existing chassis points. http://ultraracing.my/ecatalog/index.php/product/toyota-starlet-ep-91-rear-anti-roll-bar-rear-sway-bar-rear-stabilizer-bar-2/ I've not fitted one of the ultra racings and cant seem to find the instructions to confirm this so I'm only going off the photo! Might be an option for you to investigate. I wish all companies made the instructions available on their website. Yeah think your right claymore. Dont think id be able to bring myself to drill those holes in my chassis, like you say its almost to clean to do it. Get what your saying about some cars being investments too, Im sure if I left mine completely standard and sat it up for 10 years it would be worth a fortune but wheres the fun in that. I enjoy modifying it and making it my own but am also not very keen on making changes that cannot be put back for that reason. At this moment id like to say i will keep the car forever however as we all know situations and circumstances change over time so who knows. Will be worth looking into that ultra racing rear sway bar as an alternative to the whiteline one, thanks for pointing that out. I have a whiteline rear anti roll bar fitted to my daily yaris t sport and it made a huge difference to the cars handling, hopefully the starlet ones have a similar effect🙂 Quote Link to post Share on other sites
Claymore Posted August 17, 2020 Author Share Posted August 17, 2020 13 minutes ago, JamesG said: I enjoy modifying it and making it my own but am also not very keen on making changes that cannot be put back for that reason. Spot on. Same for me with certain cars. 👍 Quote Link to post Share on other sites
Sam44 Posted August 17, 2020 Share Posted August 17, 2020 Nice find I didn't know about the sway bar. Quote Link to post Share on other sites
Claymore Posted August 26, 2020 Author Share Posted August 26, 2020 (edited) 4efte lower power steering bracket refurbishment: Managed to find the lower power steering tensioner bracket required to keep the power steering and allow enough clearance for the 4efte oil filter relocator. Good condition, slight rust. Date of casting 21/3/96. Back side, stand off legs in good condition also. Part number on rear: 44446-10060 Needed to free up and remove the tensioner screw which was seized into the cast bracket. So WD-40 to the rescue again. Using 2 x 12mm spanner in a squeezing motion I loosened the lock nut and the large flange nut (foot to contact the pump). Also the adjuster screw lock nut below. To aid the removal and prevent the corroded threads from jamming even more or destroying the threads in the bracket, I ran a lubed m 8 die down the thread by hand. Yes, I know I'm supposed to use a thread chaser, but I don't have one and I've done it this way for years without an issue. The reason its not in a holder is so it puts less pressure on so it can't remove good steel. More lube and the screw came out fairly easily, no damage to threads. The screw was a bit bent so I threaded 2 x sacrificial nuts on and clamped them in the vice (to avoid damaging the screw threads) and with a few blows from the medium sized hammer I'd managed to true it up well. Sand blasted the bracket in my mates cabinet. Masked up the mating faces (combination of masking tape and small circular stickers for the round bits 😉), acid etch primer to get a good key then 1 x normal primer and 2 x satin black at a 10 min interval. Pleased with the outcome. Another piece of the puzzle ready for turbo install time. Also got some heat range 6 spark plugs which I have been investigating compared to the 5 heat range. Edited August 26, 2020 by Claymore Quote Link to post Share on other sites
Claymore Posted August 31, 2020 Author Share Posted August 31, 2020 (edited) NGK spark plug analysis. I've decided that going one heat range colder should be fine when going 4efe + t at my intended power level. As shown in an earlier post the stock spark plugs are BKR5EYA so that of course leads us to a BKR6EYA spark plug as its replacement. The chart I posted earlier decodes the product number and the only difference between the 2 plugs should be the heat range. After reading some forum posts and manufacturers explanations it seems that there are differing opinions as to what actually changes (some true some not! some alarming, some less so), so I decided it was time to "saw some shit up for science"! Firstly I measured the outer dimensions, only really concerned about the areas inside the cylinder head. Then I removed the threaded case section to inspect the insulator. I have highlighted the only significant change in red, other discrepancies can easily be chalked up to manufacturing tolerances. The change is to the height of the Insulator conductor section. This section transfers the plugs heat to the case and subsequently the cylinder head to cool the plug, as the insulator contact area is larger on the 6 heat range it will transfer more heat to the case / head. This increased length obviously shortens the Insulator absorber section length and reduces its ability to absorb heat (with a smaller gas pocket also) from the cylinder combustion. I'm glad I checked and am now confident that the 6 plugs will be ok for my build. I couldn't find any BKR7EYA, only 7E-11 which are larger gap and then it was into iridiums which were too expensive to waste! *I have only checked the above plugs from NGK - other manufacturers and plugs may have different results / changes. Edited August 31, 2020 by Claymore Quote Link to post Share on other sites
Sam44 Posted August 31, 2020 Share Posted August 31, 2020 Yeh the heat range 7 are needed around 1bar of boost, but play havoc with engine exhaust emissions. The E3 range of plugs can comfortably take 1bar with the equivalent NGK heat range 6. Nice information in your previous post. Quote Link to post Share on other sites
Claymore Posted August 31, 2020 Author Share Posted August 31, 2020 28 minutes ago, Sam44 said: Yeh the heat range 7 are needed around 1bar of boost, but play havoc with engine exhaust emissions. The E3 range of plugs can comfortably take 1bar with the equivalent NGK heat range 6. Nice information in your previous post. Cheers, the Holset info looked well written and researched so I thought I'd share it. Nice to find some compressor maps also. Quote Link to post Share on other sites
Sam44 Posted August 31, 2020 Share Posted August 31, 2020 Fantastic information. Definitely, making hybrids is hard because you can only combine compressor maps and best estimate the hybrid design. The holest and Garrett are a more developed turbo in the evolutionary design and use. These turbos play better with power delivery/control. Quote Link to post Share on other sites
Claymore Posted September 6, 2020 Author Share Posted September 6, 2020 (edited) With the suspension side of things near enough done, it was time to look at improving the braking. As the car is being built for "fast road" levels of performance I decided what's good enough for the Glanza is good enough for mine. Glanza brake caliper carrier cleanup. Bought a pair of second hand calipers, carriers and they came with some half used pads also. As you can see the brake fluid had begun to strip the paint off the calipers and reveal that there had been 3 different colour changes. Red, black and then blue. I particularly like the level of detail Mr Black and Mr Blue had reached when painting over the rubber dust seals and pad retention clips! 🙈 12mm socket to undo the caliper slide mounting bolts, a sharp tap was required to get them going but after that they wound out easily. Close up of the clips, thankfully the mounting faces of the carriers were free of paint. After an hour with the scraper I'd managed to remove all the paint I could. Thankfully you only need the Glanza carriers as most N/A's calipers bolt straight up with Glanza discs and pads. There are however some very early N/A's that use a caliper with an integrated carrier (and a smaller disc). These won't work with the Glanza carriers. Masked up the threaded holes with rawlplugs to reduce the amount of sand that would get in. Then it was off to the sand blaster (where the genius rawlplug idea failed after being blasted out and blocking the sand return hopper 😒) Cleaned out and continued blasting... After blasting. Ready to attach when my discs and pads arrive. Edited September 6, 2020 by Claymore Quote Link to post Share on other sites
burty Posted September 19, 2020 Share Posted September 19, 2020 Good write up lots of helpful tips for others Quote Link to post Share on other sites
Claymore Posted September 19, 2020 Author Share Posted September 19, 2020 6 hours ago, burty said: Good write up lots of helpful tips for others Cheers, it takes ages to write sometimes but I enjoy it. If it helps others then I know it was worth the effort. 😎 Quote Link to post Share on other sites
burty Posted September 19, 2020 Share Posted September 19, 2020 18 minutes ago, Claymore said: Cheers, it takes ages to write sometimes but I enjoy it. If it helps others then I know it was worth the effort. 😎 Absolutely I've learnt so much just reading threads on here keep up the good work it's what a forums about Quote Link to post Share on other sites
Claymore Posted September 20, 2020 Author Share Posted September 20, 2020 15 hours ago, burty said: Absolutely I've learnt so much just reading threads on here keep up the good work it's what a forums about Exactly my thoughts too, much prefer forums as a method of communicating with like minded people in the community. Can't see how social media can do it well at all. If everyone that read the build threads also started their own maybe forums will become more popular again. You can see from the views that peoples threads get there are clearly people out there reading this stuff. I hope that all the good threads that are on here inspire people to start their own. Quote Link to post Share on other sites
Claymore Posted September 20, 2020 Author Share Posted September 20, 2020 (edited) Well, the discs and pads arrived, big shout out to ID workz as always. Great price, well packed and quick delivery. 👍 Glanza discs and carrier fitment to N/A. Decided on Pagid replacement glanza discs (54146), EBC greenstuff pads (DP2453 for Akebono caliper) and glanza carriers I'd sand blasted earlier. Think the total came to £170 including a pair of Glanza calipers that I can sell on to recoup a bit of the £40 they and the carriers cost. So with the car safely supported on axle stands and the wheel removed; the standard caliper is the first thing I removed. 2 x bolts (top and bottom on rear, 12mm socket) released the caliper. Then I removed the brake pipe clamping plate from the strut with a 14mm. Caliper slid out and rested on breeze block to prevent strain on flexible hose. The caliper slide bushes has gotten stuck in the caliper through lack of use but were quite easy to free up by pressing them in with piece of wood. Once they started moving they operated smoothly. Also used an old pad and G-clamp to drive the piston back in ready for the thicker disc and pads. To remove the carrier I loosened and removed the 2 x retaining bolts (17mm socket). A breaker bar was required, but thankfully minimal corrosion on threads so they came out easily after the initial "crack, squeek, oh fuck, no it's fine" moment. Old disc and carrier off, pads were Aisin and still has the anti squeal shims both sides and the pad wear indicator clip (more on that later). The discs were in great condition with virtually no lip on them although they did look a bit blue. Old NA carrier (left) vs new Glanza carrier. Obviously larger in height by approx. 10mm to accommodate the larger disc. The bolt hole centres for mounting are the same when I measured them. Old disc vs new glanza. Old disc was 238mm diameter and the Glanza disc was 254mm. The increase in disc diameter means that the smaller NA dust shield will interfere with the disc, thankfully its only approx. 1mm thick steel and was no match for my tin snips 💪. Tidied up with a file and straightened the kinks out. Also carefully cleaned off some of the rust from the carrier mounting surface on the hub knuckle and the disc mounting surface on the wheel hub. Re assembly time, so in went the pad retention clips making sure they were orientated correctly (rounded spring sections out) Added the pads with their anti squeal strips (attached where ever contacted by caliper or piston) and some copper grease on the sliding surfaces. Note the original wear indicator clip, it features a small tab of metal on the inner face that contacts the disc when the pad material is approx. 1mm thick and causes an audible warning. Fitted the disc, slid carrier and pads over, bolted carrier to knuckle at specified torque. Slid caliper into / over carrier and disc and replaced the fixing bolts (long bolt at top short at bottom) and tightened to specified torque. Re-attached brake hose clamp to strut. Repeat for other side and then pumped the brake pedal to drive the caliper pistons back out pressing the pads to discs. Very important to do this or the first test drive the pedal goes to the floor, no braking effect and new pants required. Checked the brake fluid level and it was way over the max. mark so used a turkey baster to remove the excess fluid. Not too tough a job, glad it all essentially bolted on with no modding of important components required. The only thing I'd do differently would be to cut less off the dust shield (probably only remove the lip) and then straighten the material with some pliers instead. Need to bed them in for a bit, should be a nice improvement. Edited September 20, 2020 by Claymore Quote Link to post Share on other sites
Sam44 Posted September 21, 2020 Share Posted September 21, 2020 (edited) Fantastic info. I had no idea these were different from the ep91 UK. I'd recommend gravity back bleeding the clutch system. It gets very mucked up. Back bleeding reduces the risk of pulling any of the muck into the systems seals. I've only got time for forums, I don't understand the layout of instergram/Twitter. It's all over the place. Edited September 21, 2020 by Sam44 Quote Link to post Share on other sites
Claymore Posted September 21, 2020 Author Share Posted September 21, 2020 6 hours ago, Sam44 said: Fantastic info. I had no idea these were different from the ep91 UK. I'd recommend gravity back bleeding the clutch system. It gets very mucked up. Back bleeding reduces the risk of pulling any of the muck into the systems seals. I've only got time for forums, I don't understand the layout of instergram/Twitter. It's all over the place. Yeah its a good bolt on solution for fast road or light track use on the N/A models, the 100kg less weight compared to the Glanza should give them a slightly easier time too. Bedded them in today and they feel sharper already. Need to drain the old DOT 3 fluid and replace with 4 or 5.1 next. Quote Link to post Share on other sites
Claymore Posted September 24, 2020 Author Share Posted September 24, 2020 (edited) With the suspensions and brakes near enough complete it was time to find some alloys and tyres. Decided on 4 x 100, 14" x 6" rims (ET35). They're E30 "bottletop" rims. I've always liked them as they remind me of the Ronal Turbo's / Tom's racing wheels and only cost £120 for the 4. They're in excellent condition and looks like 2 of them were in the boot well for all their life! Fitted them with brand new 185 55 r14 Uniroyal rainsport 3's. Needed some centre caps to protect the hubs / driveshaft threads from puddles etc. Also decided that some TRD badges would add the finishing touch. Found them on eBay and they even came with some IPA wipes to clean the caps prior to adhesion. Ready to fit The centre bore is 57.1 and the Starlet requires 54.1 so I also added some spigot rings as well. New nuts required, the alloys are a 60deg conical taper seat, and the access holes are quite small so went for the 17mm hex version from drift works. Any larger and the socket doesn't fit. Thread is m12 x 1.5. All fitted up easily, cleared the stock and Glanza brakes. Took her out for a drive in the sunshine we've been blessed with recently and am very happy with the mods so far. Handling greatly improved, brakes much more responsive and no rubbing even with the 45mm drop and cut down rear bump stops. Didn't help that the old tyres were a mismatch of brands, part worns and only 145 wide! Suspension has settled approx. 5mm since I first fitted it, really like where its at currently. Just needs about double the power now.....🤔 Edited September 24, 2020 by Claymore Quote Link to post Share on other sites

Recommended Posts
Join the conversation
You can post now and register later. If you have an account, sign in now to post with your account.