Flaminsam Posted May 4, 2015 Posted May 4, 2015 Hey guys and girls, guess it's about time I started a new build thread about my new shell. I purchased the shell from a well known member on here who will remain anon for now. 😀We settled on a price that we were both happy with and a deal was struck. The shell was collected with no interior, tailgate, bonnet, wings engine etc. I was happy with what I got as the plan is the reshell the shedlet Into this mint shell. While I'm swapping parts over certain parts will be getting overhauled and some parts replaced with new items. So I set about stripping the remaining parts from the engine bay. The idea was to respray the engine bay while no engine etc was present to make a decent job on the entire thing. Everything was being removed, wiring loom, clutch master and brake master/servo even the steering rack as I would be putting my manual rack on instead 😉 Next was a decision on paint. Seeing Charls bays in the glanza and her red gt I was keen on doing a candy colour. So off to see the guys at aps in hull to see what pearl he had on offer. He offered this........... It was a nice colour and one that they have made up with a mix of other paints that they have as samples when they batch order paint. I was impressed with the colour and was keen to get the bay stripped prepped and sprayed. When the bay had all the components removed I set about with some thinners (to Charls dismay) to remove the grease and grime from the bay. It came up like a shiny penny! Then I attacked the bay with scotch brite to key it. So far so good. Next I kindly asked my talented gf If she would mind spraying it for me. Next thing I know it's in primer! Awesome! As soon as the primer went off charl attacked it with the silver base. Loads of progress! Soon after the base had dried and charl took to adding some colour to the bay. I took a step back as I didn't want to interfere. The paint is cellulose based so it soon went off. The bay looked amazing! Keen as mustard, charl cracked on with the laquer to seal the paint and then we promptly left as the laquer was 2k. Obviously charl had her mask on while spraying that. Hence why I was outside during the final stages. After the spray had gone and the lock up was safe to enter again I finally got pictures of the finished article! As you may be able to see I was over the moon! I can't wait to actually start rebuilding the bay and have it looking something like a starlet again! Watch this space 😉 Quote
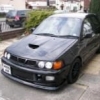
Socks Posted May 5, 2015 Posted May 5, 2015 I know who's shell this was, the first picture gave it away! ;) Glad to see its being built back up! Quote
funny onion Posted May 5, 2015 Posted May 5, 2015 Love the colour of the bay and it's a mint shell, will be awesome Quote
Flaminsam Posted May 5, 2015 Author Posted May 5, 2015 Cheers for the comments 😊 I'm away on a course at the moment so the going is pretty slow. Il be taking parts off my gt this weekend all being well and possibly rebuilding parts of the bay. It will be a pretty slow build but a quality one. 👍🏻 Thanks again to charl for spraying the bay for me! 😃 Quote
mikey4410 Posted May 5, 2015 Posted May 5, 2015 im loving that bay colour.....and my god you dont hang about getting cracking on with the car ....wicked stuff getting stuck in !!! :-D Quote
Bluebear Posted May 5, 2015 Posted May 5, 2015 ANOTHER one!?Hellfire...Be good to see where this goes! Quote
Flaminsam Posted May 6, 2015 Author Posted May 6, 2015 Mikey yea I want to crack on with this as soon as possible. Get everything swapped over so I can enjoy boost again Nick, this would be starlet number 8. Currently charl has four and I have four 🙈 Quote
funny onion Posted May 6, 2015 Posted May 6, 2015 I think if you take your time and do everything properly it will be a quality build. A chance to get rid of some bodges and sort some issues out maybe... Quote
Flaminsam Posted May 6, 2015 Author Posted May 6, 2015 Yea plenty of time on this one. Need to sort a few oil leaks on the engine and the wiring loom needs pulling to pieces to get rid of un-needed wiring Not to mention get the bumper and splitter sorted out with the wings 😊 Quote
Flaminsam Posted May 10, 2015 Author Posted May 10, 2015 Small update for you guys, I'm working away for the next four and half weeks so progress will be slow but steady. It's the weekend after the bay has been sprayed and it looks amazing! I've in masked the parts that were covered and started to re fit items to the bay. Here is how it currently stands. I've also bought some parts from lew from his old shell to make this that little bit tidier inside. Bought some well made alcatara door cards and also his cusco catch tank with the lines already made up 👍🏻 These will be getting fitted in due course. On the other hand, charl and myself have just purchased a two post lift which will make working on our neumerous cars a doddle in the future ;) That's all for now but things are progressing forward! 😋 Quote
Flaminsam Posted May 24, 2015 Author Posted May 24, 2015 So after a few weeks of working away I decided to crack on with a bit on the new gt. we also had a new addition to the lock up that will make life much easier in the long run when working on our cars 😉 Currently put together but needs wiring in and bolting to the floor before we can use it 👍🏻 So I decided to do a bit more to the bay. The wiring loom on my car had more wires In it than it really needed so I decided to remove all air con wires and all other wiring that's not needed anymore. This is some of the wire I removed. Then I decided to try and hide the wiring in the bay. Obviously the fuse box pretty much stayed where it is. I decided to run all the wiring into the n/s wing and under the slam panel for the headlights,indicators and fogs. Looked quite tidy when the cable had been routed. 😉 So before I got this new shell charl bought me some idworks wide wings for my old gt. I managed to get them to fit but they needed spraying so I kindly asked charl if she wouldn't mind doing the honours 😀 These are just in primer and do need a little work to get them spot on That's all for now but more will be on the horizon soon Quote
funny onion Posted May 25, 2015 Posted May 25, 2015 You could've took pic after I'd primed them properly... Lol Quote
Djaniero Posted May 25, 2015 Posted May 25, 2015 This looks sick man. I'm following this thread for updates .8 startlets between you both is nuts lol. Quote
Flaminsam Posted May 31, 2015 Author Posted May 31, 2015 So a little more has happened this weekend, charl painted my idworks wide wings and I finally got a few more parts off my old shell. Should have the engine/box and a few other parts off soon so I can repair leaks etc before the engine goes back into the new shell. Enough talk, more pics! That's all for now, hopefully have a bigger update next weekend when the engine, cage and seats will possibly be removed from the old shell. 😋 Quote
kevmcc90 Posted May 31, 2015 Posted May 31, 2015 Wings are looking good mate! I'd love to have a lock up like that. End up spending all night there I bet? Quote
Rich-k Posted May 31, 2015 Posted May 31, 2015 You guys need to get all your builds down (if you can get enough drivers lol) to jae or something one year it would be great too see them all as there so impressive Quote
Flaminsam Posted June 24, 2015 Author Posted June 24, 2015 We would need a low loader rich! A little progress update for you Done a few bits to the new shell recently, mainly the small jobs that need doing (those are the worst) also bought a few little bits for the shell. I've shot blasted and painted my lower arms, now awaiting new bushes. I've got a blue domo for my brake reservoir which just adds a little to the bay. I've fitted my boost solenoid in preparation for the engine. I've painted the lower braces for the rear engine mount. Bought a new steering wheel from kode. Got the brakes fitted (just need bleeding up now). Besides that just a few other small bits and pieces. Enough reading now, time for pics! Quote
Flaminsam Posted July 1, 2015 Author Posted July 1, 2015 Another small update, I've finally got the engine out of the old shell so I can now think about repairing leaks and re sealing the sump etc. I've also fitted a couple of the engine/gearbox mounts to the new shell in preparation for the engine to be mounted up. I've also been going polybush crazy! I've already stripped and resprayed the front wishbones so while I had them off I thought why not! They are superpro polybushes and they fit amazingly well and are pretty simple to do. 😄 Then for the last piece I decided to respray the anti roll bar and fit poly bushes. Just waiting on the "D shaped" bushes now and it's good to go 😊 That's all for now folks! Quote

Recommended Posts
Join the conversation
You can post now and register later. If you have an account, sign in now to post with your account.