

Browner
-
Posts
2532 -
Joined
-
Last visited
Content Type
Profiles
Forums
Wiki
Media Demo
Events
Everything posted by Browner
-
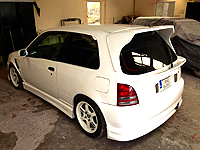
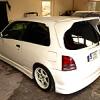 OK lads lots of updates and swift progress being made on this! I have been mental busy with parts and other cars so this was put to one side but I have cleared time and space for it now once again! I wanted to remove as much weight as possible from the car so I marked out the doors and interior panels for drilling and shed weight wherever I could... Driver's door Passenger door Driver's rear Passenger rear 4 broken drill bits, a few late nights and 50 beers later and the holes were drilled and ready for paint. I painted the complete inside of the car... And also painted the engine bay... The body will be painted at a later date as I didn't want it to get marked while the car was being built. We slowly started to re-assemble the engine bay. Everything was thoroughly cleaned before refitting and parts were painted where necessary. Shiny new bolts were used and the old rusty ones thrown away... The brake servo and brake master cylinder was first to go in. The loom was fully stripped and completely re-taped from top to bottom with new black tape to clean it up and to make sure it was all good before fitting. I wanted to remove the power steering so the car would hold better in a straight line. The steering rack was thoroughly cleaned and painted. The power steering pipes were looped and secured and brand new track rod ends were fitted to both ends. The steering rack was then re-fitted and the newly painted brackets tightened up. All fitted... The old engine and gearbox mounts were burnt and bashed out with a hammer and 3 new Powerflex Polybush mounts fitted. All 3 mounts were then wire brushed clean and polished with metal polish Next in line was the gearbox. It was absolutely filthy Two hours of cleaning later and it was finally ready for paint. I gave it 4 coats of high temperature black and 2 coats of high temperature lacquer. All original labels or bits I didn't want painted were masked off before spraying and then removed to reveal this: The engine block and summer were painted black in the same way. I just cleaned the cylinder head and other parts as I think silver spray paint looks cheap and tacky and it's harder to keep clean! Before fitting the engine and gearbox we removed the old bottom radiator brackets which are being replaced with a new alloy half rad brackets All gone Before fitting the engine I sealed the underside of the chassis legs, front panel etc with stone chip to protect from the elements. After much cursing and 50 cigarettes later the heavy engine and box was finally sat home on its new Polybush mounts. The engine is a high spec forged 1.5 5e engine with custom headwork and custom made high lift billet camshafts. Matching this is a custom made inlet manifold and throttle body. That was enough for one night! I found these braided lines and a new catch tank I had forgotten about in the shed so I mocked them up just to see. I need another breather pipe from the catch can to run a breather line or else I will have to just run one line and a breather filter on the rocker cover. I removed the old EP82 style washer bottles and got these washer and coolant bottles from another model starlet which are smaller and more compact so will give me more room in the engine bay. They were totally destroyed with oil and rusty water marks so I soaked them in a light detergent overnight and then sneakily placed them in the dishwasher when no one was home! ;) They came out like new! I was well impressed lol Christmas came early today! After another manic day at work I arrived home to find the last few parts for the build had arrived! Two brand new sets of Meister R EP85 specific Coilovers. One set for this build and another set for my RWD GT Turbo project. They are the only Coilovers I have seen that go proper low on the back for the EP85 models. I also got a brand new WEPR mild steel top mounted turbo kit. I can't wait to get it fitted! And finally a brand new Racetech TD04 hybrid turbo capable of 300bhp and with unbeatable spool up time. It should spool even quicker on my forged 5e. Next on the jobs list was the brakes. I am going to run Levin twin pot calipers on the front for extra stopping power. Everything has to be spotless before going back on so I stripped down the calipers, hubs and driveshafts and brought them to the car wash to clean them. I brought the lot back, thoroughly dried all the parts and then de-tared everything to remove any grease or fluid before painting. Any areas not needing pant were carefully masked off. They were all painted with silver caliper paint... The disc guards were removed from the hubs to fit the oversized front brake discs... And the hubs thoroughly painted... The shiny new washer bottle was fitted. It looks a lot neater than the old one which was in the bay. I replaced the old wishbones with lighter ones saving over 2kg in weight. I removed the old bushes and fitted a new Whiteline anti lift kit once they were painted and dried. There is a big difference between the old and new wishbones as you can see... After the almost 4 hours... The loom has no been completely re-taped to tidy it up and ran in the car... New coil packs fitted ;) Badly stuck for extended wheel studs so Incan fit my Levin twin pots if anyone can help me? Also looking for new HEL braided front brake lines in red too New Meister-r coilovers fitted with shiny new nuts on the front... Hubs, wishbones and coilovers are fitted. The wheel arches need a good clean Passenger side... Driver's side... I picked up a red magnetic sump plug and two small magnets. I will place the small magnets on the outside bottom of the sump to help draw any harmful particles or filings towards the magnetic sump plug and away from the valuable rods, pistons and crankshaft.
 -
Lol Did you run that ECU yet Phil? Just cagey about that other one that's floating about
-
EP70 Custom hand made intercooler setup with Forge intercooler
Browner replied to Taggy's topic in Starlet Parts For Sale
PM sent -
I have a mint ones here no holes or marks. PM me
-
I have some here mate I will sell the passenger seat seperately
-
Will this fit ep91 with a change of harness or is the ECU model specific in any way?
-
Haven't booked accommodation yet must do it tonight. Was busy booking up the rallies over here and completely forgot about it! Could nearly have been sleeping in the car! Lol
-
Can't wait for this! Got the RWD starlet fixed yesterday. Bring on a good weekend!
-
Hahaha great stuff Jay! It was well wrapped alright lol no fear of my parts gritting damaged!
-
Thanks for the business mate
-
Urgent help needed with my RWD EP85! Halfshaft question
Browner replied to Browner's topic in 4WD Starlet Knowledge Base
Any more info lads? Need to get this thing rolling -
I will get you pics today mate
-
Sound
-
They are the optional extra ones I am looking £70 for them I will post up a pic today
-
Pink really is your colour mate GLWTS
-
I have some here lads
-
I have one here was bought new from tuning developments and has a 3 bar map sensor aswel
-
I have one here mate PM me
-
I have a WEPR turbo kit here
-
I have some here mate
-
I have both here mate PM me
-
I have a nearly new kit here
-
Have a mint one here
-
I have a 5zigen Pro Racer system here I also have a newly made Catback with HKS backbox Both systems are for an EP82