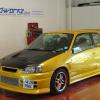
Idrees Posted January 16, 2010 Posted January 16, 2010 Hey guys and welcome to the ID-Workz Demo Glanza progess thread. This one is a 1997 Glanza in stock form with a couple of mods such as the bumper & bonnet, and is a pretty mint base to work on. It has only done 68k in KM, one UK owner since it was imported 3 years ago, and is still restricted and reads in KPH. I've known the previous owner for a while too and he isn't one to abuse his cars.Work won't be starting until the start of the summer unfortunately, but the plans are basically to give it a full rebuild from head to toe.Thanks for looking,Idrees@ID-WorkzCurrent spec list - 06/10/11Engine5E-FHTE engine (FHE with FTE pistons)Mild ported/polished cylinder headValves lappedMicropolished crankNew OEM piston ringsNew OEM oil pumpNew OEM engine gasket setNew OEM distributor cap & rotor armNew water pumpNew cambelt kitNew alternator beltNew engine gasketsNew distributor cap & rotor armNGK iridium spark plugsARP headbolts1.2 Athena MLS headgasketOrange tinted clear cam belt coverJ-performance FMICFujitsubo Power Getter exhaust systemWalbro fuel pumpDrivetrain3E conversion flywheelSpec 6 Puk paddle clutchEarl's braided brake lineSolid shifter bushingsChassis:16x8" Rota Grid Drift194/45 Toyo Proxes T1RMeisterR Zeta-R coiloversWhiteline front ARBWhiteline Anti-lift kitNew Toyota wishbonesPowerflex lower arm front bushesCusco rear strut braceCusco C-pillar braceTRD rear main beam bushesPowerflex engine mount bushesID-Workz upper front strut braceZEP Racing engine torque damperNew track rod endsNew ball jointsBrakes:Drilled and grooved discs (front)Mintex extreme padsCRN grooved discs (rear)Earls braided brake linesInteriorRecaro Evo 8 seatsGenuine Recaro EP91 railsSparco dished steering wheelTRD gearknobCustom centre consoleRelocated headunitElectronicsCustom 'tucked' engine loomRelocated fuse boxRelocated batteryGreddy E-manage UltimateGreddy 3 bar map sensorApexi AVCR boost controllerMotor Meter stepper peak series gauges (boost, water temp and oil temp)Prosport Premium oil pressure gaugeAEM wideband gaugeIndiglo dialsExterior:ID-Workz Cruise style bonnetAerocatch flush locking bonnet pinsFull ID-Workz bodykit:Livesports style front bumperLivesports style wingsLivesports style sideskirtsLivesports style spoilerJAM style rear bumperNew OEM headlights98 spec tail lights98 spec front indicatorsOEM wind deflectorsDoors delockedRear wiper removedEngine bay fully resprayed (pearl blue)Full exterior, interior and under arches resprayed (pearl yellow)Full undersealedMisc:ABS removedAir Con removedPower steering removedWindscreen washer tank relocated (in rear)Rad overflow bottle relocated Quote
Idrees Posted March 19, 2010 Author Posted March 19, 2010 The Glanza has now been parked doing nothing for 3 months, and I'm going to start work on it pretty soon. I've started off by stripping the whole front end, and sold everything to fund the project.The first thing on my to-do list is to respray the engine bay and front arches. Quote
Idrees Posted March 20, 2010 Author Posted March 20, 2010 Some pictures and progress..Engine bay stripped some more, and fully prepared for paint. I removed quite a bit of the seam sealer and reapplied it.After the hardest work out of the way (preperation), the engine bay was primed.First coat of paint applied.. Quote
Idrees Posted March 20, 2010 Author Posted March 20, 2010 Arches.. Covered in factory underseal, and less dirt than I expected!After a short while..Once they were fully prepared and seam sealed, I coated them in 2K primer..Followed by ground coat yellow..Then the pearl..Next was the lacquer, did the arches and bay together. Quote
Idrees Posted May 14, 2010 Author Posted May 14, 2010 It's been almost 2 months since an update but I've been away on holiday for most of that time.Nothing new, but just a few random pictures of the motor. Hopefully work will be continued soon.Here are some of the parts I've gathered for the build.Trust/Grex oil cooler & oil filter relocation kitMagnecore 8mm HT leadsWalbro 255lph fuel pumpEvo VII Recaro seats on EP82 rails - Rails will need to be amended to fitD1 Spec carbon gearknobSparco deep dish steering wheelCusco oil catch canMeisterR Zeta-R coilovers98 spec rear lightsWilwood 4 pot brake kit..  Quote
Idrees Posted May 18, 2010 Author Posted May 18, 2010 Jperformance intercooler: Denso 550cc injectors: Livesports 98 spec front lip: Clear indicators and crystal clear foglightsAnd last but certainly not least..A nice big compressor. 3hp and 150 litre tank, should be a good change from the baby 1.5hp/50lt tank I've been using all along! Quote
Idrees Posted May 24, 2010 Author Posted May 24, 2010 Yet some more parts.Spec 6 Puk Paddle ClutchARP HeadboltsThen in the garage.Refurbed steering rack..Me and a mate have decided to take up the task of doing a wire tuck, so many of the holes in the engine bay are no longer needed as they are originally for the wiring loom to pass through. The battery and wiper washer bottle will both be relocated to the back of the car, so we have smoothed half the bay. Front half of the bay in primer once again..Me with my gun.. Rear arches down to bare metal..Painted..Next on the list was the bottom of the car. It was quite difficult to with the car on axle stands but I managed to give it a good clean and a full underseal.Whiteline Rear ARB Quote
Idrees Posted June 9, 2010 Author Posted June 9, 2010 More parts and more work.New lower arms, they've only been used for a few thousand miles and were purchased from Toyota not so long ago. I thought they'd look best in some nice shiny red, so I got on to preparing them for paint.Anti-corrosive primer..Painted, with Whiteline Anti-lift kit fitted and Powerflex poly front bushes.While I had the spray gun out for the lower arms, I thought I'd refurb the hubs too as they were looking old and rusty.Front coilovers, lower arms and hubs fitted..Wilwood 4 pot brakes also fitted..Whiteline Front ARBOnce all that lot were fitted nicely to the front end, I moved on to the rear and got the following fitted.Refurbished axle (Red)TRD beam bushesCoiloversAdjustable JDM panhard rodCRN grooved brake discsBraided brake pipesOn to the bodywork, big thanks to a couple of mates who helped me prep the car for the paint. I primed and groundcoated some of the car in my own garage, but I'll be doing the rest in a spray booth.Edging the doorsAnd the tailgate edging done and fitted.. Quote
Idrees Posted June 13, 2010 Author Posted June 13, 2010 Another few purchases..16" Advan SA3Rs Emanage Ultimate ECU and Blitz DSBCID-Workz Livesports style fendersTime to get cracking with the bodywork now. I've primed some of the panels one at a time as my garage is fairly small to I'd struggle to do it all together. Some panels have a ground coat of yellow on too (required before Pearl).Both doors will be de-locked, and the tailgate is now de-wipered. Huge thanks to my mate who is always around to help, here he is with his welder. And finally, a quick mock up of how it may look.. Random photo from tonight.. This shows the size of my tiny garage! Quote
Idrees Posted June 21, 2010 Author Posted June 21, 2010 I've now delocked both doors and removed the rear wiper, all the holes have nicely been flushed over. New bonnet.A parcel from Camskill..Consisting of the following:Cambelt kitFuel filter5x Oil filtersNGK Iridium plugsExhaust gasketOil pressure switchWater pumpLower ball jointsTrack rod endsThermostatAlternator BeltThey are parts I'll need for the engine once I start building it up, I will make a start with that as soon as the bodywork is done.Me and a mate got the ball joints and track rod ends fitted yesterday. Excuse the dirt/dust on the car, it will get a good cleaning after the paint work is done. Quote
Idrees Posted June 23, 2010 Author Posted June 23, 2010 Time for the interior paint.Stripped, cleaned and prepared..Primed and groundcoated.. Pearl coated and lacquered..I also fitted the Walbro fuel pump and waxoil'd the inner rear quarter panels. Quote
Idrees Posted June 24, 2010 Author Posted June 24, 2010 The ID-Workz Varis style bumpers are now made (available on my website) so I had to sit one on my car with the FMIC just have a taste of how it will look! Quote
Idrees Posted June 26, 2010 Author Posted June 26, 2010 Today I got started on the paint properly as the body was all prepped and I know someone who was very kindly willing to rent me their spray booth for the weekend.First thing in the morning I was on the phone to the recovery chap to shift her there.In the booth and final prep work being done..Fully ground coated..My new exhaust system - Fujitsubo Power Getter, I love it. Quote
Liam_D Posted June 26, 2010 Posted June 26, 2010 Awesome mate, really cannot wait to see this all painted, colour is gonna be sexy Exhaust looks mint aswell mate, Quote
Idrees Posted June 27, 2010 Author Posted June 27, 2010 Thread tidied to make it easier to read Quote
Scott-EP Posted June 27, 2010 Posted June 27, 2010 Cannot get enough of your Build Threads, Remember when i first signed up to the forum i read your whole build thread for your Glanza Rep...Keep it up Quote
Idrees Posted June 27, 2010 Author Posted June 27, 2010 Cheers dude, that must have taken a while!Finished off with the ground coat..Then out came the pearl A short while after I finished with this. Quote
Sanchez Posted June 27, 2010 Posted June 27, 2010 Idrees that looks fucking awesome mate!!!!!!!!!!!!!!!!!!!! Quote
LukeSR Posted June 27, 2010 Posted June 27, 2010 Simply awesome dude!Can't wait to see it finished Quote
Nanglebadger Posted June 27, 2010 Posted June 27, 2010 outstanding as always young man!!!!!!!!!!!!!cant wait for more updates on this beauty!!Phil. Quote
Sparky Posted June 28, 2010 Posted June 28, 2010 Nothing short of immense as usual my man LOVE the bay being blue with the wheels and brakes, just looks out standing, coming along real well Its going to be what the last replica should have been ;) Quote

Recommended Posts
Join the conversation
You can post now and register later. If you have an account, sign in now to post with your account.