Mr. Chem Posted July 24, 2013 Posted July 24, 2013 Hi chaps, I've been a long time lurker, so I thought it was about time I put together a build thread for my Glanza. Before the Glanza I had a Mk3 Golf My mates belonged to the JDM-register club, so when the time came to replace the Golf, they convinced me to go with the Glanza. Scutch who is on here helped me find a suitable car. In the end we found a clean 98 spec car in white that had only been in the country for a year. The guy selling it wasn't the most aware of individuals shall we say, but the car checked out and it had some nice optional extras to go with it. Reflet rear lights, clear 3rd brake light, genuine rear lip, duck bill and front lip. Extras that had been added when the car was imported included Defi gauges(!) unknown lowering springs, and HKS Silent Power Exhaust, as well as these rather odd looking alloys wheels which were made in Korea. The body of the car was pretty straight, although the paint was a little dull and the headlights yellow and pretty scratched. One of the first things I did when I got it was stick on an apexi air filter to hear a bit more fluttering. And I invested in my first rare part - the anodised blue Oil cap from Zep racing (courtesy of Socks) I have a machine polisher (DA) which I have been getting to grips with, so I fixed my headlights.BeforeAfter Huge difference in performance now. Next step was to get rid of those horrid 14" KDM wheels, and on the cards was a set of lightweight wheels.I set my mind on some Lenso Samurai Spec C Wheels. 15", 7J and very light. Apologies for the crap pictures, taken with a cheap phone. A mate of mine helped me tint the fog lights too, and with the cleaned headlights make the front end look so much nicer The car originally came with a sex aid Razo gear knob, so this was swapped out for a TRD job The plan to start of with was to swap the standard starlet seats out for some FTO seats, but at the last minute the guy started being a dick, so I got some Gen 7 Celica seats instead.They are so much more comfortable and supportive. Big thumbs up to Rich for helping me with these. They were sold to me under the pretence that they would fit straight in. Kind of....The seat bases were on Glanza rails, but only the back bolts "done up" (I use that term loosely.)Rich (Scutch0) helped me make some brackets that allow all 4 bolts to be used, and thus are much more secure.Along with a GT centre arm rest, so much more comfy! A punto rear wiper made a great addition to the rear Quote
Mr. Chem Posted July 24, 2013 Author Posted July 24, 2013 Before long the need for more powas began to bite, so some engine stuff started happening. After a JDM-reg meet, a greddy type s found its way onto the car. Next was to improve the cooling. Now I am a bit of a tart and want to keep the air con and the full size rad etc, so a front mount at the moment is not on the cards. Instead, I found a ARC from Mr. Lang and fitted that instead. My mates have helped me along the way loads along the way. My talents lie more with the detailing and simple wiring. A tegiwa rear tow hook was added to the rear that day. And an aluminium heat shield made for the apexi So this is how the engine bay stood, function without the form lol. I like to cycle in my spare time too, so I got a roof rack for the Glanza along with my Thule Fairing from my VW days] Now we all know that dash speakers alone are pants, so I sourced this JDM Alpine speaker shelf which used to grace a mate of mines car. The speaker cones were absolutely trashed, so these were replaced with Alpine 6x9s. I swapped out the blue lights in the alpines for red, and the results were pretty awesome. The car then received its first machine polish, which was reasonably successful. If anyone else is looking to polish their own car, be aware, the paint is very thin and very soft, and is incredibly easy to burn through with even a moderate pad and polish. Quote
Mr. Chem Posted July 24, 2013 Author Posted July 24, 2013 I was happy with the way the car was going, but it wasn't fast enough. I bypassed the hi/lo solenoid to combat this, but would hit fuel cut every so often. Step forward a JAM Racing ECU. I though the car was fast before. Fuck me is it fast now. So much more savage up the higher revs. A Tegiwa brake stopper was fitted in preparation for a brakes overhaul.http://s1104.photobucket.com/user/trog_nfs/media/94EF9AA8-009C-4552-A484-4638E82A7751-2437-00000149A65D98A7_zps09a73723.jpg.html'> The previous owner had fitted some rather garish carbon effect Glanza stickers to the car, and had not removed the remaining adhesive that held on the originals. I had planned to remove the stickers altogether, but the paint underneath has reacted, so some OEM style black replacements were sourced.http://s1104.photobucket.com/user/trog_nfs/media/81CD1851-57A5-4008-9F78-E14B7EAA6D31-1603-000000D901133053_zps671563c2.jpg.html'> And thats kind of been it, just been enjoying her.http://s1104.photobucket.com/user/trog_nfs/media/D01CE700-ED63-4C70-87A8-4E7BEF9AED4D-1603-000000D8E1CEF1BA_zps79469c06.jpg.html'>And playing with a new camera app.http://s1104.photobucket.com/user/trog_nfs/media/88368D28-C949-41B4-B5AB-FE885F237B9E-1603-000000D8F49DCCF1_zpsbe58f62f.jpg.html'>http://s1104.photobucket.com/user/trog_nfs/media/A2F2CFE9-AFB9-4C56-94BD-609481FE7424-1603-000000D8FAA60E64_zps783c9b3e.jpg.html'> My plan since fitting the JAM was to improve the efficiency of the ARC, and this was carried out in a similar way to the scooby boys.I mounted 3 Hozelock mister nozzles in my scoop, and a washer bottle with pump in my boot. These were linked up to a switch on the dash that would spray cold water onto the intercooler. Alongside this I mounted a intake temperature gauge fitted to after the intercooler. http://s1104.photobucket.com/user/trog_nfs/media/8961D587-936B-4ACC-B5D4-F044F3334161-1603-000000EA4E8D4ED3_zps0e5df44b.jpg.html'>http://s1104.photobucket.com/user/trog_nfs/media/E79611B1-1759-4595-A4B1-5E1231508F2B-1603-000000EA5BDA6062_zps4f24fc19.jpg.html'>The spray pattern is pretty decent, and is a proper mist too.http://s1104.photobucket.com/user/trog_nfs/media/3AAE91A7-1184-437E-AAD8-E5A66A013AF7-1603-000000EA49C862AB_zpsc6f97794.jpg.html'> Now if you look very closely at the exhaust in the first pics, it sits very far inside the rear valence. When I fitted my decat, I was getting real problems with the heat of the exhaust and the unburnt fuel messing with the paint work. Looked like the flexi had been crumpled a little and the exhaust had been fitted in a strange way. This also caused a fouling issue with the floor. The solution was to length the mid section of the exhaust slightly, and whilst I was at it, the mid box was deleted. Is now uber loud and gurgly!!!! Love it. http://s1104.photobucket.com/user/trog_nfs/media/4E3AB108-CF25-4711-B35F-9F6E39B6B4DB-1603-000000EA73D0BED5_zps6ea57030.jpg.html'> Quote
Mr. Chem Posted July 24, 2013 Author Posted July 24, 2013 The final few things I have been doing were my engine bay, turning it from the dirty mess it was to something a bit cleaner. In the process I went back to the airbox, but smoothed out all the fins on the inside. The colour chosen to paint the bay was a colour of my own creation to match the greddy type s bov, and is pretty much spot on. Blue hoses then replaced all my lines, and some sanding and polishing fixed the metal work. http://s1104.photobucket.com/user/trog_nfs/media/F5751854-33D2-48D5-948A-9443ED0B47A5-1603-000000EA36283706_zpsf295d5f7.jpg.html'>http://s1104.photobucket.com/user/trog_nfs/media/7D58CCEB-0A49-4178-809E-D0C258C95A32-1603-000000EA7B7BF67E_zpsc704cd97.jpg.html'>http://s1104.photobucket.com/user/trog_nfs/media/A5BEFE7F-6686-4C9E-BE89-D75366ED6F74-1603-000000EA8064ACB7_zps2b7246a0.jpg.html'>http://s1104.photobucket.com/user/trog_nfs/media/A9903523-BA60-4129-8CDA-A65D2E633860-1603-000000EA85677AB6_zps6f030d13.jpg.html'>http://s1104.photobucket.com/user/trog_nfs/media/7A314ED9-C14B-4468-BEDB-0AF8A371938D-1603-000000EA8A6FED29_zpsd63727f5.jpg.html'>http://s1104.photobucket.com/user/trog_nfs/media/A8530F69-1817-4995-94AF-C124D0BE72E9-1603-000000EA8E5EBEBD_zps9d63c4ed.jpg.html'> Quote
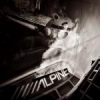
Mr. Chem Posted July 24, 2013 Author Posted July 24, 2013 My friends and I have just been to Dorset for a camping trip, and the Glanza didn't miss a beat. Even loaded to the brim with beer and tents it still did 43 mpg. Immense. My friend is a bit of a photo fiend, so here are some of the latest from Dorset. The night shot impressed me the most. And to all the unscrupulous types out there, remember this is not the Glanza you are looking for. Future plans for the car include to sort the brakes (OEM replacements and HEL lines are waiting in the wings)Handling (RARB, Anti Lift kit, strut bracing)More powa (Adjustable acutuator + manifold first, later maybe hybrid turbo and front mount as necessary). Thanks for reading. It's a long one.Looks mint dude like them wheelsThanks buddy. Wheels were a different choice, but I love them, and most people agree they suit the car well. Quote
palmer_starlet Posted July 24, 2013 Posted July 24, 2013 Love it man so clean, got some nice bits on there also. Can i ask where you got your roof rack from? Because atm my bike has to be taken to pieces and put in the back lol. Quote
Spoon_tuned Posted July 24, 2013 Posted July 24, 2013 awesome updates car looks so much better from when i saw it when you collected the seats...keep up the good work mate Quote
Mr. Chem Posted July 24, 2013 Author Posted July 24, 2013 Love it man so clean, got some nice bits on there also. Can i ask where you got your roof rack from? Because atm my bike has to be taken to pieces and put in the back lol. Its a thule roof rack, same one that fits the UK 3dr starlet. 761 bars, 754 foot pack, 774 short roof adapter and 1041 fitting kit. The fairing was a US import. I have Thule 591 cycle carriers to carry the bike. awesome updates car looks so much better from when i saw it when you collected the seats...keep up the good work mate Cheers man. Finished adapting the seats to get them a little more secure. The drivers seat was easy as just had to flip two brackets, whilst the passenger I had to add a little steel, but so much easier given they were already on starlet rails. Quote
scutch0 Posted July 25, 2013 Posted July 25, 2013 This is a great little motor. Very tidy. The supra in the pics looks good, I wonder who's that is Quote
Spoon_tuned Posted July 26, 2013 Posted July 26, 2013 Its a thule roof rack, same one that fits the UK 3dr starlet. 761 bars, 754 foot pack, 774 short roof adapter and 1041 fitting kit. The fairing was a US import. I have Thule 591 cycle carriers to carry the bike. Cheers man. Finished adapting the seats to get them a little more secure. The drivers seat was easy as just had to flip two brackets, whilst the passenger I had to add a little steel, but so much easier given they were already on starlet rails. thats awesome least your happy with them car looks really tidy Quote
Mr. Chem Posted July 26, 2013 Author Posted July 26, 2013 This is a great little motor. Very tidy. The supra in the pics looks good, I wonder who's that is Some local cube's.... Quote
Greenmachine81 Posted July 27, 2013 Posted July 27, 2013 cracker motor mate.. clean and tidy, fine example wat suspension u on? Quote
Mr. Chem Posted July 27, 2013 Author Posted July 27, 2013 It's just on some lowering springs. I think they are pi but as I didn't fit them I'm not sure. I don't actually run HIDs, those are my LED sidelights but a long camera exposure. Quote
Liam_D Posted July 27, 2013 Posted July 27, 2013 I need to know what bulbs they are!! Haha been looking for some that look like that for ages. Quote
Mr. Chem Posted August 30, 2013 Author Posted August 30, 2013 These were the led side lights 181084108916Now the problem I have had with all my cars is I get them to a state where I am happy with them, then I get this itch were things tend to get out of hand. On my old VWs that was never a problem due to an abundance of cheap parts on the second hand market, however with the glanza, there is still an abundance of parts, but they are all new and shiny (relatively). Hence things have moved on a bit....Now I have been getting used to the car, I like the "soft" springs it is running, but it really under steered on the limit. I saw whiteline rear anti roll bars were on offer on camskill, so I er bought one. It was a bit of a pig to do on the drive way, so a mate helped me out with his ramp.As well as the anti roll bar, I bought Idrees rear 3 point brace from him. Impression is that it has made a massive difference! Then handling is a lot more neutral. The best way I can describe it is the pivot point feels closer to the middle of the car. Almost like there is some steering at the back. Wet roundabouts are hilarious. The problem with sharpening up the handling was highlighting the power deficit. It wasn't that it was slow, just felt like there was more to give. My plan is to getto a bar on the ct9. But there are a number of areas which needed improving first to make sure the car didn't go bang! It was recommended that the fuel pump be replaced with a 255lph job, especially as the JAM requires more fuel. I can't have a whiny noise in my car ( my little sister does enough of that!) so I settled on one of tuning developments pumps. Easy to fit, and no noise. I was very impressed. May be something to do with the foam jackets their pumps come with.One thing I didn't expect was a change in engine behaviour. Normally when I lifted off below 2k, the car burbled. Now it pops and bangs. Which is interesting when driving through supermarket car parks.The next step in prepping the car was to fit a front mount intercooler. Now my requirements were very specific:1. The air con had to be retained.2. No crash bar cutting or removal.3. The bumper still had to look like a 98 spec, not a chopped mess.4. Short route hot pipe.After searching the forum for ages, I finally purchased a Hdi kit. Probably a poor move but it is supposed to be one of the better options.Would have been far easier to fit like thisAnyway, as term time is quickly approaching, a couple of mates rallied to give me a hand; peachy and scutch. Bribed with pizza lol. Safe to say they won't be helping again.My first task was to move the horns and sort the wiring out, as well as remove the air can fan. I can hear you saying "but you re keeping the air con", and you'd be right. So a bit of a rewire later and the radiator fan doubles as the air con fan. Next was removing my ARC and associated pipework. Then. It was a case of getting it all mounted upThis is where scutch is in his element. Legend pretty much fitted the cooler and pipes himself.The rest of the pipework followed suit although the factory air box meant I couldn't run a bov. This was swapped out for my apexi. The increase in intake temp will be offsetted by the improved intercooler efficiency. Not ideal, but no filter relocate due to the air con matrix.That was effectively the end of day 1. Well it was supposed to be. Upon the test drive ( without the bumper madmax style) my car which used to hit 0.9 bar was only hitting 0.2bar. Crap.One of the mikalore clamps wasn't secure, but even then the car would only hit 0.4 bar. Diagnosis (again from scutch) was a very worn actuator. Luckily I had a hks replacement in the garage and e clips, but its fitting meant basically removing everything. There are no pics at this point, as we were all fed up and tired as it was being a cube. When the actuator was on (getting dark by this point), in that cinematic fashion we had time for 1 last test drive. Hazzah! All of the boosts! I was so relieved, as were my apathetic by this point chums. Little did we know that the worst part of the ordeal was ahead of us... Quote
Mr. Chem Posted August 30, 2013 Author Posted August 30, 2013 (edited) Day 2. The face off between cooler core and bumper. You can see them squaring up to each other, trying to psych each out.No scutch this time (he'd had enough) but peachy returned to help.The plan: refit the bumper over the enormous hdi core.Weapon of choice: Dremel.The arena: my driveway. Basically the cooler bent me over. The plan of attack was to remove pieces of the bumper little pieces at a time. This was complicated by the OEM frontlip, which is made of very thick plastic and is bolted to the bumper.The cutting eventually started to yield results. The casualties? Half the width of the middle and lower spars, all the vertical supports and some of the lower mounting point of the bumper. This led us to this:Only on on one side. Crap. The culprit was eventually found to be two of the lip mounting bolt, which just stuck up too far. These were quickly dispatched, and what do you know?Now when reading a build thread, the sense of time isn't apparent. Let me tell you, this was about 5 hours of cutting and fitting all in, with 20 mins for lunch.Now we knew it would fit, the tidying up could begin. If you cut plastic with a dremel, even at slow speed you get a lot of melted plastic. Armed with wet and dry paper, we had to smooth out the contours you can see below.Hard at work mr peachThe end result was a much smoother finish.I was glad of my decision to paint my intercooler black, maximum stealth.That was day two, and a very tired pair of amigos surveyed the dremel graveyard, called it a day from there. Edited August 30, 2013 by Mr. Chem Quote
Mr. Chem Posted August 30, 2013 Author Posted August 30, 2013 Day 3: the home straight.All the hard was finished, the final steps was to refit some items and to finish the tidy up. Earlier in my build thread I fitted a temperature sensor, and I wanted to swap this into the FMIC piping. However, as always the gods conspired against me, and the metal sensor snapped off and fell into the depths of the cooler piping. Desperately I shoved my magnetic pick up tool into the pipework, but to no avail; the sensor was non-ferrous. Crap.And so began the labourers task of yet again removing the bumper and pipes to retrieved said sensor. Many blue moments passed, before it was removed. Luckily I had a spare, so this was soldered onto the wire and refitted successfully. The factory cold air feed cold then be modified to work with my apexi (cutting the back out) as well as my old Ali heat shield.The intercooler sprayer could then be moved from the scoop to the number plate recess.And so concluded a very tiring few days.I think it doesn't look too bad for a first attempt, which means I just about met the criteria I set myself.I know I haven't followed the well trodden routes of startled modification, but given how hot our summers have been recently, I couldn't get rid of my air con. And given the amount of flex the front end has without the crash bar, hacking that up wasn't an option either. Project compromise eh? Quote
ro55ifumi Posted September 2, 2013 Posted September 2, 2013 Sweet looking V , looking good John Quote
maddox710 Posted September 2, 2013 Posted September 2, 2013 Good job on that intercooler fitting, I have a hdi cooler and will eventually be converting to 98 spec front bumper will definitely do another visit on this thread Quote

Recommended Posts
Join the conversation
You can post now and register later. If you have an account, sign in now to post with your account.