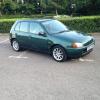
Budnbass Posted December 15, 2016 Posted December 15, 2016 (edited) Right as we're usually a lot quieter than normal at work over the winter months we've decided to build a little project to keep us busy. Obviously we choose a starlet as they're cheap, fun and not too complicated. So we brought this for £170 As you can see it's not in the greatest condition but it's never going to be a show car! Plan is to keep the outside looking shitty but getting up to 200bhp as cheaply as poss... Edited February 9, 2017 by Budnbass Quote
RoryWebb432 Posted December 17, 2016 Posted December 17, 2016 Nice! Love the sound of this. I have a similar project Quote
Budnbass Posted December 17, 2016 Author Posted December 17, 2016 So we stripped the rear and got rid of everything we didn't need, We was planing on turboing the NA engine, but fortunately for us, unfortunately for him, a friend of mine wrote of his Ep82 the other day so we brought his complete engine with turbo ect, interior and engine looms, stalks, dials, exhaust and his recaro for a decent price. So now it will be a case of swapping everything over. We got the engine removed and started tidying up the engine bay. Quote
Budnbass Posted December 21, 2016 Author Posted December 21, 2016 Ok so we got some more done on the starlet, pulled the bump strips off and got some Yaris SR alloys on we had laying around. Cleaned and painted the NA gearbox whilst it was out and got the FTE clutch and lightened fly wheel fitted. Just need to sort out a few more things before we can get the engine in. Making good progress with this, not too sure how the workings going to go though. Quote
RoryWebb432 Posted December 25, 2016 Posted December 25, 2016 Bloody hell. You work fast a loy of people take a couple years to get to where you are with the build. Quote
Budnbass Posted December 28, 2016 Author Posted December 28, 2016 Perks of having 5 guys working on the build and quite a bit of spare time! It's also helped massively that we brought everything all in one go.Made some more progress, engines and box are in, fuel pressure regulators mounted just needs connecting, all unnecessary brackets are removed. We had to swap the rocker cover for the NA one as the FTE one had a massive crack across the front from the crash. So we painted that black which has come out good.Personally I'd have liked to propperly clean and paint the engine bay propperly but it's never going to win any shows so we decided against it.After filling the power steering up we had a leak so had to rebuild the pump and with new seals and gaskets and find a new pipe as the NA ones different to the FTE one. Next on the list is get a half rad, fan, brackets, exhaust as the Ep82 will take to much modifiying to fit and a front mount 🙂 Quote
Budnbass Posted December 28, 2016 Author Posted December 28, 2016 Ohh and we got some decent leads aswell! Quote
Budnbass Posted December 30, 2016 Author Posted December 30, 2016 As we're going to be using the EP82 interior loom, I'm going to get rid of the power windows and use old school windy windows, does anyone know of the glass is the same for electric and manual windows? Quote
Rich-k Posted December 31, 2016 Posted December 31, 2016 With that engine it seems a waste to keep the outside looking shitty mate! Great build Quote
Budnbass Posted December 31, 2016 Author Posted December 31, 2016 At the moment it's all about getting it running, but tbf I don't think it would need to much to tidy it up. Got a front mount and exhaust sorted yesterday, managed to pick up a j performance front mount and and exhaust for £200, Exhaust fitted without any issues but the front mounts going to need some playing around the get the pipes to fit as I think it was used running a td04.We also fitted a half rad we got of eBay. Triple core with fan £70 and then brackets for £20 really happy with it.We'll get the intercooler mounted propperly in the new year, and then onto the wiring loom! Quote
Budnbass Posted January 4, 2017 Author Posted January 4, 2017 Intercoolers now fully fitted, which was a right pain to fit! One of the jobs I thought would take 10 mins ended up taking all day, as it came off a 91 running a TD04 we had to modify and make the pipe work up to the turbo. We also sprayed it black to make it less noticeable even though we've cut away half the bumper! I'm really happy with how it's sitting now and looks good. We also got most of the Engine wiring in which was pretty standard and simple engine wise, unfortunately the loom we've got is from a quad headlight auto 82 so there's a long list of things that need changing over from the old engine loom such as;Dual headlights re wiring to h4 bulbs,Side repeaters as 82 ones are too short,Wipers need wiring up,Washer pump needs wiring,And a few other things that need sorting.We're going to get it running first then sort all of the above to get it ready for MOT.Does anybody know the standard weight of a basic NA will be interested as to what it weighs now fully stripped Quote
SpikeyJp_68 Posted January 4, 2017 Posted January 4, 2017 VL commodore looking is that intercooler Looking good guys Quote
Budnbass Posted January 5, 2017 Author Posted January 5, 2017 Yeah happy with the intercooler, was questioning whether we should go front mount or top mount, but front mount was deffinstly the right choice! Okay kool hopefully it should be somewhere around 780 stripped?! Going to be fitting the dash loom over the next couple of days and I got this little bible to help us out. Quote
Patches Posted January 5, 2017 Posted January 5, 2017 Going to be fitting the dash loom over the next couple of days and I got this little bible to help us out.Ha where did you get that guide? That's awesome! Quote
Budnbass Posted January 6, 2017 Author Posted January 6, 2017 I work for Toyota Mate, had to dig it out of storage! For every model pre 2000 these were auto issued and then they put all the info online. The books are so much better though. Quote
Budnbass Posted January 6, 2017 Author Posted January 6, 2017 (edited) Didn't manage to get anything done on this today but next week we're hitting this hard and this thing will be running by this time next week! Edited January 6, 2017 by Budnbass Quote
Dean_mc88 Posted January 8, 2017 Posted January 8, 2017 Nice little budget sleeper this. I like builds that make same power as big expensive builds. Just proves you don't have to have mega money to get performance and have fun !!Top work Quote
Budnbass Posted January 8, 2017 Author Posted January 8, 2017 Cheers mate, so far we've got about £1000 in this but that's everything to get it running standard ct9 power, and a few extras like boost gauge, FPR, Glanza Brakes and the seat. Once it's all running and set up we're looking to go to the next step, TD04, emanage, injectors and fuel pump. It's just a bit of fun really. Quote
morgey Posted January 8, 2017 Posted January 8, 2017 Cool little build this. Be good to see it buzzing around some tracks. Weight is a bit of a funny one but you should see low 800s i reckon, i had my 20v swapped uk spec on a weight bridge. Full interior, full tank of fuel. Very light weight wheels. And was 940kgs thats electric windows and mirrors, rear wiper all sound deadening still inplace. Obviously the 20v is a heavier engine being a 1.6 and there was 40kgs of fuel on board. Its hard to judge the weight of everything and the difference in engine weight so will be interesting to see what you can get it down to regardless Quote
Budnbass Posted January 8, 2017 Author Posted January 8, 2017 Were aiming to take it santa pod on the 26th Feb to see what it'll do up the strip and then progress from there. As for weight it's completely stripped so I'd be hoping for low 800's I'm going to try and get it weighed this week when it's running.They'll be plenty of updates this week... Quote
Budnbass Posted January 9, 2017 Author Posted January 9, 2017 Spent some time on this today, managed to get the dash and interior loom out and down to just the support bar. Starlet dashes are deffentily held in with a few more bolts then mondern cars, new Yaris dashboards practicly fall out in comparison!I got the obvious connectors connected the the engine loom and ecu, but fitting an Ep82 interior loom in a 91 is deffinatly not plug and play! At a quick glance to get it running I'm going to have to swap the interior connector to rear loom, for fuel pump and lights ect and then ignition barrel connector needs swapping over. Once them two are sorted it should run. That's the aim for tomorrow anyway, I'll try and get some pics and wiring loom details for future reference. Quote
Budnbass Posted January 11, 2017 Author Posted January 11, 2017 .....and she's running! Main thing was sorting out the connector to the ignition barrel, and the connector to the rear loom. Fortunately Toyota have used pretty much the same colour wires for both looms so it wasn't too hard to work out. With the ignition barrel connector, it was the same amount of wires and the same colours just in a different shape connector, so that was simply a case of swapping the plug from the 91 loom to the 82 loom.The connector to the rear loom was a bit more difficult, but cross referencing the EWD book I've got for the 91 loom and the wiring EWDs for the 82 loom from here....http://www.toyotagtturbo.com/wiki/EP82wiring/EP82%20Starlet%20Wiring%20and%20Connectors.pdfMade it a lot easier! Without them both it would have been a bit of a guessing game!Engine runs well with no leaks, and holds boost well.Tomorrow's tasks are getting the dash back in and wiring up everything else, i.e. Wipers, lights - front and rear, horn, stalks ect.http://rs76.pbsrc.com/albums/j33/loz_dormer/EAC9A1A2-4BA6-4EDE-A0AB-533ABF4A387D.mp4?w=160&h=160&fit=clipIf anyone needs any help with the wiring side of things, drop me a pm and I'll happily help, I know the wiring can be a bit of a grey area! Quote
Budnbass Posted January 12, 2017 Author Posted January 12, 2017 Main goal today was getting the stalks in, so we can then wire up the wipers and lights. Ep82 stalks are not a direct fit to a 91 column. We had to modify the stalk mounting and make support bracket for the stalks to bolt on too. We also had to space the stalks out so they reach the back of the steering wheel to make the self cancel work. It was quite a lot of trial and error but we got there in the end. We also stripped the steering wheel down, getting the rid of the airbag and the plastics. It'll do until we get a proper one! Quote
Dean_mc88 Posted January 12, 2017 Posted January 12, 2017 Coming along nicely this Did the injectors land ok ? Quote

Recommended Posts
Join the conversation
You can post now and register later. If you have an account, sign in now to post with your account.