SpikeyJp_68
-
Posts
1024 -
Joined
-
Last visited
Content Type
Profiles
Forums
Wiki
Media Demo
Events
Everything posted by SpikeyJp_68
-

Crankshaft big end journals measuring over 40mm ?
SpikeyJp_68 replied to SpikeyJp_68's topic in Engines
Ah I see so for example the standard they used might be 1" +/- .04mm ? I've ordered plastigauge anyway so that will confirm if I'm within spec or not -
N/a and glanza driveshafts ?
SpikeyJp_68 replied to SpikeyJp_68's topic in Drivetrain & Transmission
That's what Toyota told me anyway. Said they had to get them from Japan even still it's a bit ridiculous. -
Looking good pal
-
Joe's 98 starlet full Glanza rep TF035HM - final bits
SpikeyJp_68 replied to SpikeyJp_68's topic in EP91 Progress Blogs
Used a shit tonne of wd40. I thought myself they looked a bit 'flakey' almost -
Crankshaft big end journals measuring over 40mm ?
SpikeyJp_68 replied to SpikeyJp_68's topic in Engines
It never came with a standard so that's why I sent it to the machine shop. It's a 1-2" micro calibrated at 1". It looks like I'll be sending the crank off to them anyways -
Crankshaft big end journals measuring over 40mm ?
SpikeyJp_68 replied to SpikeyJp_68's topic in Engines
It's imperial. 0.0001" Converted via google -
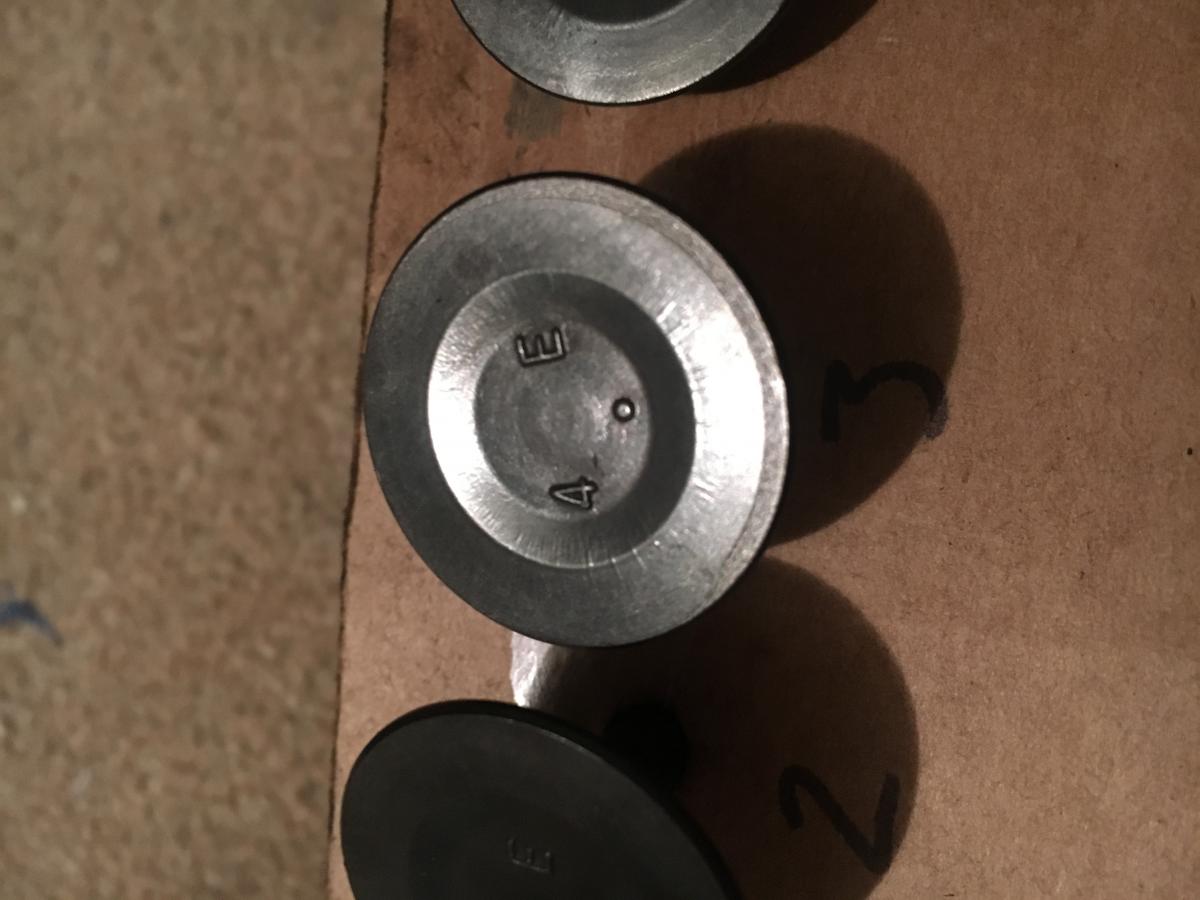
Hi guys, Gotten round to measuring my crankshaft and I got the following numbers: No.1 = 40.045mm No.2 = 40.048mm No.3 = 40.048mm No.4 = 40.043mm The limits are 39.985mm - 40.000mm so how is this so ? Had my micrometer calibrated the day before in a machine shop and double checked my measurements which came in at +/- 0.0002" of the originals. Any help appreciated
-
Joe's 98 starlet full Glanza rep TF035HM - final bits
SpikeyJp_68 replied to SpikeyJp_68's topic in EP91 Progress Blogs
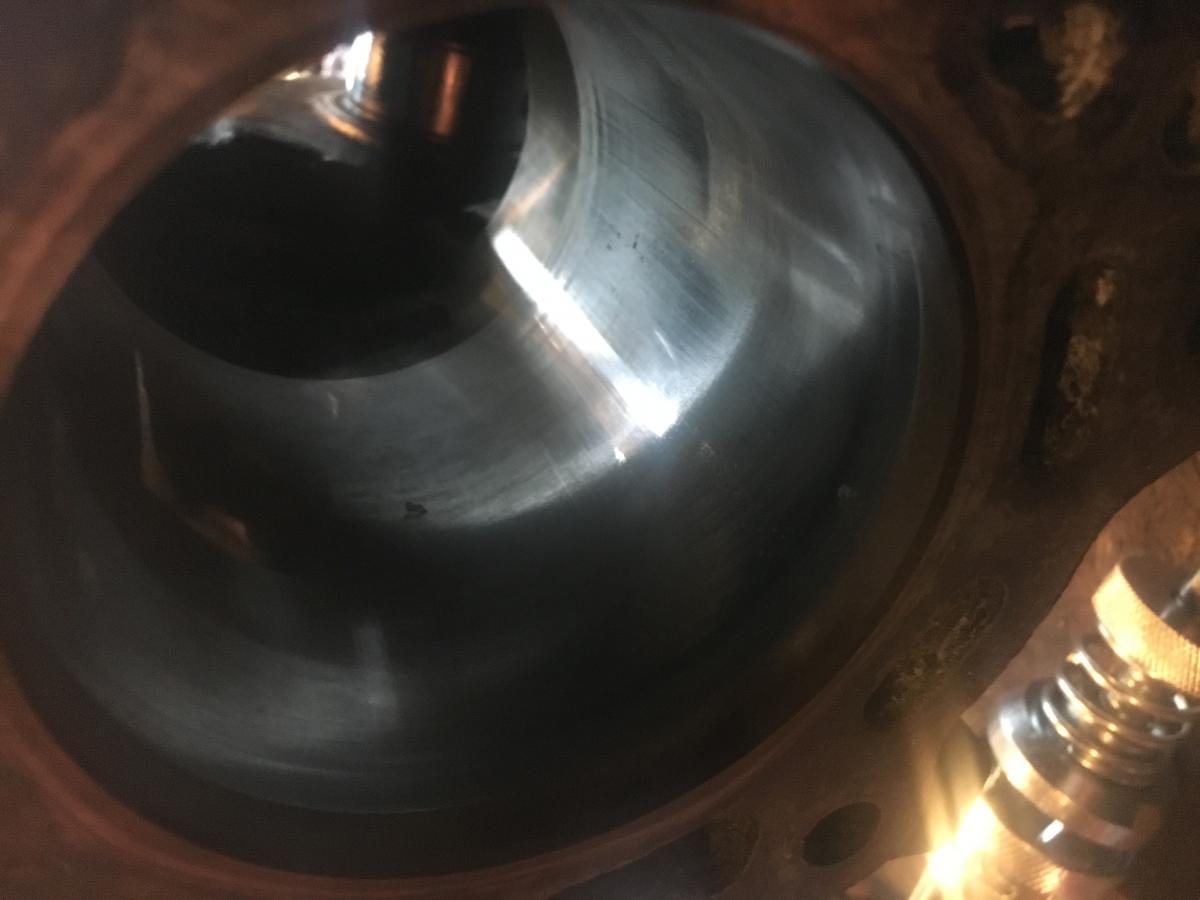
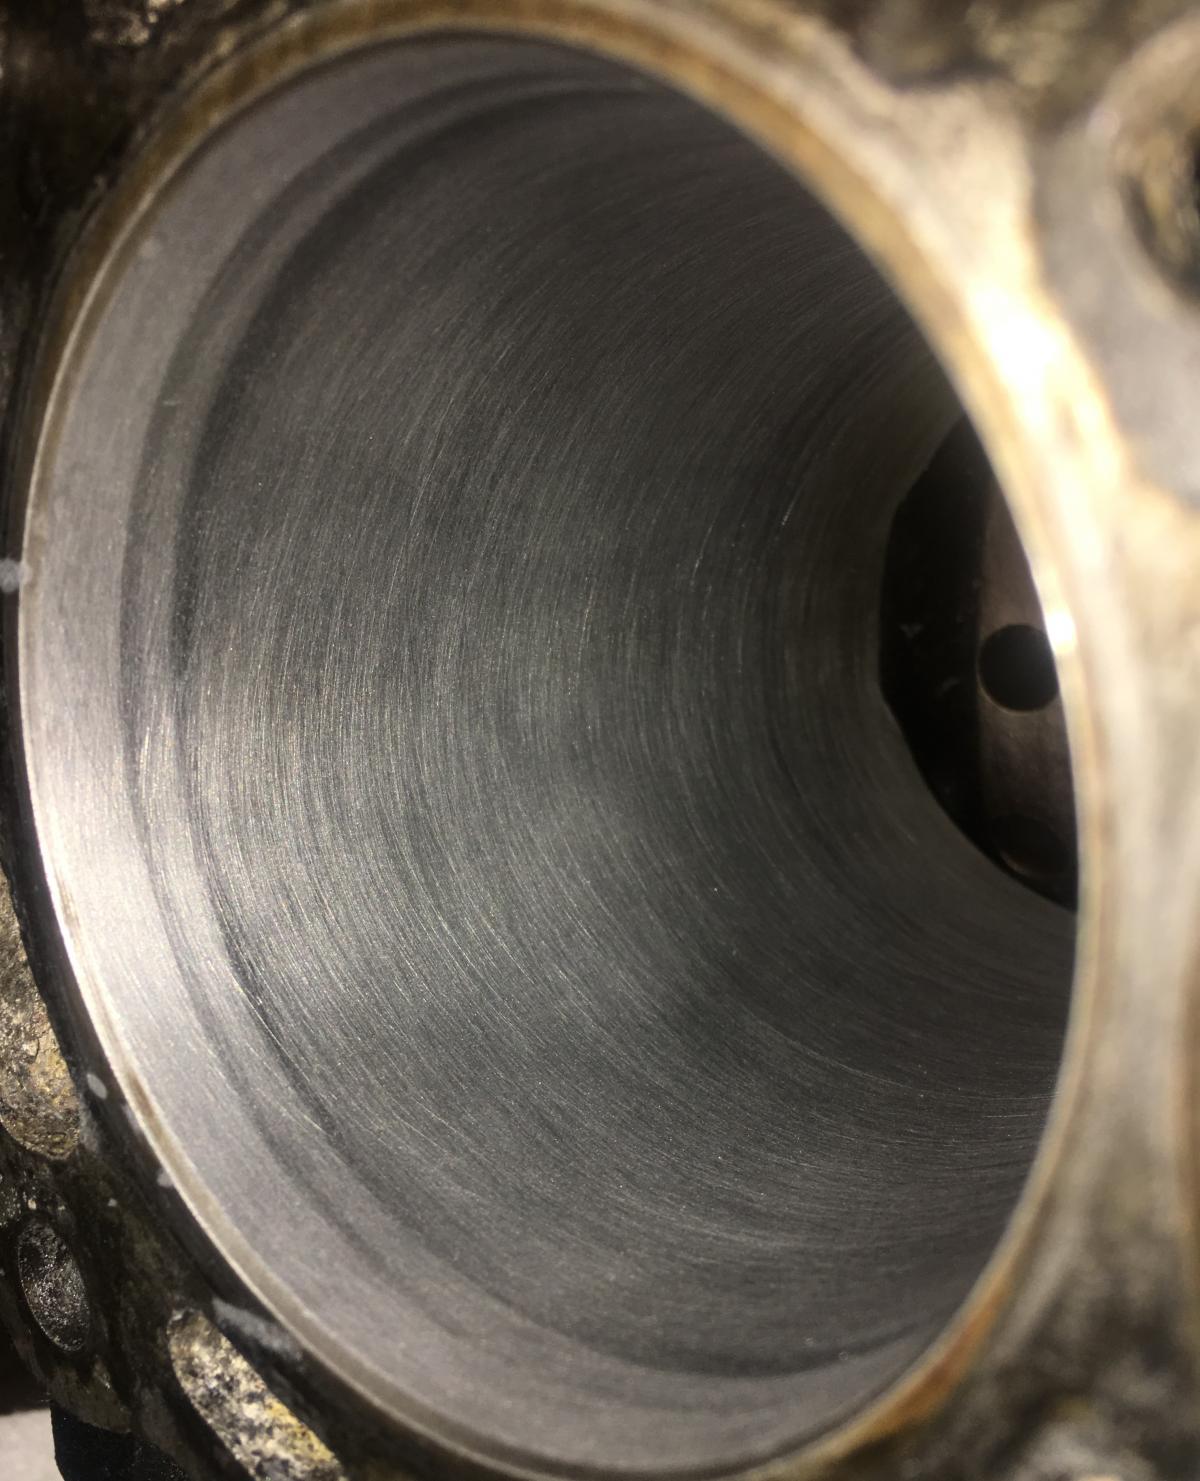
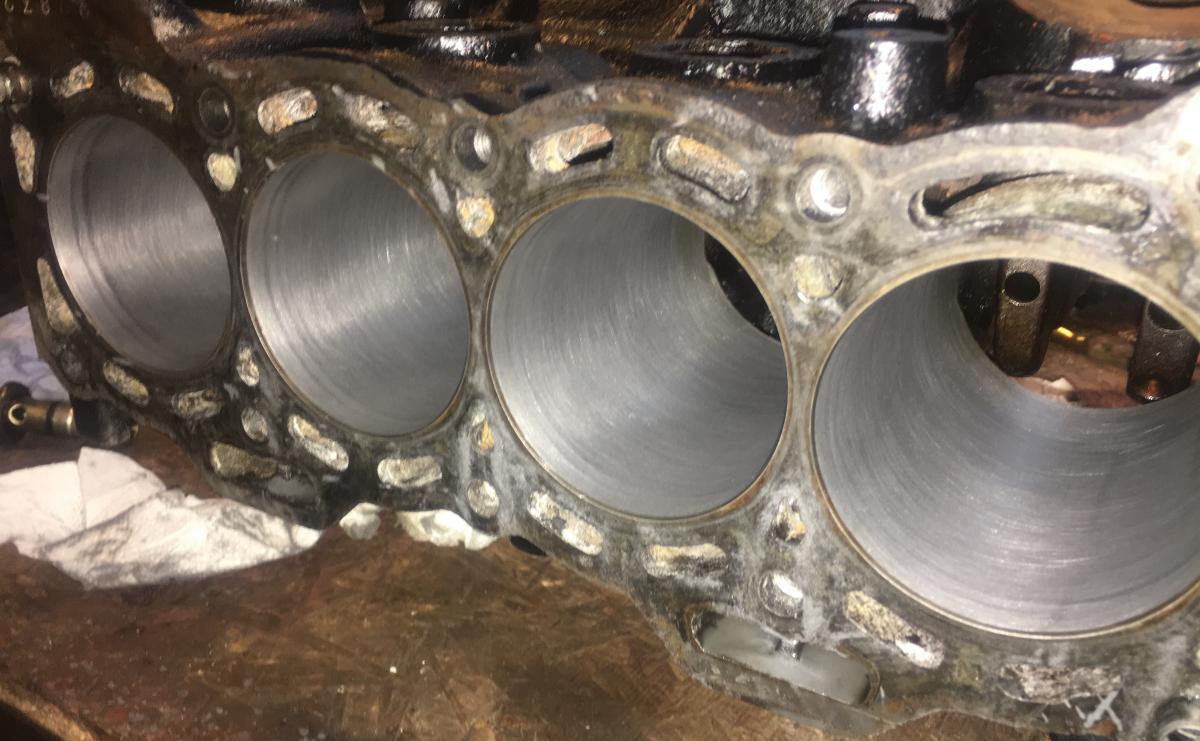
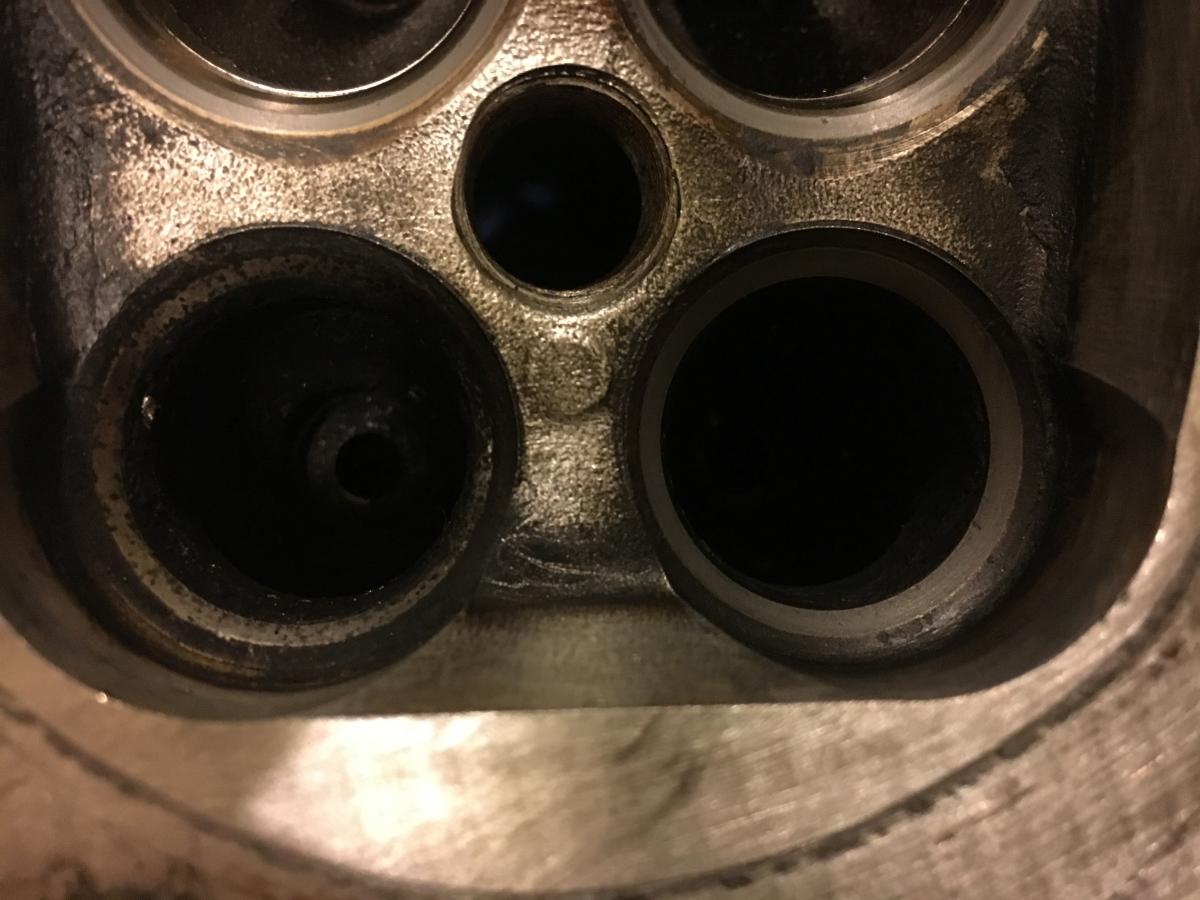
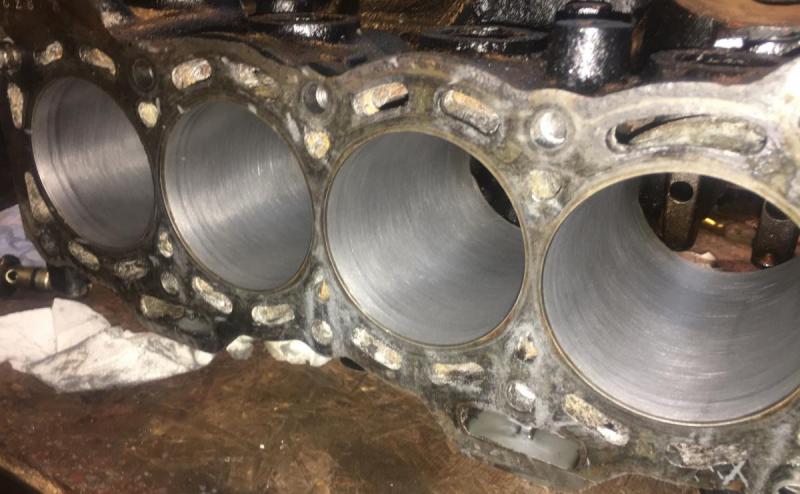
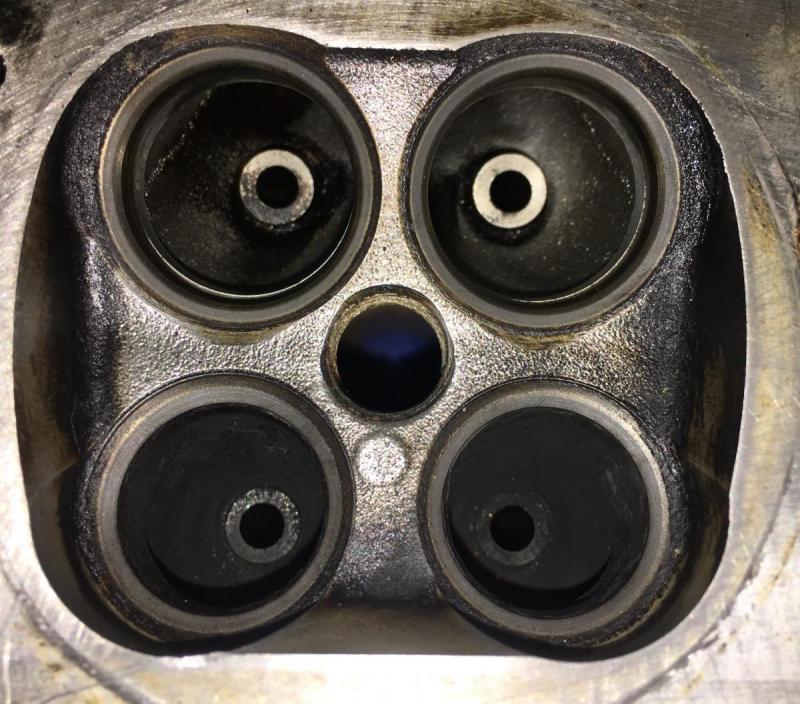
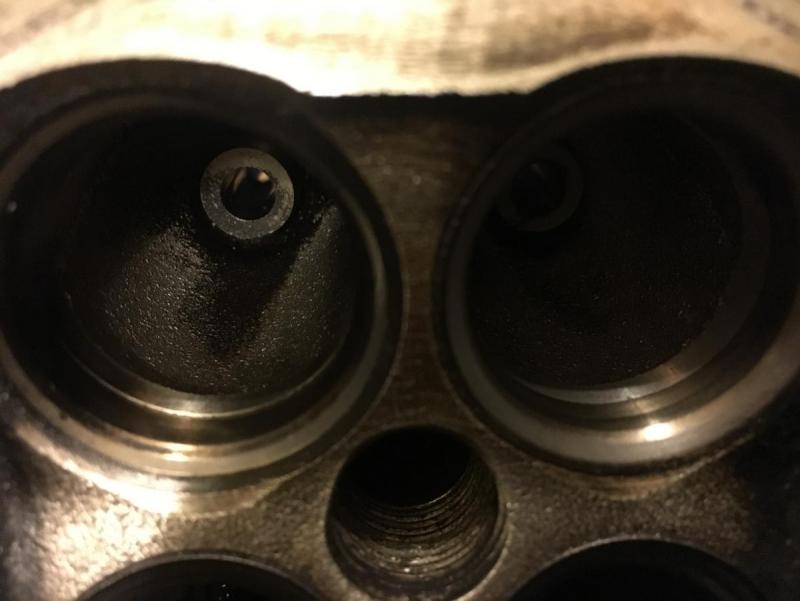
The cylinders have been honed. Before And after

-
N/a and glanza driveshafts ?
SpikeyJp_68 replied to SpikeyJp_68's topic in Drivetrain & Transmission
Cv joints themselves are 800 Euro a piece from Toyota. Just had new cv boots put on so they're good to go really. I will be for the time being with an FTE flywheel and clutch -
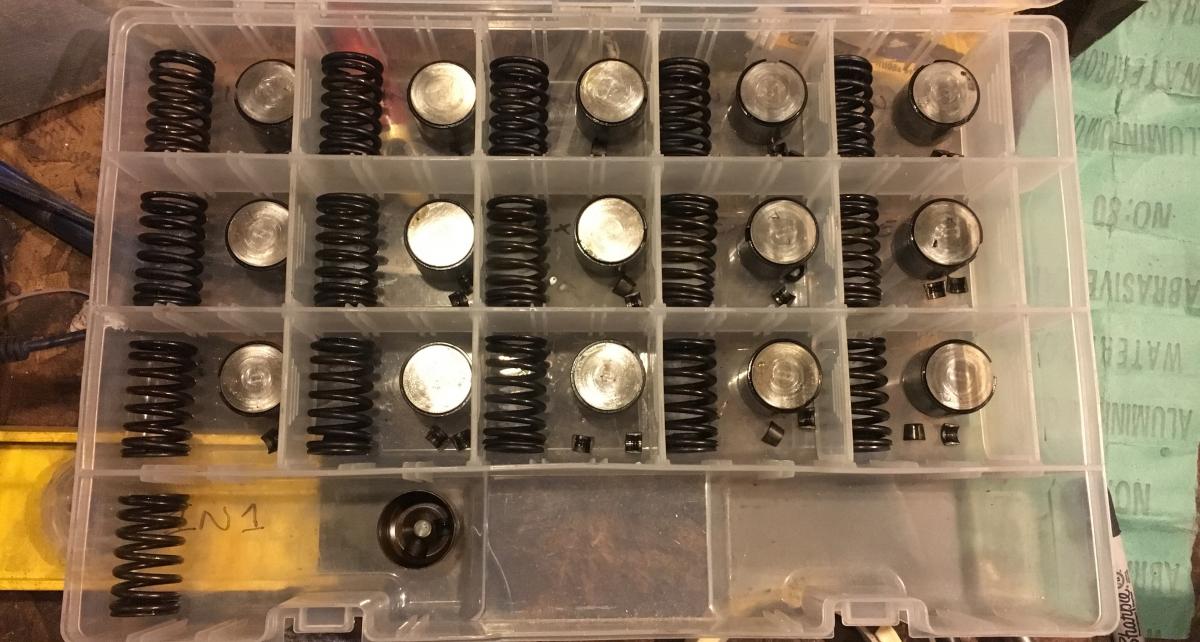
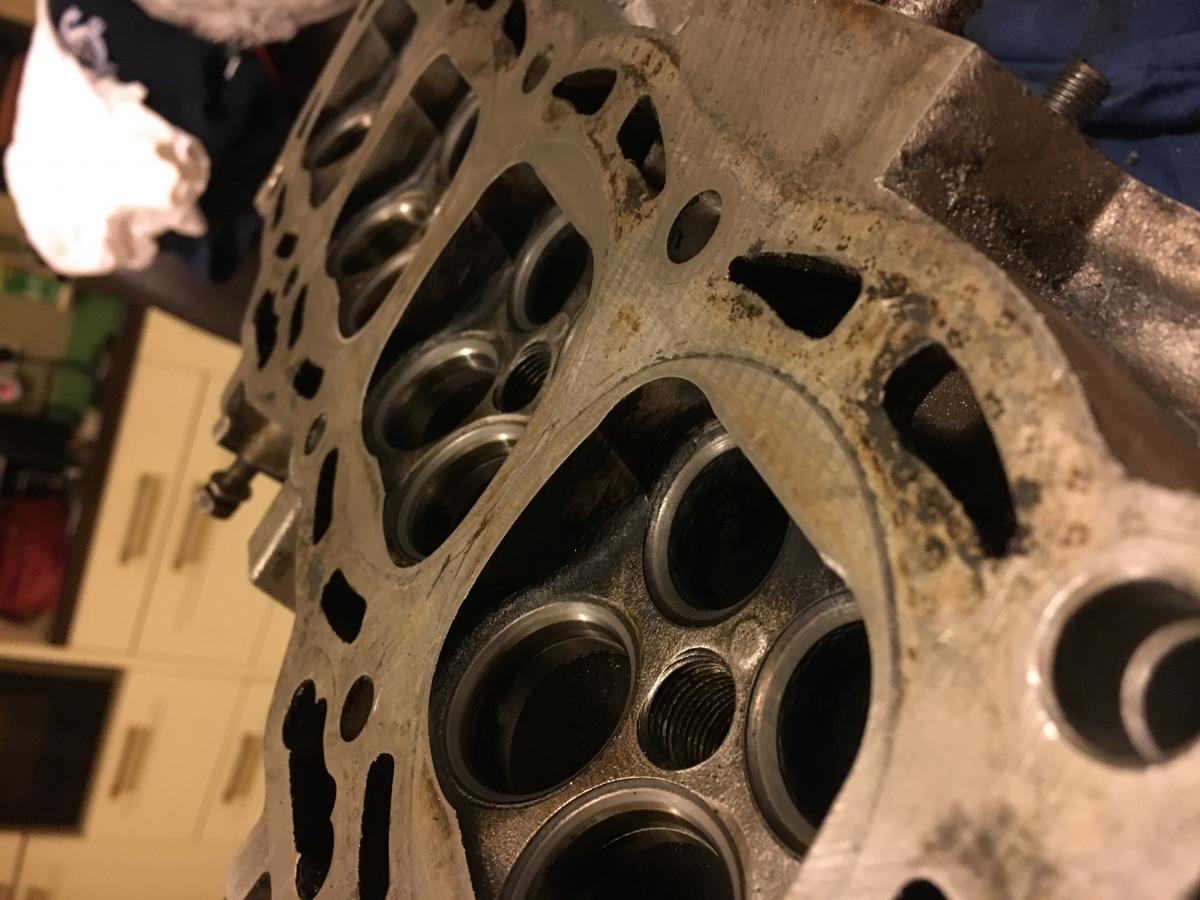
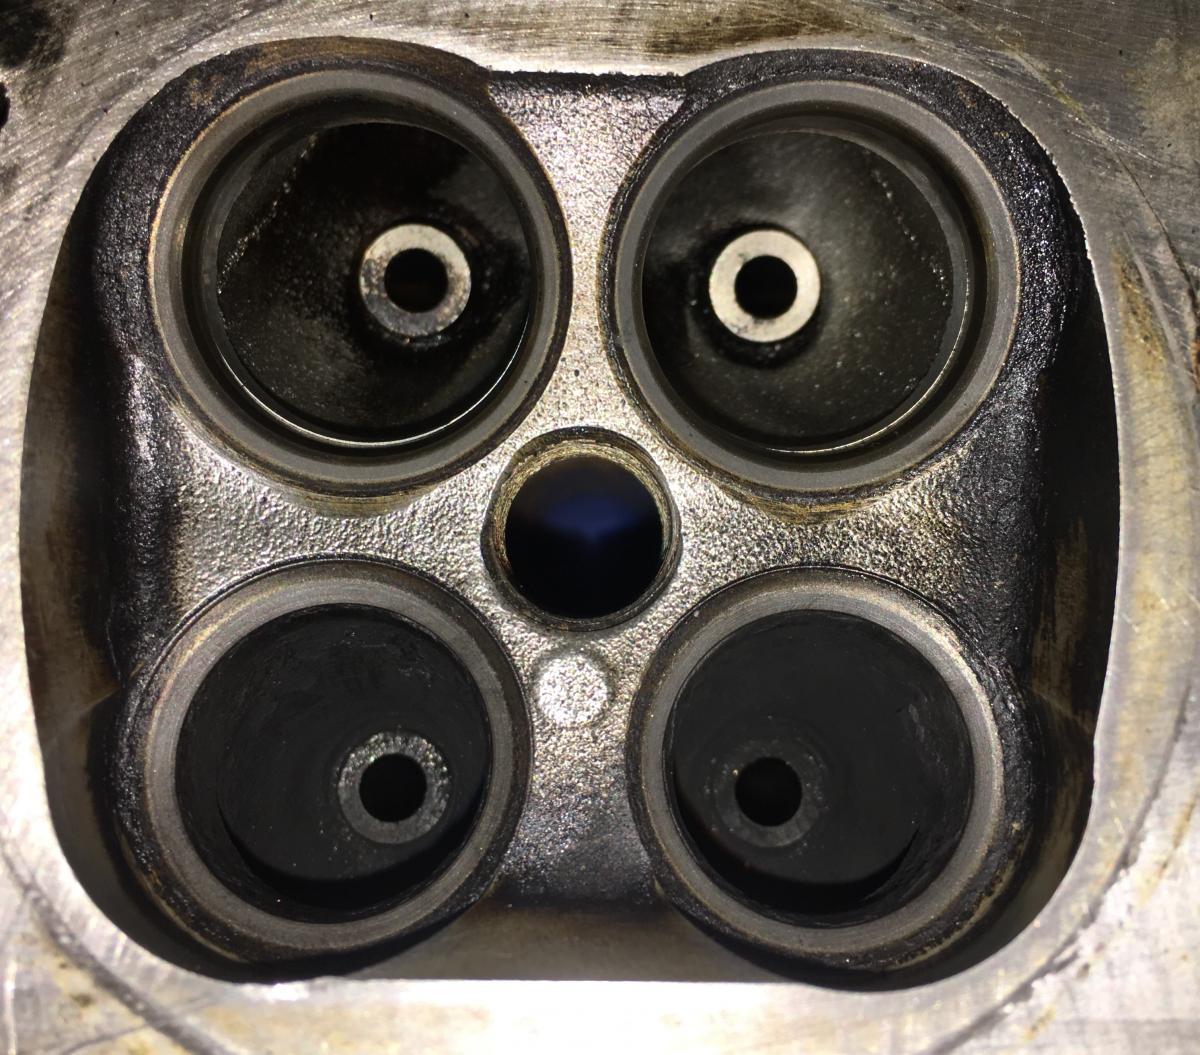
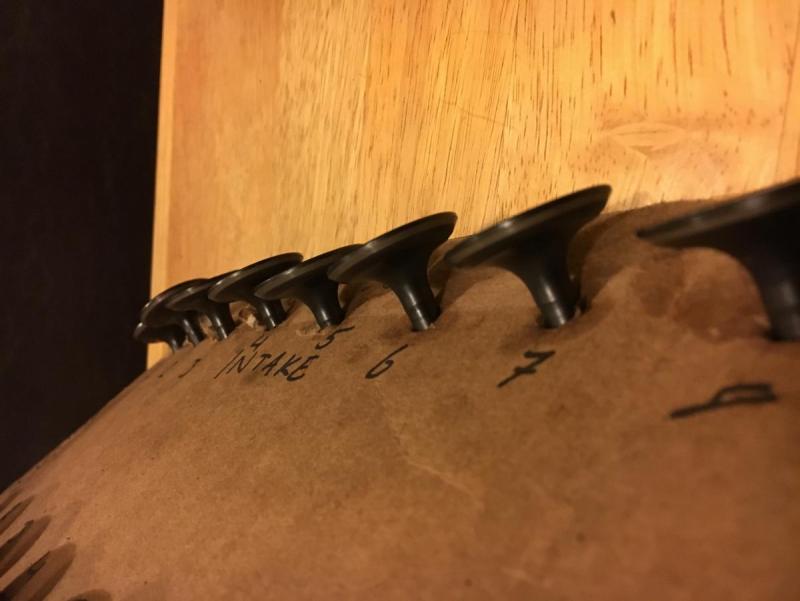
To do it properly you'll need to remove the head. It can be done at home if your confident enough. As for keeping everything together you'll need a box like this and label the different sections in1 in2 ex1,2 and so on You'll also need a valve spring compressor to get the little collets out that keep the retainer in place.

-
MISS,STRESS >>> mister koni yellow
SpikeyJp_68 replied to 5e colin's topic in EP80/EP82 Progress Blogs
I'll wait and see how you do yours and follow that becuase I can see myself making a mess of it -
MISS,STRESS >>> mister koni yellow
SpikeyJp_68 replied to 5e colin's topic in EP80/EP82 Progress Blogs
Let me know what it's like pal. Just bought the same kit myself -
Joe's 98 starlet full Glanza rep TF035HM - final bits
SpikeyJp_68 replied to SpikeyJp_68's topic in EP91 Progress Blogs
I'll have to go over them again with some fine grit for 2-3 mins per valve. Took about 2 and a half hours. Exhaust valves were badly pitted -
Don't waste your time with a ct9 upgrade. Wait and go for a td/tf turbo or a ct12/9 hybrid that Colin suggested
-
Joe's 98 starlet full Glanza rep TF035HM - final bits
SpikeyJp_68 replied to SpikeyJp_68's topic in EP91 Progress Blogs
Boom
-
Valve stem oil seal removal and re-seating valves
SpikeyJp_68 replied to SpikeyJp_68's topic in Engines
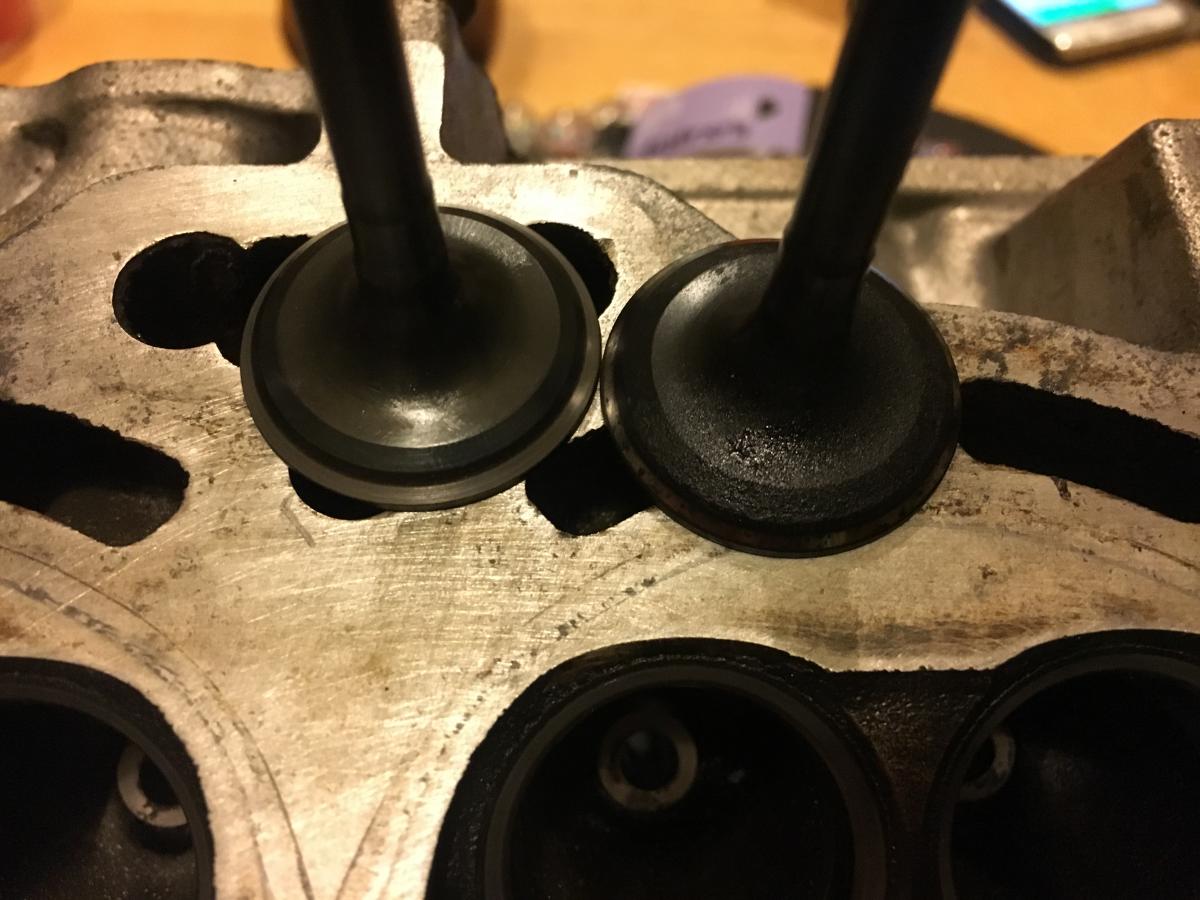
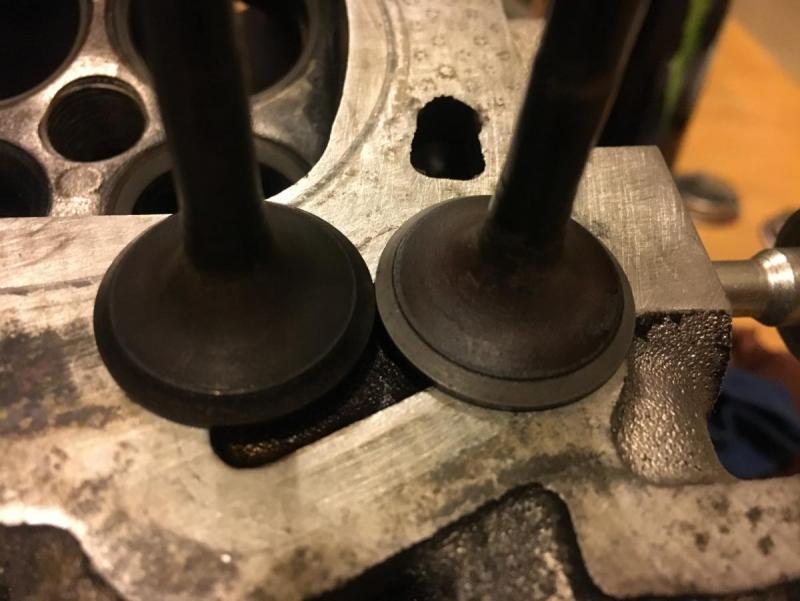
They've been seated. Intake valves tool about 7 mins each start to finish as they were in pretty good condition anyway. Seated V non seated On the other hand, exhaust valves took about 15 mins a piece becuase they were quite badly pitted. I ended up doing 2 runs with coats and 1 run with fine. As before, seated V non seated Now they look like this ! Took about 2-2.5 hours in total and is quite therapeutic once you're properly set up for it haha


-
Joe's 98 starlet full Glanza rep TF035HM - final bits
SpikeyJp_68 replied to SpikeyJp_68's topic in EP91 Progress Blogs
I'll let you know about time and the condition of my hands -
Joe's 98 starlet full Glanza rep TF035HM - final bits
SpikeyJp_68 replied to SpikeyJp_68's topic in EP91 Progress Blogs
Valves have been cleaned. Might start reseating them tomorrow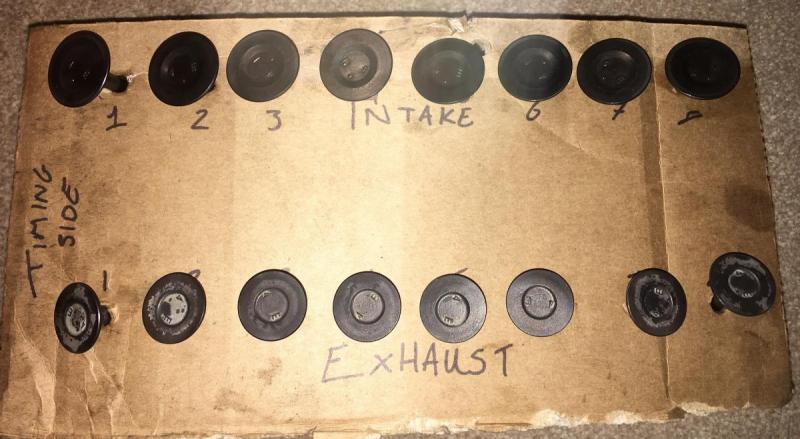

-
Valve stem oil seal removal and re-seating valves
SpikeyJp_68 replied to SpikeyJp_68's topic in Engines
5-7 minutes of actual grinding is what I was told. I'll give one a go tomorrow starting with coarse ending with fine and go for a 1mm seat as Colin says. I'll time it start to finish so from applying the coarse grit to removing the fine grit and I'll report back with pics and a time -
Apart from the older rs6 avant c5..

-
Valve stem oil seal removal and re-seating valves
SpikeyJp_68 replied to SpikeyJp_68's topic in Engines
Only way to find out is to crack on and do it I suppose might give it a go tomorrow and see how I get on -
Valve stem oil seal removal and re-seating valves
SpikeyJp_68 replied to SpikeyJp_68's topic in Engines
I've bought a valve lapping stick, I've read it's not the best to do with a drill -
Valve stem oil seal removal and re-seating valves
SpikeyJp_68 replied to SpikeyJp_68's topic in Engines
That's okay, I'll check them though -
Should just pull out mate. You could break up the grommet with a small screwdriver as they're only cheap
-
Joe's 98 starlet full Glanza rep TF035HM - final bits
SpikeyJp_68 replied to SpikeyJp_68's topic in EP91 Progress Blogs
will be going that aswell Colin