Pikey009 Posted September 8, 2022 Share Posted September 8, 2022 V nice mate mate really clean too Quote Link to post Share on other sites
JamesG Posted October 23, 2022 Author Share Posted October 23, 2022 On 9/8/2022 at 11:48 AM, Pikey009 said: V nice mate mate really clean too Thanks Jase. Only a small update but picked up a few bits from toyota last week. New headlight adjusters and front bumper fixings for where it attaches to the wing. Got them all fitted and replaced the originals. Wanted to replace the adjusters while they are still available as mine had seen better days. Just a shame you cant get new headlights from toyota anymore . Quote Link to post Share on other sites
JamesG Posted February 25, 2023 Author Share Posted February 25, 2023 (edited) Started the car up for the first time in a while after sitting over winter recently. I have developed a strange issue with the factory radiator fan circuit. The fan is on constantly when the engine is cold even with just the ignition on. I ran the car up to temp with the fan unplugged and at 93 degrees the fan shuts off before coming back on when the coolant drops to around 85 degrees. Also if you unplug the fan switch sensor the fan shuts off when I believe the fan should come on as soon as you unplug the sensor as a safety feature. It's as if the circuit is running in reverse opposite to what it should be doing. I tried changing the radiator fan switch on the thermostat housing, the thermostat itself, the rad fan fuse and the rad fan relay in the fusebox but nothing made any difference. So I decided to install my own separate adjustable fan controller relay, it was fairly straightforward to wire in and set up. I found a suitable spot out of the way behind the glovebox to mount the fan controller and went about getting all the wires connected up. Then I used an adapter to fit the 1/8th NPT temperature probe into the stock fan switch location on the thermostat and got that plugged in. I decided to use a toyota plug to connect the wiring to the radiator fan in order to keep it looking as factory as possible. I also added another inline fuse in between the battery and the fan just to be safe. It all works well, I have set the fan to kick in at the same temp it used to at 92 degrees on my water temp gauge. It then runs until the coolant temp drops to around 84 degrees before shutting off. Hopefully I can revisit the factory fan wiring in the future and find out what's going on with it but for now I just wanted the fan working as it should again. I have also replaced the old kenwood stereo that came with the car with a more modern sony unit. I have been meaning to do this for a while, It also has a digital clock display which is useful for me as i've removed the dash clock to run the wiring for my oil pressure gauge. Its a great improvement over the old one and goes well with the rest of the interior. Edited February 25, 2023 by JamesG Quote Link to post Share on other sites
JamesG Posted April 29, 2023 Author Share Posted April 29, 2023 (edited) Made some more progress with the car over the last couple of months. Purchased a spare 4efte rocker cover with the intention of removing the baffle, giving it a proper clean inside and then painting it. Started by drilling the heads off all the factory fitted rivets to allow the baffle to come free. Then I ground the remaining stubs flush with the dremel and gave the area behind the baffle and the baffle itself a good clean out to remove all the oil residue and grime. Next I marked and drilled the 14 5mm holes needed to reattach the baffle with m6 bolts, I did have one small incident puncturing through with the drill bit however wasn't too worried at this stage. Tapped all the holes out to m6 x 1.0 thread. I then dropped it off at my local welder for the AN10 fittings welding ontop for the breather setup. I also got him to weld up the hole that I had accidently punctured through. Then it was onto painting, gave it a good sand down and removed some of the casting marks on the outside with the dremel. All cleaned and masked up ready for painting. Went for a wrinkle black finish, came out pretty good. Decided to use low profile 10mm hex bolts to reattach the cover. Was originally going to use button head bolts but the allen head rounds off quite easily, so went for these instead. The inside was given a final clean and the baffle was then stuck down with loctite black gasket maker, all the bolts were secured with loctite 243 and torqued down. Spark plug seals installed and ready to go on the car once the sealant had fully cured. Looks great and I think it goes well with the rest of the engine bay. I have also fitted a RW developments coolant expansion tank to replace the original plastic one. Its very well made and is a good addition to the half rad. Got some new toyo TR1 tyres, nothing too special but a decent upgrade over the old ones and well suited for road use. Fitted some new centre caps as the mounting tabs had snapped off on some of my originals, aswell as some new wheel nuts. Lastly I have fitted a whiteline adjustable rear anti roll bar, I got it for a good price back in november in the black friday sales and have only just got round to getting it on the car. Took my time positioning the L brackets on the chassis to get them in the right spot. All done, very happy with it. Looks great hanging down under the rear bumper, will have too see how much difference it makes to the handling over summer. Edited April 29, 2023 by JamesG Quote Link to post Share on other sites
JamesG Posted April 29, 2023 Author Share Posted April 29, 2023 (edited) Heres some pics from Japfest at Silverstone last weekend. A good turnout of starlets, It was good to meet and chat to a few of the owners. The car drove the 300 mile round trip faultlessly very pleased. Edited April 29, 2023 by JamesG Quote Link to post Share on other sites
burty Posted April 30, 2023 Share Posted April 30, 2023 Great photos Cars looking lovely Quote Link to post Share on other sites
JamesG Posted May 2, 2023 Author Share Posted May 2, 2023 Thanks Burty Quote Link to post Share on other sites
JamesG Posted May 14, 2023 Author Share Posted May 14, 2023 Another update, Bought some Reflet rear tail lights in from Japan. Happy with the condition, gave them a good clean and then polished them up. Only change I had to make to the bulbs was to put orange indicators in. Came out really well and make a great difference to the look of the back of the car. Also bought a replacement 96 Glanza front grill badge made by a lad on one of the facebook groups to replace my original that I had a go at refurbing. I thinks it looks great, really good to see people reproducing discontinued parts. Quote Link to post Share on other sites
Gav Missen Posted May 14, 2023 Share Posted May 14, 2023 Looks pukka bud Quote Link to post Share on other sites
JamesG Posted May 15, 2023 Author Share Posted May 15, 2023 21 hours ago, Gav Missen said: Looks pukka bud Thanks mate. Quote Link to post Share on other sites
JamesG Posted July 8, 2023 Author Share Posted July 8, 2023 (edited) After driving the car quite a lot in the past few months I decided I wasn't quite happy with the seat rails and wanted to get the seats to sit lower in the car. So I managed to get hold of a pair of ep91 low rails made by William Tuite in Ireland. They're really well made and get the seating position as low as possible. Only problem was they are designed to work with recaro SR seats with the flat base, the trendline seats have a different bolt pattern and the base of the seat hangs down in the middle. So I decided to sell the EP3 prem seats and the rail setup in order to fund some recaro SR4 DC5 seats. They are in good condition, just needed a good clean with some woolite and my mate's wet vac. They came up really well. Very happy with how they sit in the car, they are a lot lower and really change the driving position. Edited July 8, 2023 by JamesG Quote Link to post Share on other sites
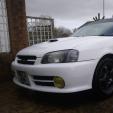
JamesG Posted October 15, 2023 Author Share Posted October 15, 2023 (edited) Picked up some aftermarket replica headlights for the car recently. Wanted to try them out and see how they compare to the toyota units as my lenses are quite worn and always seem to come back yellow despite polishing. Got them installed and quite impressed with the fitment overall. They fit well onto the original mounts and line up nicely. Swapped over the bulbs and put my osram nightbreakers in and they seem to work well. Time will tell to see how they last but look much better than my originals. Also got some more genuine bits from toyota. New front windscreen moulding and dam strip, Drivers front door weatherstrip and gearbox syncros to hold onto incase I ever need to refresh the box in the future. Got the drivers door weatherstrip fitted. The soft material on the inside has deteriorated on the orignals, the new one looks great and window operation seems a lot smoother. Unfortunately the passenger side one is discontinued, wondered about trying to use a rh side one but there is a rather large curve in the trim to follow the shape of the door. Been out in the car a lot lately enjoying the last of the summer months, heres a few pics with the local scenary. Hopefully got some more improvements coming over the winter. Edited October 15, 2023 by JamesG Quote Link to post Share on other sites
BMX-RIG Posted October 15, 2023 Share Posted October 15, 2023 Nice work james, good to see the new lights work well. First set ive seen fitted! Quote Link to post Share on other sites
JamesG Posted October 16, 2023 Author Share Posted October 16, 2023 22 hours ago, BMX-RIG said: Nice work james, good to see the new lights work well. First set ive seen fitted! Thanks Tyler, yeah pleased with the lights. They're pretty decent overall. Good to see an alternative available. Quote Link to post Share on other sites
Patches Posted October 17, 2023 Share Posted October 17, 2023 On 10/15/2023 at 4:09 PM, JamesG said: Also got some more genuine bits from toyota. New front windscreen moulding and dam strip, Drivers front door weatherstrip and gearbox syncros to hold onto incase I ever need to refresh the box in the future. Well done finding all those syncros! I wanted to find a new set for mine but couldn't get all of them, think 3rd gear one was the one I couldn't get in the end Quote Link to post Share on other sites
JamesG Posted October 17, 2023 Author Share Posted October 17, 2023 7 hours ago, Patches said: Well done finding all those syncros! I wanted to find a new set for mine but couldn't get all of them, think 3rd gear one was the one I couldn't get in the end Yeah, as far as I'm aware I've managed to get 1st, 3rd, 4th and 5th gear synchros. Only one I couldn't get was 2nd gear. I read a thread on the other forum where a lad had successfully used 1st gear synchro for 2nd gear and 4th gear synchro for 3rd gear. So I was hoping to use a 1st gear synchro for 2nd gear. https://www.toyotagtturbo.com/community/index.php?threads/gearbox-synchros.110499/ This is the part number I have for 3rd gear synchro, can't confirm it's correct though as I've not had the box apart. Quote Link to post Share on other sites
stevie82 Posted December 5, 2023 Share Posted December 5, 2023 lovely build and the car looks awsome. Where did you get the new headlamps from if you dont mind me asking ? Im at that point too. Quote Link to post Share on other sites
JamesG Posted December 7, 2023 Author Share Posted December 7, 2023 On 12/5/2023 at 6:16 PM, stevie82 said: lovely build and the car looks awsome. Where did you get the new headlamps from if you dont mind me asking ? Im at that point too. Thanks mate, heres the link for headlights. I had to message the seller and ask for just 1 pair. https://www.alibaba.com/product-detail/Black-Housing-Aftermarket-Headlamp-Headlight-For_1600226466504.html?spm=a2700.galleryofferlist.normal_offer.d_title.48c361eb61sWSG Quote Link to post Share on other sites
avster Posted December 8, 2023 Share Posted December 8, 2023 Beautiful build am looking for the standard MAP sensor for my Glanza Cheers Afzal Quote Link to post Share on other sites
JamesG Posted March 11, 2024 Author Share Posted March 11, 2024 So about time I updated this, cars been tucked away in my good mate's garage again over the winter months. Meanwhile ive been busy making some upgrades. First up was the doorcards, mine had seen much better days and both corners had been snapped by someone trying to access the upper trim fixing. So went out and got myself some 3mm thick ply to remake them. I traced around the old cards and marked out all the holes, then I cut them to shape with a jigsaw and went about cutting all the holes out with a drill and multitool. Once I was done I got myself some suede fabric and used spray glue adhesive to stick the fabric to the ply. This is the finished article, pleased with how they came out. While I was behind the doorcards I also decided to redo the plastic lining as the originals were a mess, Again traced them out and cut some plastic sheeting to size. Then stuck the plastic to the door with fresh butyl tape. Quote Link to post Share on other sites
JamesG Posted March 11, 2024 Author Share Posted March 11, 2024 (edited) Next up I decided to take the plunge and ordered a new ct9 ram horn external gate manifold kit from Sacha at wicked ep racing. I had been debating it for a while after problems with boost creep on the oem ct9. I like the ct9 and wanted to get the most out of it while still on standard engine management. A couple of months later it arrived, it really is an amazing bit of kit. Got the tial 38mm MVS from Mike at tuning developments. Made a start on getting it fitted, starting with clocking the compressor housing to face down and making a new hot pipe adapter to suit. I was then able to get the kit bolted up to the engine and make a start on connecting up the oil and water lines. I made a bracket to hold the internal gate shut instead of welding it permanantly closed. Also made up my new short route hot pipe. Then it was onto fabricating a new intake pipe to accommodate the new turbo position. I realised my triple core civic rad and fan shroud was taking up too much room in the bay so sold it on in order to fund a new tegiwa dual core half rad and stoney racing fan. Made up some brackets out of flat aluminium bar to attach the new fan to the rad. Came out really nice. So this is where we are at with the kit now complete. Took it on a short test drive down the road to check for leaks and make sure everything is working as it should. The sound is insane, can't wait to get back out in the car again now and im hoping I should have much better boost control. Running a 0.7 bar spring in the wastegate for now and ill see how stable it holds the boost level. Edited March 11, 2024 by JamesG Quote Link to post Share on other sites
JamesG Posted March 11, 2024 Author Share Posted March 11, 2024 Managed to break one of these clips that holds the archliner in while working on the car. Luckily they are still available from toyota. Actually worked out cheaper to get two of them shipped over from japan via amayama than it would have cost me for one at my local toyota dealer!! I have also purchased a 400 cell cat from tegiwa to go in the exhaust just after the sump. Going to get my exhaust fabricator to make me up a new front pipe to house it once I get the car back out. Should help me to be emmisions compliant. Quote Link to post Share on other sites
jellybaby Posted March 15, 2024 Share Posted March 15, 2024 where did u get head light from dude ?? Quote Link to post Share on other sites
JamesG Posted March 15, 2024 Author Share Posted March 15, 2024 55 minutes ago, jellybaby said: where did u get head light from dude ?? Here's the link mate, you just have to message the seller and ask for just 1 pair 👍 https://www.alibaba.com/product-detail/Black-Housing-Aftermarket-Headlamp-Headlight-For_1600226466504.html?spm=a2700.galleryofferlist.normal_offer.d_title.48c361eb61sWSG Quote Link to post Share on other sites
jellybaby Posted March 15, 2024 Share Posted March 15, 2024 11 minutes ago, JamesG said: Here's the link mate, you just have to message the seller and ask for just 1 pair 👍 https://www.alibaba.com/product-detail/Black-Housing-Aftermarket-Headlamp-Headlight-For_1600226466504.html?spm=a2700.galleryofferlist.normal_offer.d_title.48c361eb61sWSG cheers dude Quote Link to post Share on other sites

Recommended Posts
Join the conversation
You can post now and register later. If you have an account, sign in now to post with your account.