Claymore
-
Posts
660 -
Joined
-
Last visited
Content Type
Profiles
Forums
Wiki
Media Demo
Events
Everything posted by Claymore
-
Claymore's sleeper 4efe+t-t+t build (R.I.P. the Nanza)
Claymore replied to Claymore's topic in EP91 Progress Blogs
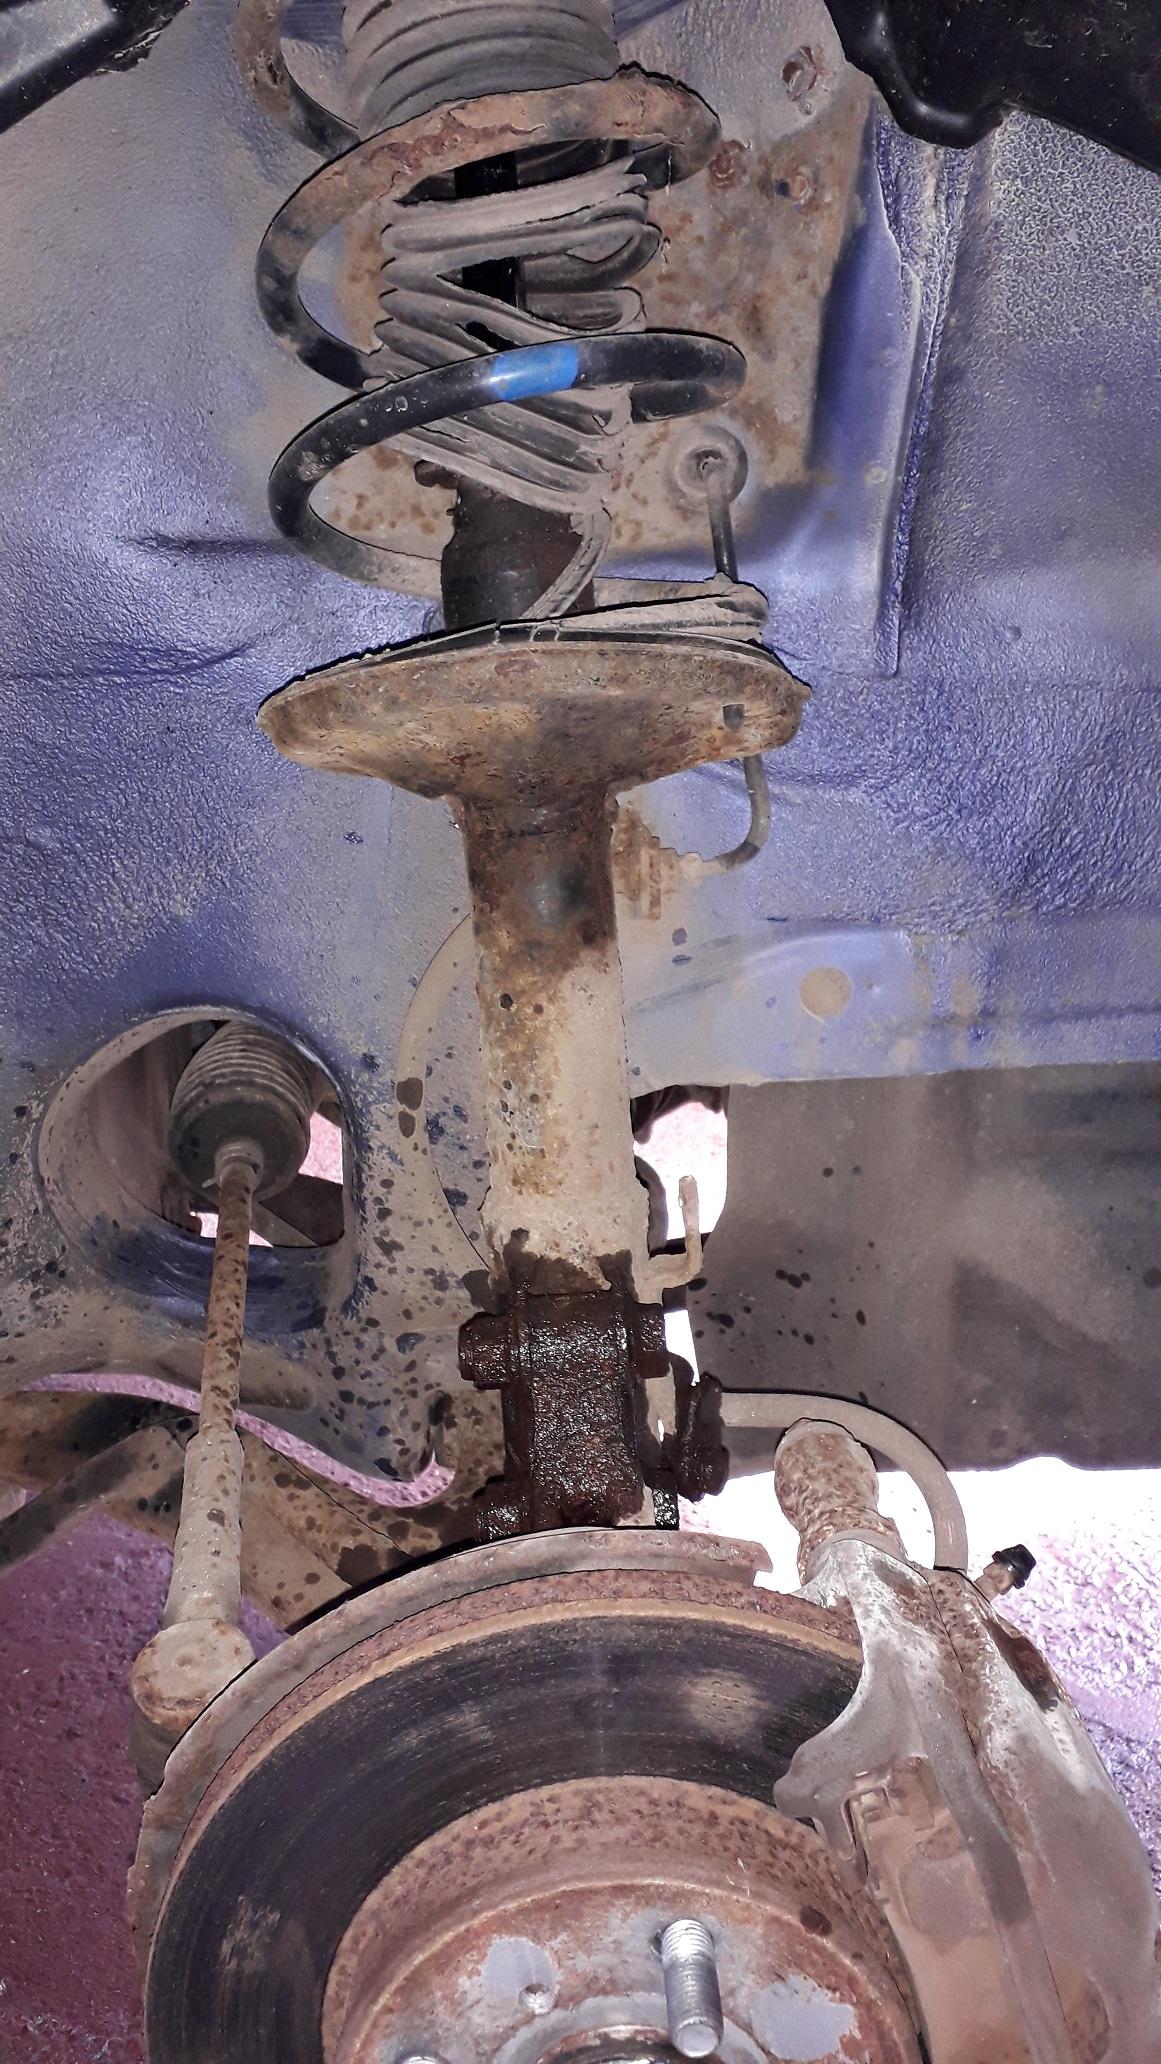
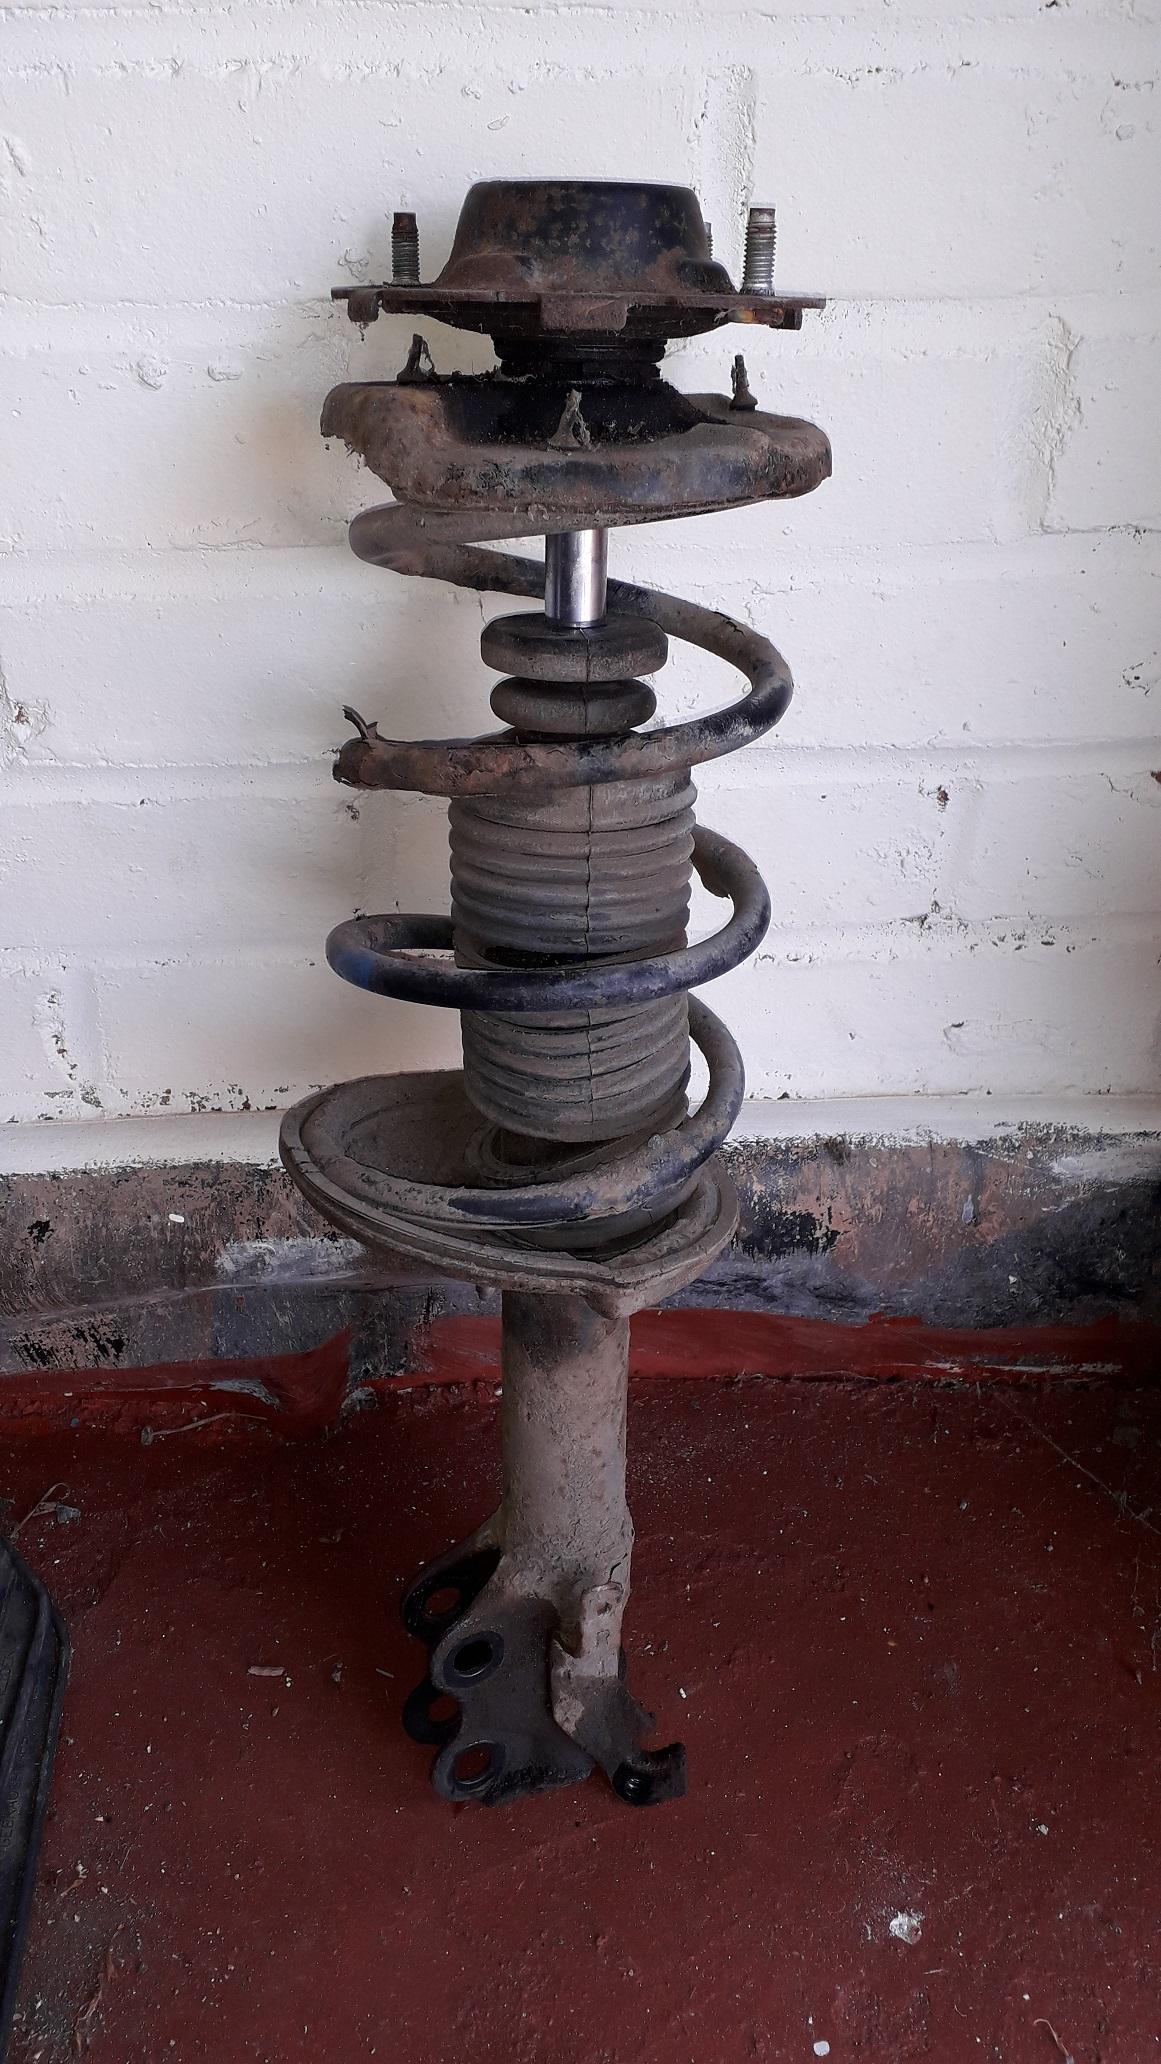
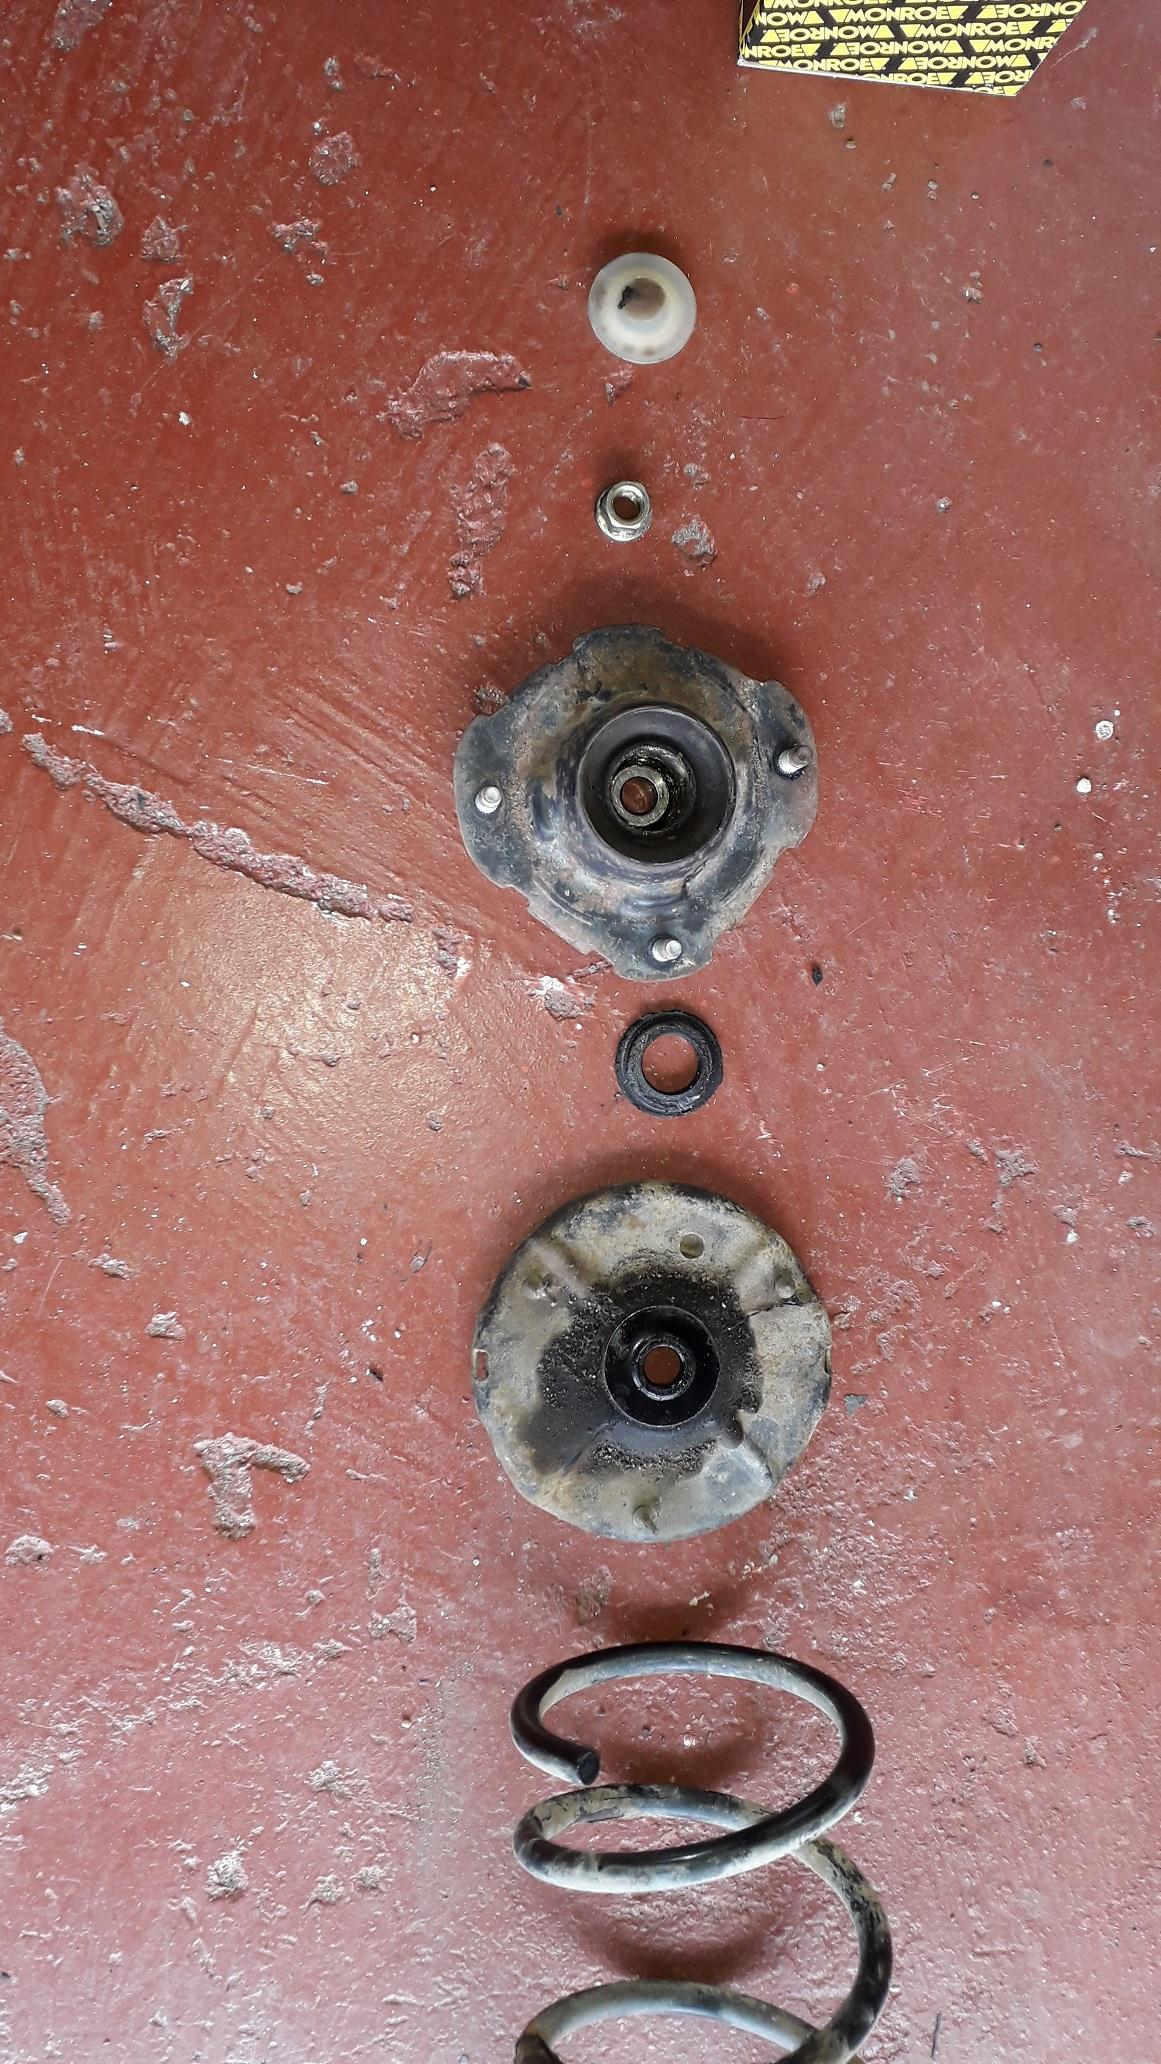
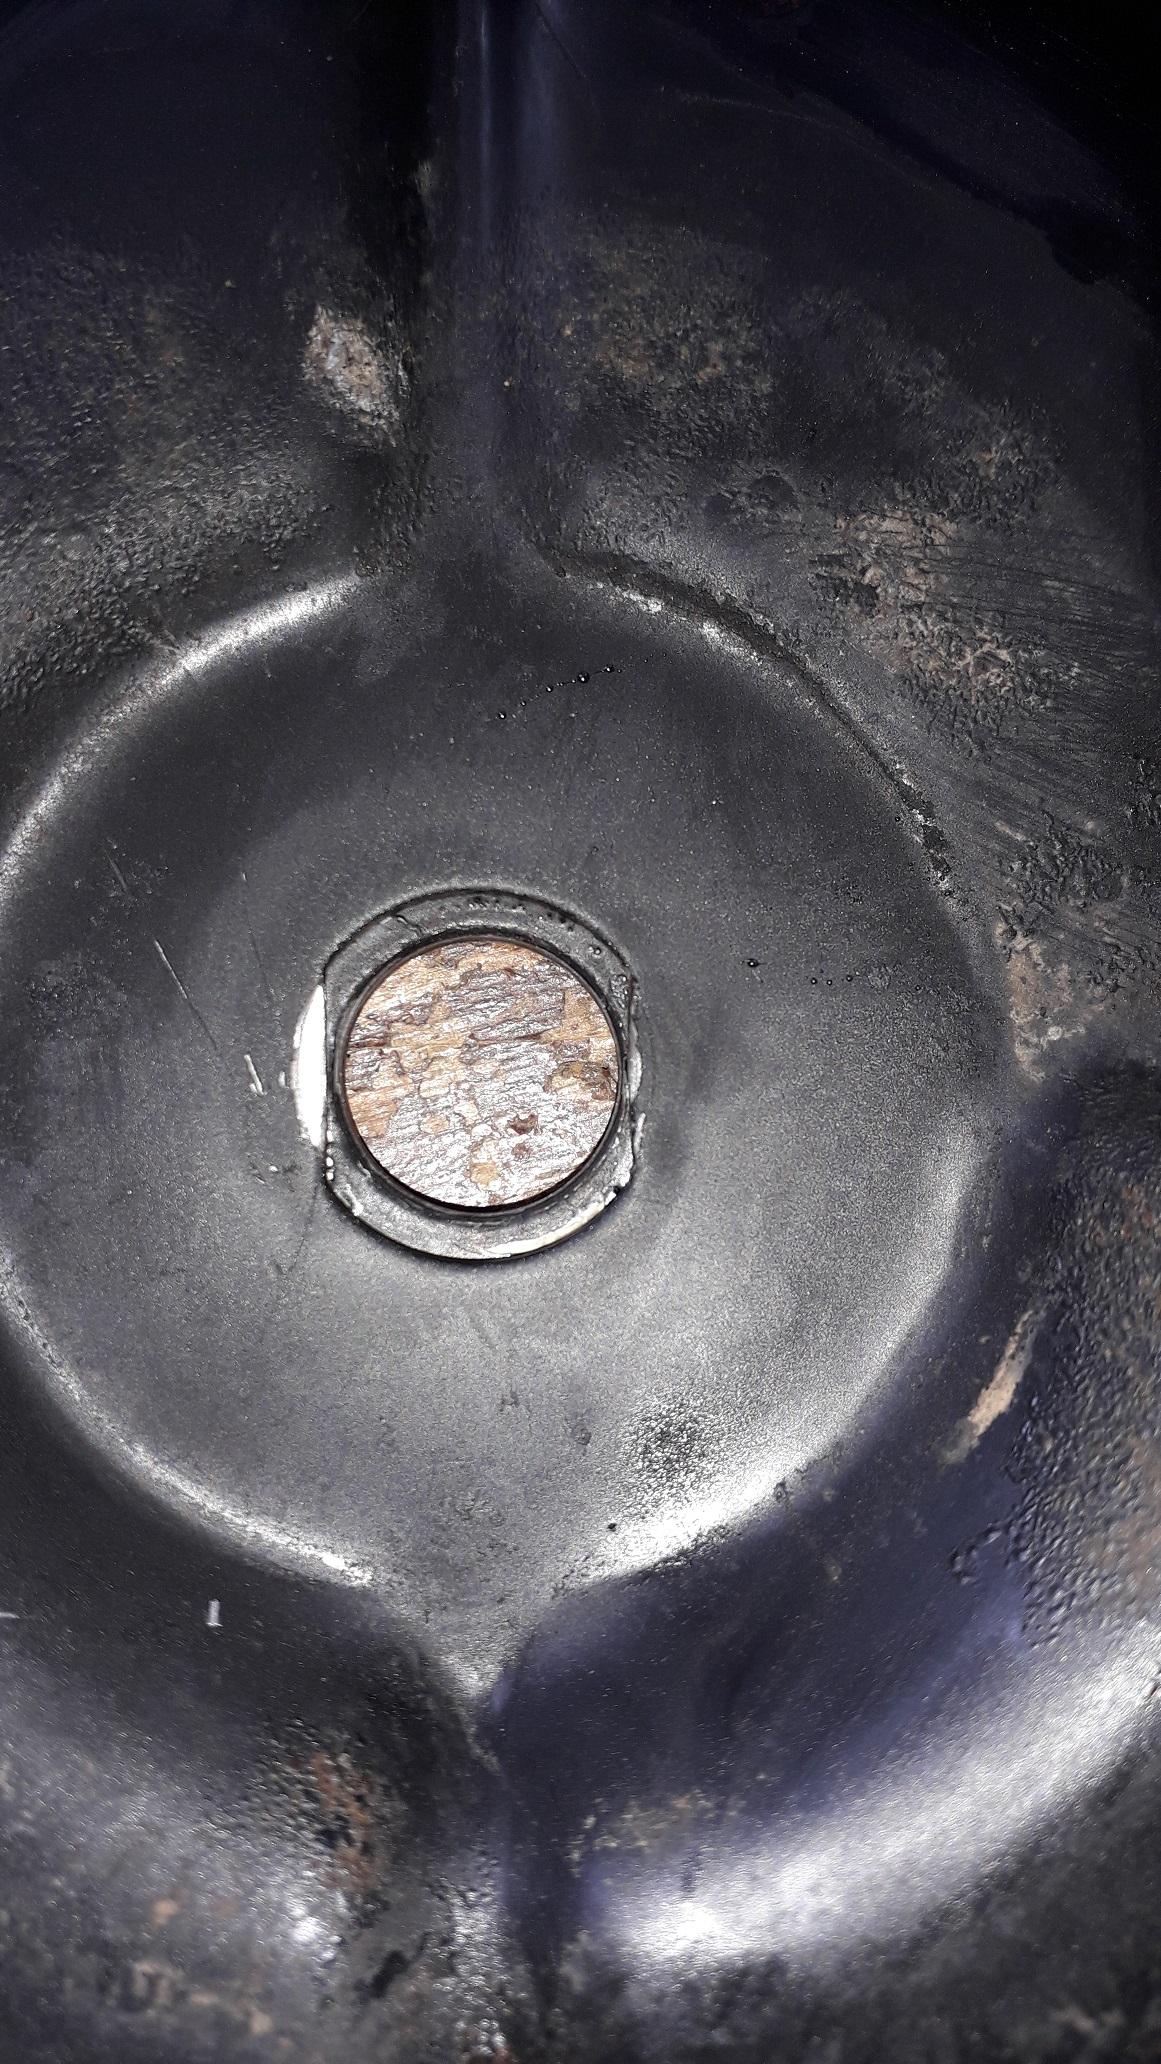
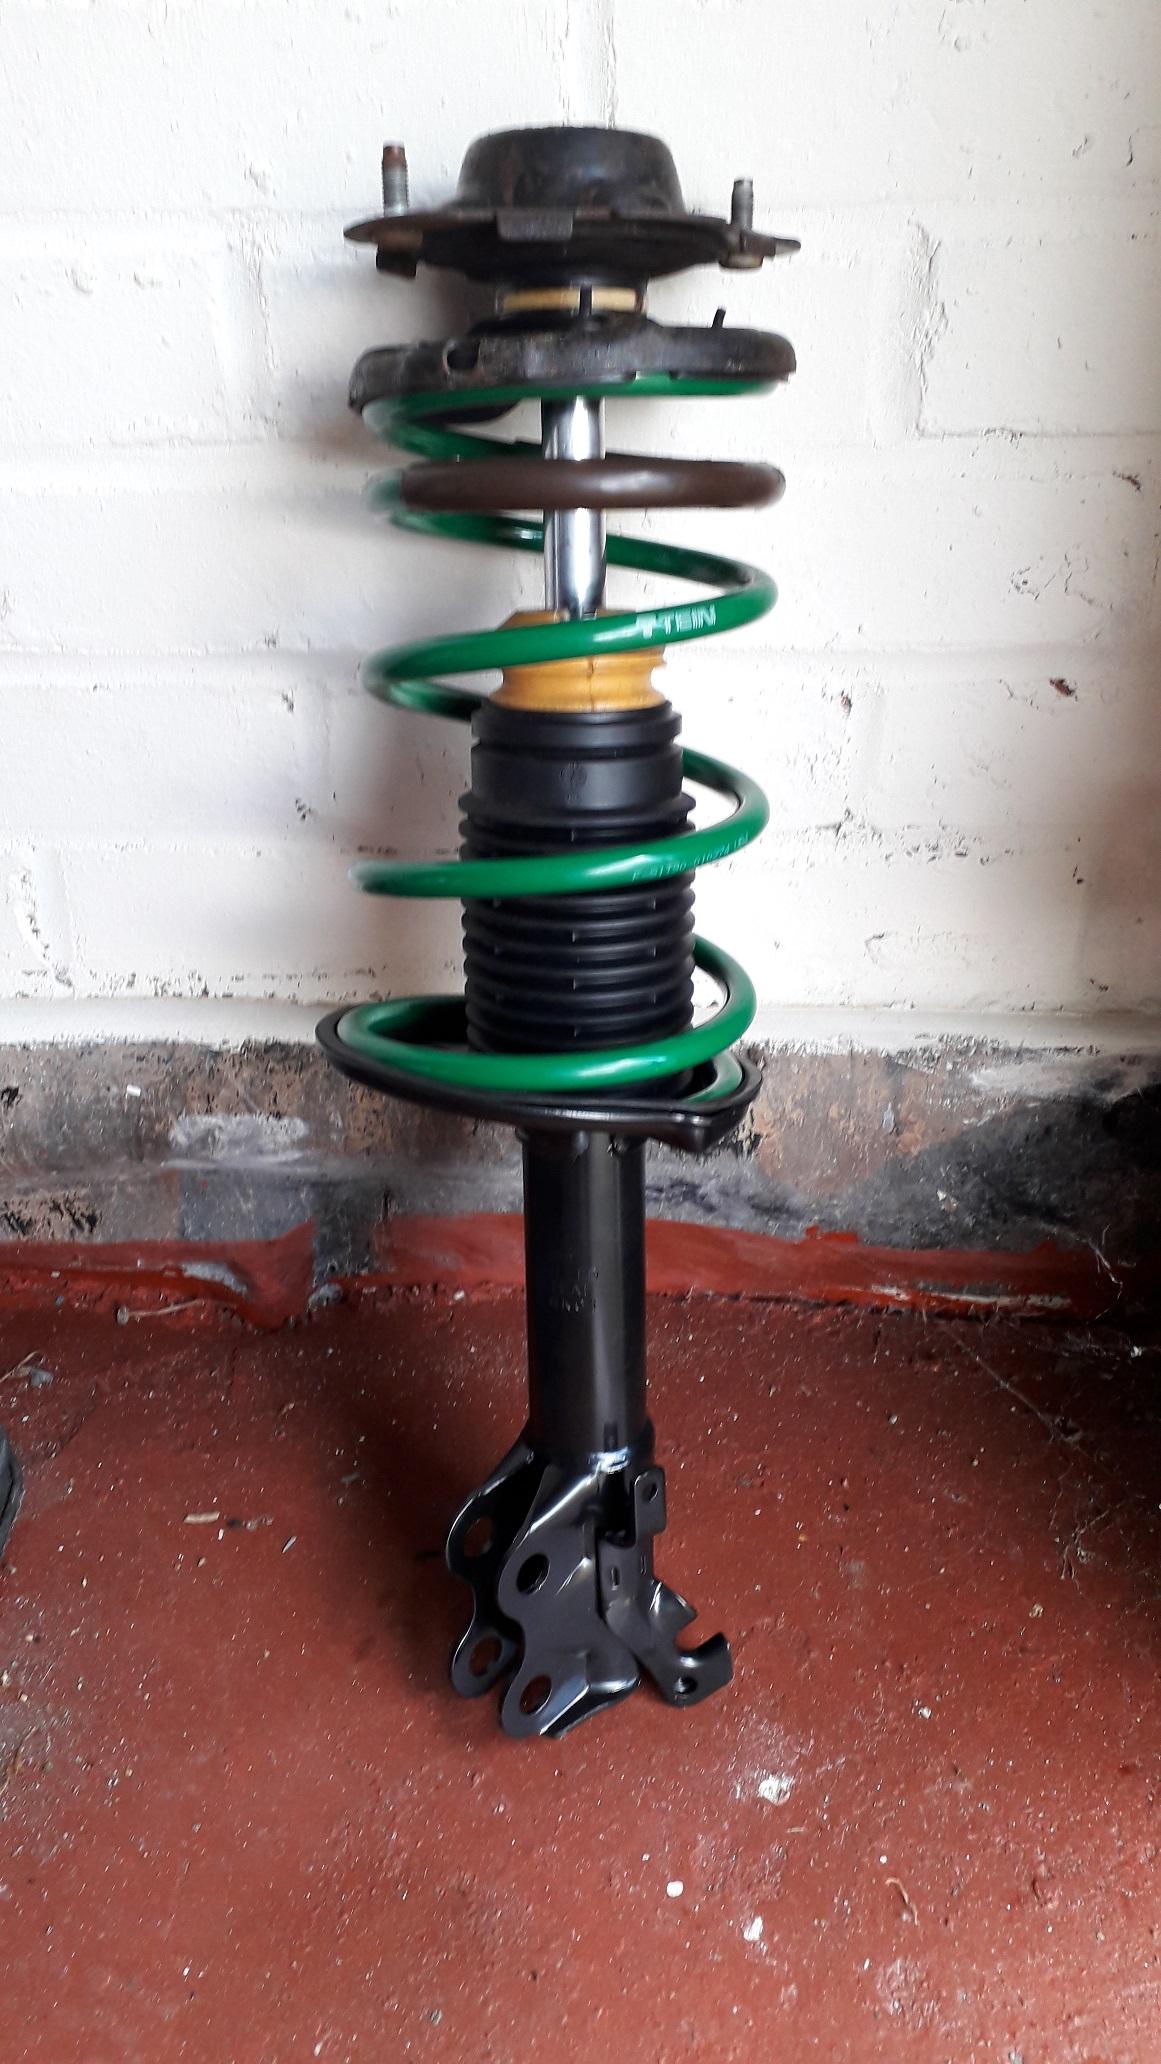
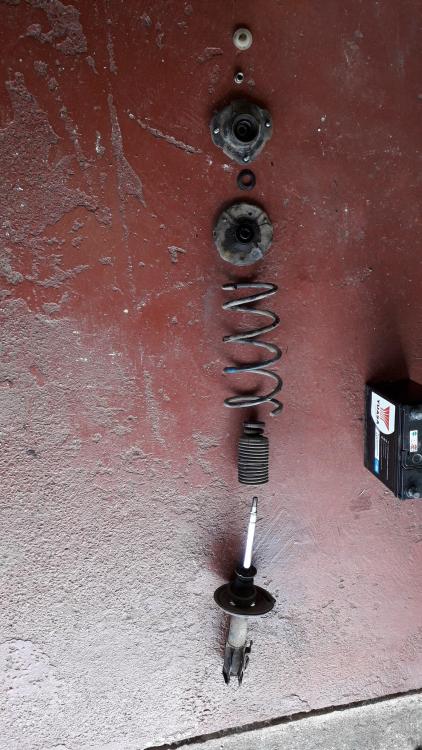
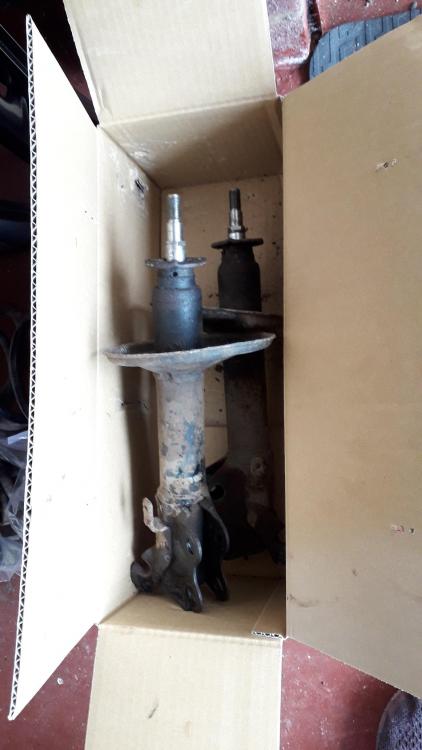
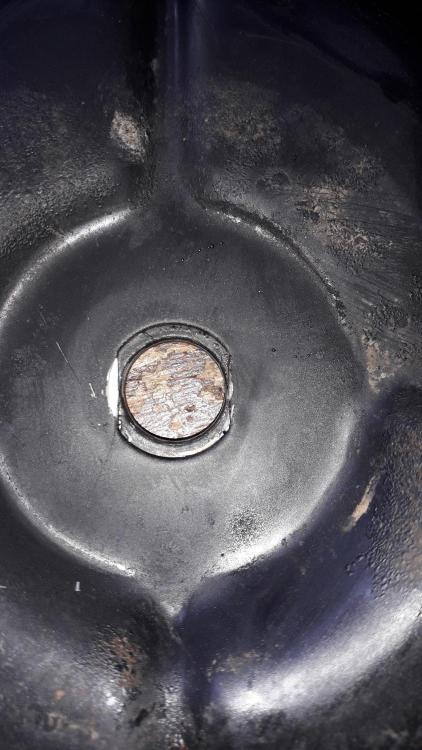
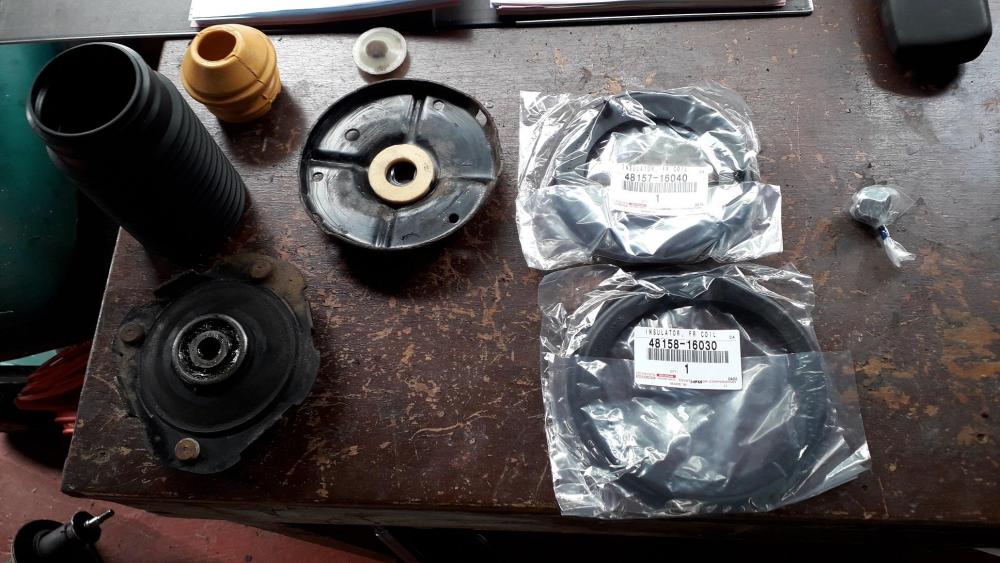
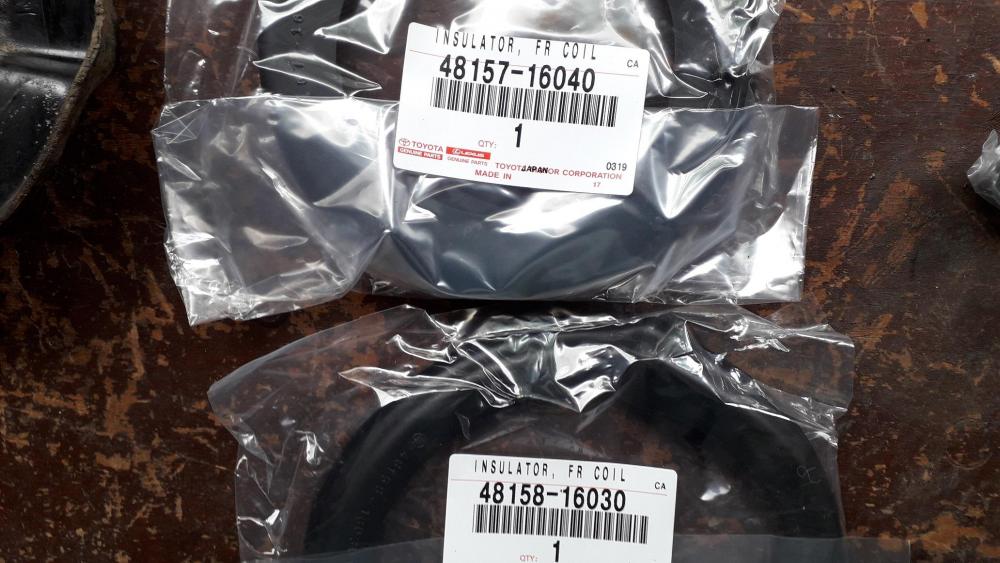
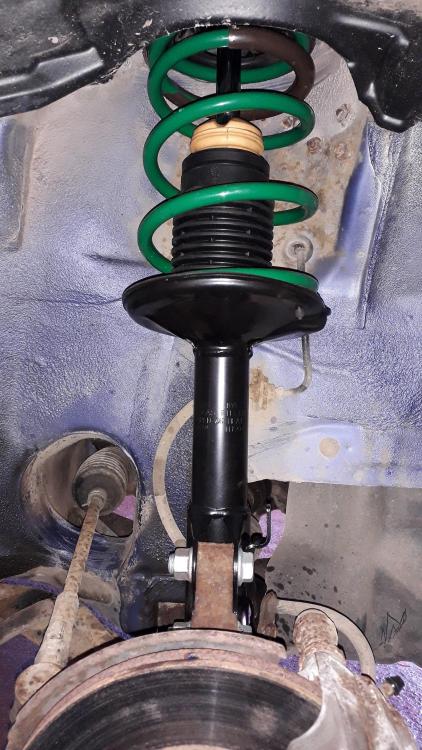
Front KYB Excel g shocks and Tein springs install. The suspension was pretty tired and both front shocks were weeping slightly, upon inspection they were branded Toyota so I believe they are most likely the original shocks. Got some new top mounts (didn't fit but more on this later), Monroe bump stops (PK054), spring pads, lower bolts and nuts and dust seals and KYB shocks (333209, 333210). Firstly I loosened the 3 x top shock mount nuts in the engine bay and then removed the bolt holding the brake line to the bottom of the shock. After letting the 2 x lower shock nuts soak for a while in WD40 I loosened and removed them with the help of 2 x large breaker bars. Removed the 3 x top mount nuts and the shock assembly was all mine. Easy Peasy. As removed, rusty leaky mess, bump stop bellows were perished, lower spring pad was shagged too. Used the spring compressors to compress the spring which took the tension off the top mount, I removed the dust cover to reveal the top shock nut which I removed. The laid out components below are: dust cover, top shock nut, top mount, sponge dust shield (to protect top mount bearing), upper spring perch (with upper spring pad fitted), spring. Old shocks were so knackered they couldn't even push out their own piston rod. Just a note, there are 2 different types of upper spring perch, the internal and external. These are the external type which wrap over the outside of the spring. There are 2 x flats on the inner hole and these line up with... the 2 x flats on the sides of the shock shaft. New and old parts prepared for assembly. Had to use the old top shock mounts as the new KYB ones specified for the vehicle on eBay don't fit. 🤬. the new mounts had a 15mm hole in the centre and the shock is only 14mm so it rattled like a dick in a bowler hat. Thankfully the old mounts were serviceable so I had to use those instead. The sponge dust shield goes on top of the spring perch (not in it as shown below). Tidied up the old components with rust treatment and painted them. So, I replaced the lower spring pad, fitted the new bump stop and bellows, compressed the new spring and fitted it, added the upper spring perch with new spring pad, new dust seal, shitty old top mount 🙄 and new nut and dust cover. Back in it went, top mount nuts attached loosely first, then bottom bolts (bought new bolts and nuts as its quite likely the old ones will be rusty and may well damage the threads upon removal.) Fully tightened the top nuts, then bottom bolts. Finally bolted the brake line back on as well. Repeated for other side. Rears next...


-
Welcome aboard! Don't forget to start a progress blog. People love reading them.
-
If the only problem is the belt being too long 4pk940 means: 4 ribbed belt 940mm in circumference. If you measure the length you need with a piece of string then you can order the correct length belt. This topic shows its harder. Is the belt splitting in half on the pulley edge? Photos of the problem will help.
-
I like a challenge but I think you may struggle unless you have all the broken pieces to re assemble back together. Looks like some pretty careless removal or they're from a crashed glanza. The cracks in the first and second picture can probably be repaired with 2 part epoxy. The broken pockets would be more difficult. They're used to attach some headlight clips for the adjusters. If you look at the thread below it shows the sort of thing your looking for, Kev 3d printed the clips himself. The first pocket should be ok with a new clip bonded in, not sure if the clip can be bonded to what you have left on the second pocket though.
-
Bargain find for £50! Nice progress.
-
Claymore's sleeper 4efe+t-t+t build (R.I.P. the Nanza)
Claymore replied to Claymore's topic in EP91 Progress Blogs
Thanks Sam, After investigating this one, just looking at the painted cam covers on eBay makes me shudder at what could be inside! -
Claymore's sleeper 4efe+t-t+t build (R.I.P. the Nanza)
Claymore replied to Claymore's topic in EP91 Progress Blogs
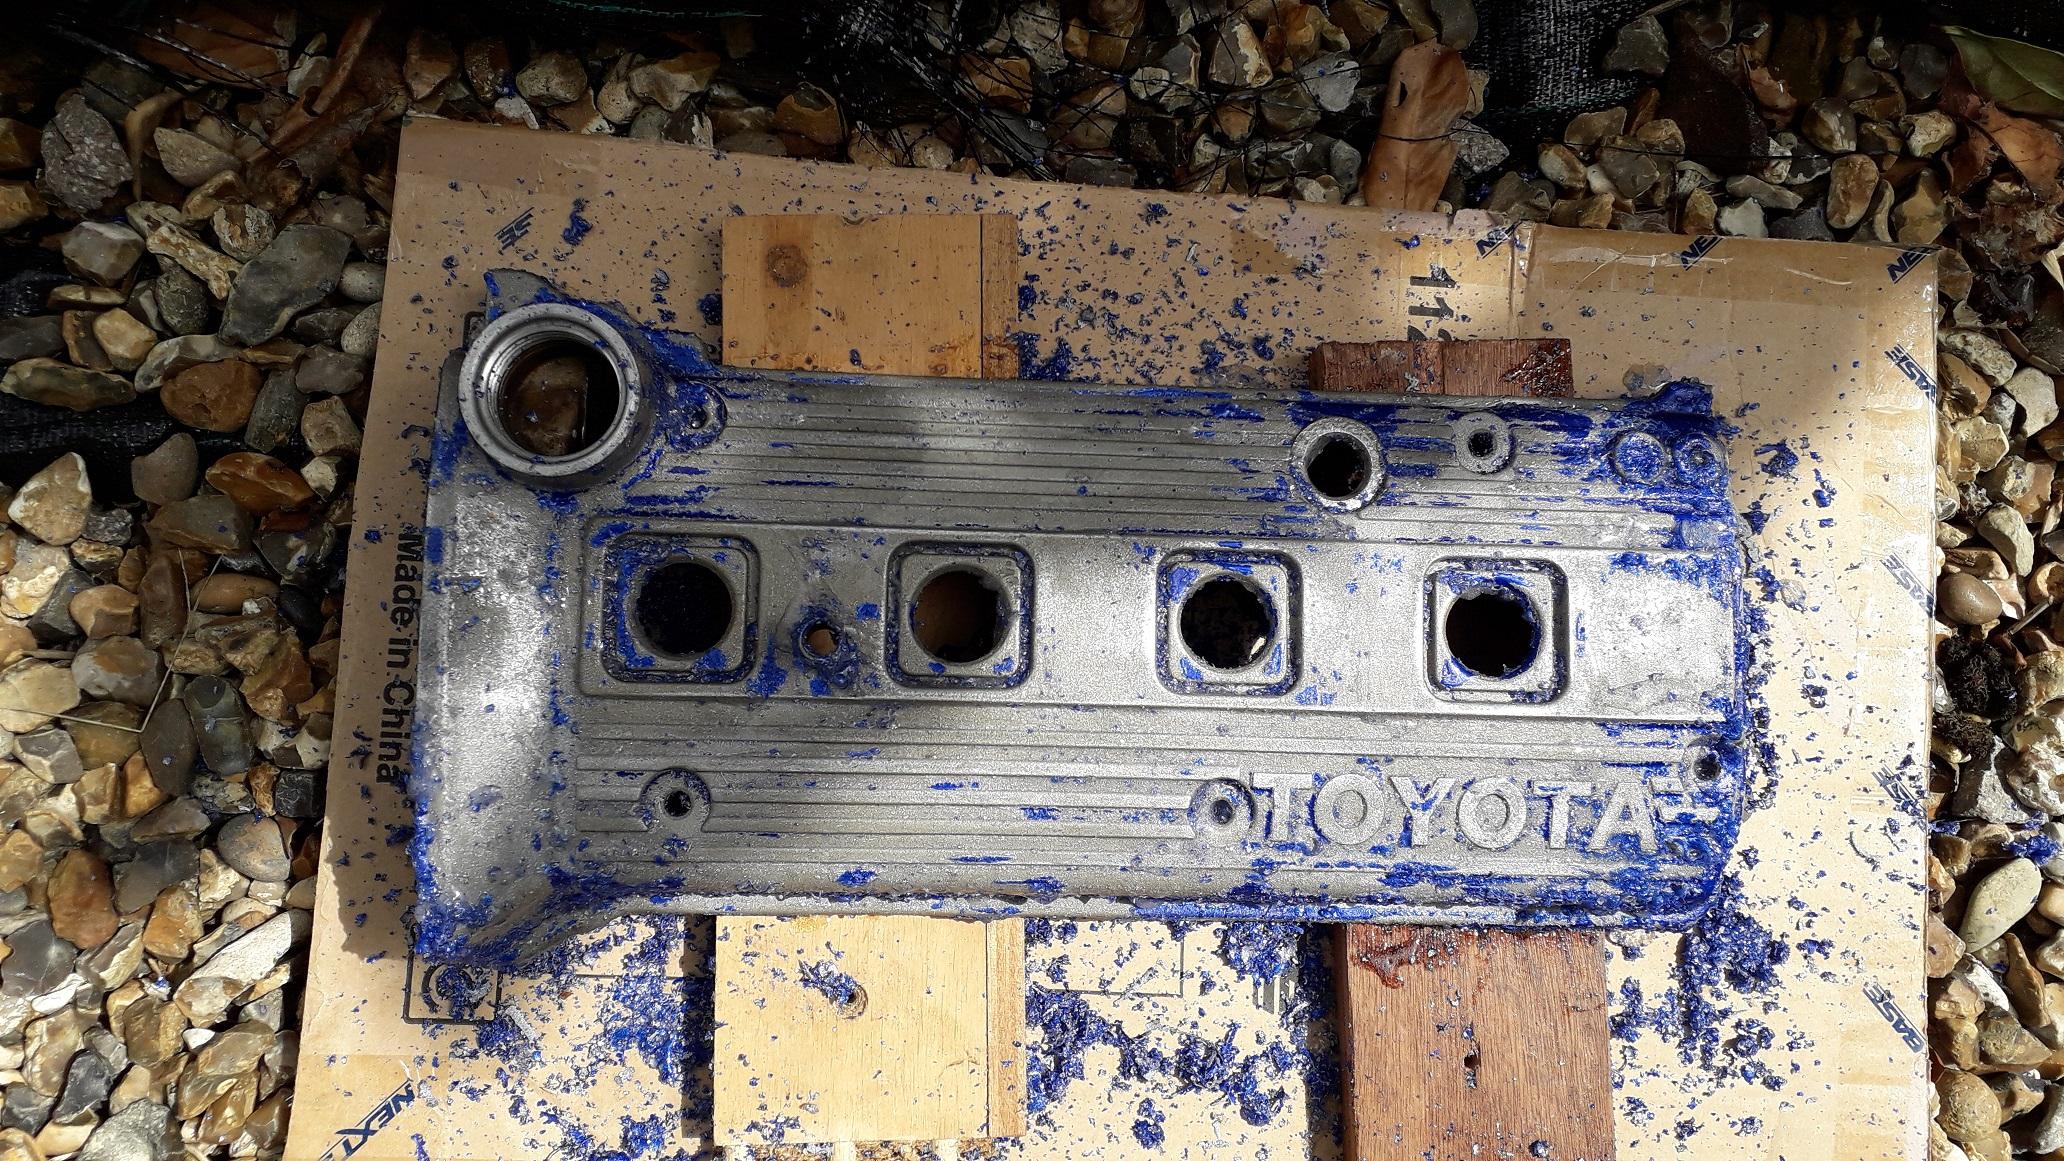
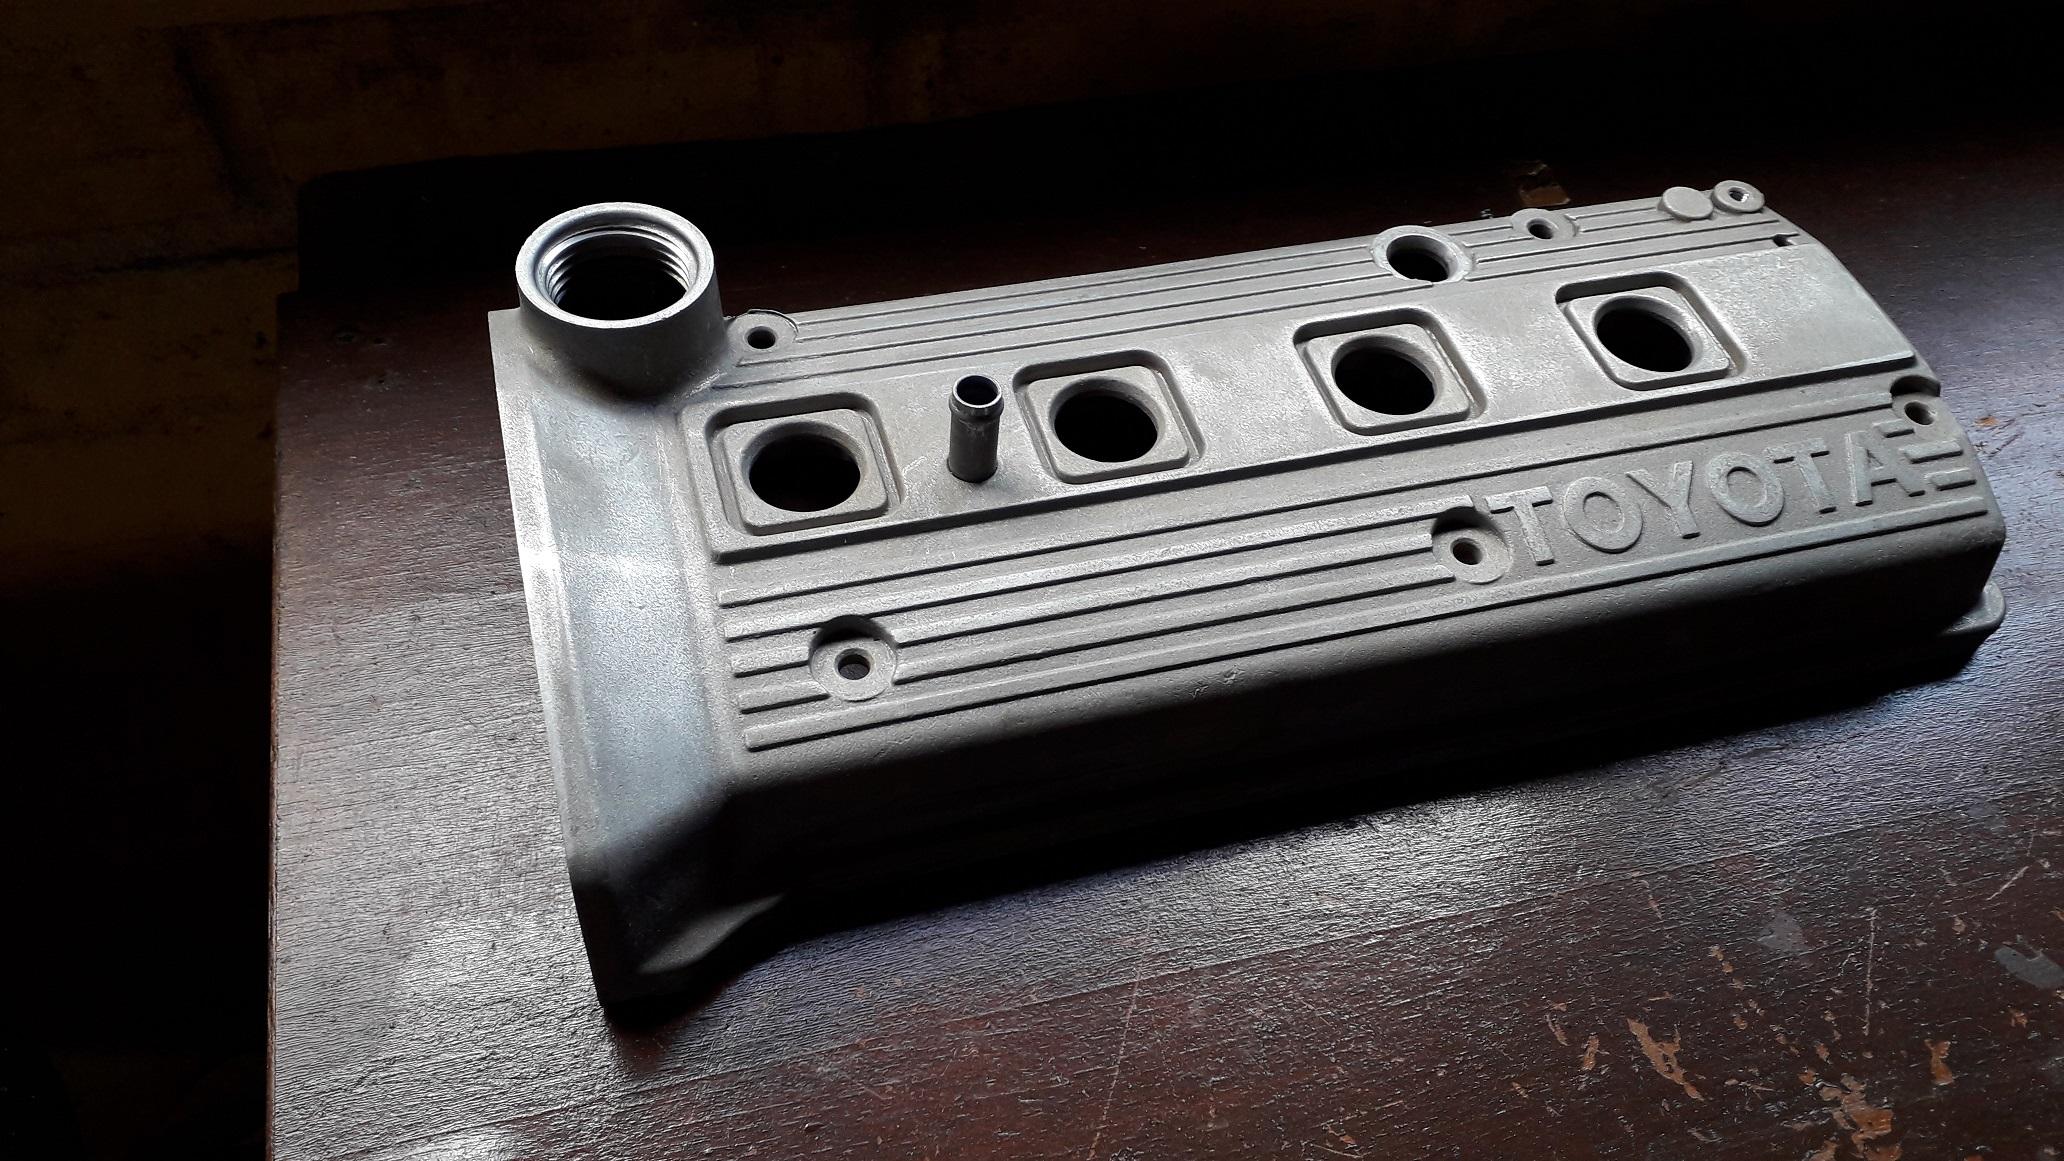
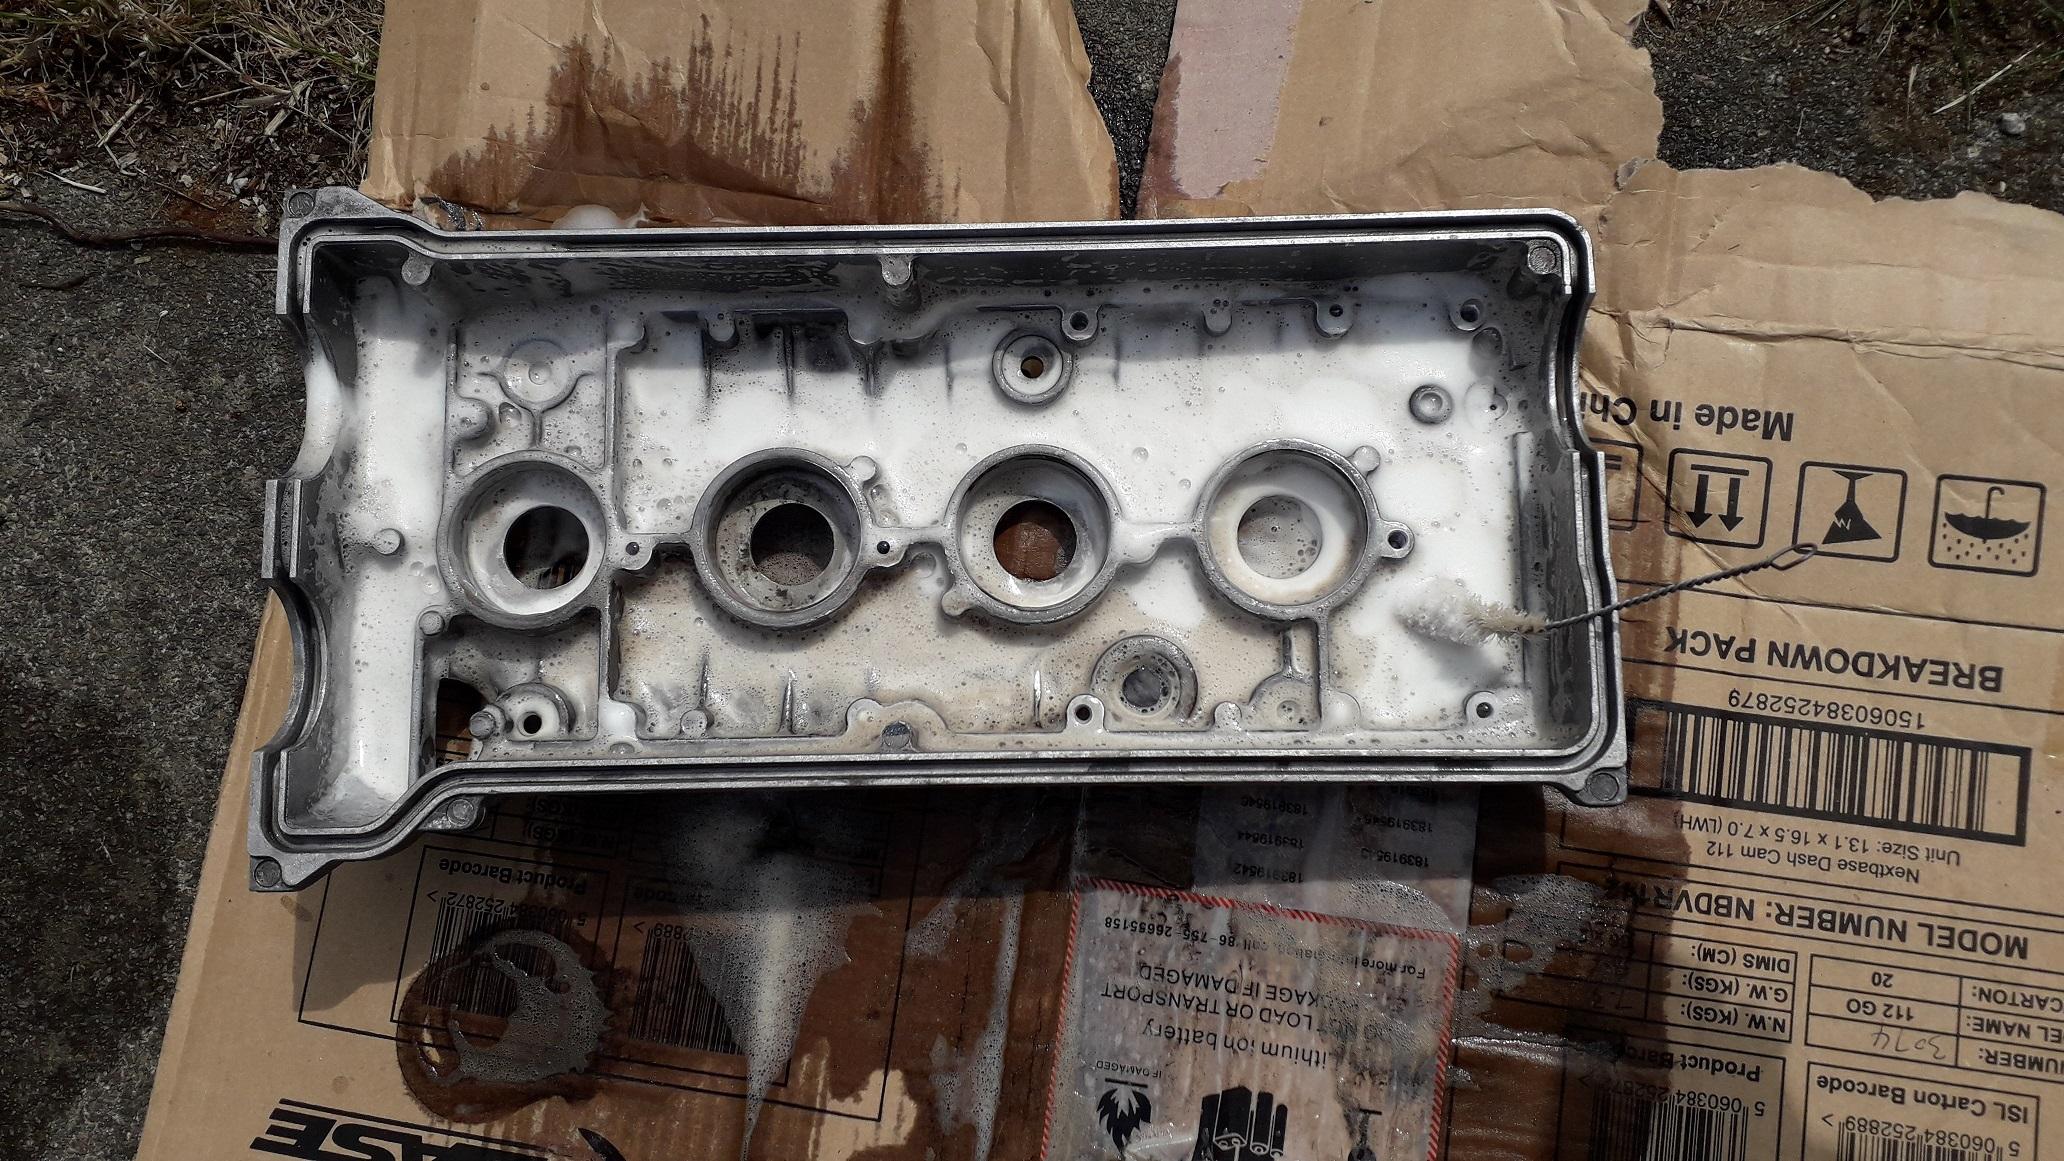
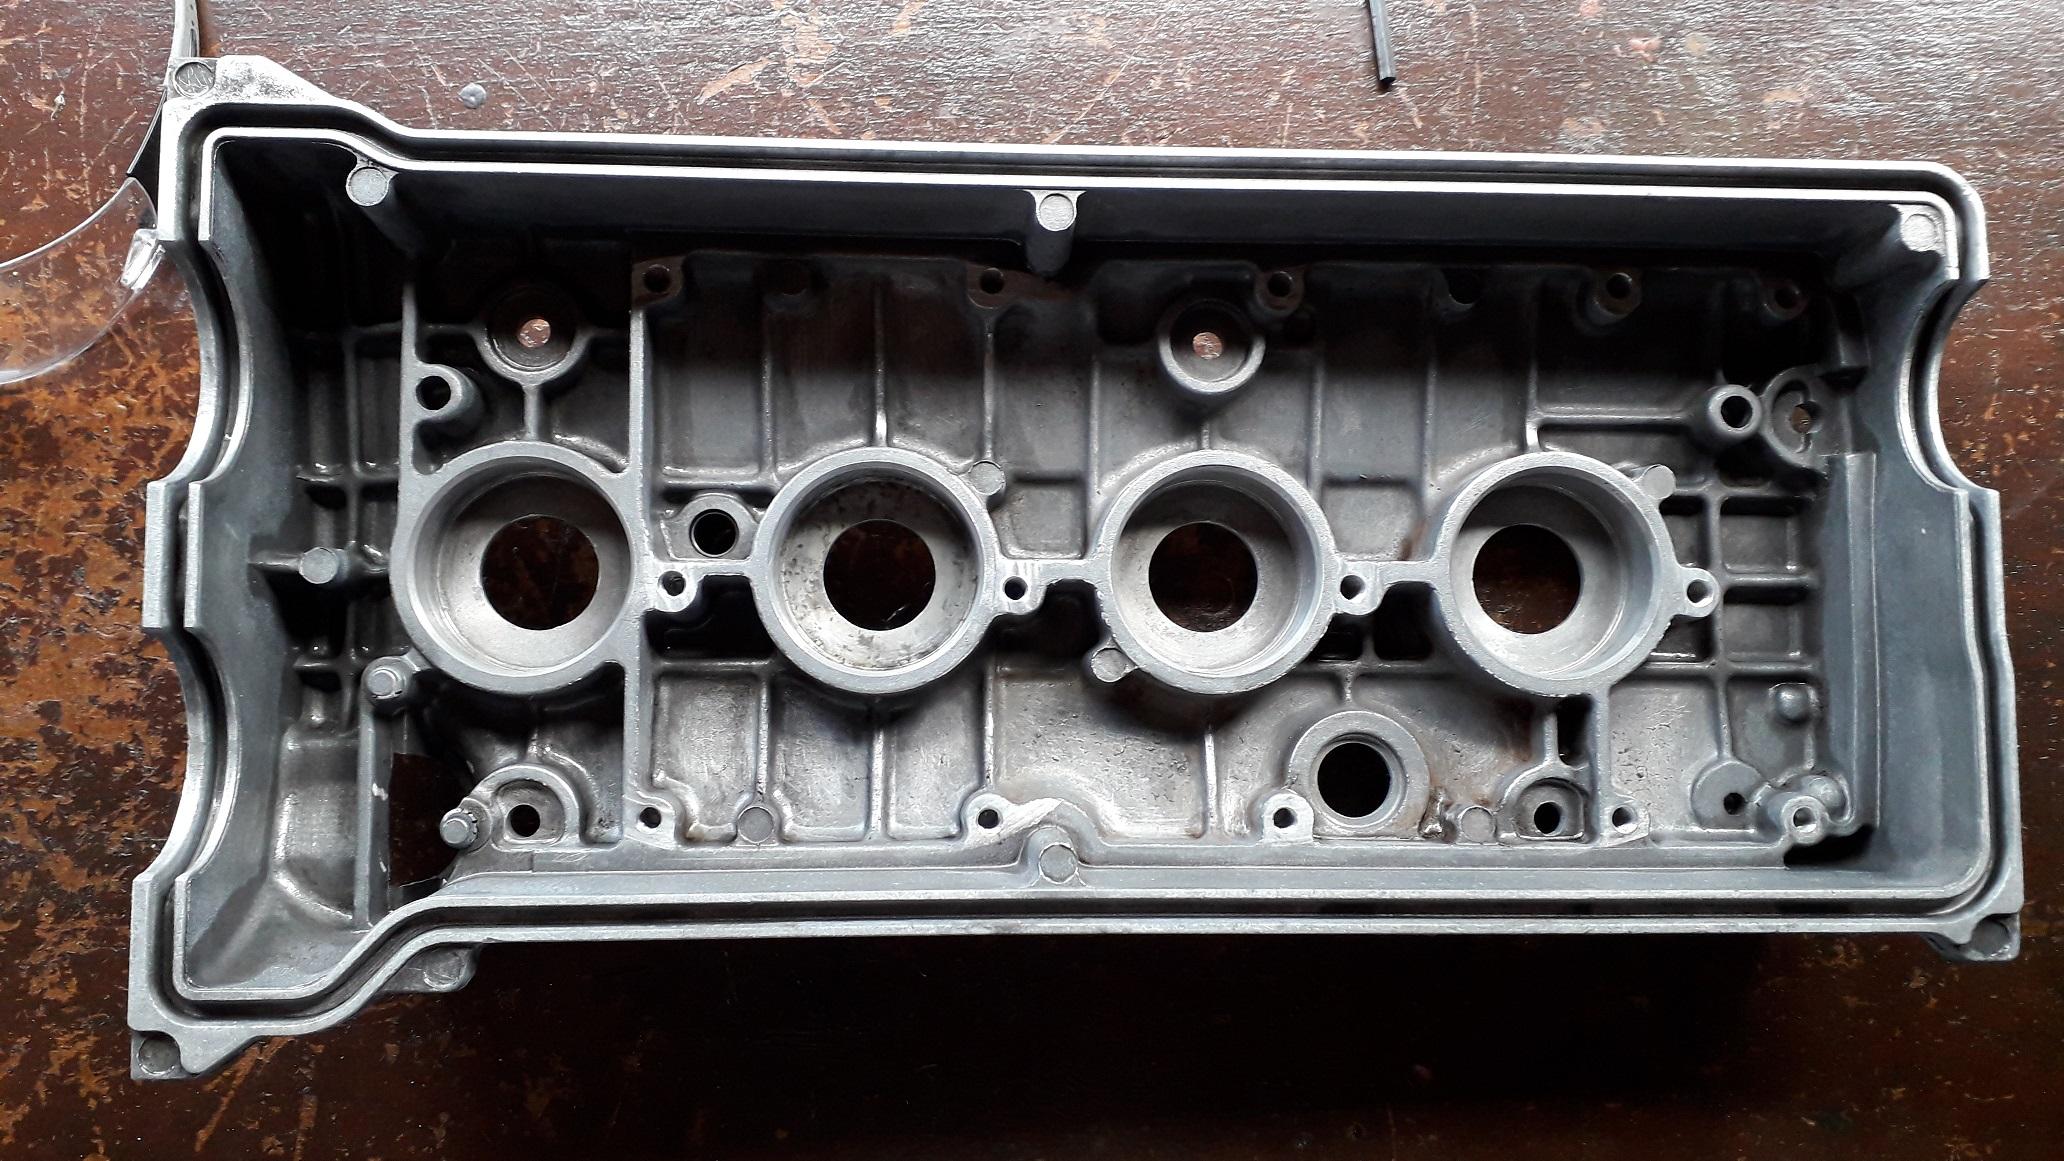
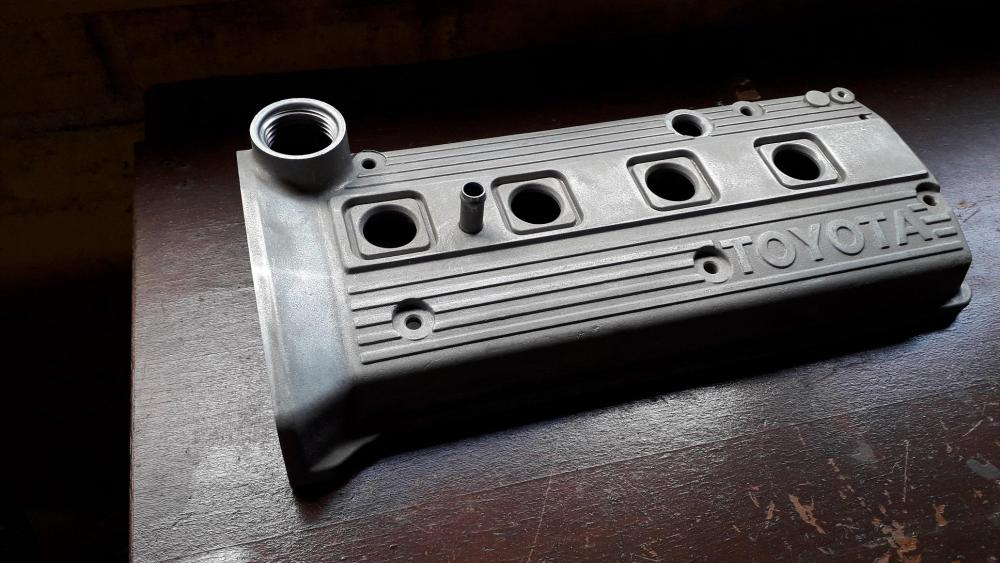
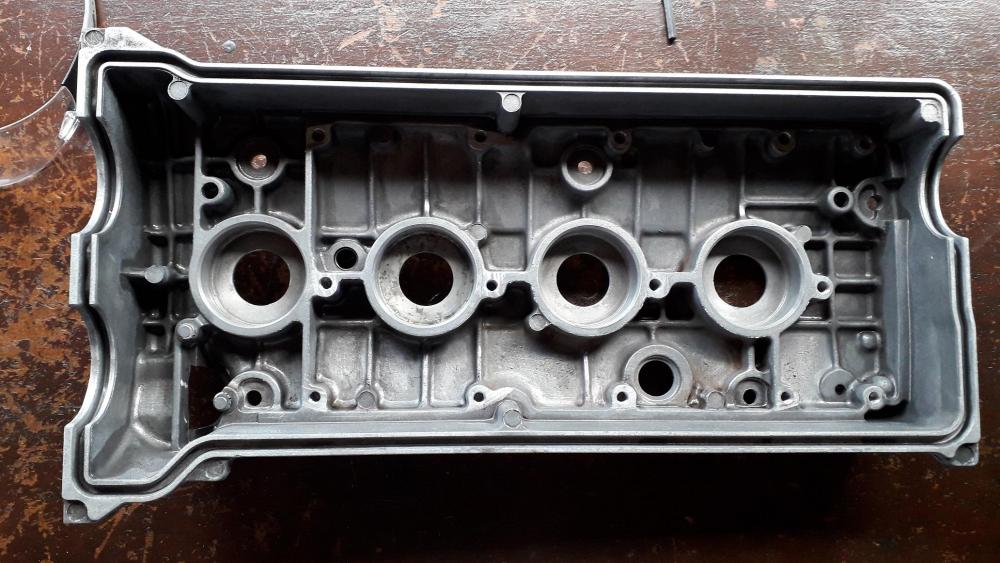
Paint stripping / internal de grease. Bought some Power Strip paint stripper (saw it on another build thread). Pretty evil stuff, two coats had turned 90% of the paint to jelly. Third coat did the rest. After scraping off some remaining flakes, I rinsed it out with water and scrubbed it with a stiff brush to remove the remains of the paint stripper and paint. Its only 3 photos but it took about 3 hours and was not pleasant working with chemicals like these. Needed to clean the varnish / oil residue off the inside. Decided to use alloy wheel cleaner this time and it worked a treat. Wire brush was used to scrub the residue while the cleaner fizzed the rest away. 3 rounds later I was happy. Cleaned out ready to re assemble. Might get the baffle plates re plated before hand so its all fresh. Took a total of 12hrs from start to this point. A labour of love but better than chucking it.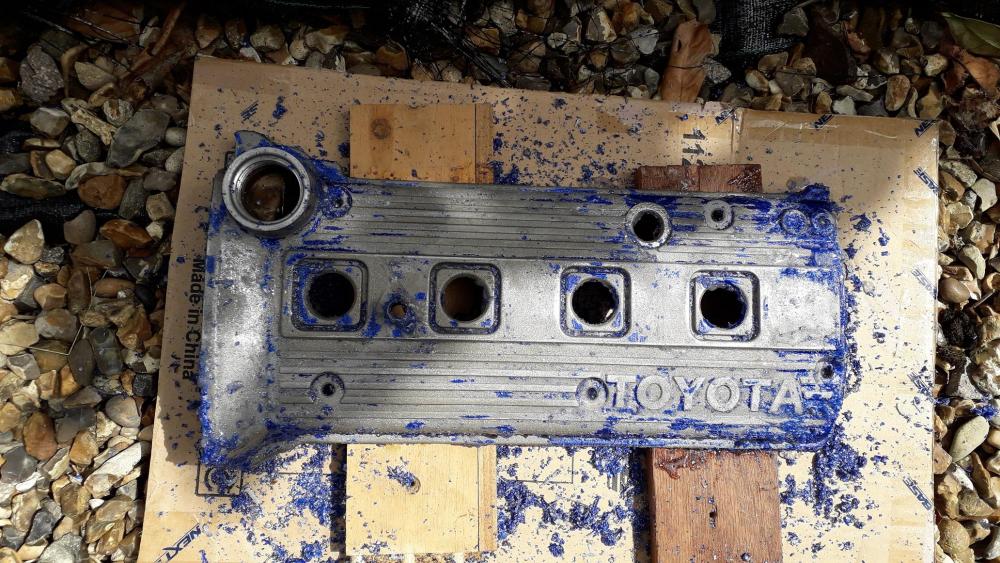


-
Claymore's sleeper 4efe+t-t+t build (R.I.P. the Nanza)
Claymore replied to Claymore's topic in EP91 Progress Blogs
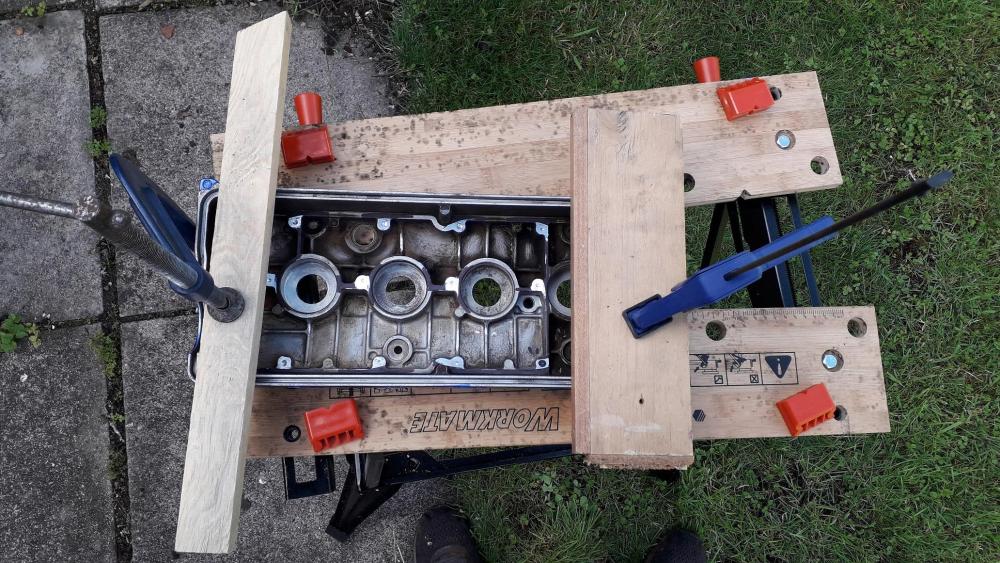
4efte cam cover re baffle. First I coloured the areas around the remains of the alu rivet posts with a sharpie (so I could see when I had removed all the post) Sanded down the posts with a sanding wheel on the grinder and had to get the last 2 in the corners with the dremmel and drum sander. Also cleaned up the rougher parts of the casting while I was at it. Decided that as my pillar drill bearings are totally boolaxed (leading to a nasty "wandering chuck"), I'd stand more of a chance using a cordless hand drill, so I clamped the cover to my workmate. I then carefully drilled 3mm pilot holes in the required locations. Next I had to open the holes out to 5mm (drill size to tap M6). First hole, broke my 5mm bit off.🤬 Note to self, don't buy cheap eBay drill bits, HSS means high speed (not slow speed because your scared of punting a hole right through) and there's always time for lubricant. Thankfully the bit came out by hand, found a spare 5mm bit and the rest of the holes were no problem lubed up at speed. M6 taper tap with grease (only another 12 holes to go) followed by modified plug tap (ground down tip to make into bottoming tap) to send the threads to bottom of the blind hole. All done, ready for paint stripping.


-
Looking to do some power mods to an na ep91
Claymore replied to Matt's topic in Intake, Turbo & Exhaust
Hi, Most people use a large washers on both sides of the throttle cable bracket to clamp the cable to it (m 8 x 30mm washers, I got mine from Wilko for about £2) If your going to spend a few hours changing the manifold it makes sense to use new gaskets on both ends, better than having to do it all over again if they don't seal or finding out they're knackered and you can't put it back together if its your daily! You will also need a longer vac hose to the MAP sensor on the firewall and a longer brake booster hose (make sure you get the correct type of hose). On the corolla the manifold has 2 x metal braces, one to the head and one to the block. If you didn't get these I would consider making at least one to go to the head to prevent the manifold fracturing over time. Many people run without them but Toyota added them for a reason. -
According to the parts finder I use the original part number was 16400-11360 or 1640011360 Its been substituted with radiator part number: 16400-1B030 or sometimes listed as 164001B030. It fits more than one Toyota Model. Might be worth checking if there is a part number on the current rad you have. I have checked other parts finder websites and they don't list the new part number, only the old number 😕 As always I accept no responsibility if you choose to follow this advice! Make sure you check the part number matches in the sale advert as some listings on ebay were not the same O.E. Toyota reference.

-
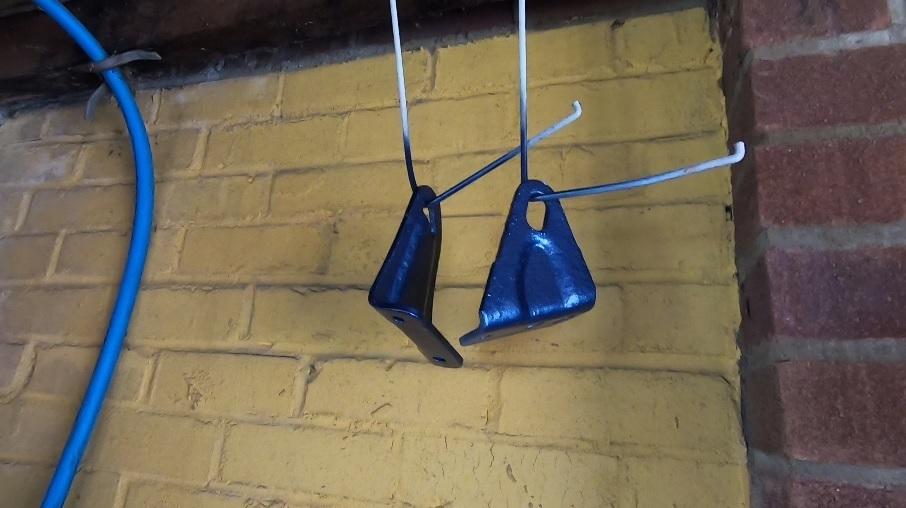
I think maybe it is for a Tow bar that was fitted and has now been removed. The bracket doesn't look very "Toyota" to me. You should also have two metal towing eye brackets attached to the rails under the car. These are fixed to the nuts in the rails not that loose bracket nuts. Like these:
-
Claymore's sleeper 4efe+t-t+t build (R.I.P. the Nanza)
Claymore replied to Claymore's topic in EP91 Progress Blogs
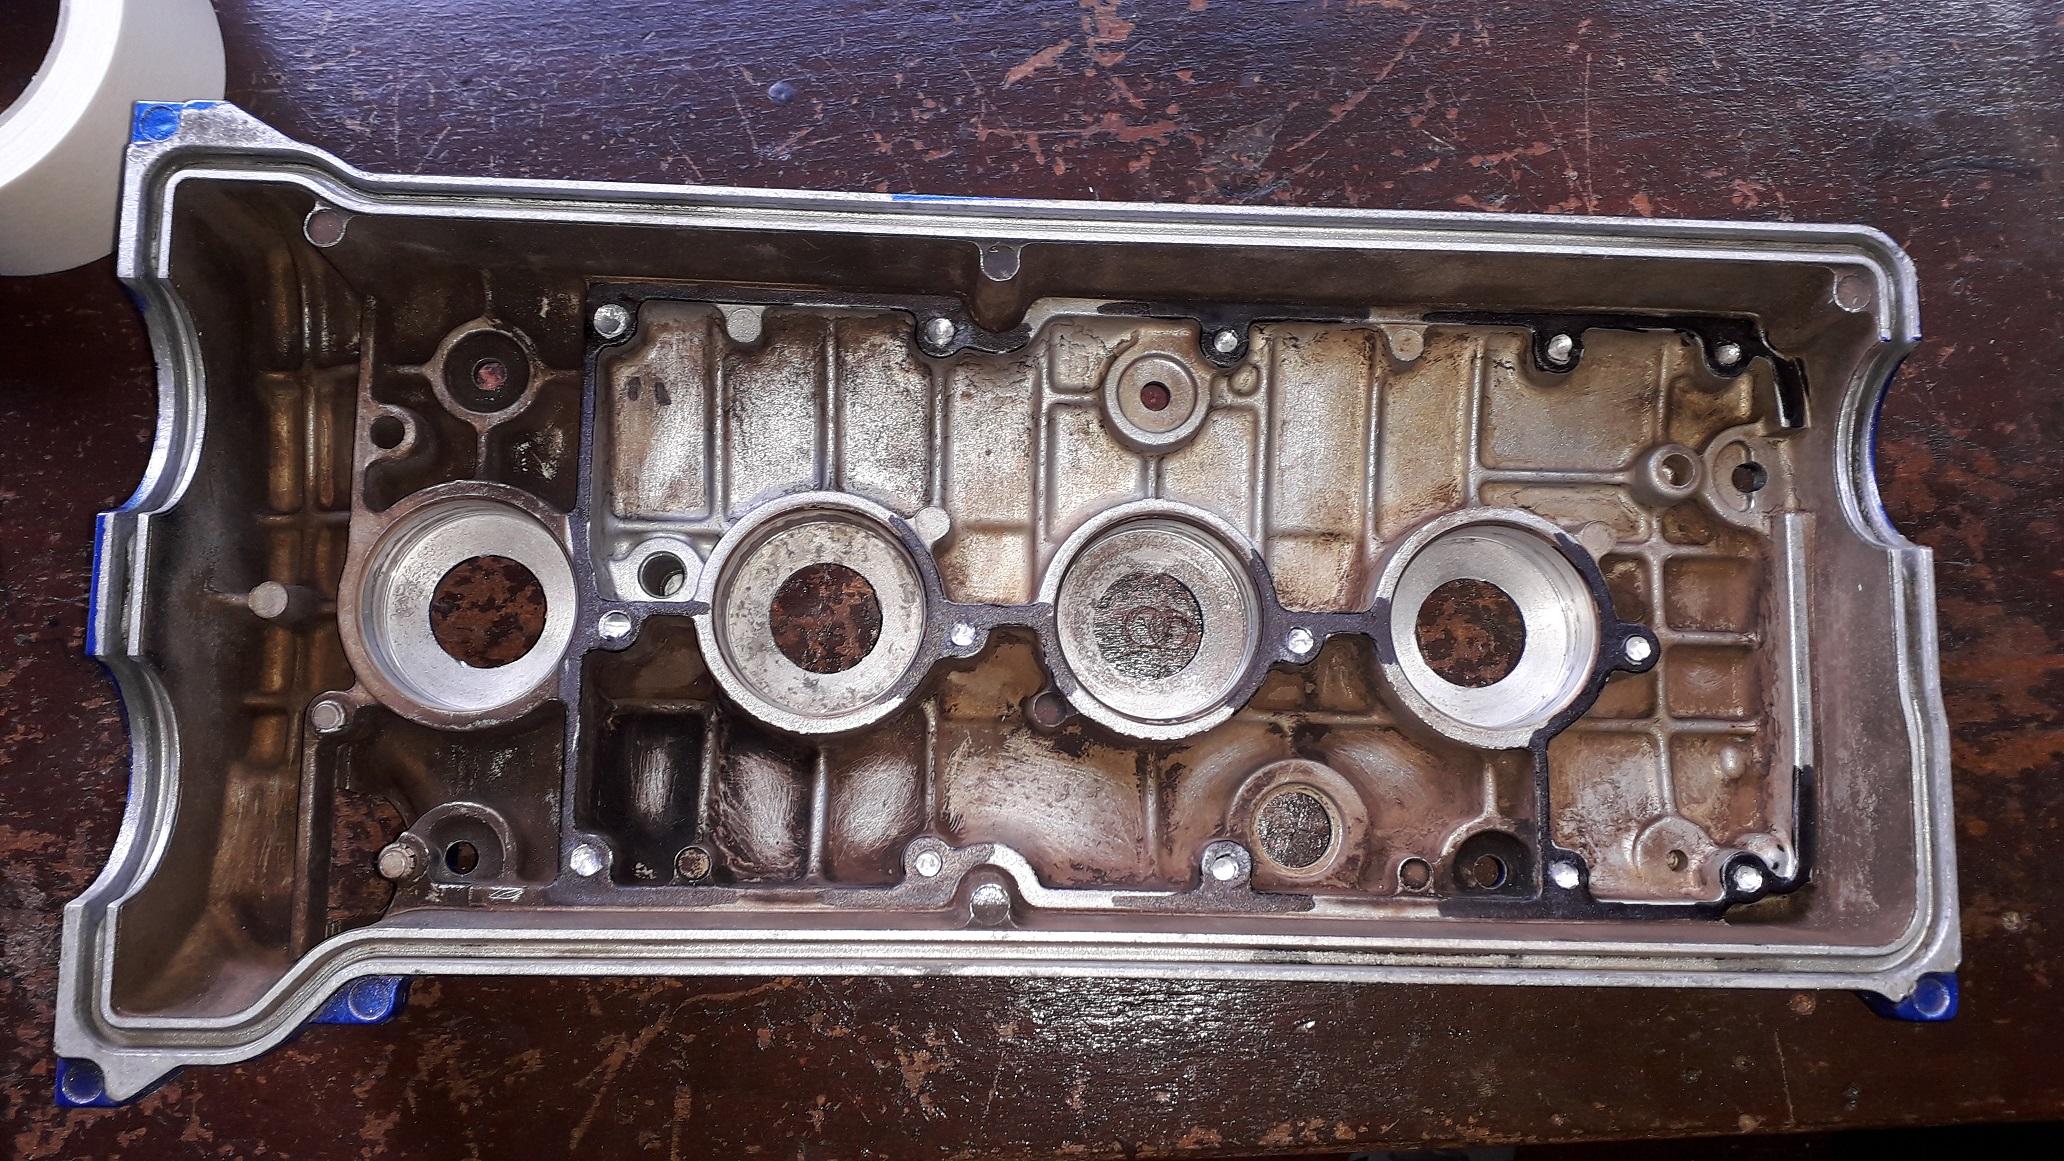
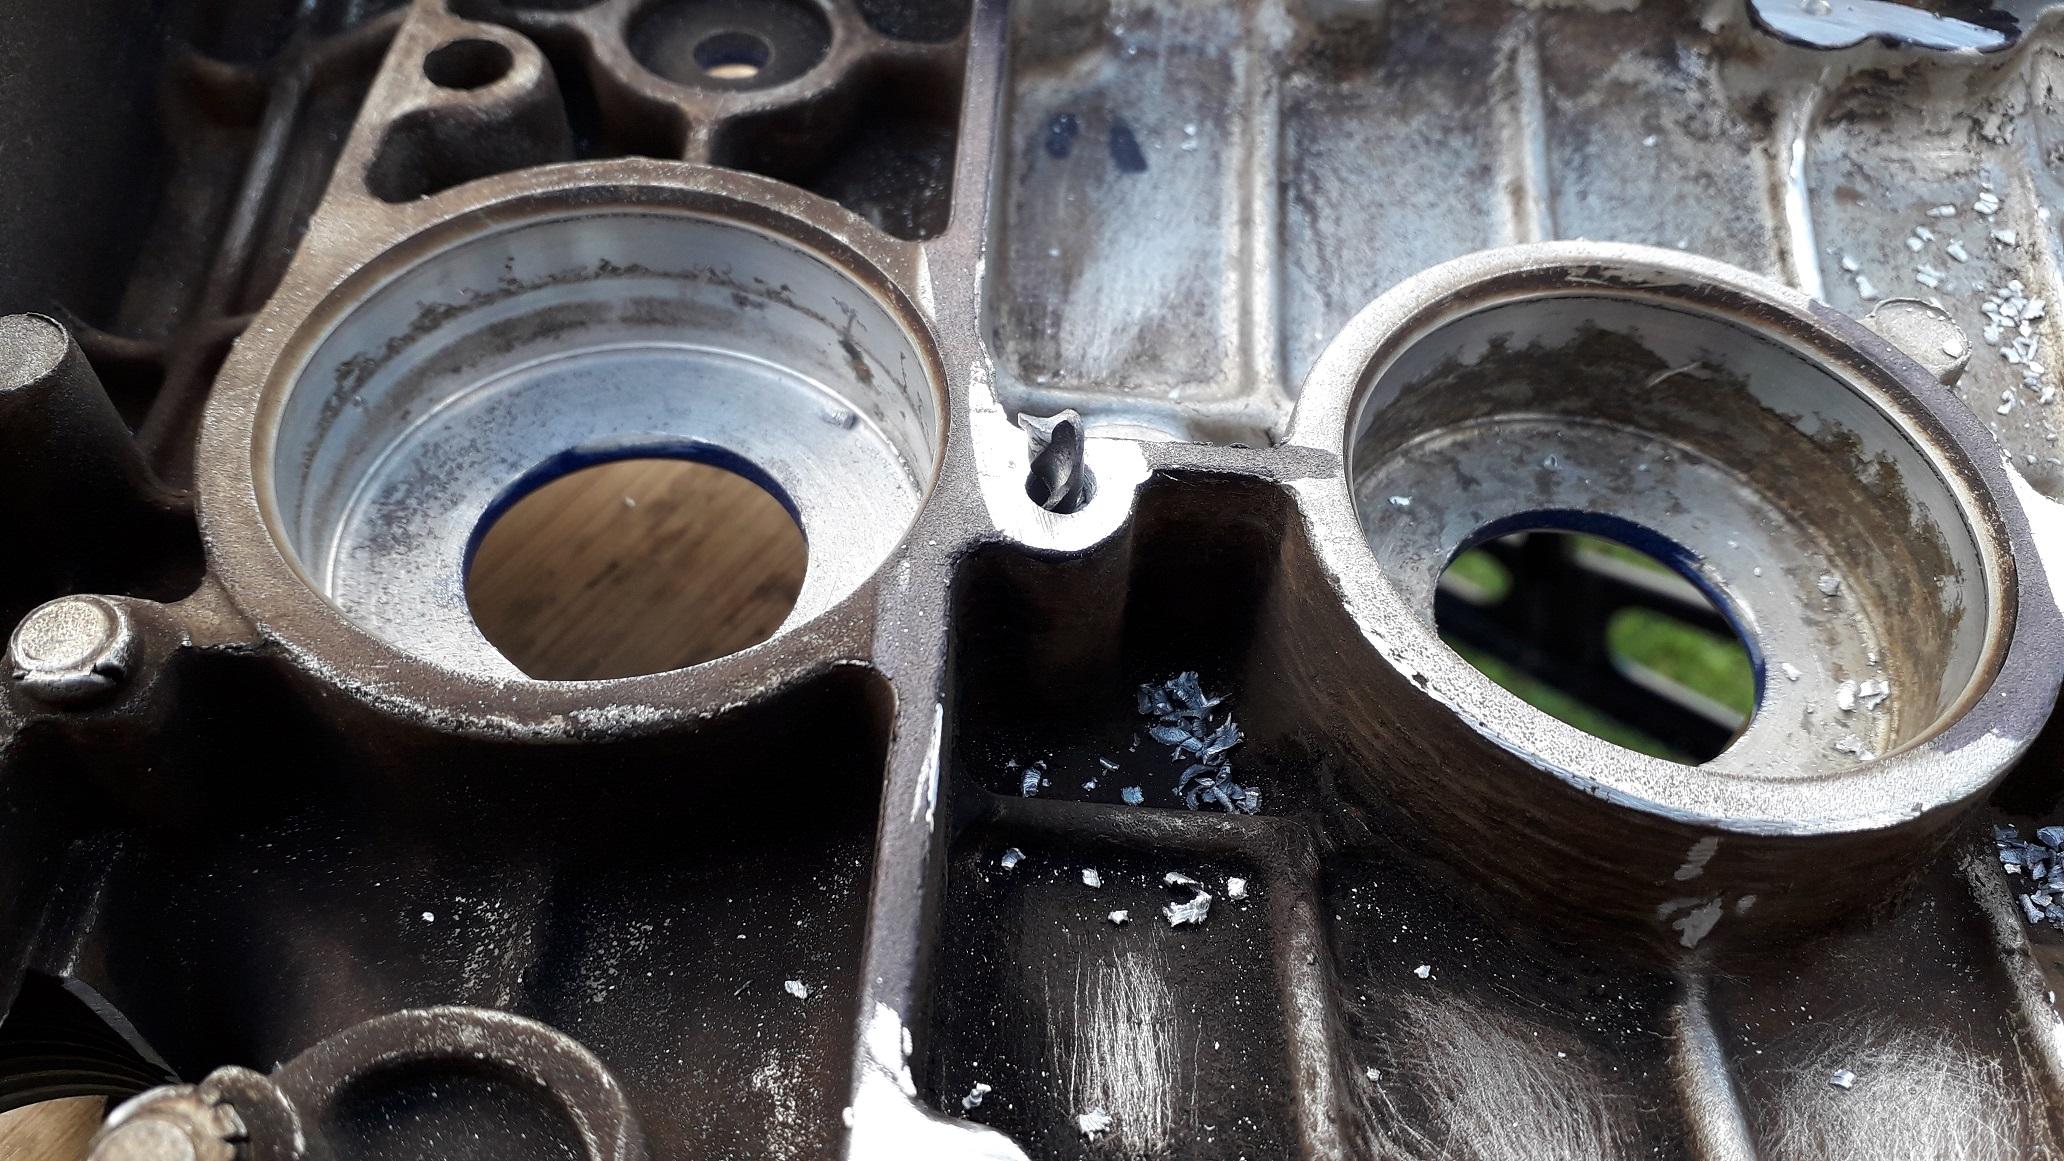
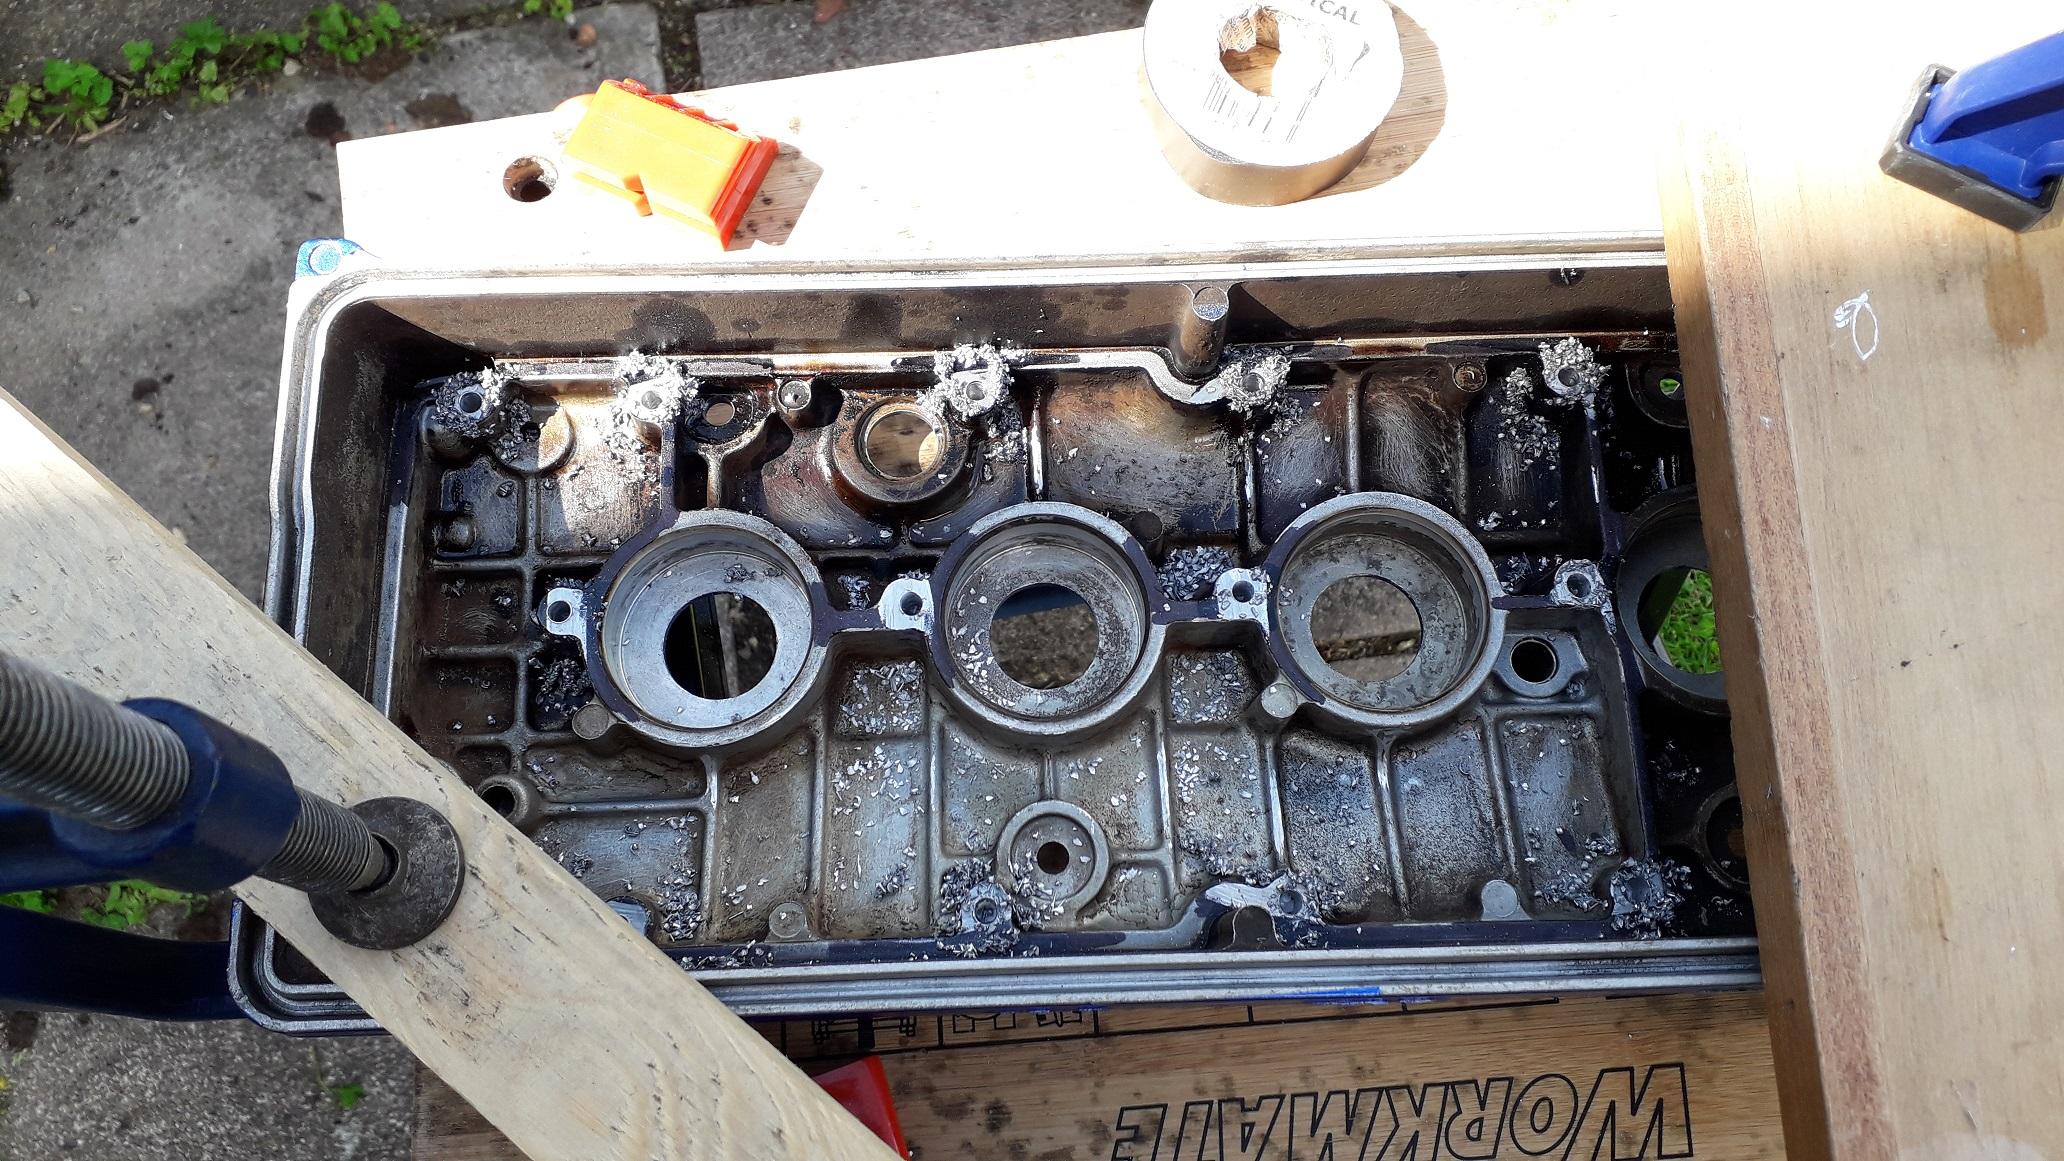
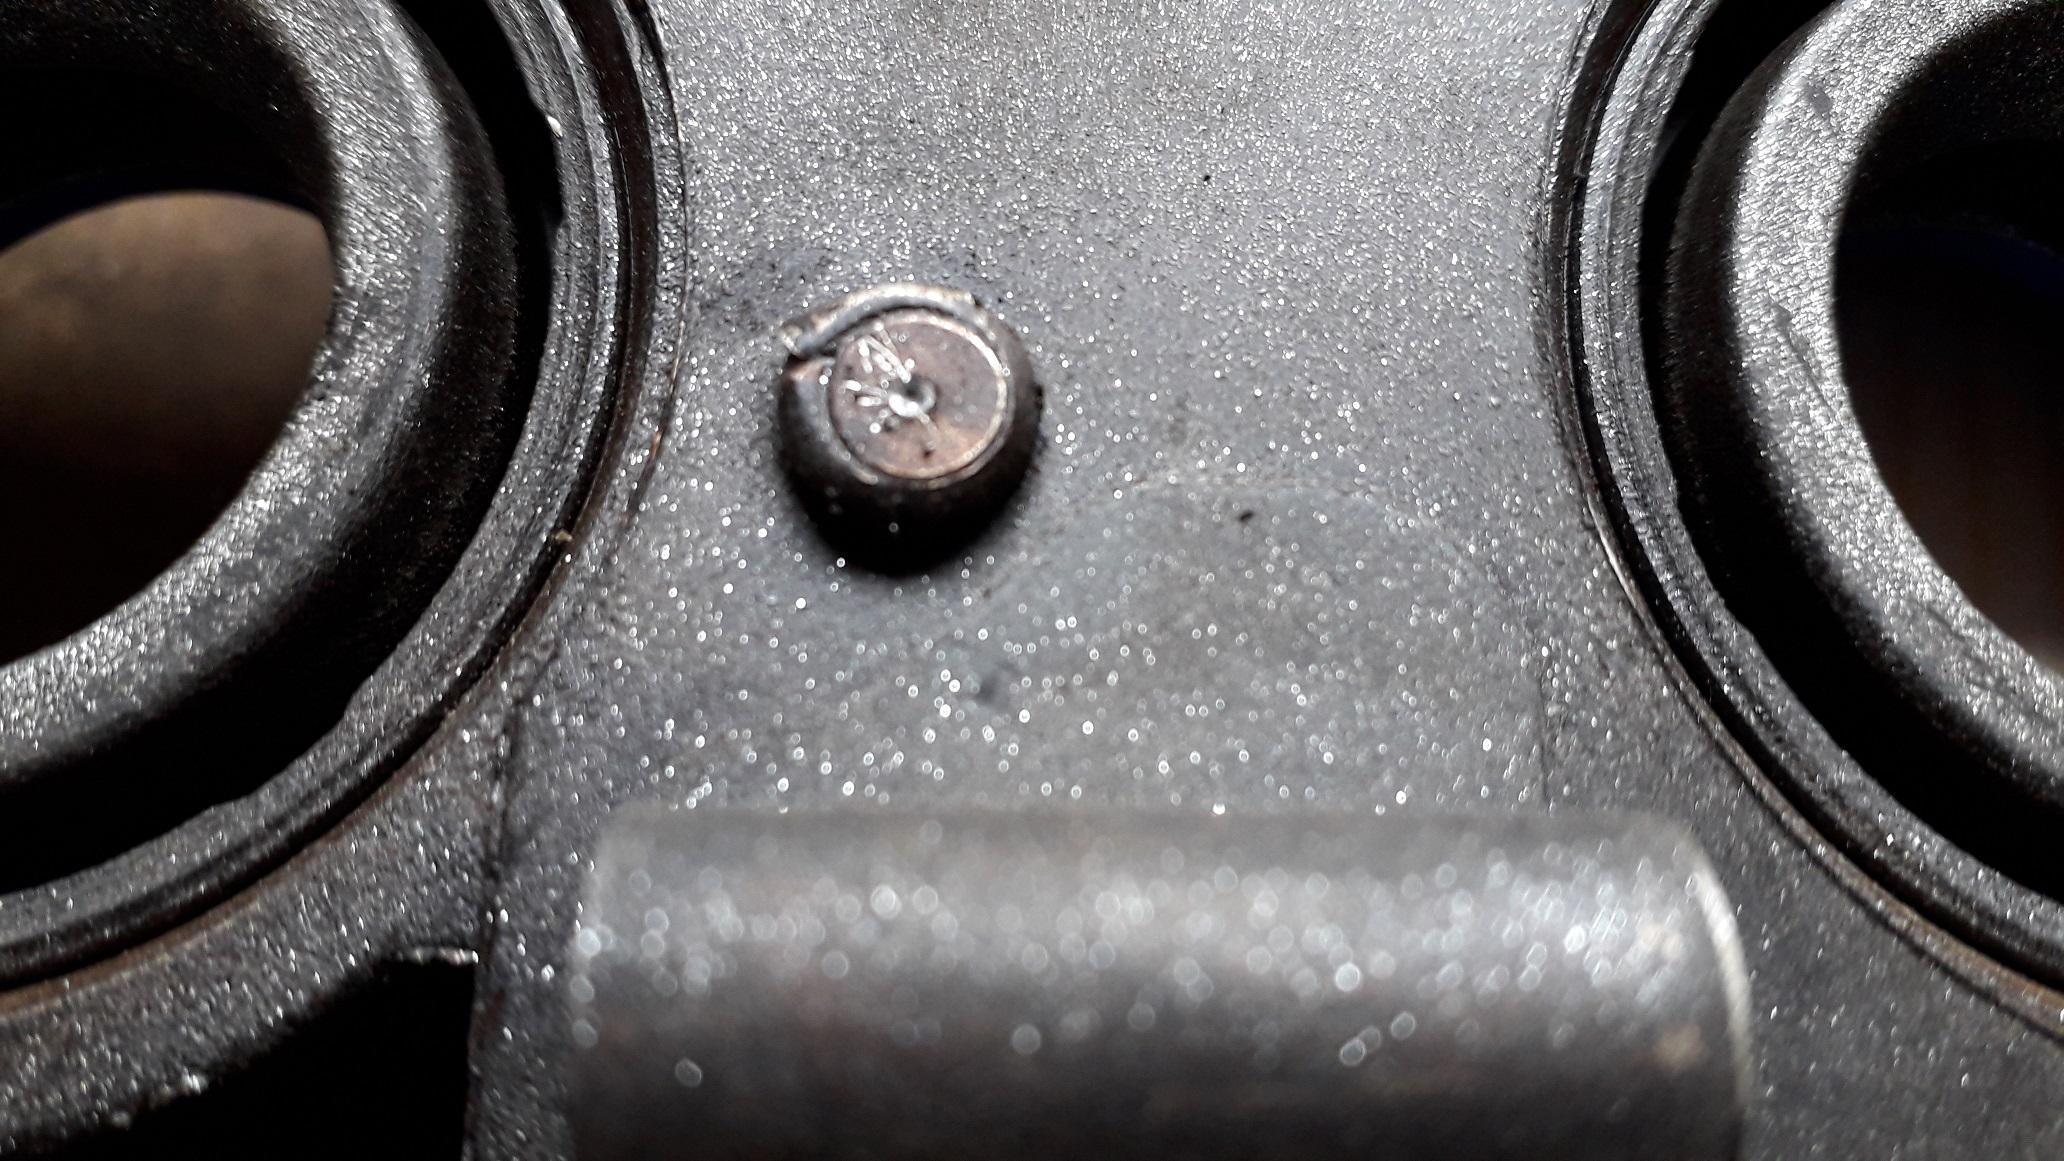
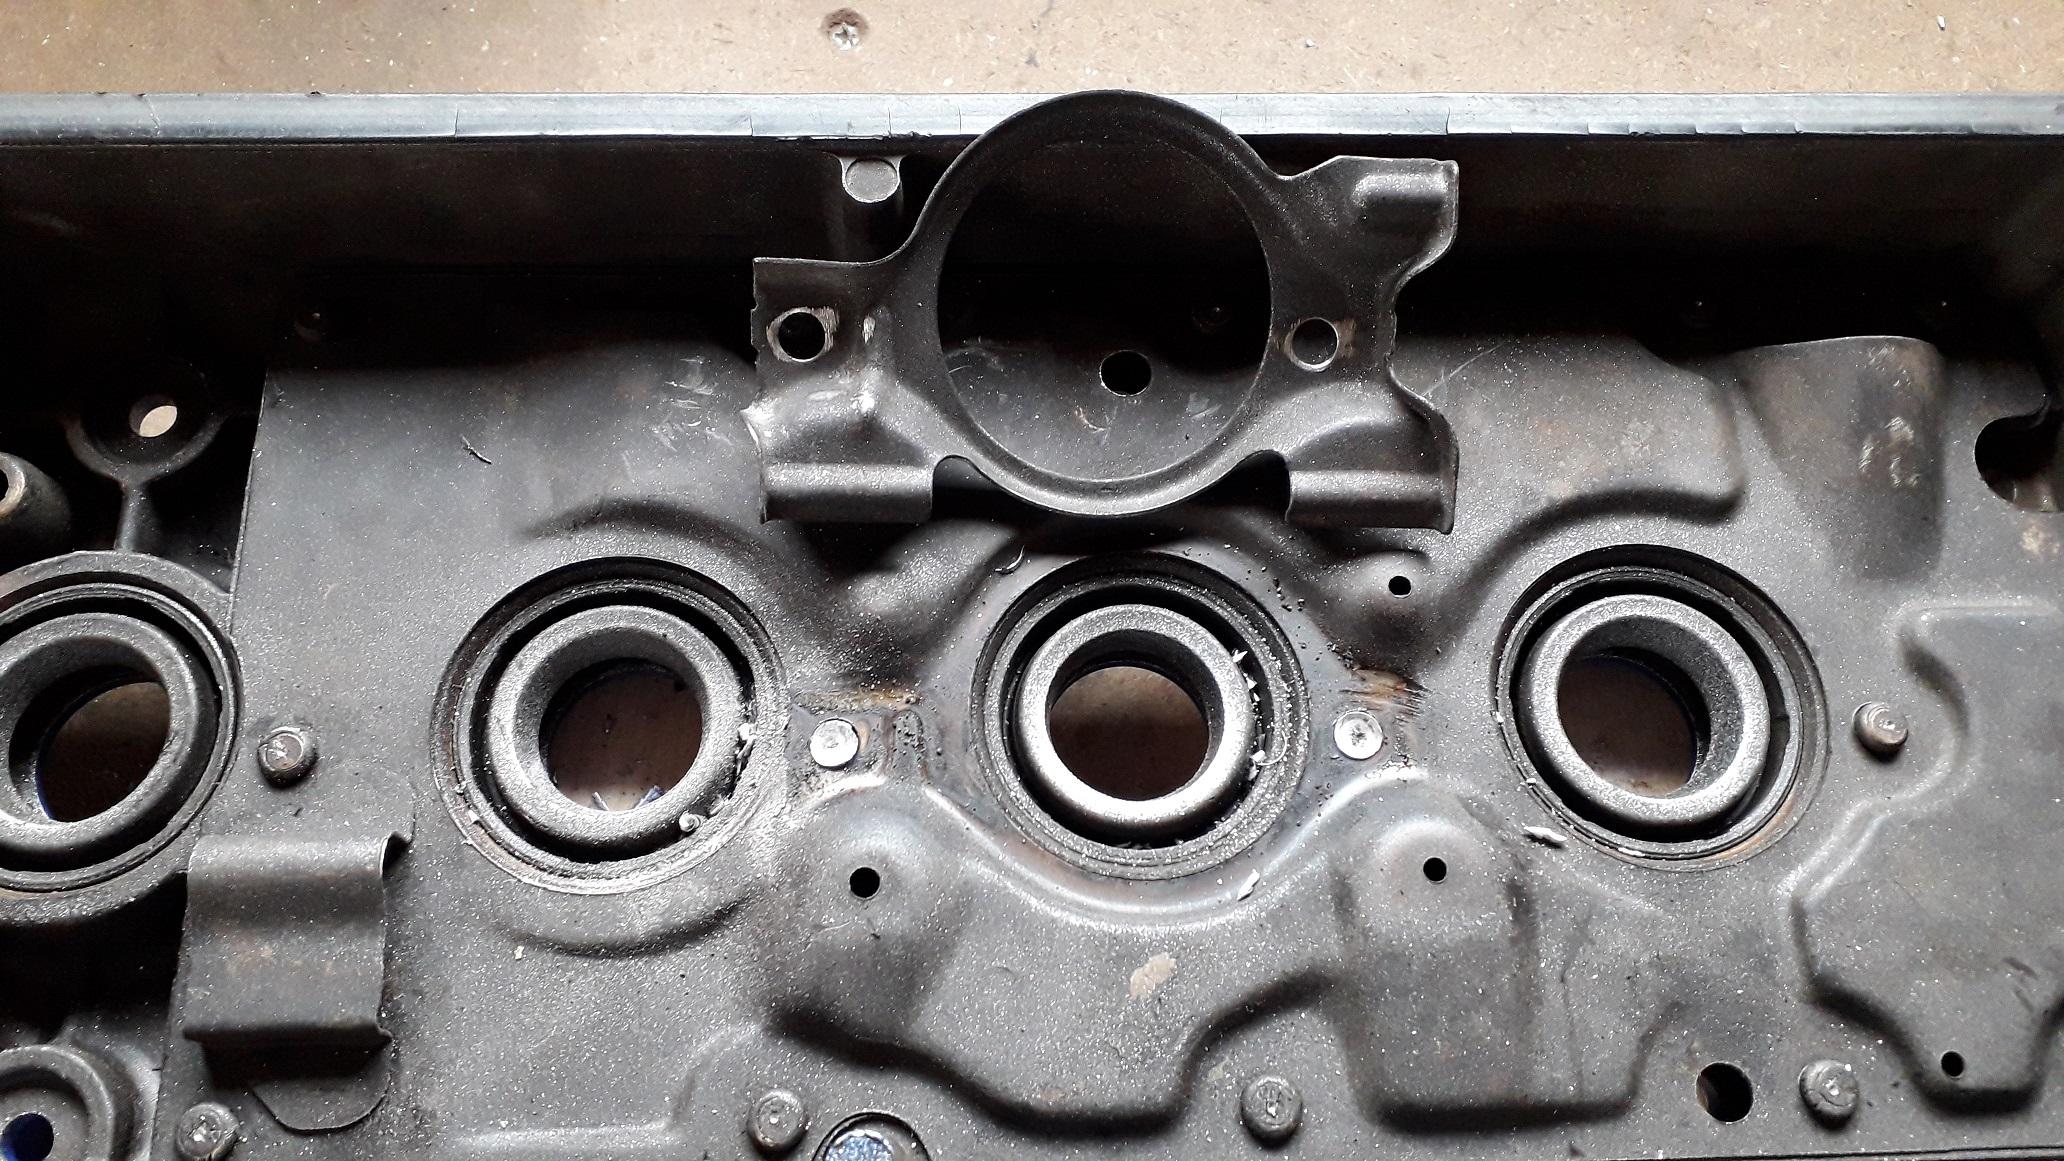
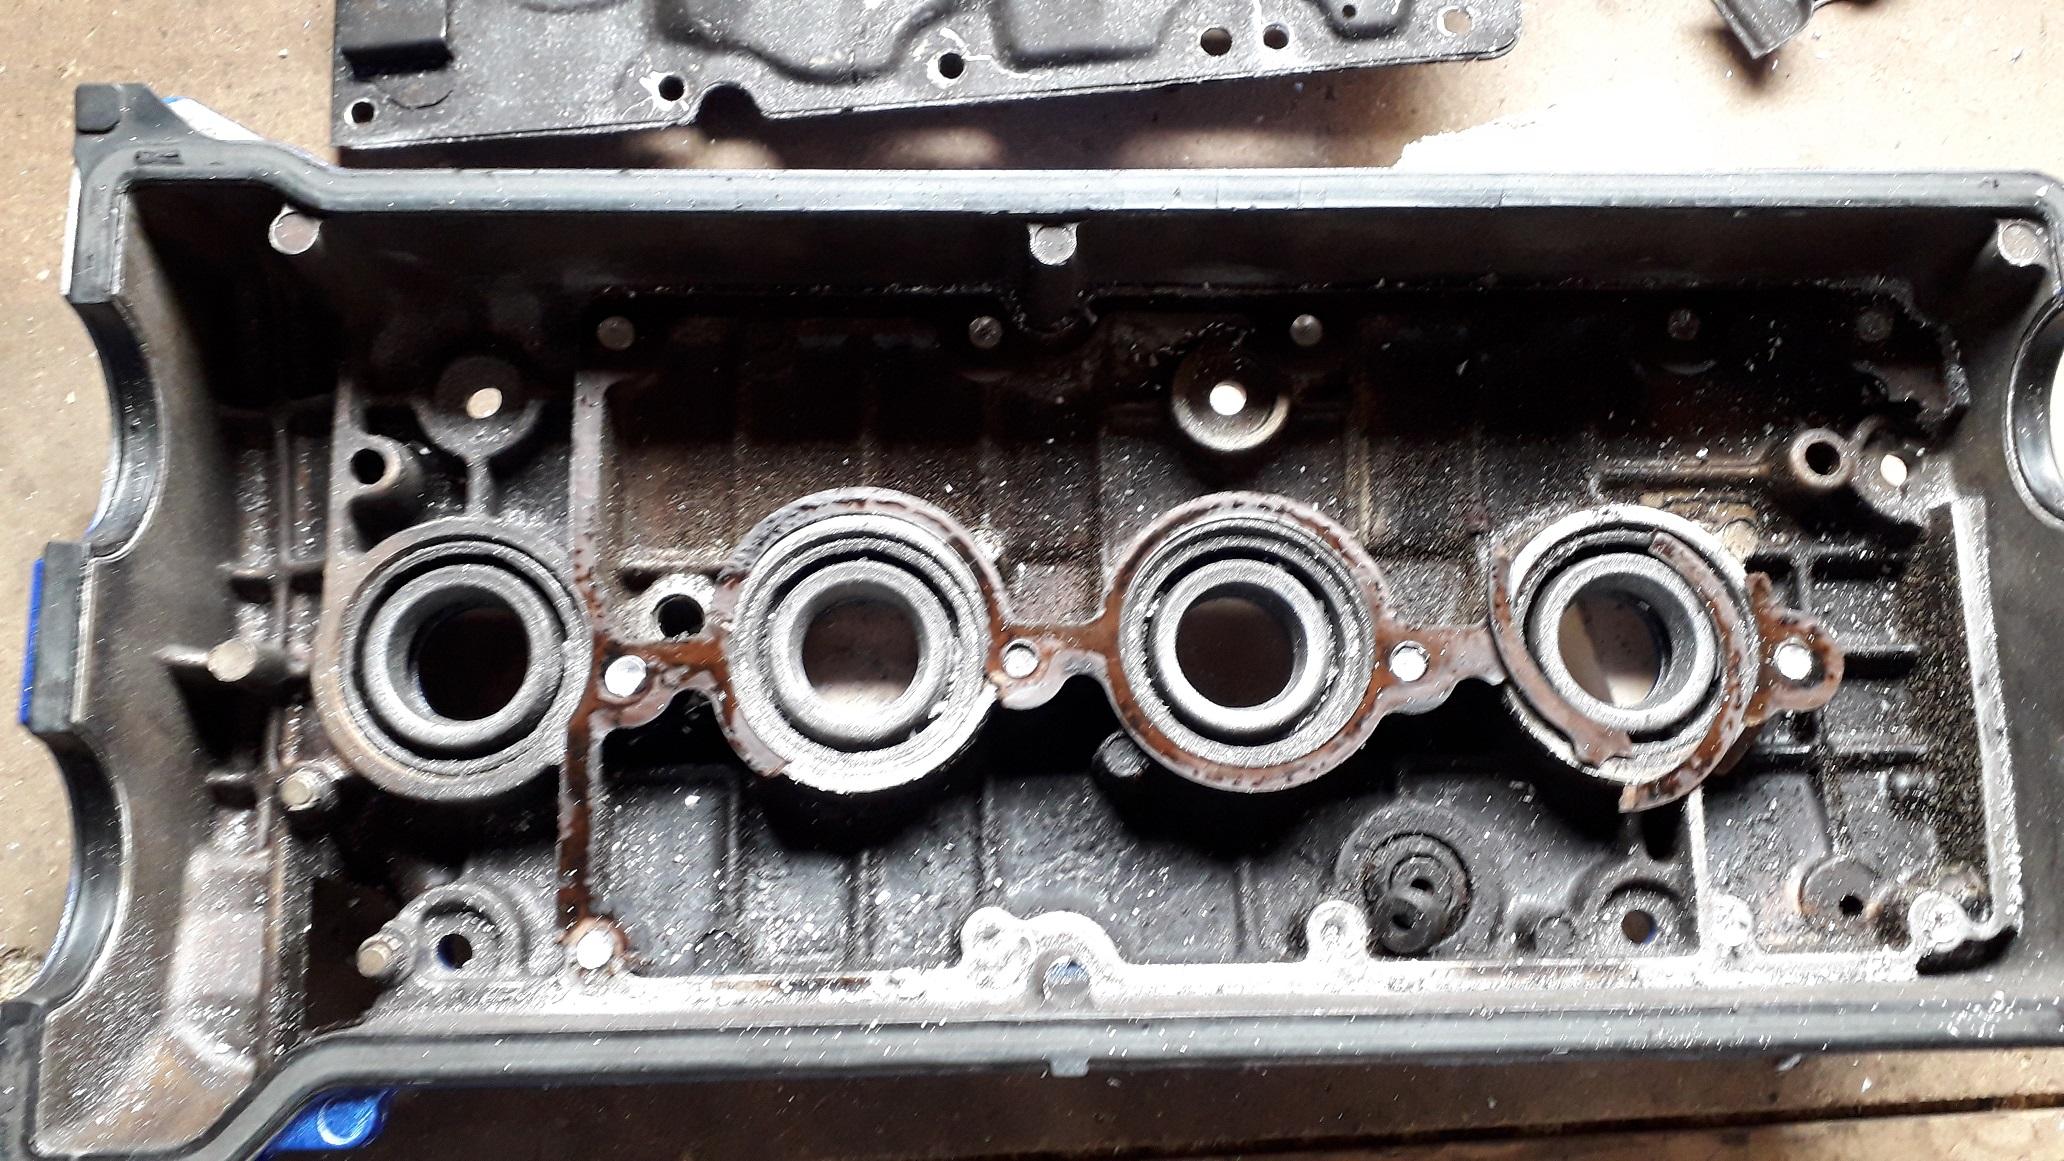
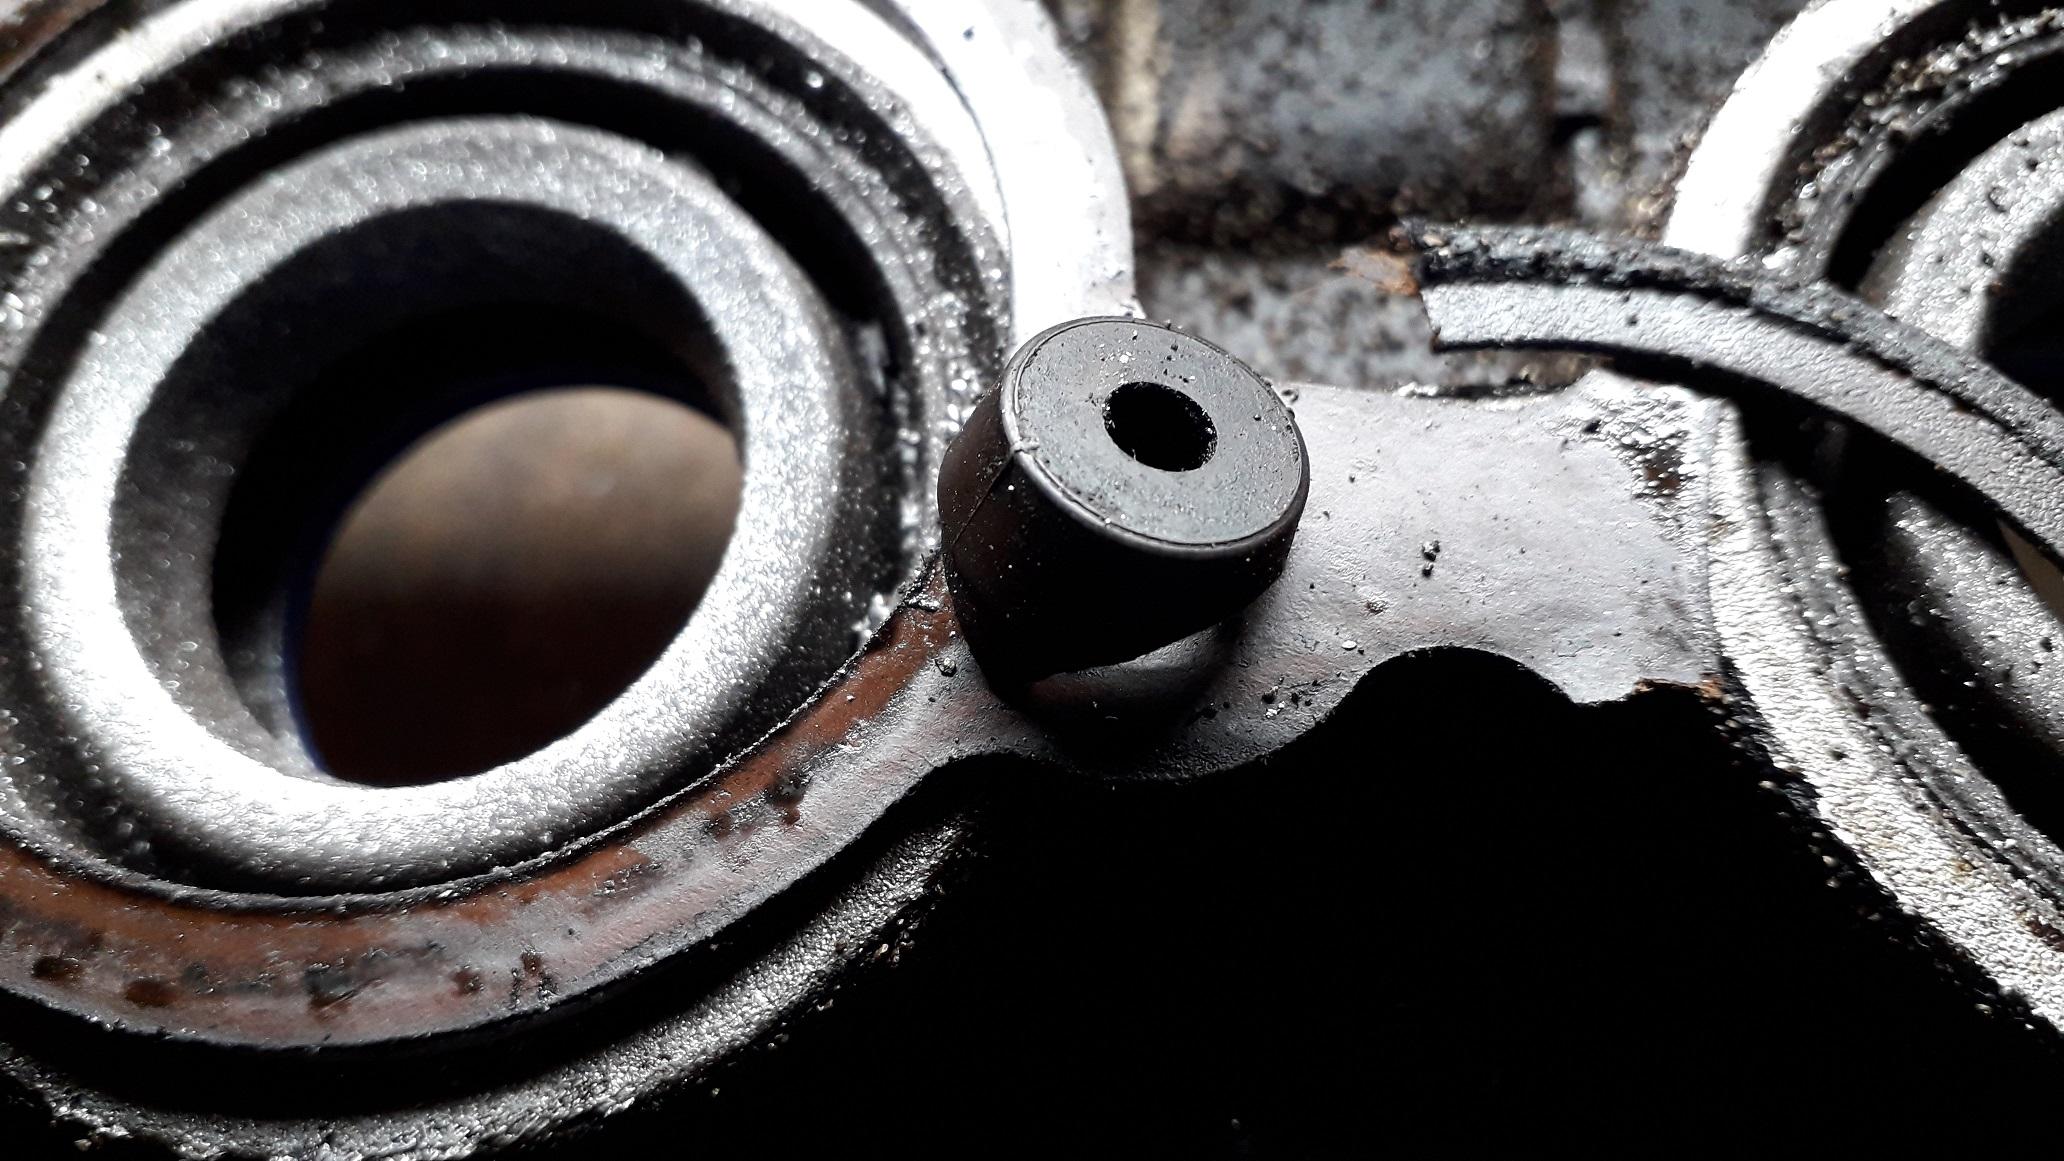
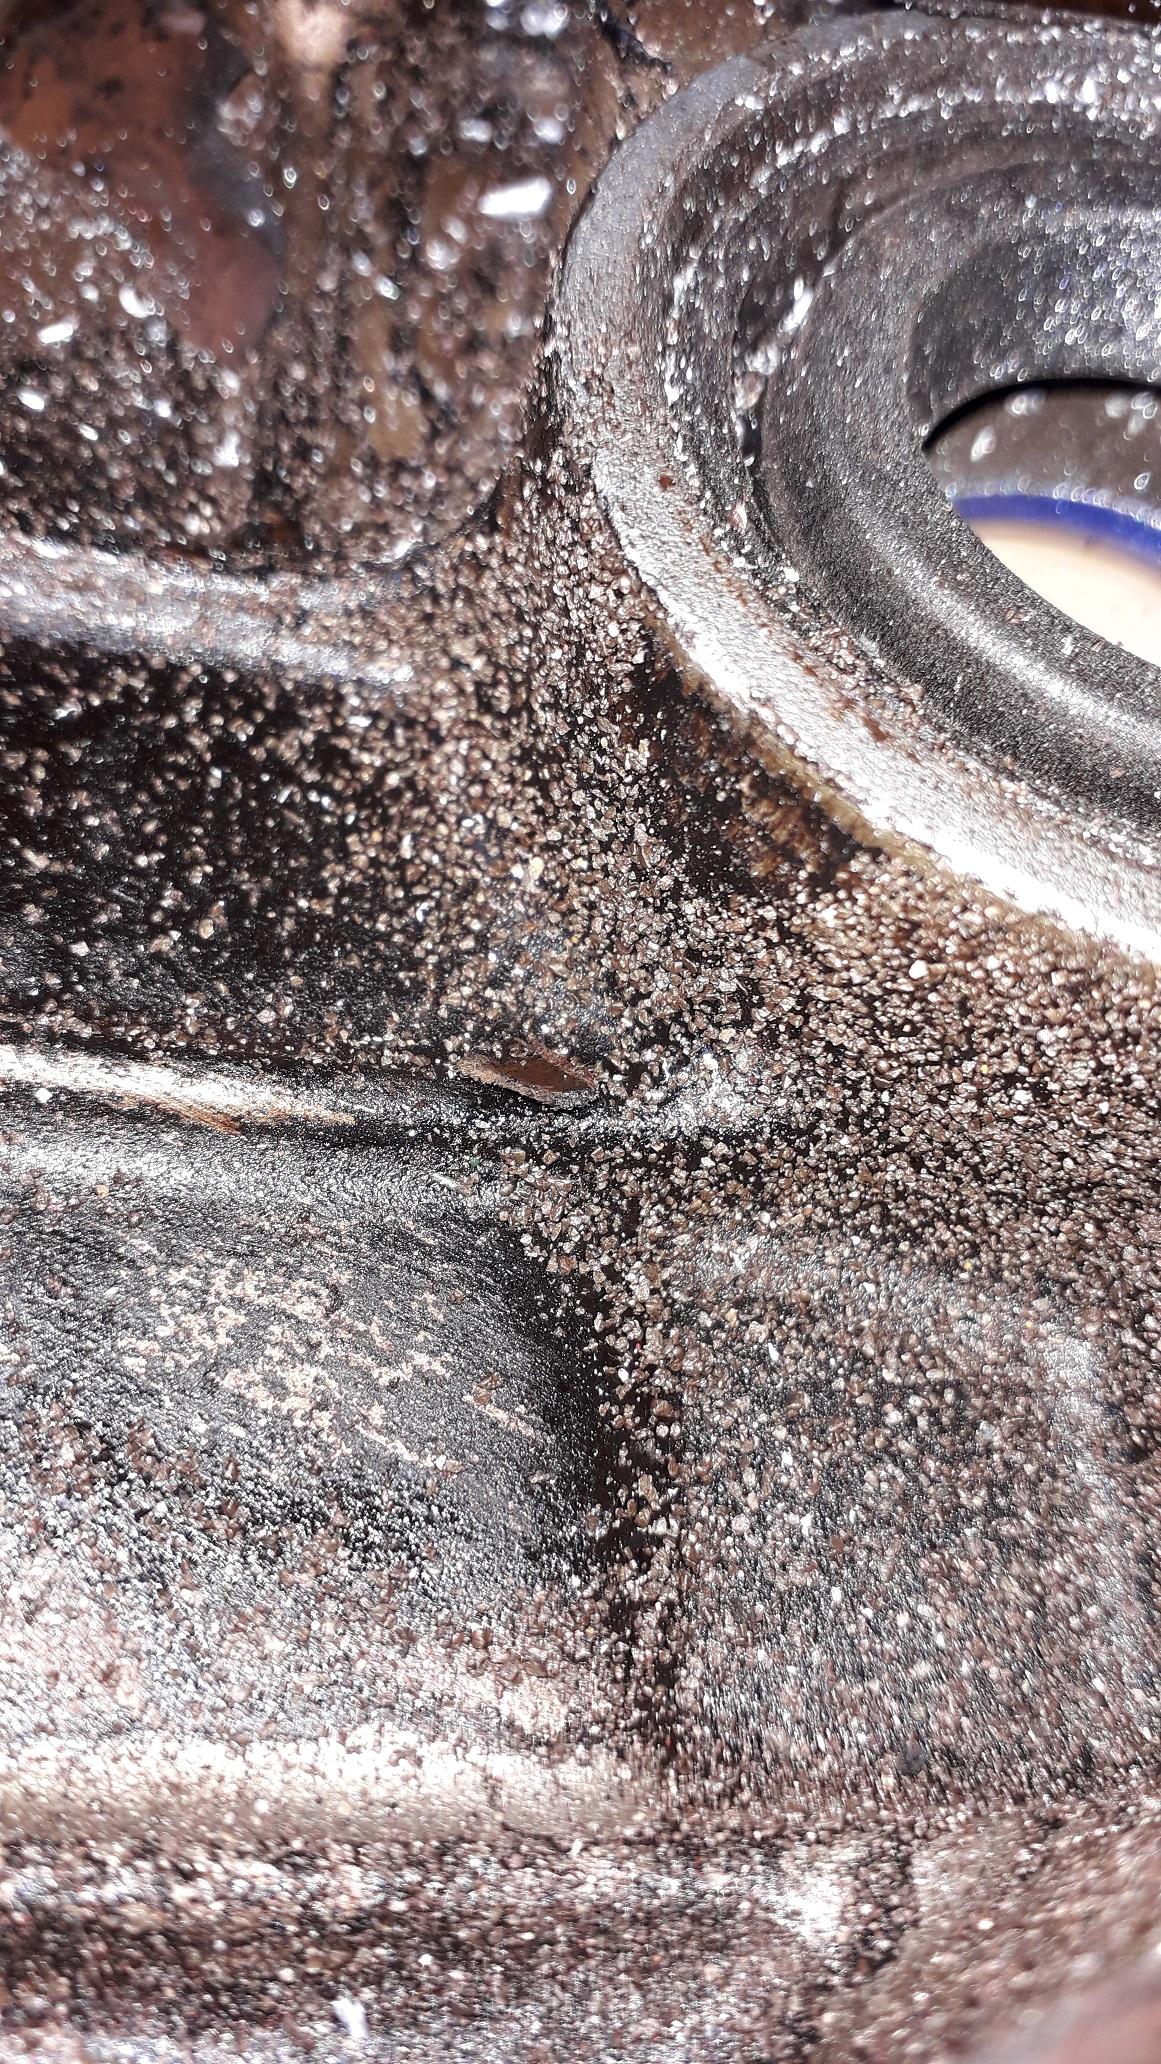
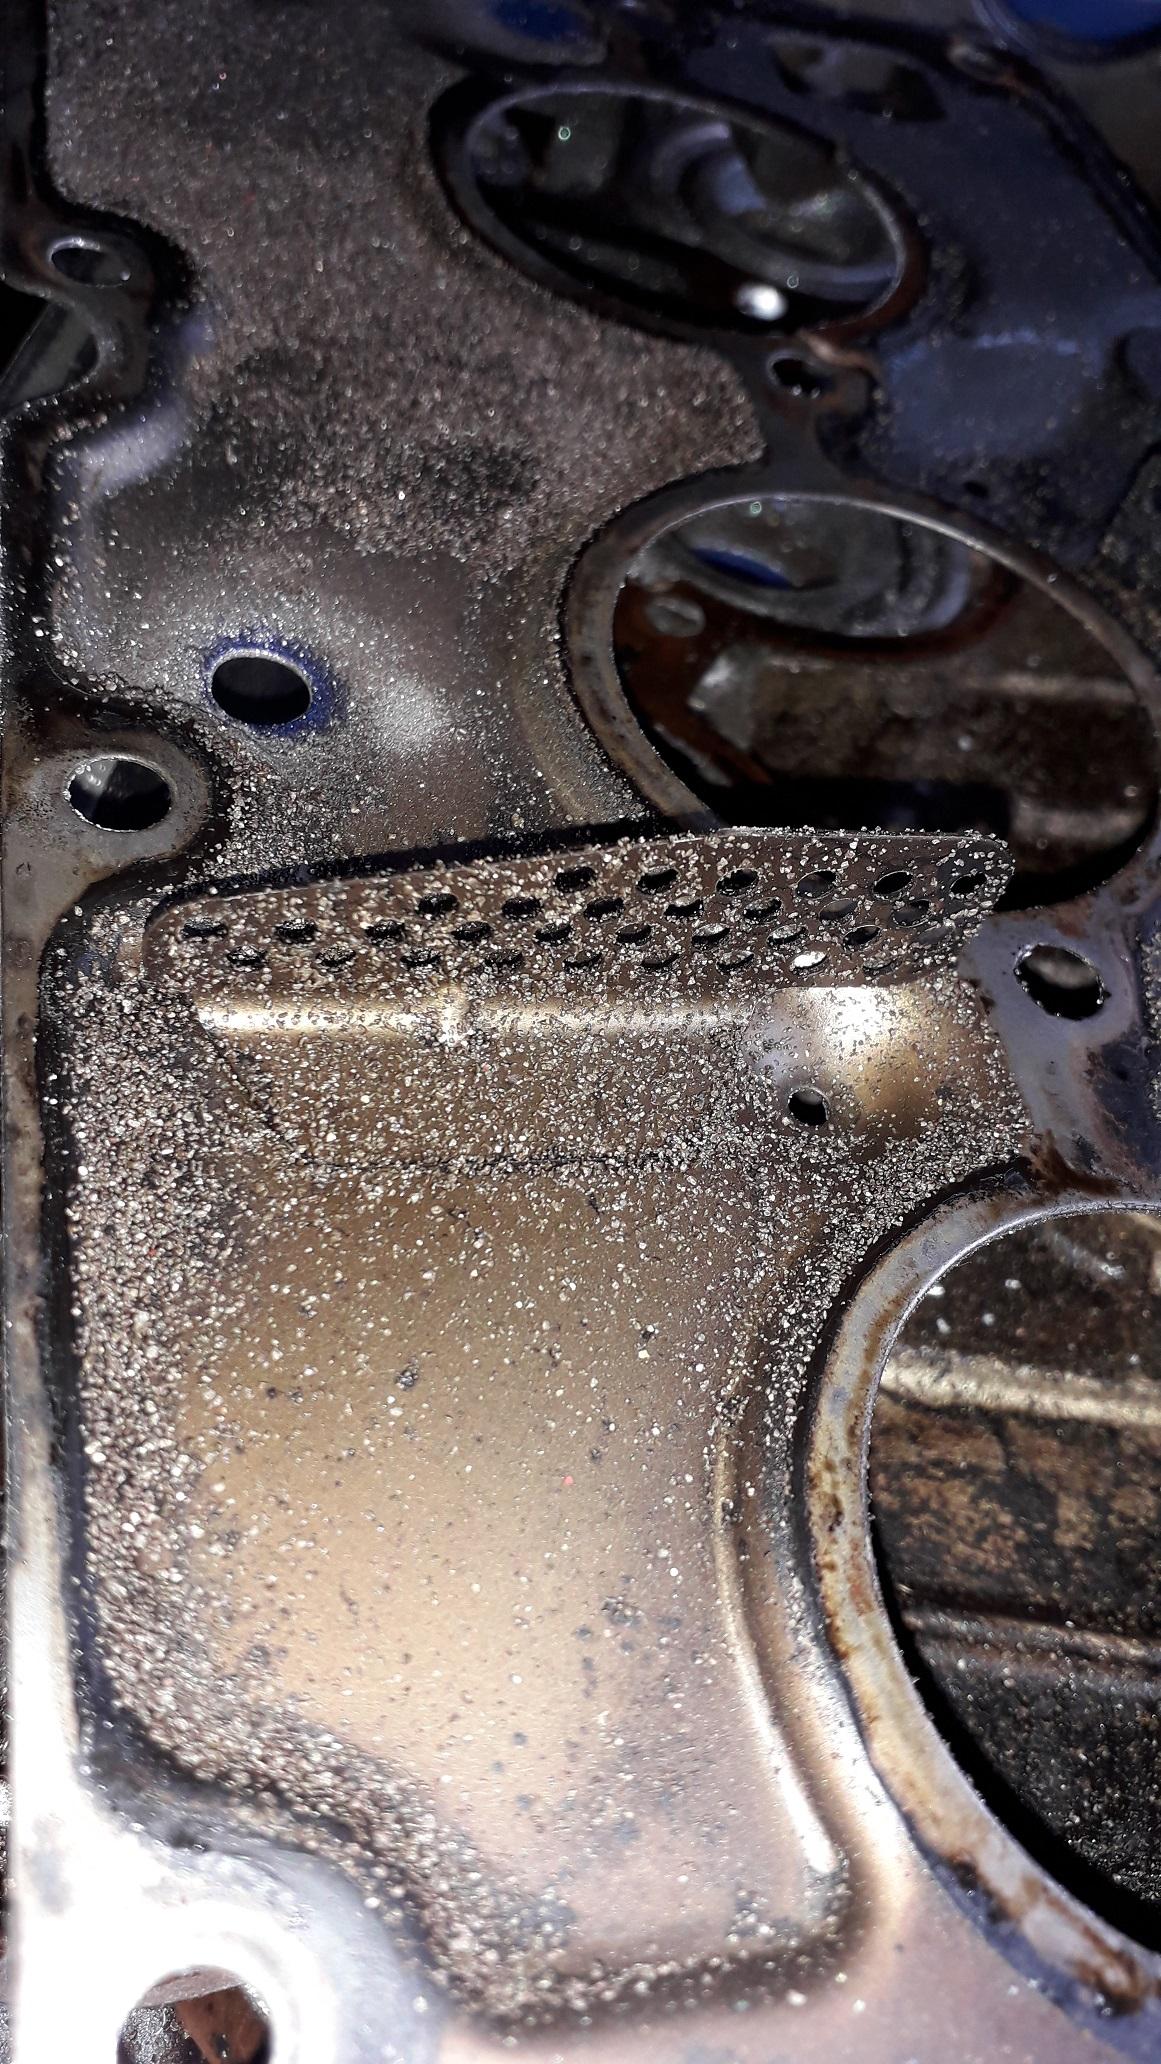
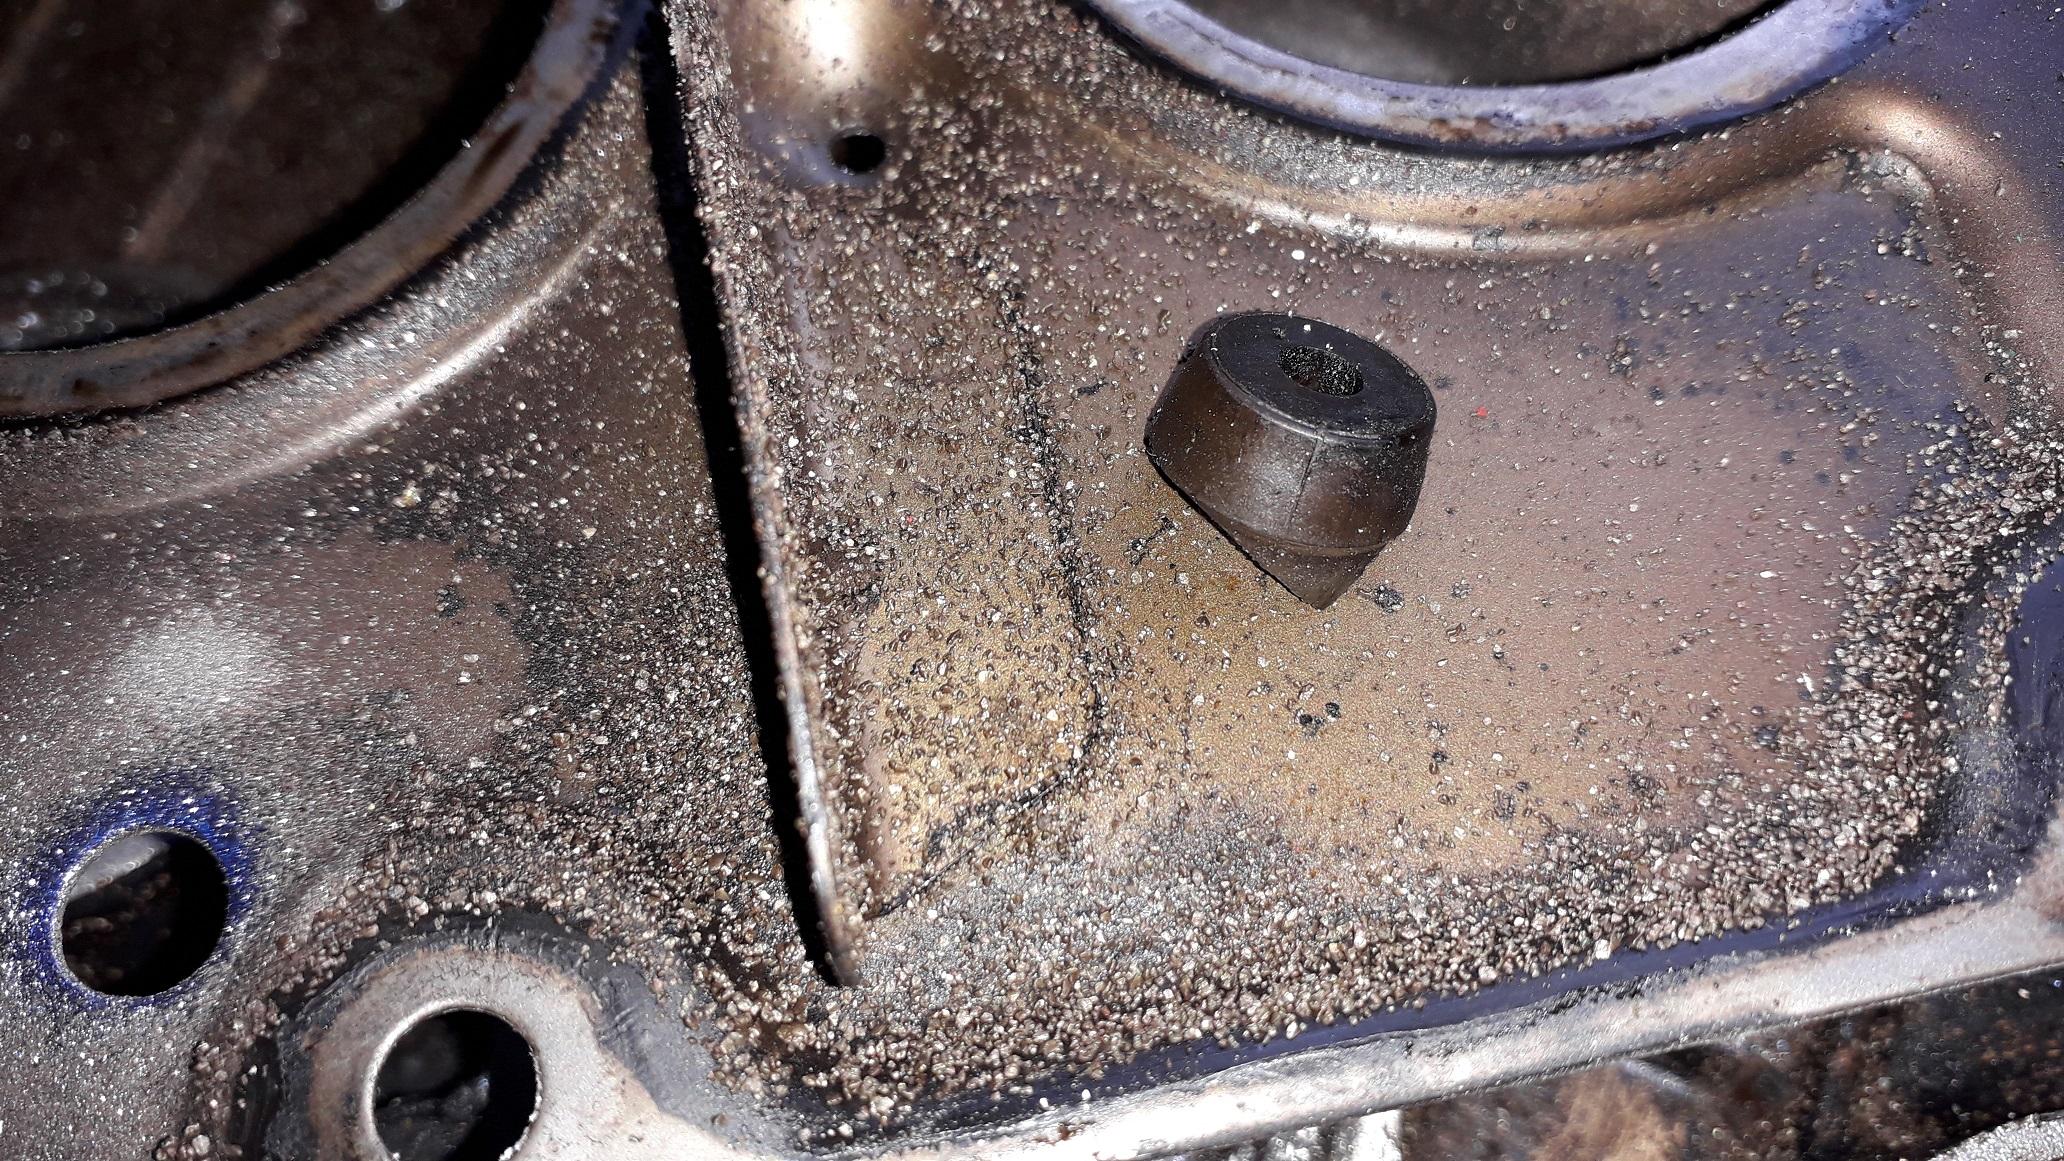
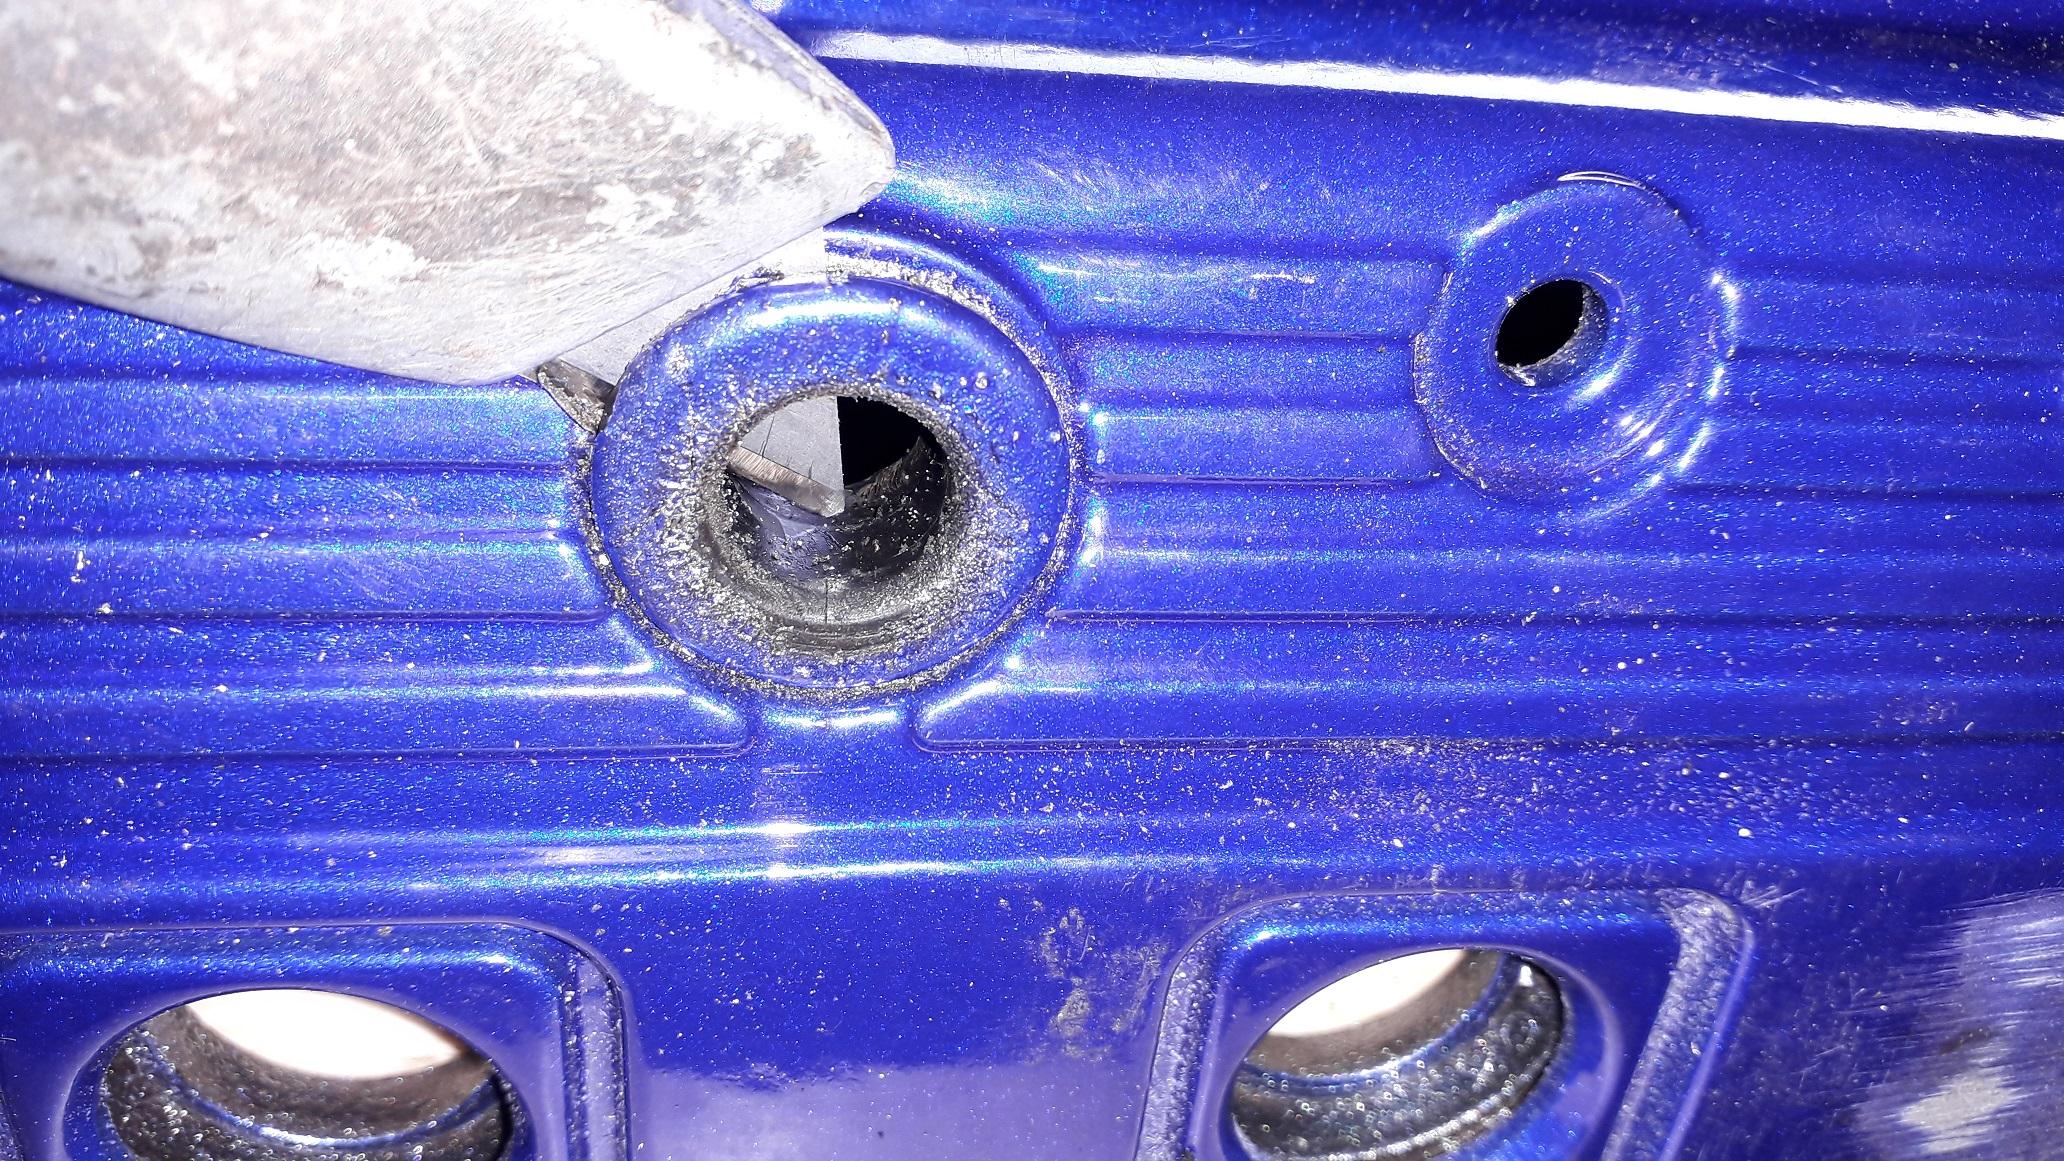
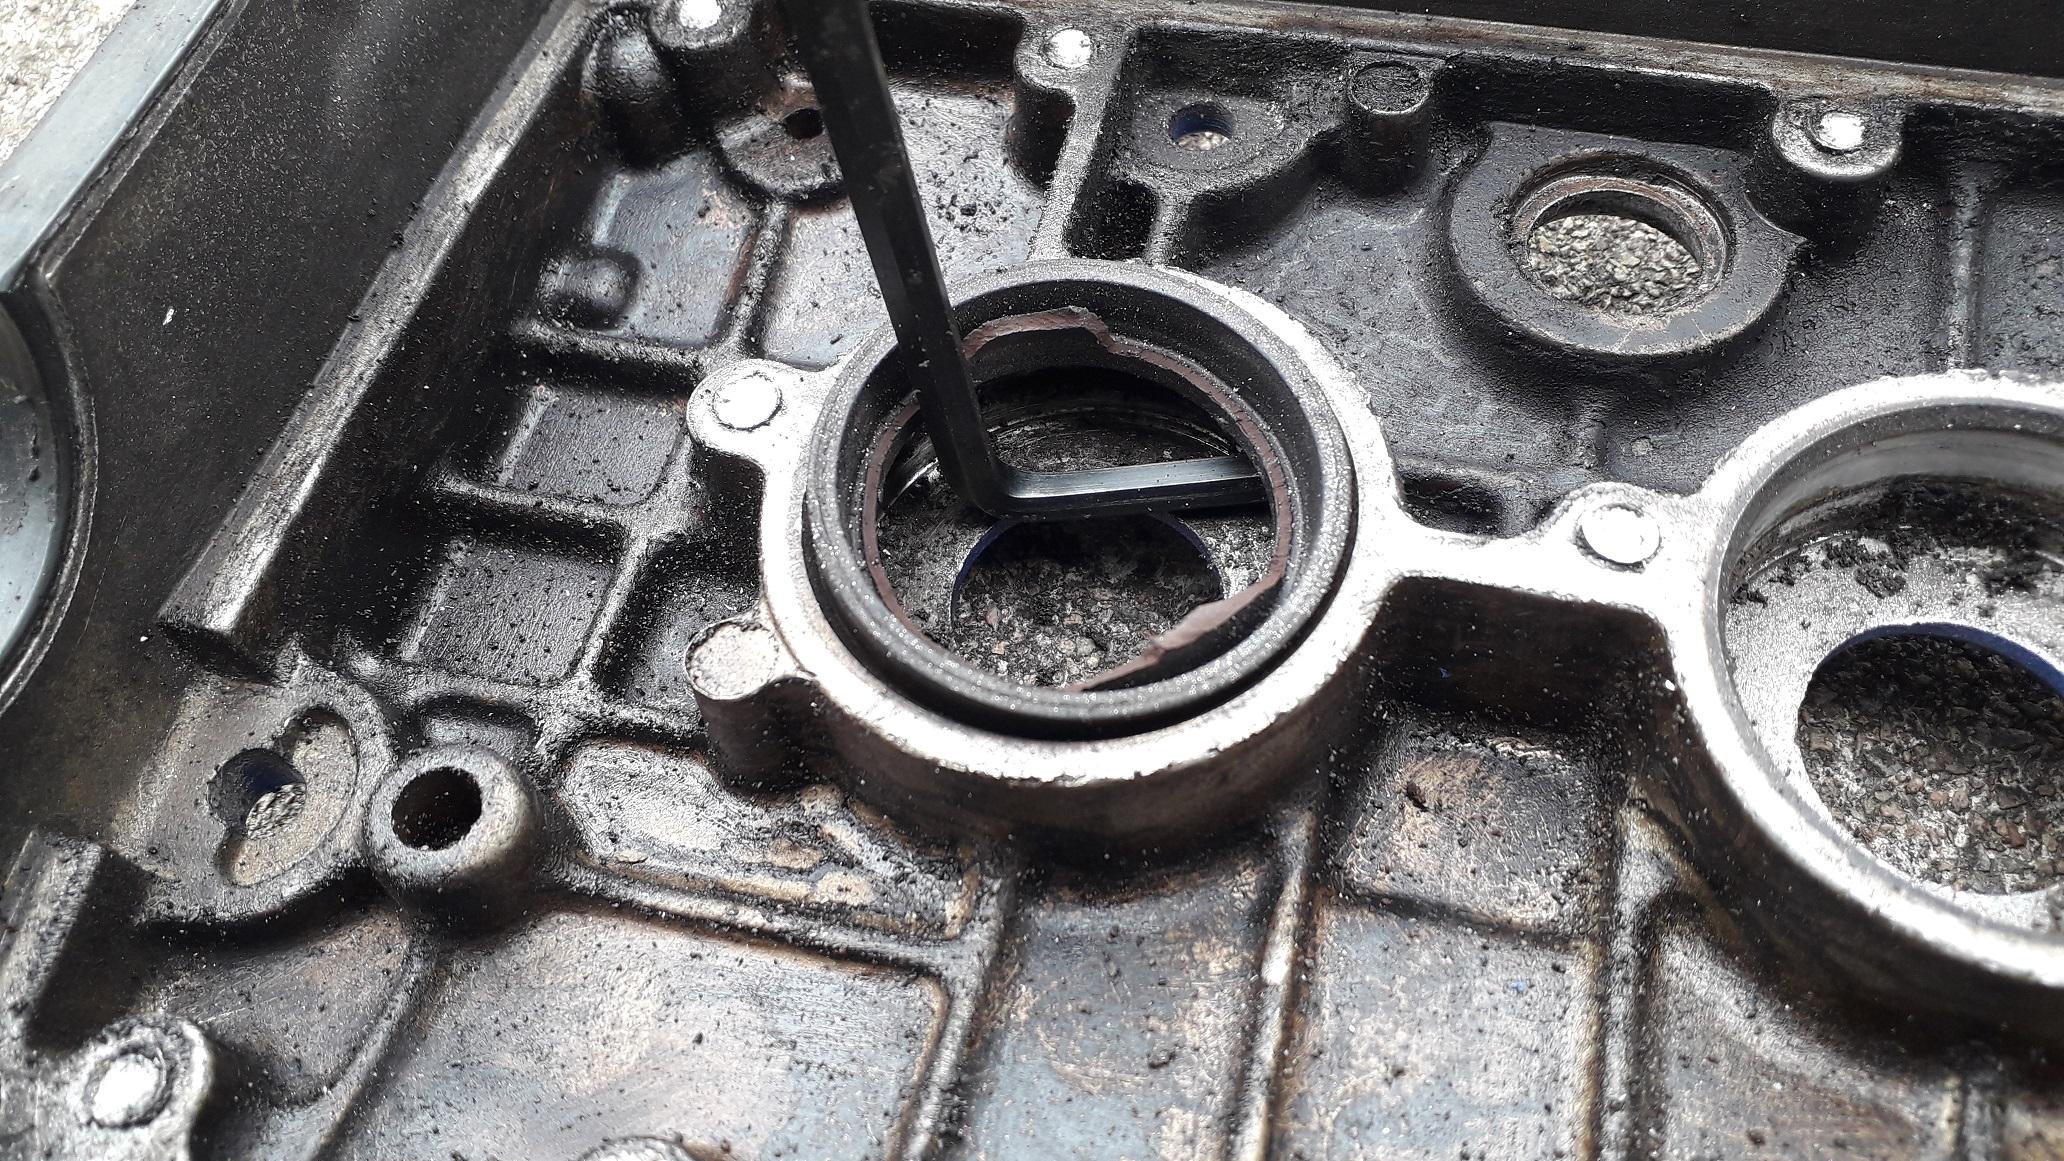
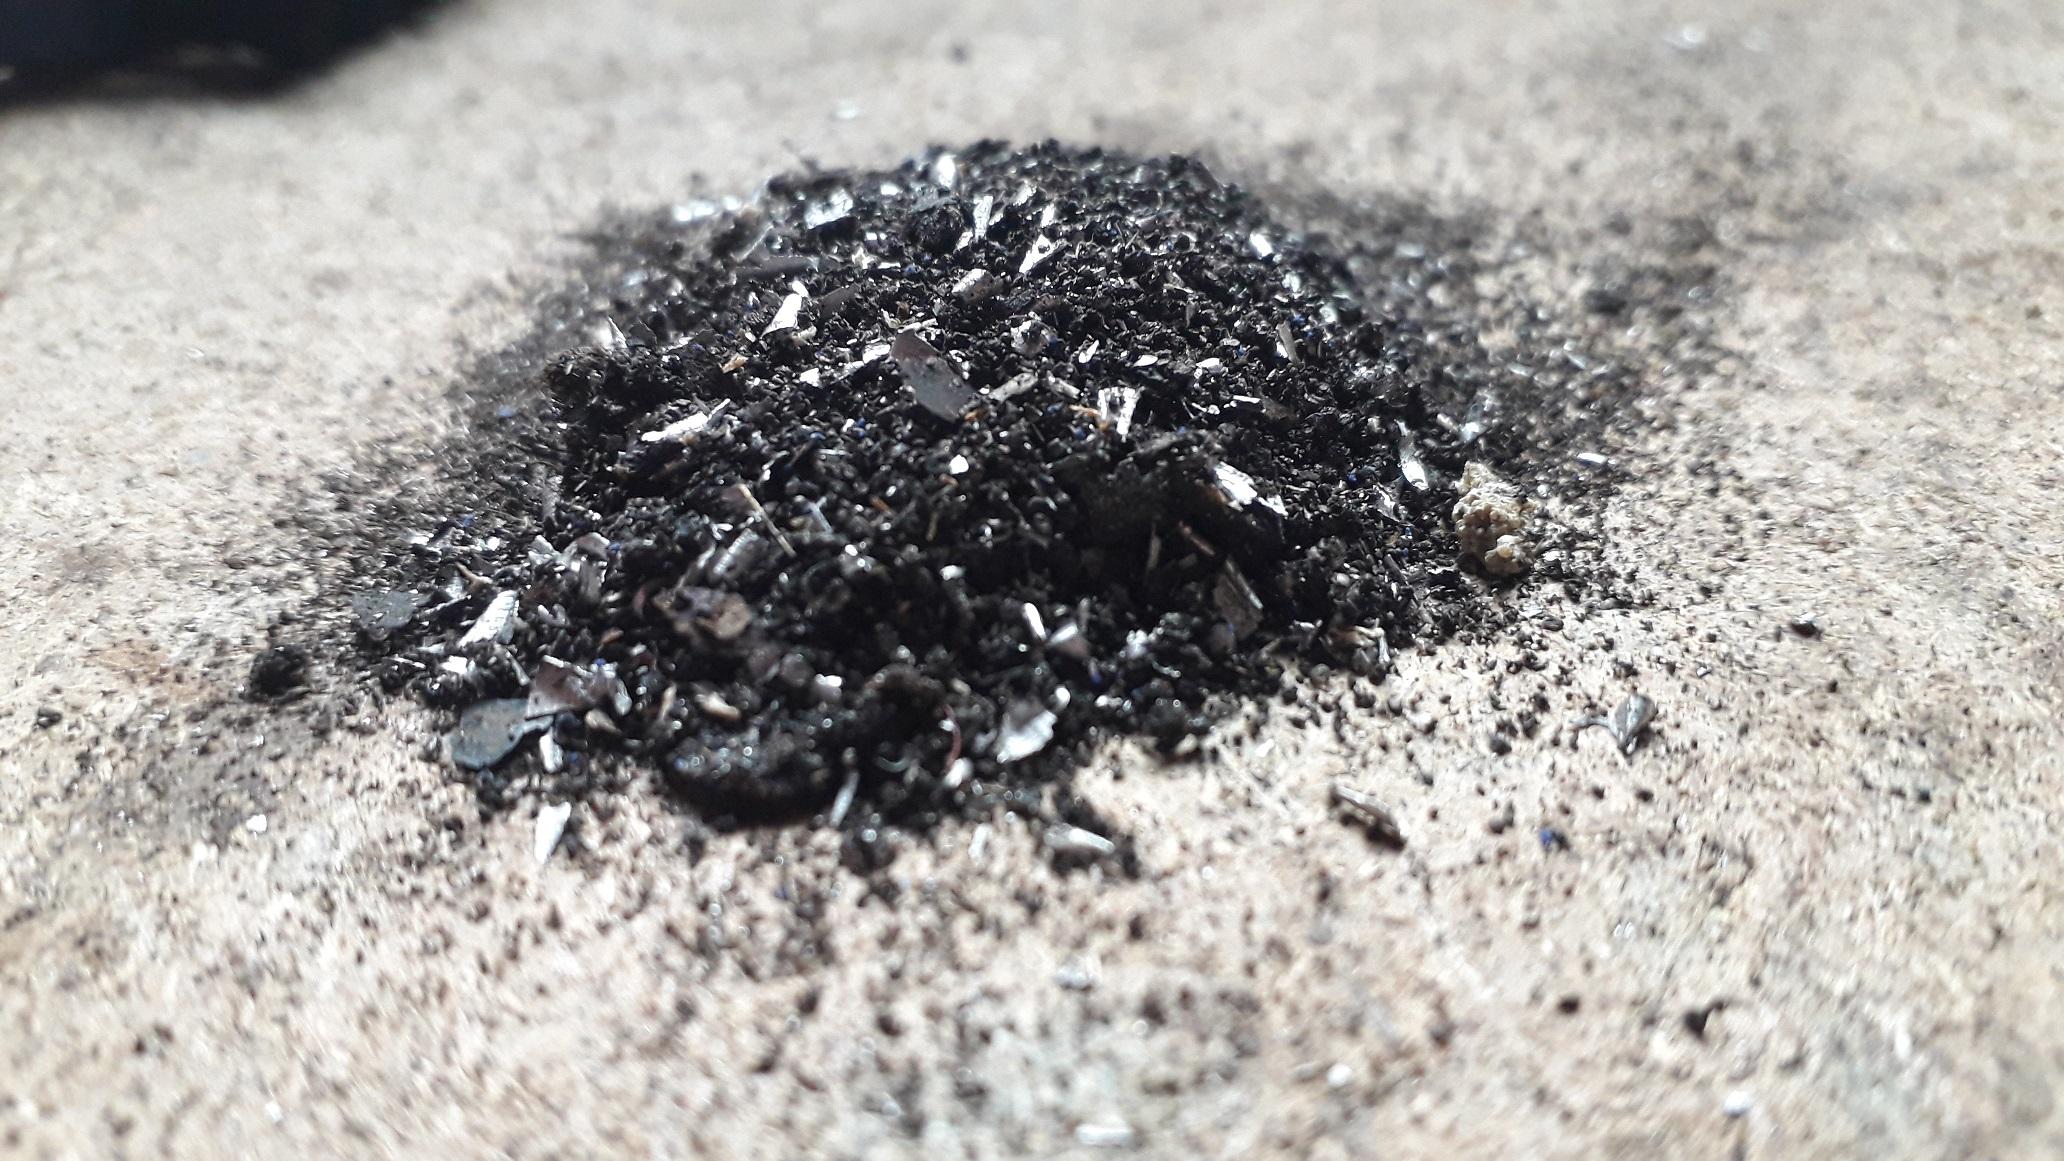
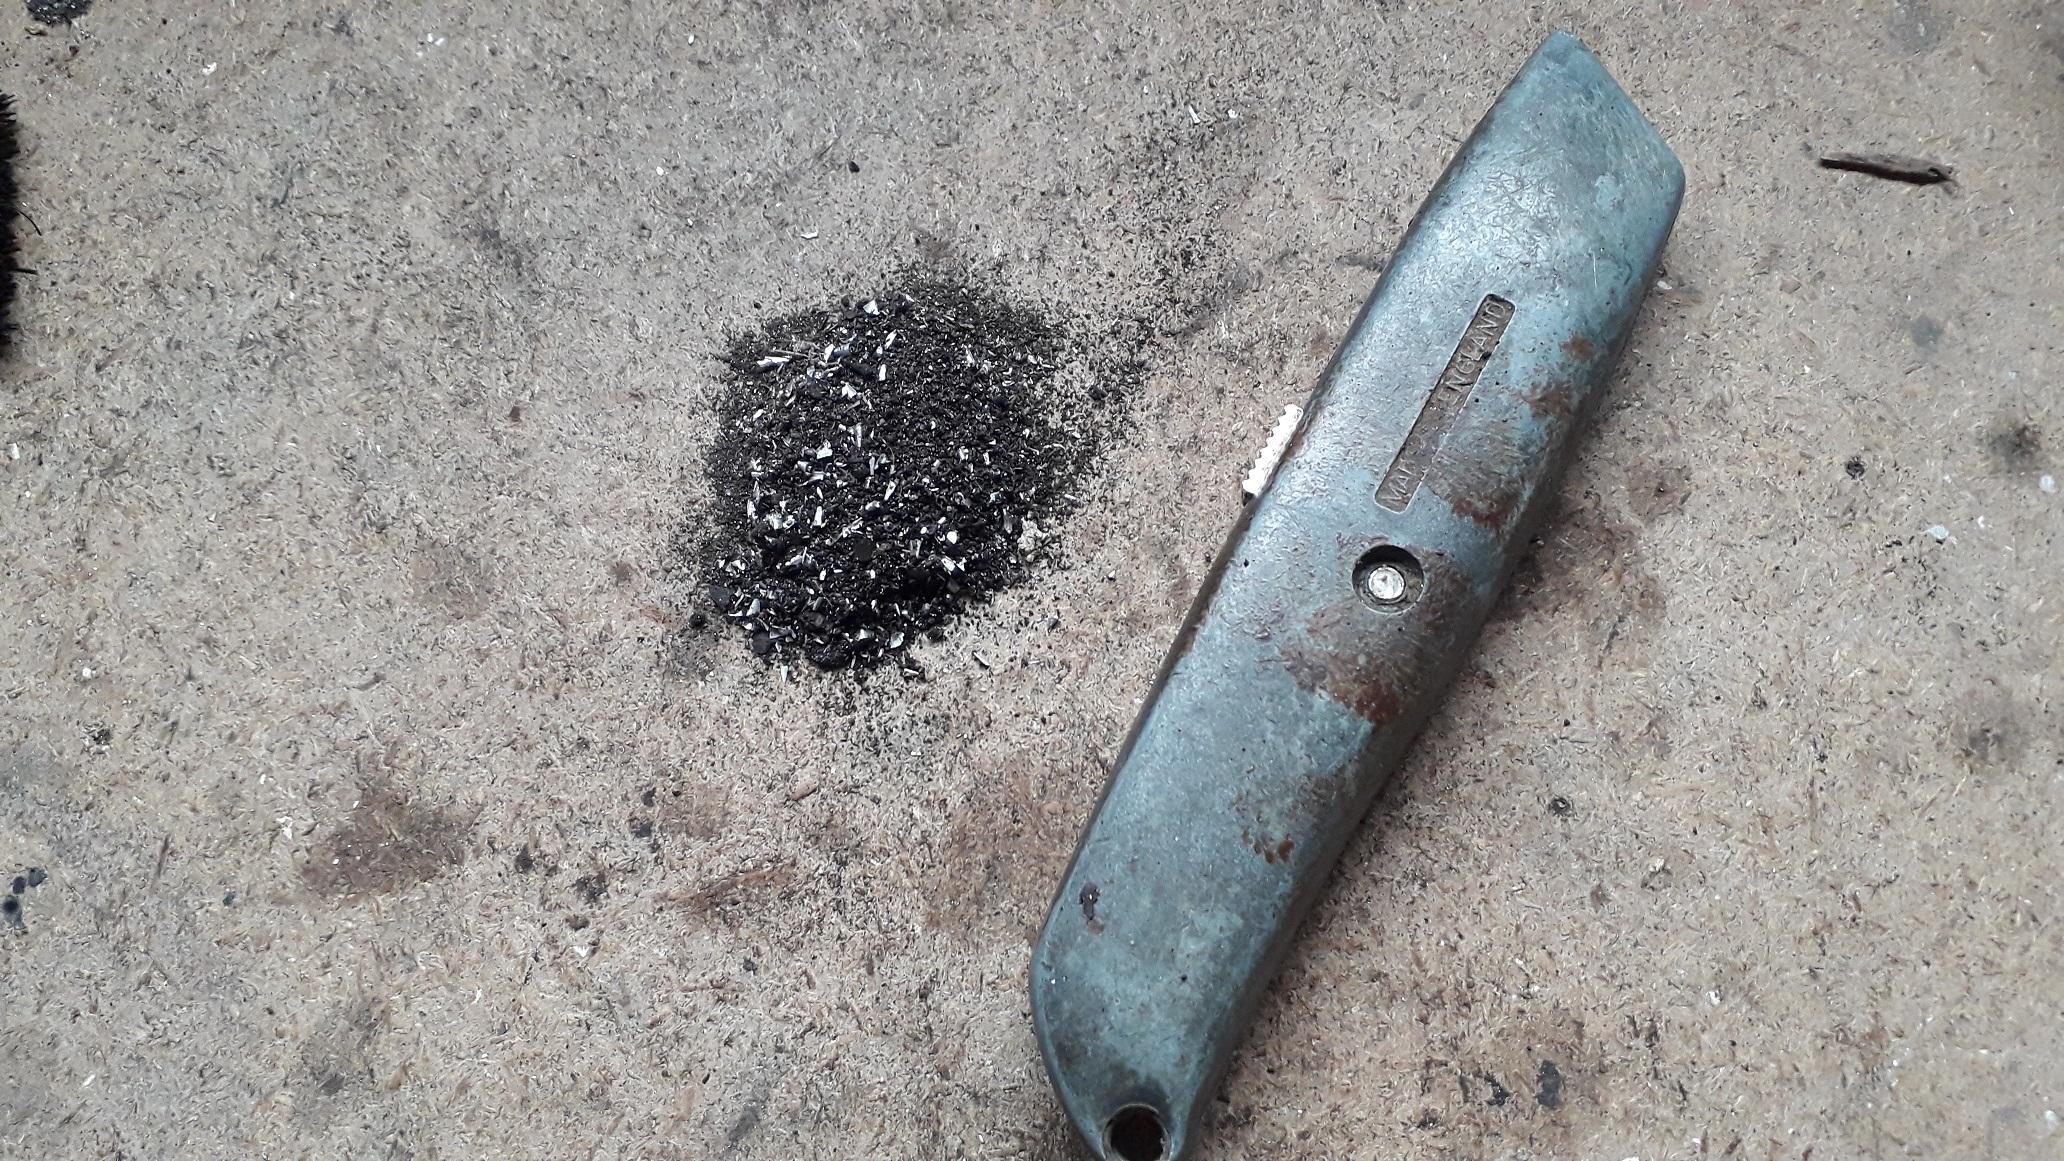
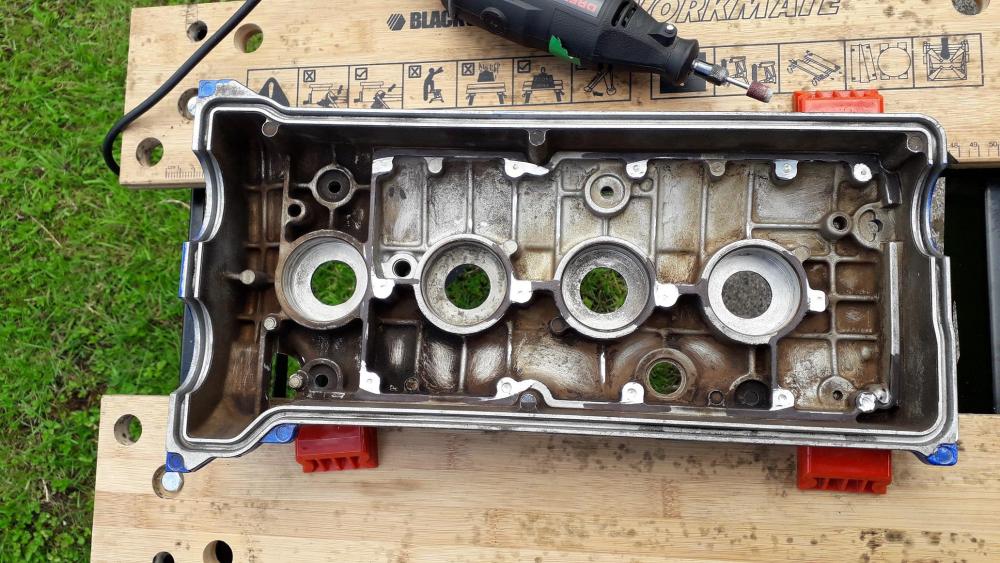
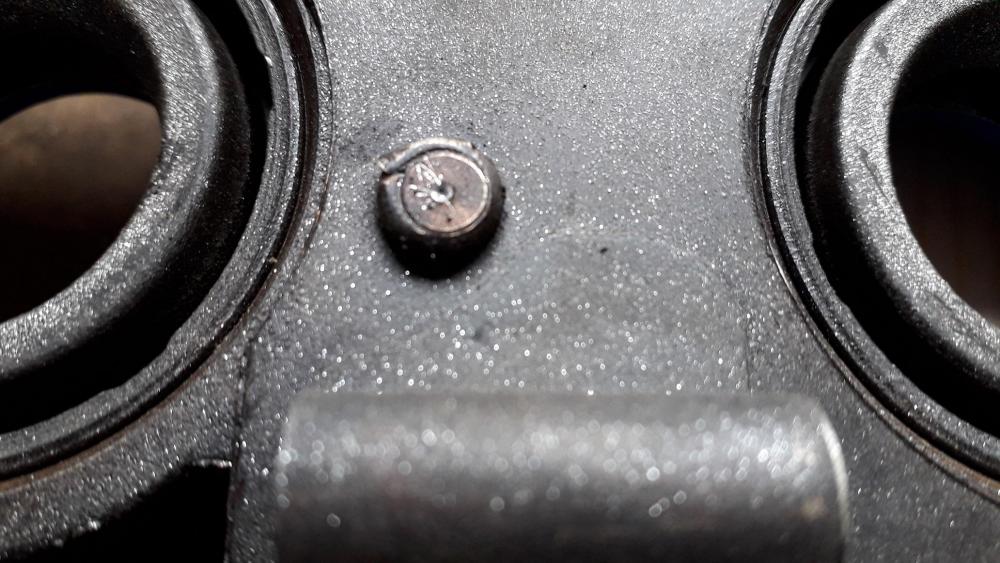
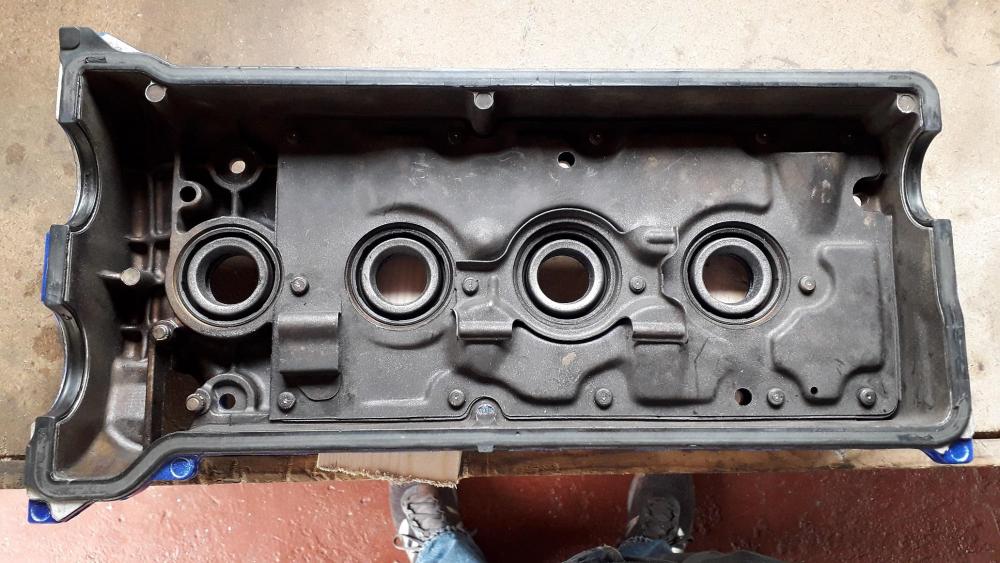
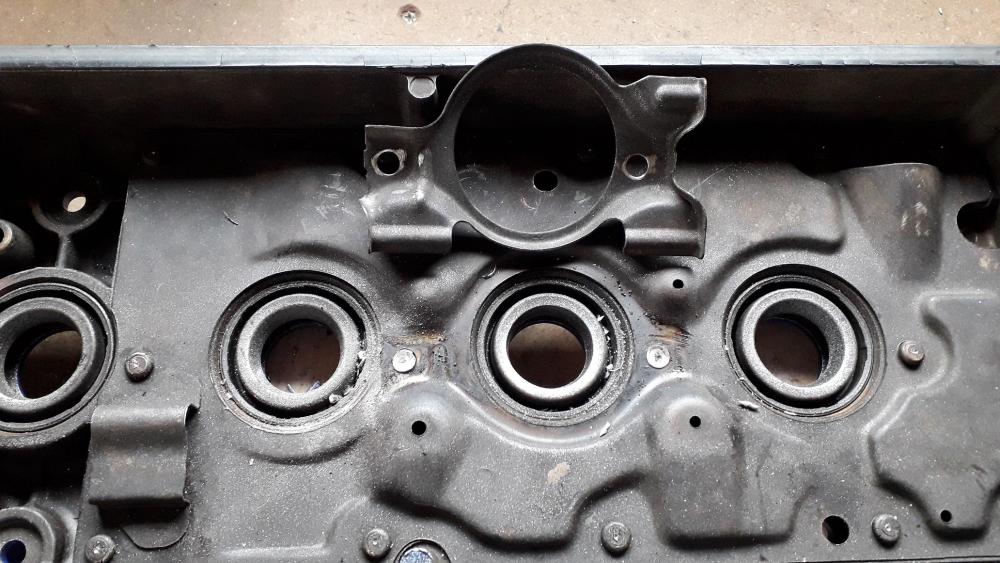
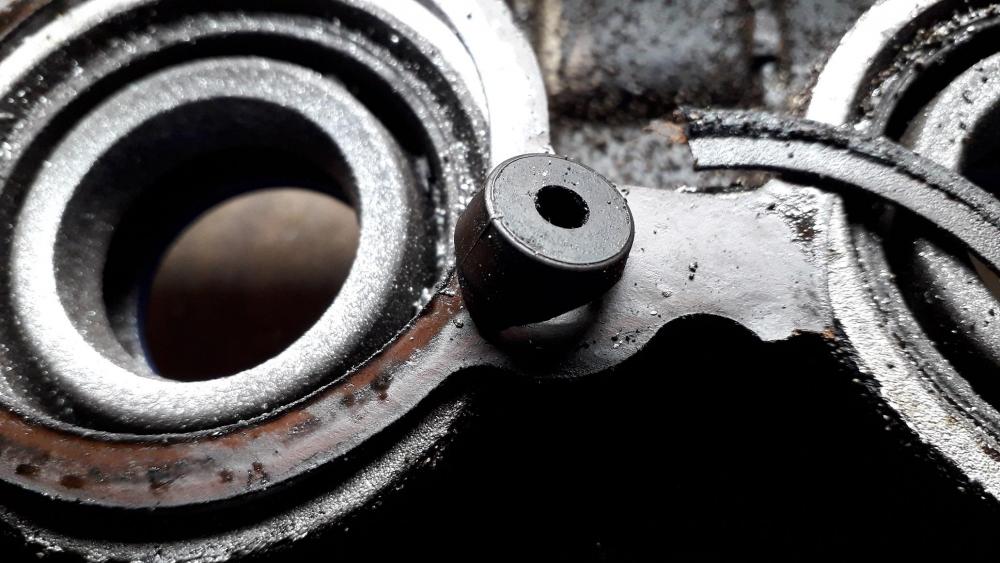
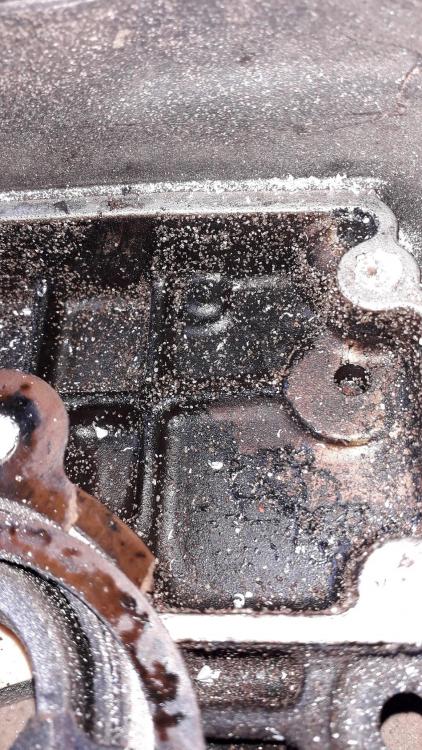
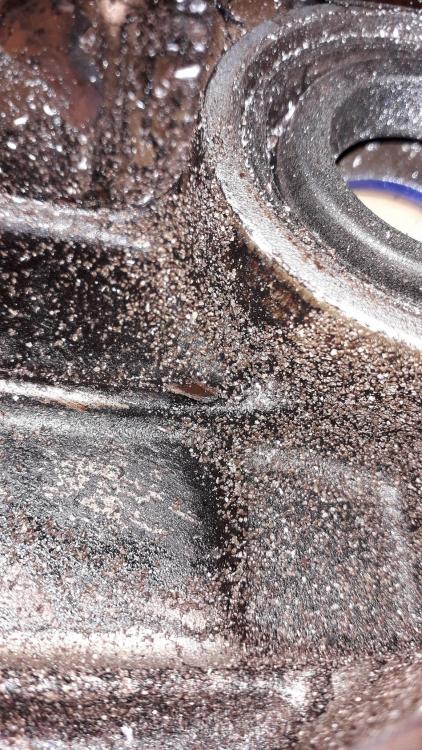
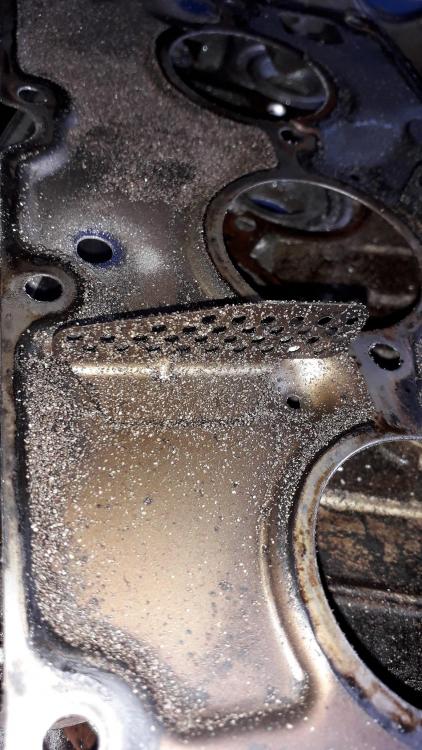
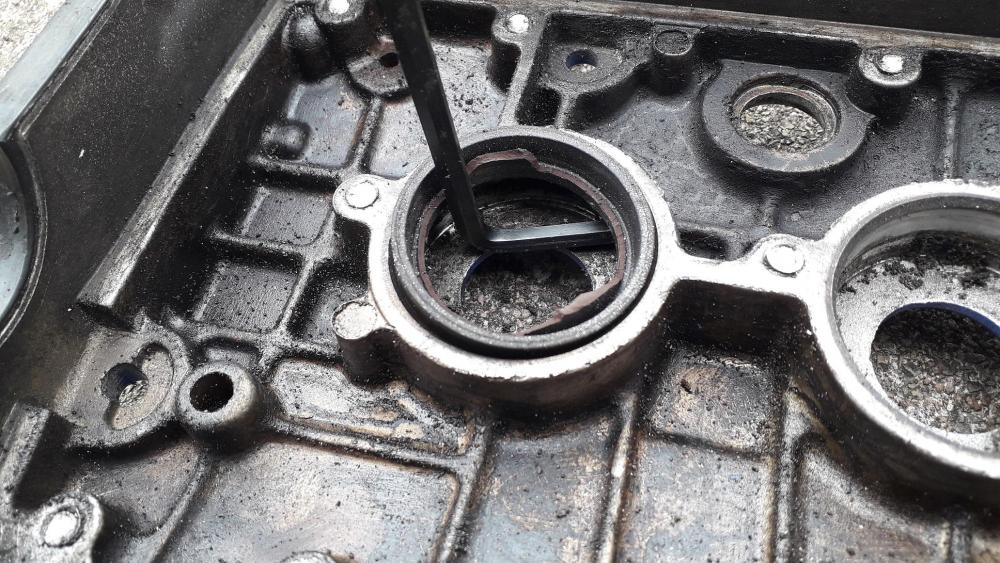
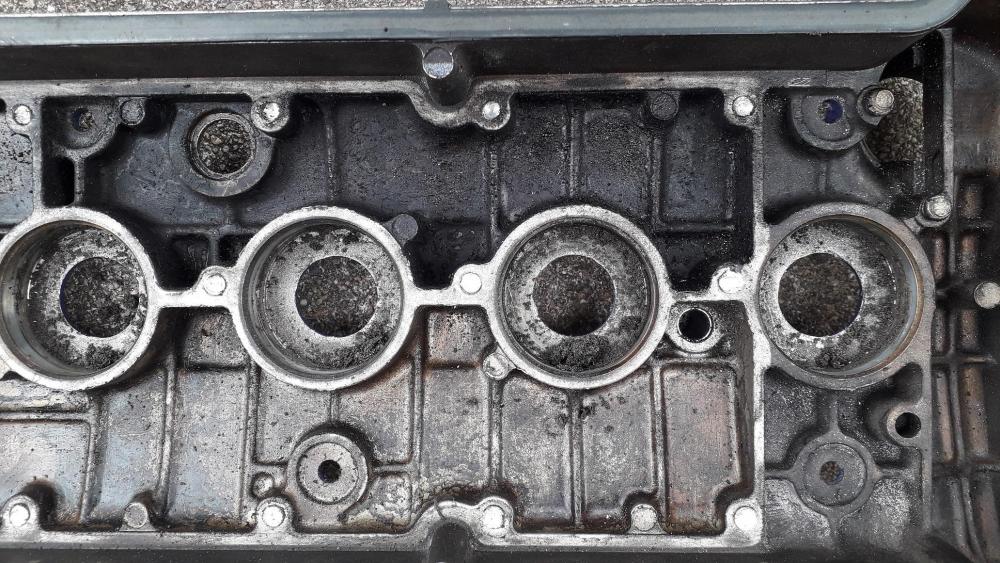
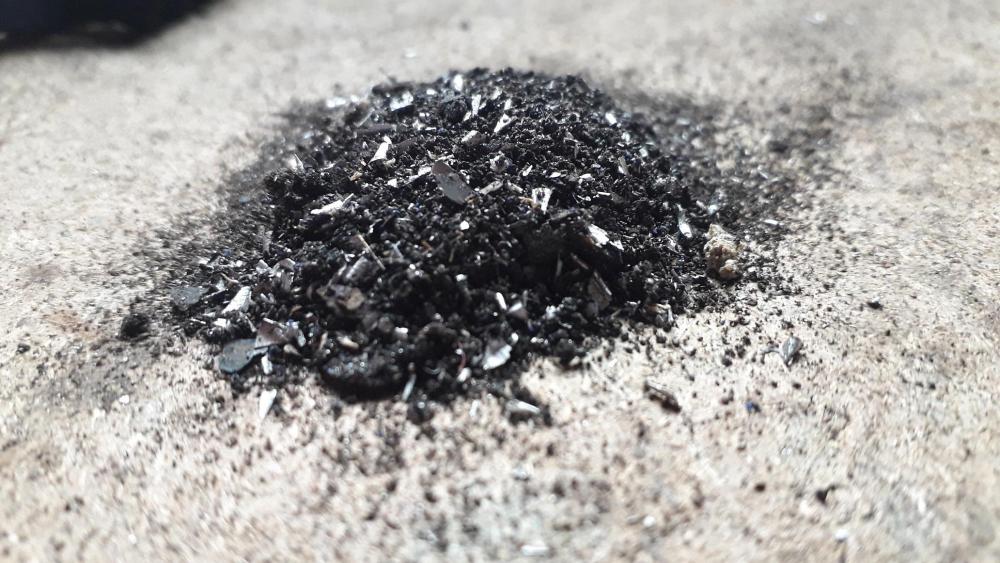
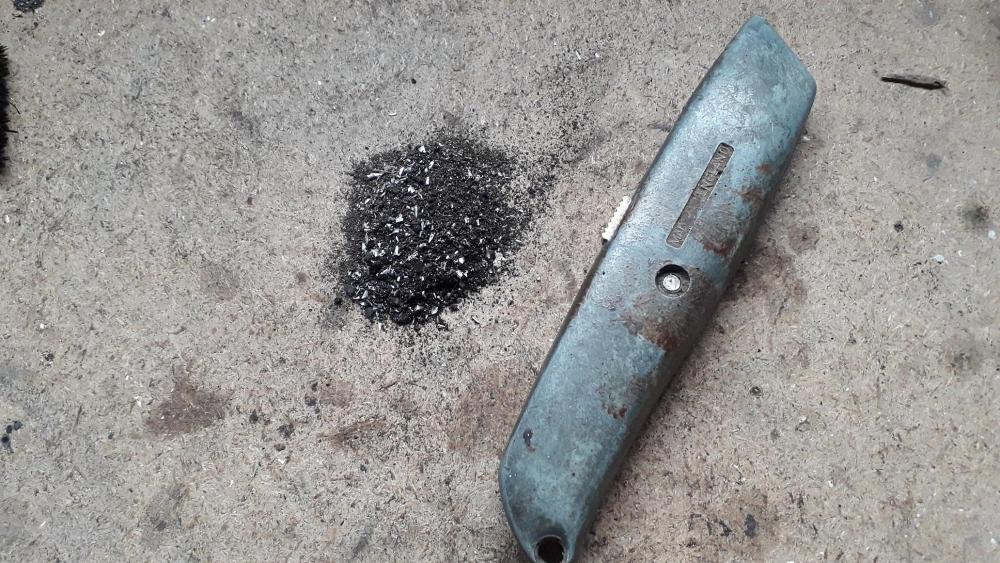
Of course it was C 😱 4efte Cam cover baffle removal: First had to remove the baffle plates, centre punched the riveted aluminium posts on the cam cover to prevent the drill bit slipping. When the parts arrived the PCV valve showed clear evidence of sand blasting erosion, first sign of trouble. The second was the rattling sound when you moved the cam cover and sand fell out! All rivets punched ready to drill Drilled the heads off the centre 2 first with an 8mm bit as these hold a mini drip tray onto the cam cover. (Note the 3 holes in the upper baffle plate that release oil onto the "trays" of the mini baffle.) Drilled the remaining rivets off, had to use a small drum sander and burr to help out but eventually freed the baffle plate, thankfully virtually unmarked. Note the card gasket from the factory install. Mystery item turned out to be the tip of a previous PCV valve. Obviously had been replaced and snapped off in the process, left for me to find. Thanks . Large enough not to be able to escape into engine but may have impeded the flow around the PCV area. Deffo been sand blasted then. Plenty of it stuck to the oil residue on the cover. Plenty of it stuck to the oil residue on the baffle plate too. Cut the old PCV grommet out with the Stanley. Snapped the central rings out of the seals and then carefully levered out the rest of the spark plug hole seals a few mm at a time, kept moving the "lever" round the hole. Was careful not to score the walls of the cover with the lever end. Greeted by yet more sand blasting media under the seals. Thankfully these would have only fallen directly into the bores at spark plug change time Pile of unwanted-ness Stanley for scale All in all I would say I removed over a table spoon of just sand from the baffle (after taking into account the alu swarf from drilling and the sand that was already removed from vacuuming / falling out). I had thoroughly vacuumed the ports before investigation to see if it would have any effect. There's no way that parts washing would have been able to remove all the particles from the cover with the item assembled. Cleanup / reassemble to follow. YouTube video of the latest cover I've refurbished: https://www.youtube.com/watch?v=e0tlJcCMhP4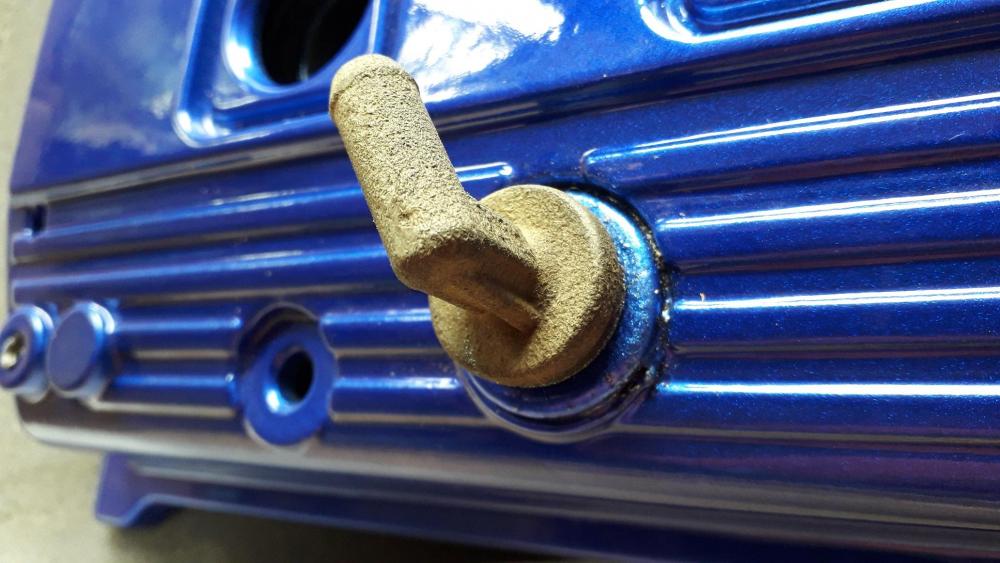


-
Claymore's sleeper 4efe+t-t+t build (R.I.P. the Nanza)
Claymore replied to Claymore's topic in EP91 Progress Blogs
Maybe on the next engine. Lol I'll get stage 1 complete first. -
Claymore's sleeper 4efe+t-t+t build (R.I.P. the Nanza)
Claymore replied to Claymore's topic in EP91 Progress Blogs
This was the scenario I was describing. I've been set on the TF + corolla mani combo for a while now as I feel it will provide the power delivery and level I want. Power figures are what I was aiming for (and spoke to Tuning developments about it and they say that 160 ish with the TD04 was what they achieved on an fe + t). I do have a TD04l 13t as well and they both fit the same manifold so could easily be trialled. As said I can always add fuel pressure (within limits) or increase injector size if necessary and I will be data logging and monitoring AFR's for setup. -
Claymore's sleeper 4efe+t-t+t build (R.I.P. the Nanza)
Claymore replied to Claymore's topic in EP91 Progress Blogs
Thanks for the info. The 2.8 bar base pressure adds up to quite a high fuel pressure if 1 bar of boost reference is added! Interesting stuff. -
Claymore's sleeper 4efe+t-t+t build (R.I.P. the Nanza)
Claymore replied to Claymore's topic in EP91 Progress Blogs
Wierd about the stock 4efte fuel pressure at idle. Is the 3 bar recorded with the vac line connected or disconnected? Most say idle pressure is 2.4 bar. If that's with vac connected it seems about right for 3 bar vac line disconnected. And yes, I knew there was a point where the pressure increase has a detrimental effect on flow, also worries about the affect on pattern too. If I can figure out the gauge plumbing with extra banjo and twin feed bolt I'll let you know the pressure results. Trying not to worry about it. Lol. If the Kemso is questionable just bin it, twin Wally's for the win! -
Claymore's sleeper 4efe+t-t+t build (R.I.P. the Nanza)
Claymore replied to Claymore's topic in EP91 Progress Blogs
Sam said: "Not really., But the cheaper kemso fuel pump already fitted to the vehicle did have me worried at the time & still second guessing myself. keep me posted On what you get, I always like to compare. I didn't take the 295cc 4efte over 80% for reliability reasons. From the information out there I should see an improvement in duty with the 2xfuel pumps. Only time will tell, its been delivered I just need to rewire them in. If I remember correctly the 3sge 2ltr the 372cc light green injectors are off is 170-180hp factory. " I'll believe you on that, but what fuel pressure and duty cycle were they used at? As we know the larger the injector the more coarse the adjustments become where one click in the piggyback fuel table site might be the difference between rich and lean. It just seems most people tuning the glanza's don't need such measures to make the same bhp. Not knocking what you've done or where you're at. . Your project has quite a lot of stipulations for max power with excellent fuel economy etc. so its not the usual build. (Don't forget to update your build thread! Lots of pics please) Wouldn't want to run an injector over 80% either for safety reasons anyway. Yes, inherited uprated fuel pump may be a concern, not knocking them as a brand but it could be tired. Always one of the items to refresh for me. If you've got the Walbro (255lph?) why not just replace the kemso and see what happens? Could be done by this afternoon and at least you'll know. I'll give it a go as planned and see the results. Can always go up in pressure or injectors at a later date. -
Claymore's sleeper 4efe+t-t+t build (R.I.P. the Nanza)
Claymore replied to Claymore's topic in EP91 Progress Blogs
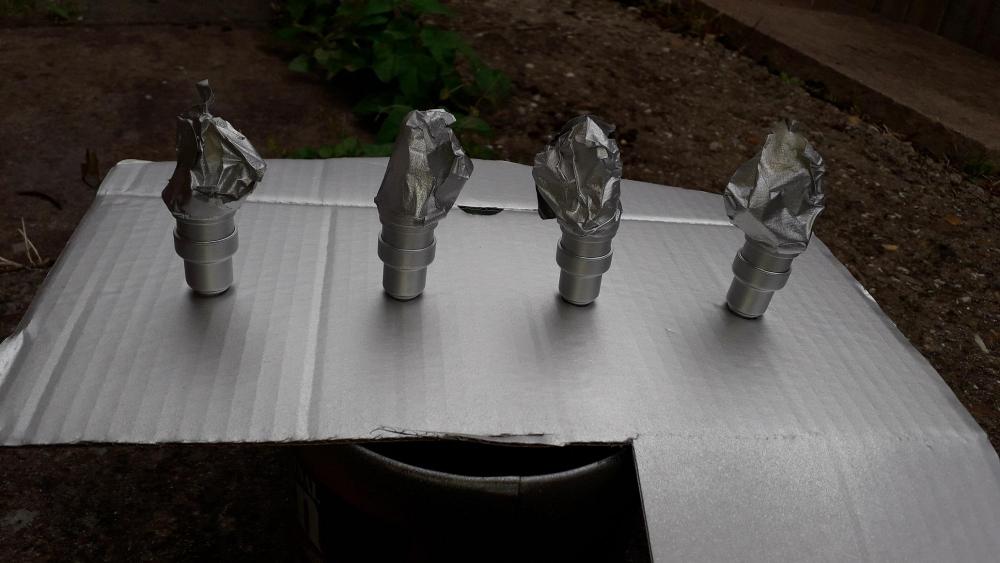
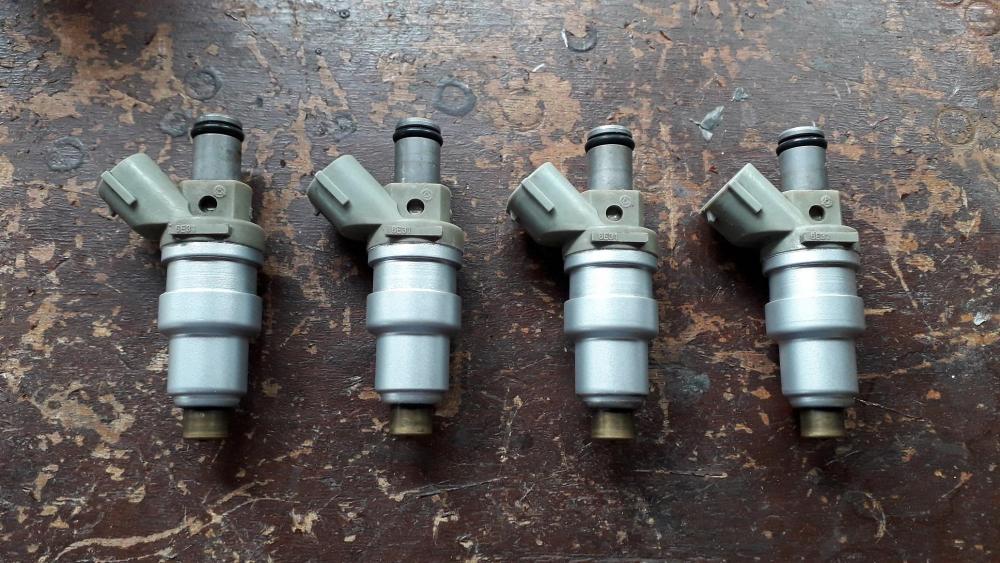
Speaking of injectors. https://www.youtube.com/watch?v=fWBOrM646ow Glanza 4efte injector clean and paint: Before and after. Quick once over with 240 wet n dry. All cleaned up Masked and sprayed VHT silver. Not too sure about the paint, it says its resistant to oil and petrol but seems to come off quite easily with brake cleaner. Hopefully once in a hot engine bay it will "cure" or something? 😕 All done. Also picked up this in a joblot of parts, 4efte Cam cover: Yes its been painted and I've been "investigating" it yesterday so place your bets: A= clean as a whistle (Not sand blasted, only been chemically cleaned prior to paint.) B= Some sand blasting media inside. C= Quite a lot of sand blasting media and a surprise item inside!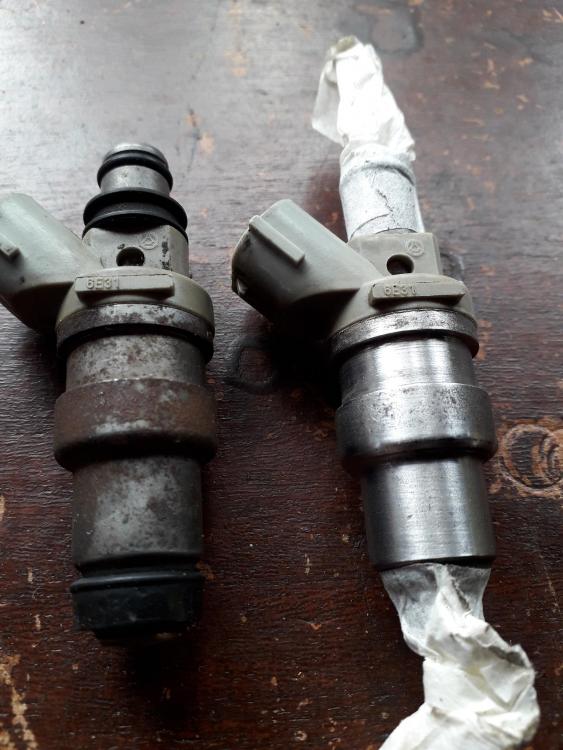


-
Claymore's sleeper 4efe+t-t+t build (R.I.P. the Nanza)
Claymore replied to Claymore's topic in EP91 Progress Blogs
For my power goals I'll be using the "old favourite" Walbro 255lph with glanza 295cc's at stock fuel pressure. Might try and find a new glanza fpr (if they still make them) as my stock 4efe one is probably a bit tired by now. If nla I might add an adjustable fpr if I need more fuel. I've done a bit of reading up and it seems 300cc ish injectors are ok for 200 ish bhp at 85% duty. Seems a bit odd that you need to run such a large injector (372cc) and increased fuel pressure with 2 fuel pumps? -
Think they're 45mm I/D mate according to danstengineering. https://danstengineering.co.uk/Velocity-Stack-Kit-for-Triumph-TT600-Throttle-Bodies-All-Lengths Also I believe they taper to a smaller diameter at the head side. (37mm according to a mazda miata website post). 55mm is too big for a 1.3 litre revving to 6k rpm. FYI my previous car had 46mm itb's, 2.3 litre revving to 7k rpm.
-
One in the for sale section dude.
-
Claymore's sleeper 4efe+t-t+t build (R.I.P. the Nanza)
Claymore replied to Claymore's topic in EP91 Progress Blogs
Thanks Sam, I had some heat range 6 plugs on the shopping list along with additional / upgraded earth wires. Even the standard battery earth looks a bit small. Interesting stuff with the vacuum chamber, I saw another of your posts regarding the delay of fuel pressure increase. Does the chamber only slow the pressure signal reference or does it reduce it also? -
Claymore's sleeper 4efe+t-t+t build (R.I.P. the Nanza)
Claymore replied to Claymore's topic in EP91 Progress Blogs
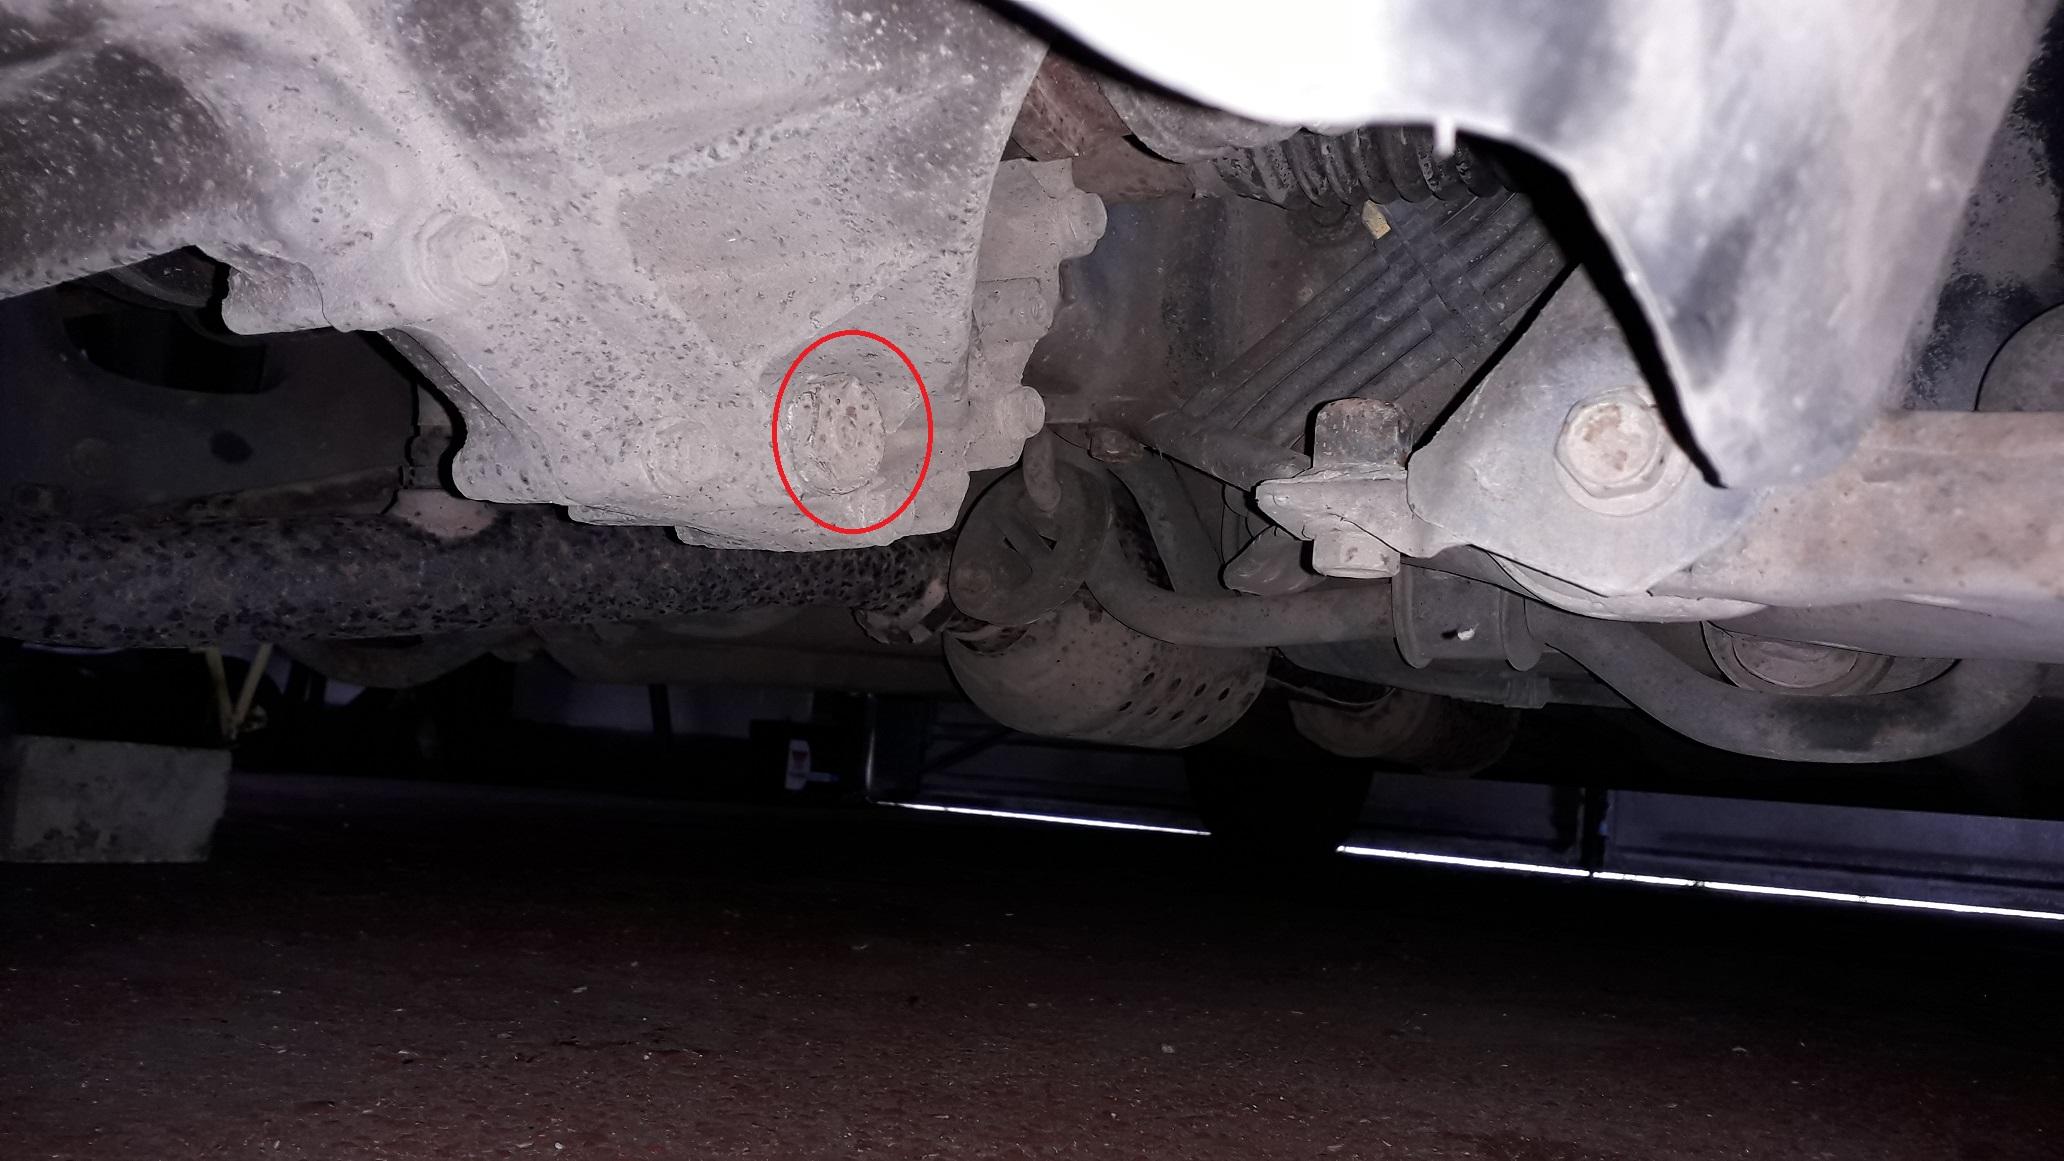
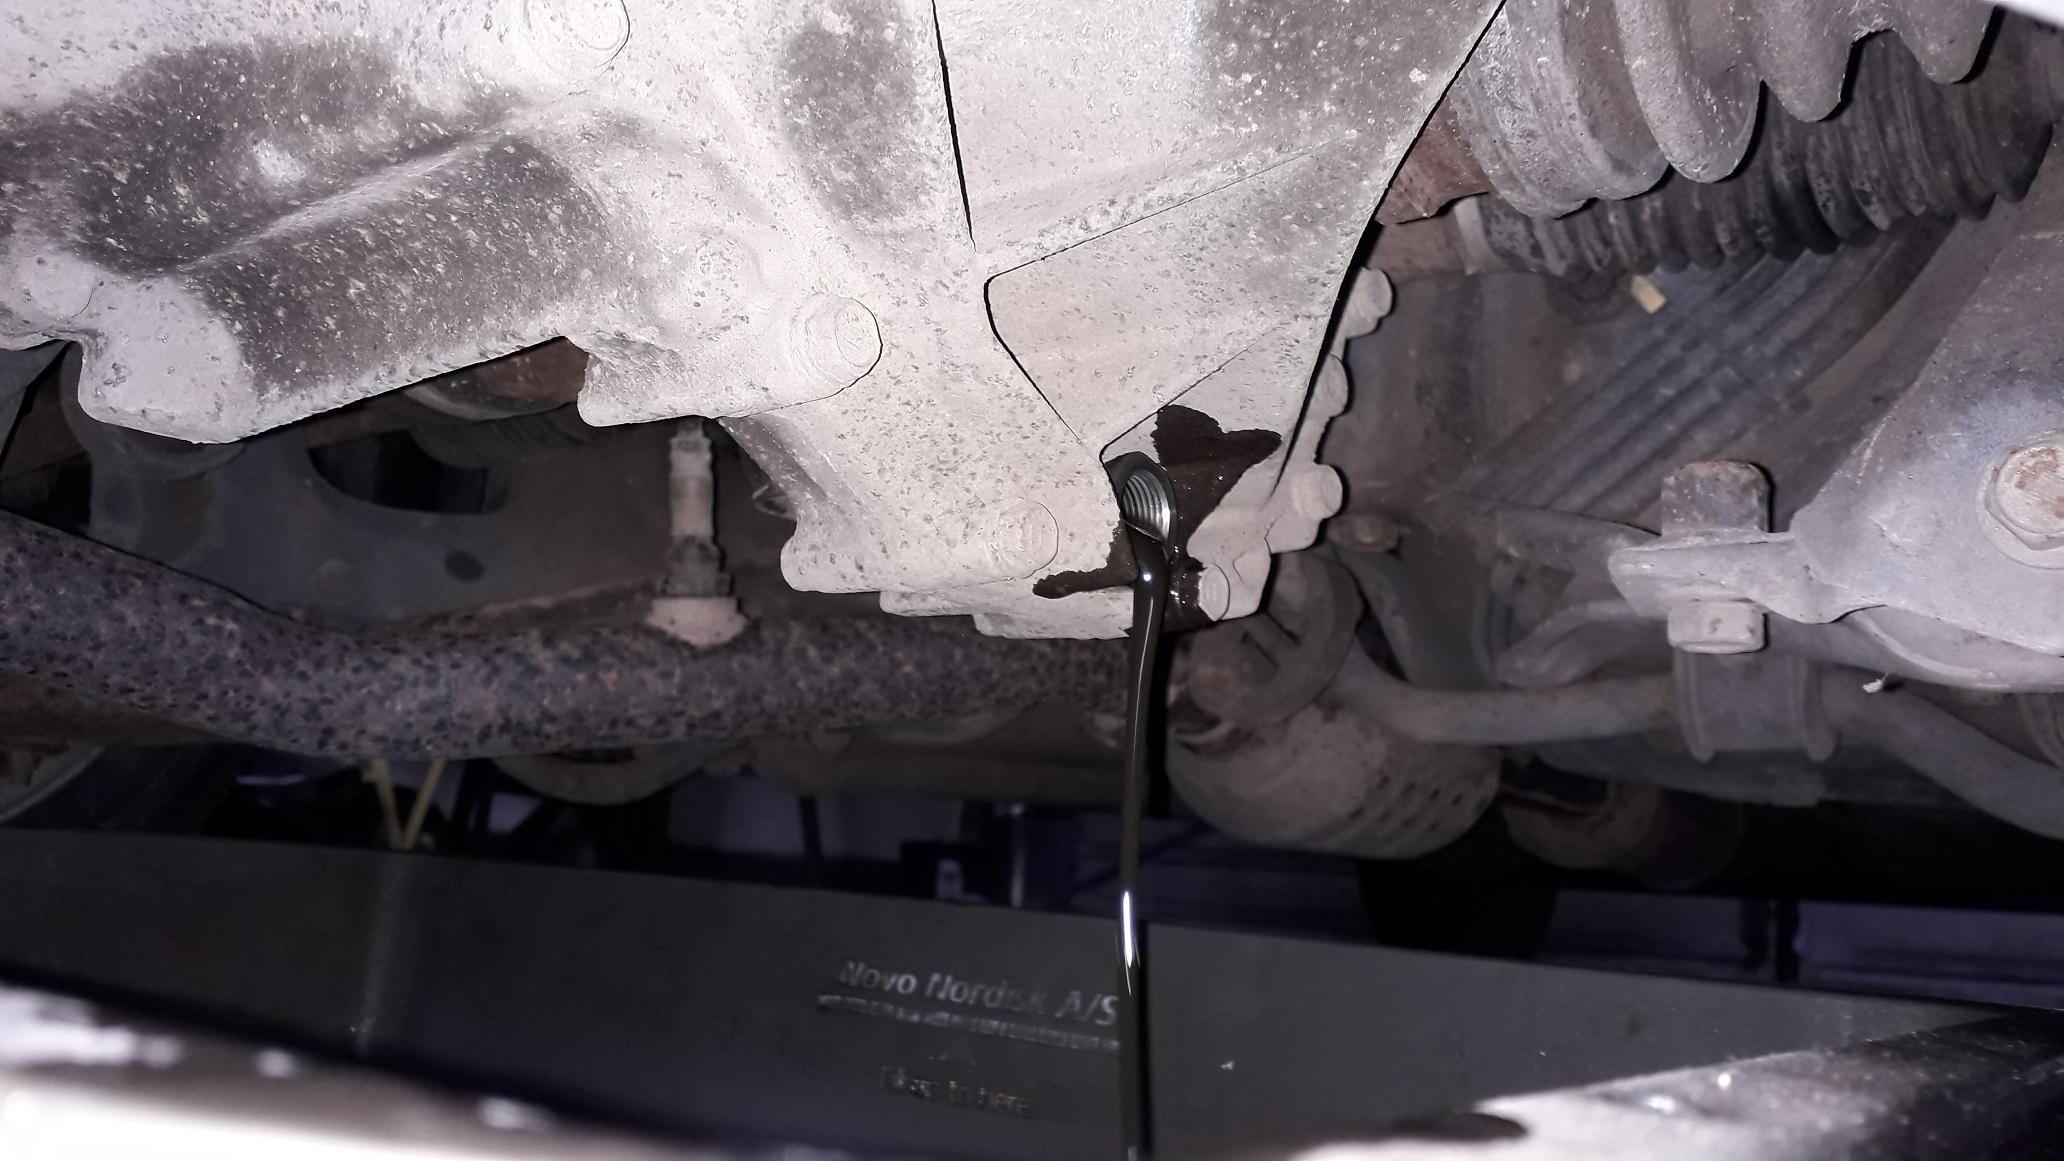
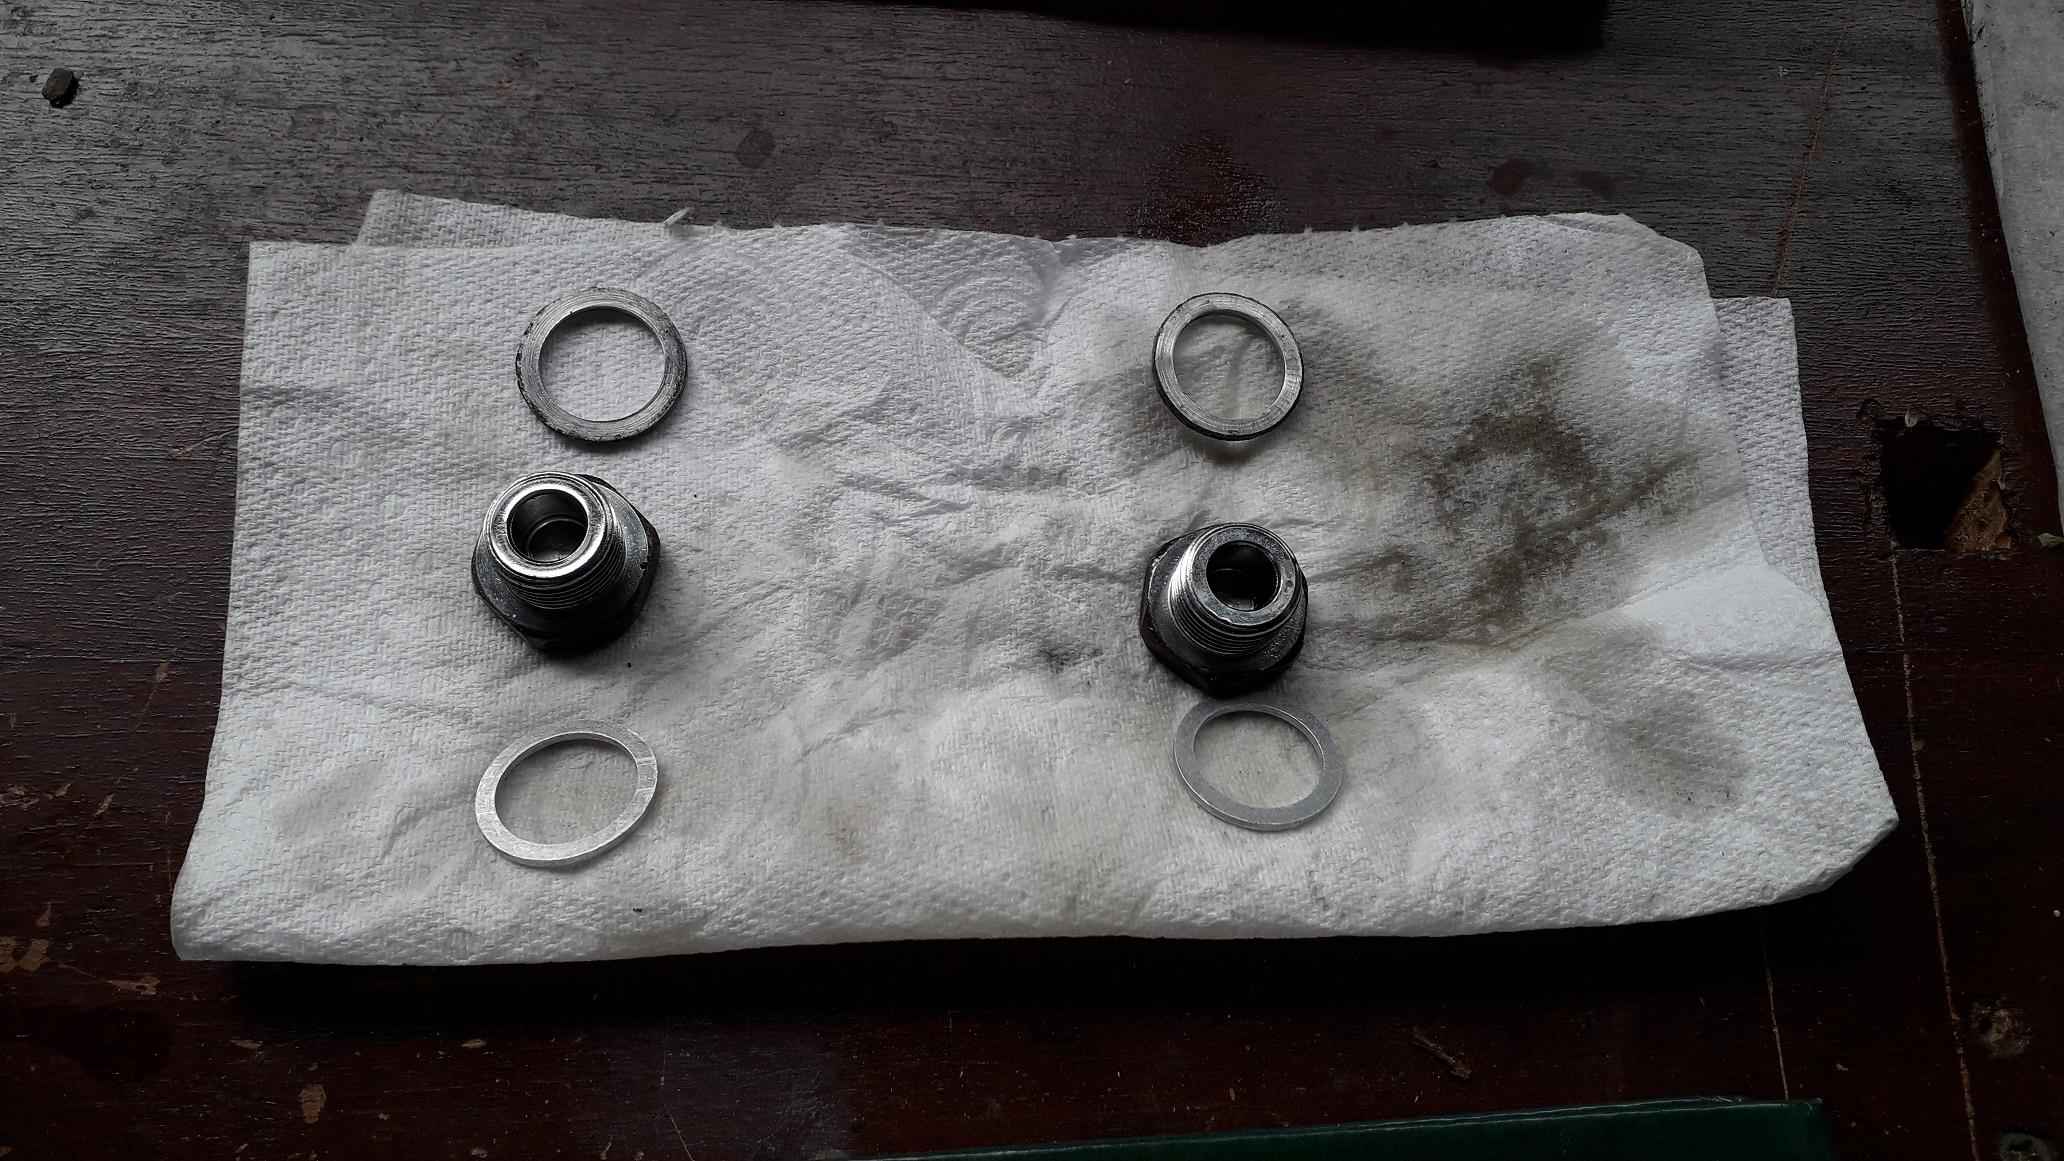
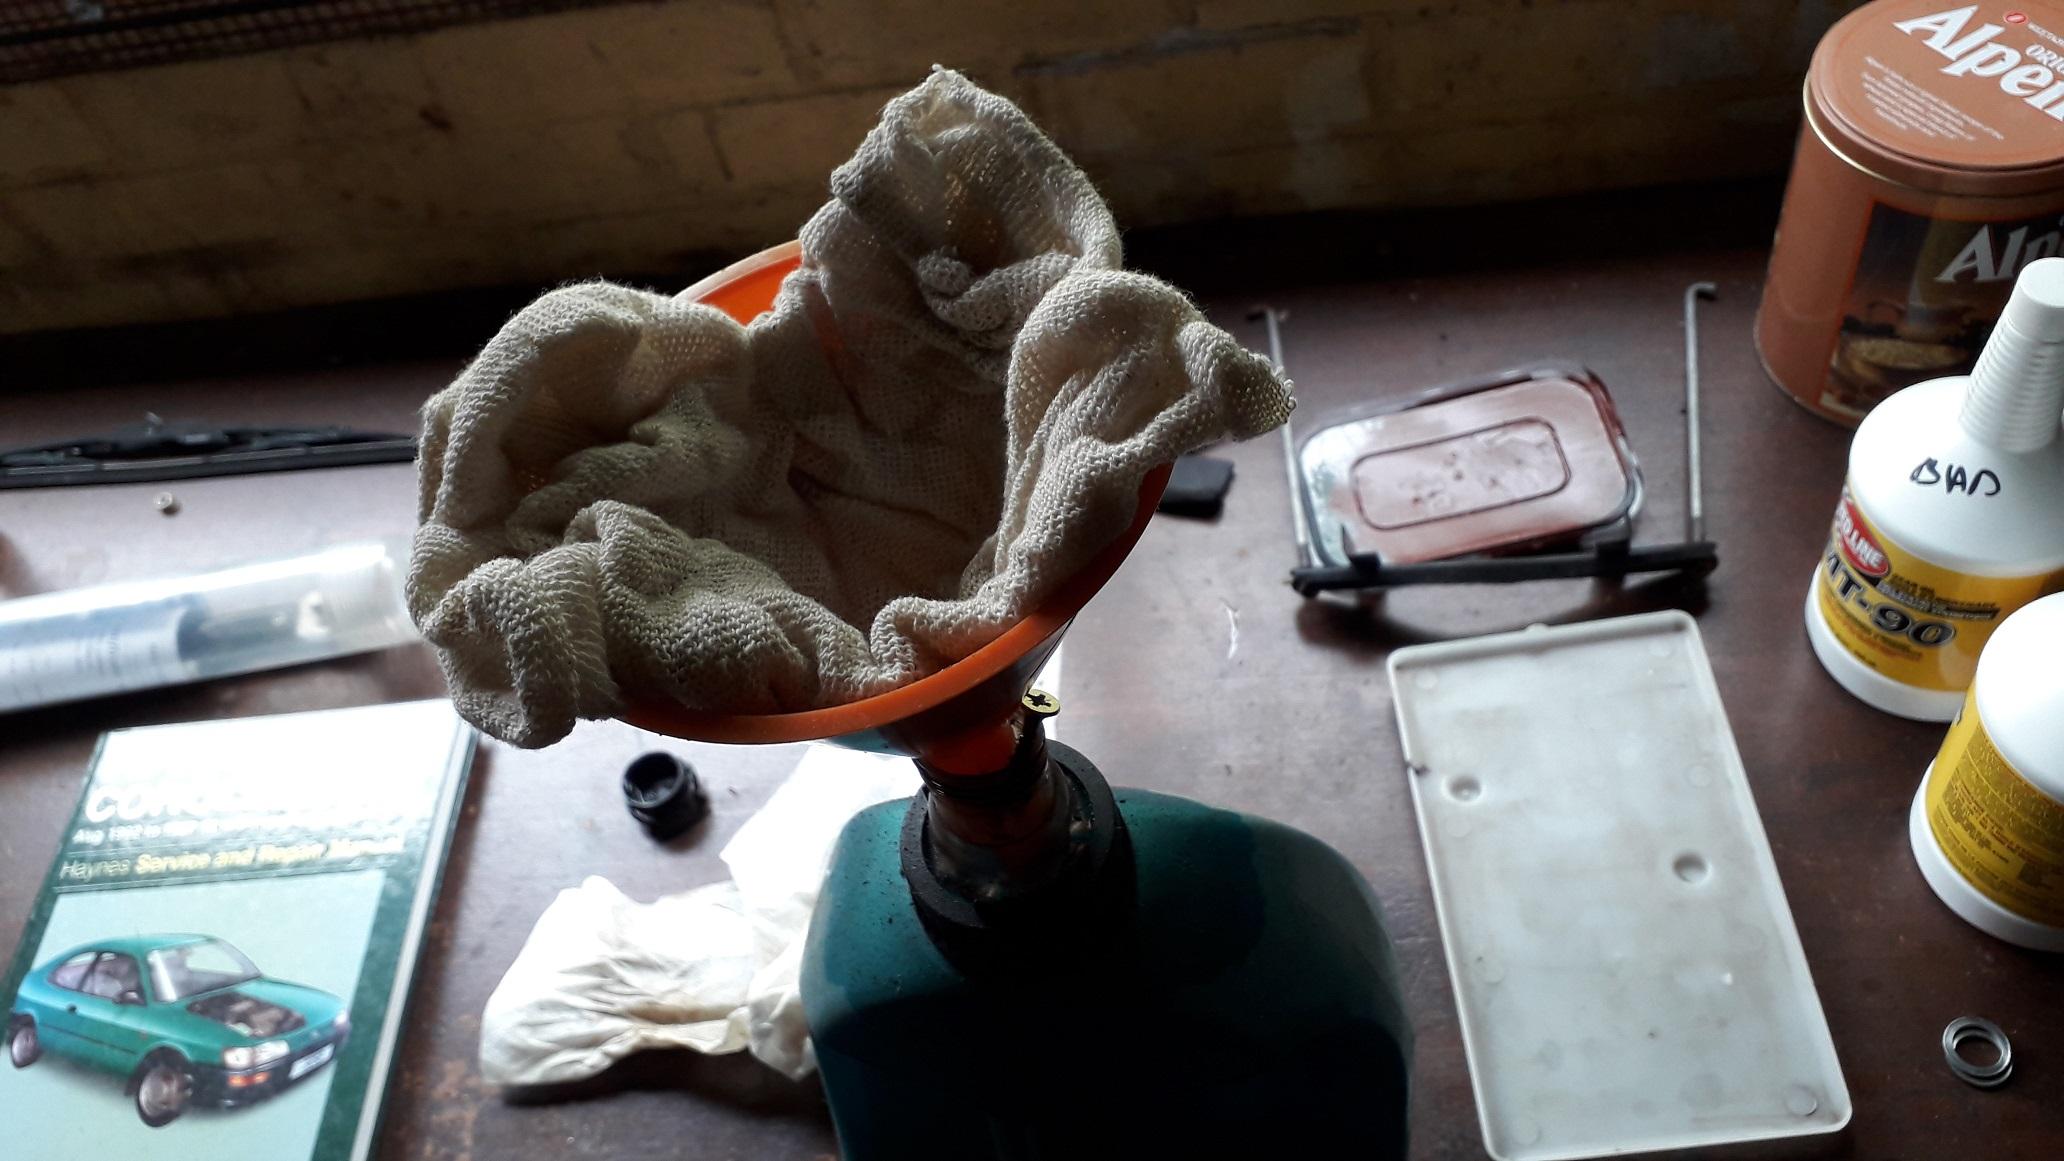
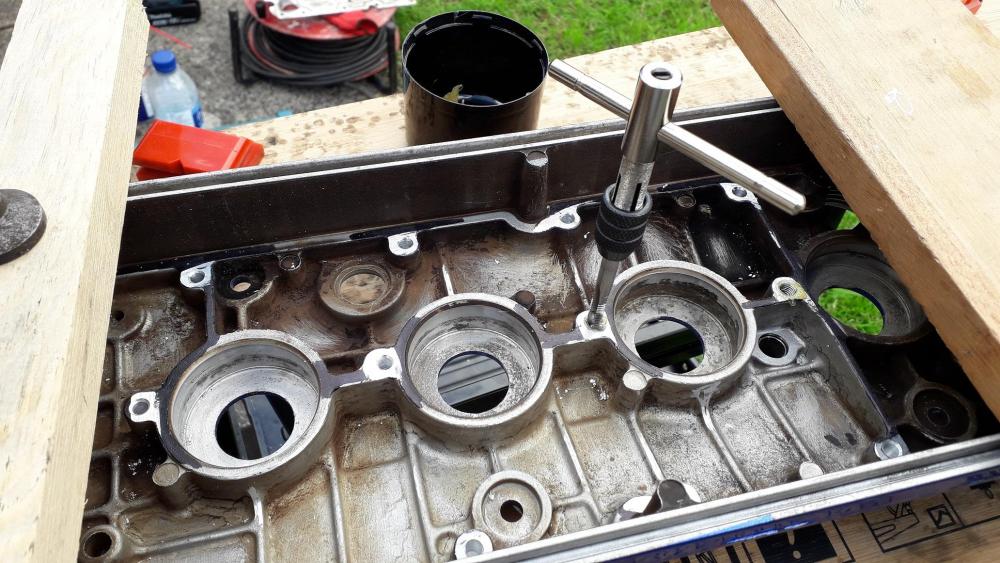
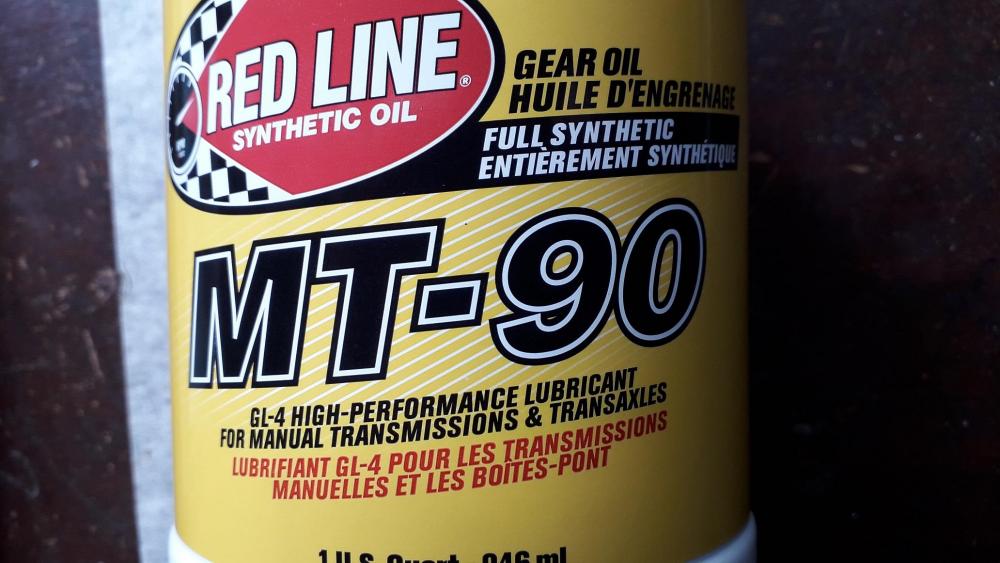
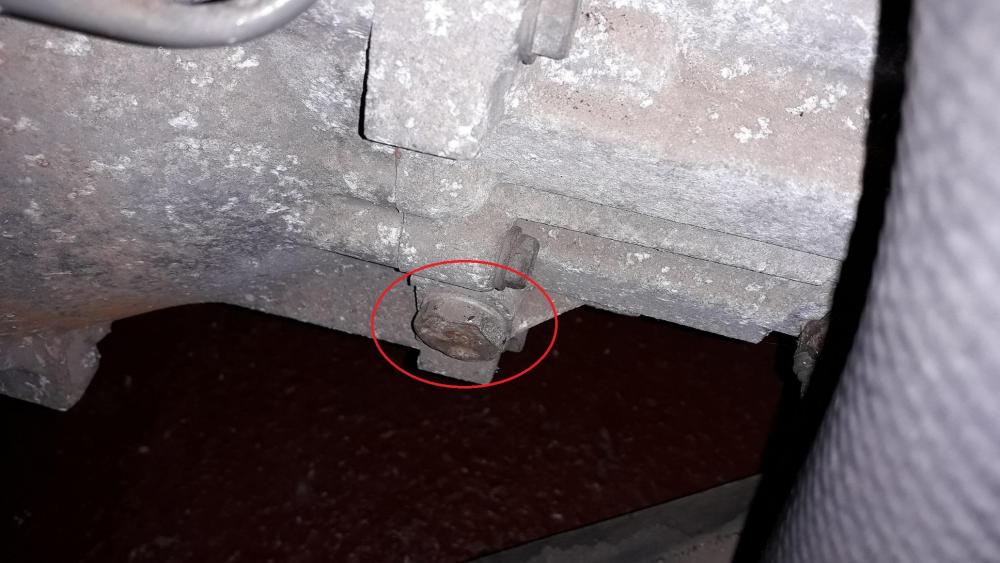
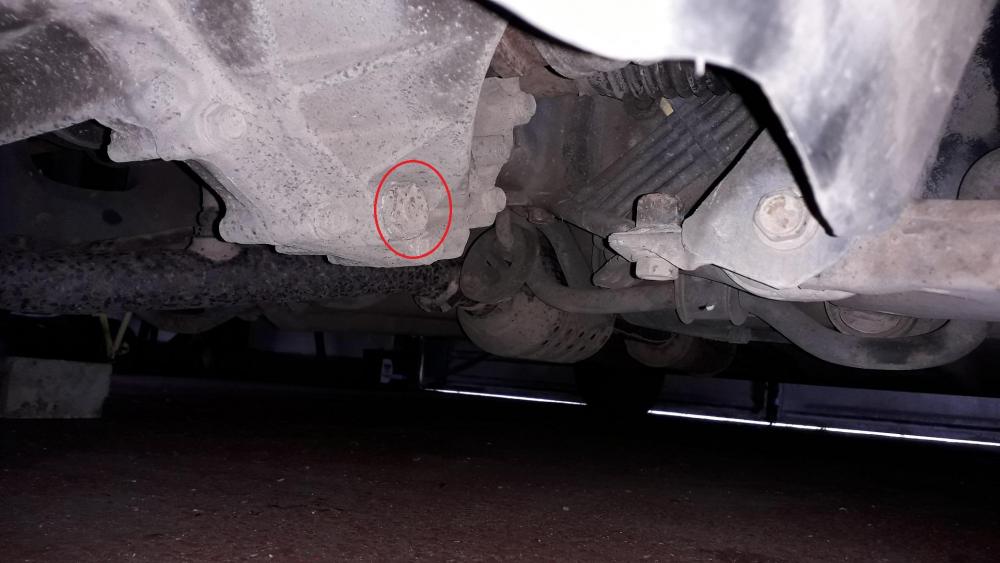
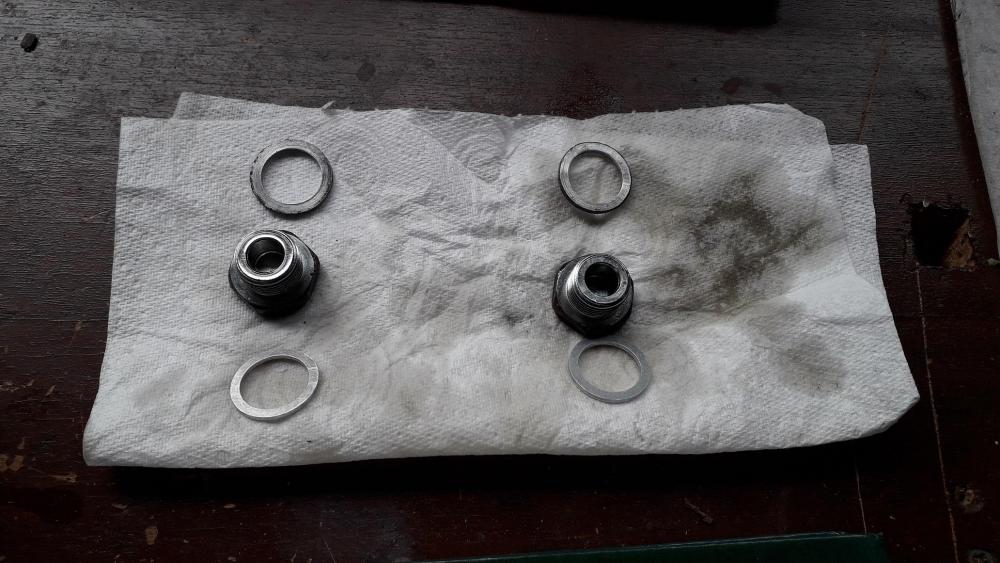
Gearbox oil change time. Really like the Red line range of oils, went for MT-90 GL4 (75W-90) which meets the Toyota owners manual specified oil. It says you can use GL4 or GL5 but as the box appears to have brass synchros I stuck with GL4. Fill plug on front (24mm thin walled socket) always remove fill first to check you can. Drain plug (also 24mm) Clearly needed a change, probably never been done before. Drain and fill plugs removed (old aluminium crush washers at top, new at bottom) washer size is 18 I/D x 24 O/D x 2mm from Toyota (part number= 90430-18008). I managed to find some that were 18 x 24 x 1.5mm on eBay and they worked fine. Drain plug, crush washer refitted and torqued to 39Nm. I fashioned an exact copy of the official Toyota "special tool" for gearbox refilling! Took just over 2 litres but less than 2.5 litres. Fill plug, crush washer back in and torqued to 39Nm also. Screened the old oil into a container through a rag to check for debris, thankfully no synchro material. Don't know whats on the box magnet though. Ignorance is bliss. Shifts sweeter from cold. An improvement over the slight notchy feel. Thanks for looking.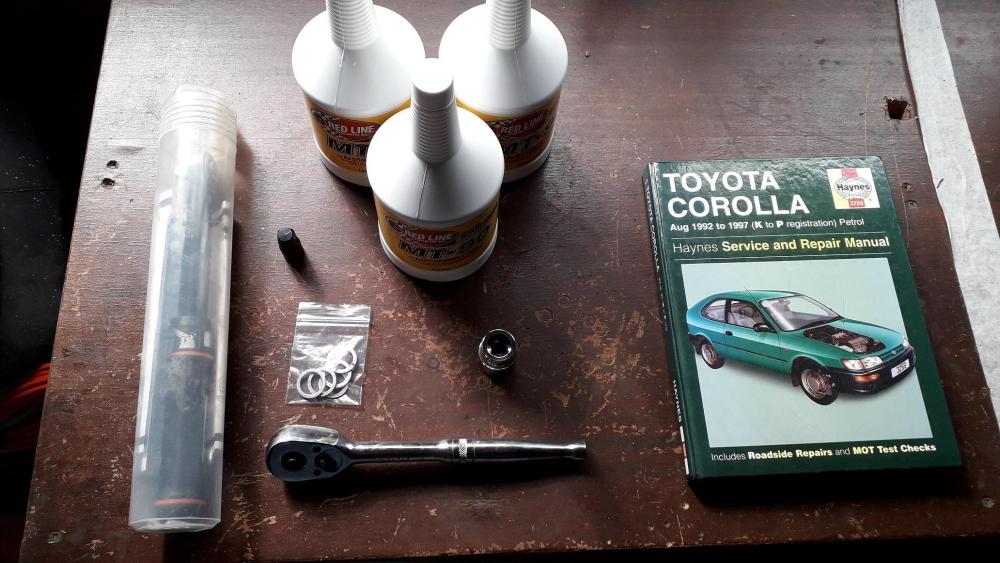


-
Claymore's sleeper 4efe+t-t+t build (R.I.P. the Nanza)
Claymore replied to Claymore's topic in EP91 Progress Blogs
Good to know its still on going. Might be the combination of the wheels and housings used in the hybrid, hybrids are difficult to get right, might be the porting on exhaust housing, might be too much flow from the 11 blade comp wheel (looking at your build thread the 11 blade comp wheel blade height is a fair increase over the 6 + 6 stock 13t). Difficult to know as compressor maps are difficult to find with all the possible combos out there. Your the first starlet user I've read about who complains that his TD04l spools too quickly! Lol. Maybe exhaust manifold is flowing too well at low rpm? Can you elaborate on which other mods you feel have best improved the spool time of the turbo please (not the turbo design itself)? PM if you prefer. Was also wondering, you said about fixing the fuel pressure at a set rate and not vacuum referencing it as you were getting rich areas lower in the rev range. Which FPR do you have? Is it 1:1 ratio or rising rate 1:1.5 for example. -
Claymore's sleeper 4efe+t-t+t build (R.I.P. the Nanza)
Claymore replied to Claymore's topic in EP91 Progress Blogs
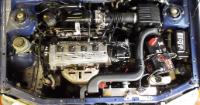
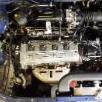
Thanks Sam, I got it off eBay in the end, found a guy who was selling a corolla 4efe engine complete with gearbox. Sent him a picture of the manifold I wanted and I offered him £50 for the manifold and both brackets, he took them off and posted them. 😎. There are loads of corolla engines for sale on there, just contact one at a time and you'll get one. Still going with the TF035hm turbo (assuming its not blown). Seems to offer the type of delivery I'm looking for and more than enough flow for my particular power goals. How's your build going? we've been waiting for some updates / pics, saw on the other forum you were experiencing surge issues with the hybrid? Any updates? Also when you mention surge are you describing open throttle compressor surge (too much flow resulting in cavitation of compressor) or surge of boost (sudden increase in airflow 80's style)?