JAG Posted July 19, 2011 Posted July 19, 2011 Mate that looks so sexy!Cruise wings next maybe? lol Quote
WallaceGlanza Posted July 20, 2011 Author Posted July 20, 2011 Thanks guys, I'm loving the way the bonnet looks and it's nice and functional - I had the rain guard out the other weekend and after a good run the heat was pouring out the vent. The oil cooler however is over-cooling the oil, even with a thermostat, so more duct tape over the core is required! Regarding the wings I actaully don't want the cruise ones, I prefer the "mc chu" style ones as modelled by Joz above, those and a slightly wider stance should go nicely with the bonnet. Quote
rorenapier Posted July 20, 2011 Posted July 20, 2011 Temps are you seeing with the cooler in place? Quote
WallaceGlanza Posted July 20, 2011 Author Posted July 20, 2011 70 off boost upto 75 with a little boost on the dualler, it sat nicely at 85c over that hot weekend when driven "properly" but it needs boost to get upto that temp. Quote
jonnygt Posted July 20, 2011 Posted July 20, 2011 bonnet looks sweet, needs the rocker cover a nice bright colour to set it off Quote
dzign Posted July 20, 2011 Posted July 20, 2011 Amazing work!!! This car is just awesome inside and out man. Cant wait for more updates!!!! Quote
shorty Posted July 20, 2011 Posted July 20, 2011 Is a true stunner bonnet defo whent to a good home imo. Very very clean looking v, love it dude. Quote
WallaceGlanza Posted August 3, 2011 Author Posted August 3, 2011 Thanks for the nice comments guys.Time for a small update;My rocker cover had become a bit sorry looking after being painted a couple of years ago with paint which wasn't heat resistant:So since it was in such bad condition and that you can now see it through the bonnet (well on the rare days that it's not running and the rain guard comes out!) I decided to re-paint it, this time with some proper heat resistant paint.It looks basically the same as the old one did although the paint didn't give as nice a coating: Fitted:You may also notive I replaced the pcv valve - I was going to gut it but it snapped off when trying to remove it so I had a new fitting welded on, this was to allow me to fit my catch can. After the long discussions regarding this on here I knew exactly how I was going to fit it, I also wanted to do a bit of work on the catch can itself to make it more efficient. Most catch cans have nothing inside them which doesn't really help in removing oil particles from the vapour, the idea of fitting wire mesh inside the cans does help but simply having it dumped in the bottom isn't great. Firstly the vapours aren't necessarily going to flow through it and it's a pain to clean, so I came up with a nice simple idea to get around this.Take a tea bag strainer (yes really) and put the mesh (a stainless scouring pad!) inside:Then place this in the top of the catch can with a third port/nozzle fitted below, I also put a rolled up piece of rubber in the can to sit the strainer on and which will also help seal around the strainer:The third port is the inlet to the can, meaning that all the vapour has to pass through the mesh and will help the oil droplets condense and collect in the bottom of the can. It's a nice simple idea which should be more effective and easier to clean out.I'll be setting up the catch can as per this diagram:(all credit to enzo_e492901 for working that one out) however for now I've not got it tee'd into the turbo inlet so the third port on the catch is just blocked off. This set up requires the use of check valves like this;Fitted in line to act as the pcv valve before the can (to stop it and the head being pressurised under boost) and the others when fitted will allow the whole breather system to act as the standard one does both on vacuum and boost but hopefully providing a cleaner inlet charge. So all fitted it looks like this:Still not the tidiest bay but it's better. Unfortunately the catch wouldn't seal properly due to there being no gasket where the lid bolts on so I've had just block off the inlet for now, I will seal the can with sump sealer then see how it actually works.Also once I fit the new turbo inlet complete with tee I'll get rid of the open filter on the rocker cover - at least then the rocker cover may stay cleaner this time! Quote
WallaceGlanza Posted January 22, 2012 Author Posted January 22, 2012 As usual it's been ages since an update.... however this year I'll be putting a bit more time into the glanza and hopefully finally getting some track action in it. But before it will be any use on track there's one area that really needs sorted - the brakes, now I've known this for a while hence the reason last year (back in August) I finally got myself a nice set of Wilwood 4 pots and 3G 288mm two piece discs (2nd hand but with barely any miles on them so in excellent condition):To get them to fit behind my Rays wheels I knew I would also need spacers so I had some 15mm aluminium one's made up and got longer wheel studs too:So I set about removing the stock set up:All stripped including dust shields:Longer wheel studs fitted (I used an electric impact gun to pull these through, easy when using that!):A quick comparison of the old and new discs:Then fitted:I was chuffed with how easily the kit fitted until I went to fit the Rays and admire the new setup:A tight fit even with the spacer.... a bit too tight:Turns out the 288mm kit I bought was infact a 300mm kit! There was no way they would fit behind the Rays however they did squeeze behind my tiger sport wheels (that sounds much cooler than TSW!):Albeit with the wheel weights removed! There was only about 2mm clearance between the caliper and inside of the wheel. With the 15mm spacers also on the rear the stance has been subtley but effectively improved:A test run of the brakes proved them to be as I expected - a huge improvement over stock, much improved pedal feel and a strong progressive bite. They reduced the braking distance nicely even on the less grippy bridgestones the tsw's are fitted with.I ran the car for a couple of weeks with the wilwoods fitted but couldn't face getting rid of the Rays and there was no way of making the kit fit the wheels so it was unfortunately sold.... however I now have enough info to make up my own kit which I will be doing in the next month or so. Fast forward to today and I was doing a little bit of tidying up, over winter the car had been getting very damp inside and when frosty the car would be thoroughly frozen on the inside! The recaros were also getting mouldy so something had to be done, I thought the lack of rear interior and bare metal wouldn't be helping this so set about carpetting it today,First off the remaining plastic trim parts were removed to give a nice fully stripped slag!:Then I set aboout fitting the carpet, for the very rear section I made up a thin hardboard panel and covered it in the carpet (like motion on here did) then just laid the carpet in the area in front, et voila:I'd say it looks much neater but still has a nice stripped out track look, on first impressions driving it seems to have got rid of the road noise but retained all the exhaust noise which is nice!As I said I'll be getting another big brake kit sorted soon and when the weather improves will also fully refurb the rear brakes - I'm really looking forward to finally chucking this thing round a track. Quote
Idrees Posted January 22, 2012 Posted January 22, 2012 Sweet, interior looks so tidy now. I've got a set of Celica brakes which perform very well and are cheap. Quote
Amjad Posted January 22, 2012 Posted January 22, 2012 Wow those brakes are huge! Loving the interior!!I can vouch for GT4 brakes, mine are 277.5mm so not far off Wilwoods albeit with a less powerful caliper Quote
Ryan-11 Posted January 22, 2012 Posted January 22, 2012 Good stuff mate, the carpet in the back looks awesome, bit of a bummer about the willwoods tho. Quote
LukeSR Posted January 22, 2012 Posted January 22, 2012 Shit one on the brakes mate! But I absolutely love a stripped, then carpet'd rear! Quote
Ryan5793 Posted January 23, 2012 Posted January 23, 2012 shame about the willwoods, looked mega under the rays! love the rear too well actually i love the look off the whole car. Quote
WallaceGlanza Posted January 23, 2012 Author Posted January 23, 2012 Cheers guys. Yeah I was gutted when the wheels wouldn't clear the calipers but as I said I've now got measurements to make up my own kit so can spec it just as I want it, so cheers for the offer Id but I'll be sticking with the wilwoods. Quote
Liam_D Posted January 23, 2012 Posted January 23, 2012 Love this car mate shame about the Wilwoods looking less and less likely that im gonna be able to run a set with my current wheels!Love the interior too that looks ace mate. Quote
WallaceGlanza Posted May 4, 2013 Author Posted May 4, 2013 Well seeing as I'm a proper member on here I thought I'd better update this.... So over a year ago with an MOT due and a handbrake that wasn't working I decided to take the Glanza off the road (oh the joy of having a second car!) to fix the handbrake and a few other bits at the same time - this was back in April - it took until mid September before an MOT certificate was issued! The list of things I was wanting to do wasn't long but as usual nothing went straightforward. The initial jobs involved this small pile of parts: New handbrake cables, rear caliper rebuild kit, poly rear trailing arm bushes and some heat wrap for the whole exhaust. After getting under the car I was pretty shocked at the condition under there, specifically the Whiteline chassis parts which had corroded very badly in quite a short space of time: The panhard rod was horrible: So I decided to add cleaning up all these parts and the rear beam to the list. I knew the powerflex rear trailing arm bushes wouldn't be a direct fit after seeing people having to remove the ring in the arm to fit them, however I didn't want to do this as imo it doesn't look safe. I had planned to have the bushes turned down to fit but upon trying them against the axle I realised it wasn't going to be that simple, so I contacted powerflex gave them some dimensions and they sent a new pair of bushes for me trial fit, thankfully these fitted perfectly: You can see the dfference between the GT and Glanza bushes here (Glanza on the left): Whilst waiting for the new bushes from powerflex I rebuilt the rear calipers and set about removing the exhaust to allow me to heatwrap it. Due to the exhaust being a custom system it's only a 2 piece system, going from the downpipe right to the backbox just after the rear beam in one section, this makes it bloody hard to remove with the car just on axle stands. Unfortunately I got slightly frustrated trying to remove it, bent a section of the fuel tank and caused a leak! A new fuel tank was required. With the exhaust off I decided to enlist the help of my friend and his welder to make the exhaust a 3 piece system: So it went from this: To this, with the addtion of a couple of flanges and the heatwrap: I was finally able to get the back end put back together and freshened up like so: Whilst the rear end was being played with it was also a good time to finally get a set of 4 pots sorted up front. Before I sold on the previous Wilwood kit I had fitted for one week I took a few measurements to allow me to replicate the kit but with the 288mm discs I needed to fit behind the Rays. The required parts were gathered: Wilwood midilite calipers, custom brackets, hi spec discs (288mm diameter, 25.4mm thick and race grooved) and bells and ferodo pads (which need modified to fit the midilites). The bells also needed drilld and centre bore taken out to suit the hub, one done I had them anodised along with the brackets: After a few trial fits and minor adjustments the completed kit was fitted: A nice tight fit behind the rays (once the wheel weights were moved!): Finally after months of the road it was time to get back on it - after a complete faf getting through the mot involving re-fitting the standard cat and manifold taking them back off to get rewelded then finally passing. I'm happy to say the cars running nicely again though, the brakes are awesome, no more fade on my favourite back roads! After a wee clean and blast up that back road the car looked like this: Next up is finally a bit more power, after driving a torquey beemer most days this thing is feeling a little underpowered, I'm going to get it checked on a dyno first to make sure nothing is amiss then it's finally time for a bigger snail! Quote
Socks Posted May 4, 2013 Posted May 4, 2013 You've had this car a long time dude! Glad to see you still have it and its still going strong! Keep us all posted Quote
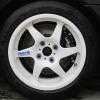
WallaceGlanza Posted May 4, 2013 Author Posted May 4, 2013 You've had this car a long time dude! Glad to see you still have it and its still going strong! Keep us all posted Certainly have, almost 8 years of pain! With the better weather coming it was time for the Glanza's annual clay bar, polish and wax (it doesn't get used enough to warrant getting done more often!). At the same time there were also a couple of small mods I wanted to do. First was some centre caps for the wheels, being an old style of Rays wheels the current genuine ones don't fit so I bought some generic ones and finally found some nice stickers to go on them like so; http://s202.photobucket.com/user/WallaceGlanza/media/My%20Glanza%20V/IMG_1483_zpsa016f62f.jpg.html'> I'd say they look good on the wheels: http://s202.photobucket.com/user/WallaceGlanza/media/My%20Glanza%20V/IMG_1500_zps76c087bd.jpg.html'> http://s202.photobucket.com/user/WallaceGlanza/media/My%20Glanza%20V/IMG_1502_zpsaedb3b66.jpg.html'> http://s202.photobucket.com/user/WallaceGlanza/media/My%20Glanza%20V/IMG_1512_zpsaae00594.jpg.html'> The other minor thing was changing the rear wiper, the old one was a bit rusty and makes the whole car look dated, so a newer one from a Toyota Previa (Got to keep it in the family) was fitted. Before: http://s202.photobucket.com/user/WallaceGlanza/media/My%20Glanza%20V/IMG_1503_zps1c9527c8.jpg.html'> After: http://s202.photobucket.com/user/WallaceGlanza/media/My%20Glanza%20V/IMG_1515_zps8923a0a8.jpg.html'> http://s202.photobucket.com/user/WallaceGlanza/media/My%20Glanza%20V/IMG_1514_zps2896524a.jpg.html'> It's all in the details! As mentioned in the last update I was wanting to get the glanza rolling roaded before squeezing more power out, just to make sure everything is running ok (as usual I'm hearing noises and getting paranoid!). Typically the night before the rolling road was booked the trusty glanza decided to spray v power over the driveway through a corroded fuel line, so a repair was done (bodged) to make sure it would make it! Make it she did and it even managed to not blow up on the rollers at Wallace Performance. On the first run Matty wasn't happy with how lean she was running, a wee tweak to the rrfpr and it was much improved. the power output was as expected - basically the same as she made back in 2007 (albeit on the original engine), 186.8bhp and 164.2 lbft http://s202.photobucket.com/user/WallaceGlanza/media/My%20Glanza%20V/2134b3a9-0e90-47e0-86a4-bfe08394efad_zps0c6c5316.jpg.html'> http://s202.photobucket.com/user/WallaceGlanza/media/My%20Glanza%20V/IMG_1522_zpsb73b6d6d.jpg.html'> http://s202.photobucket.com/user/WallaceGlanza/media/My%20Glanza%20V/IMG_1523_zps3ce5ad4c.jpg.html'> With the tweak to the fuelling the glanza is running much better now, its much smoother lower down and doesn't run like a bag of shit when cold! So it seems it's finally time for a bit more power, that means this little lot can can be thrown on: http://s202.photobucket.com/user/WallaceGlanza/media/My%20Glanza%20V/IMG_1530_zps82eb2087.jpg.html'> The turbo is a TD12 which were sold by Tongs/Enzo over on UKSC for a short while, it has TF035 compressor housing, CT12 exhaust housing and TD04 internals so should provide good spool times with a nice power and torque spread - exactly what I'm looking for. http://s202.photobucket.com/user/WallaceGlanza/media/My%20Glanza%20V/CIMG0590_zps792d0f85.jpg.html'> http://s202.photobucket.com/user/WallaceGlanza/media/My%20Glanza%20V/CIMG0594_zpsc5134639.jpg.html'> http://s202.photobucket.com/user/WallaceGlanza/media/My%20Glanza%20V/CIMG0600_zps3330b624.jpg.html'> I can't wait to get it on and mapped!!!! Quote
WallaceGlanza Posted May 5, 2013 Author Posted May 5, 2013 Some awesome work going on here mate! Cheers mate, not exactly quick progress but will be good to finally have a bit more power! Quote
shorty Posted May 5, 2013 Posted May 5, 2013 nice update dude. always wanted to see some one give a td12 a prooer shot. is a true hybrid with alot of potential!! Quote
WallaceGlanza Posted July 6, 2013 Author Posted July 6, 2013 The standard ct9 (not the original one as it blew up a long time ago!) has finally been upgraded in favour of a lovely and pretty rare TD12. I'll let the photos do the rest of the talking: Firstly the old setup before removal; http://s202.photobucket.com/user/WallaceGlanza/media/My%20Glanza%20V/IMG_1535_zps483496db.jpg.html'> Comparison of the CT9 and TD12; http://s202.photobucket.com/user/WallaceGlanza/media/My%20Glanza%20V/IMG_1537_zps17011005.jpg.html'> http://s202.photobucket.com/user/WallaceGlanza/media/My%20Glanza%20V/IMG_1538_zps4dd1941e.jpg.html'> http://s202.photobucket.com/user/WallaceGlanza/media/My%20Glanza%20V/IMG_1539_zpsdb2d12d9.jpg.html'> Fitting with the nice shiny oil/water lines; http://s202.photobucket.com/user/WallaceGlanza/media/My%20Glanza%20V/IMG_1544_zpsc81cde41.jpg.html'> http://s202.photobucket.com/user/WallaceGlanza/media/My%20Glanza%20V/IMG_1552_zpseae2d075.jpg.html'> Unrestricted intake with fitting for catch can like the original efi pipe: http://s202.photobucket.com/user/WallaceGlanza/media/My%20Glanza%20V/IMG_1565_zps043f1e24.jpg.html'> http://s202.photobucket.com/user/WallaceGlanza/media/My%20Glanza%20V/IMG_1549_zps2fe30eae.jpg.html'> The 370cc injectors were also fitted then it was time for mapping. Wallace performance did a great job at that and Matty is very helpful, the result is a healthy 235bhp and 197lb ft of torque @ 1.2bar (in a very warm- 28C dyno room!, it will be well over 240bhp on a cool run). http://s202.photobucket.com/user/WallaceGlanza/media/My%20Glanza%20V/IMG_1649_zps73da86a8.jpg.html'> The turbo spools nicely (I actually have it setup even better than on the graph now) with full boost coming in about 3200rpm and screaming all the way to 7000rpm The power is very linear and pulls very nicely, but torque steers like mad on any camber! The only small issue is the radiator cap leaking slightly under full boost, it also comes straight out the vent on the cruise bonnet onto the windscreen. Engine bay before and after cleaning up the coolant! http://s202.photobucket.com/user/WallaceGlanza/media/My%20Glanza%20V/IMG_1643_zpse9a04e7c.jpg.html'> http://s202.photobucket.com/user/WallaceGlanza/media/My%20Glanza%20V/IMG_1644_zpse0c9426d.jpg.html'> http://s202.photobucket.com/user/WallaceGlanza/media/My%20Glanza%20V/IMG_1648_zps3f349b73.jpg.html'> You can also see my slightly over the top catch can setup! So with the Glanza running nicely it's time for some track action and handily Knockhill is open for Japfest tomorrow..... Quote

Recommended Posts
Join the conversation
You can post now and register later. If you have an account, sign in now to post with your account.